Free Teabag Knitting Pattern + Printable PDF
THIS ARTICLE CONTAINS AFFILIATE LINKS THAT SUPPORT HANDY LITTLE ME CONTENT AND FREE PATTERNS.In this blog post, you will see a free teabag knitting pattern and a printable PDF.
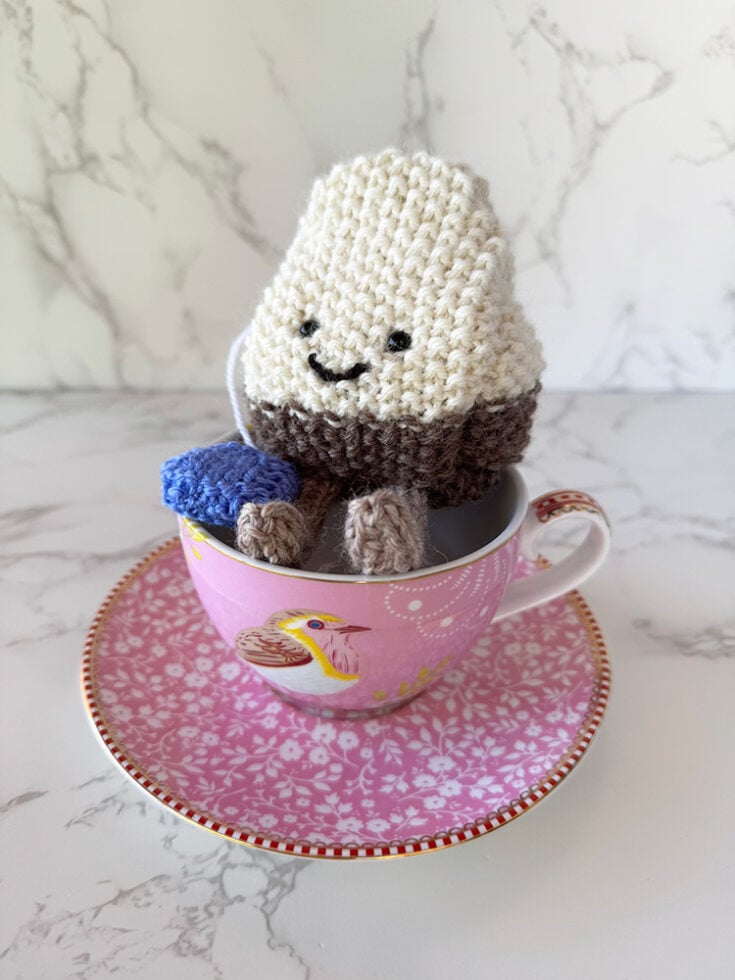
Meet Earl the Teabag—a tiny, squishable mini plush that’s perfect for gifting, ornaments, or brightening your desk.
This beginner-friendly project works flat, uses scraps, and comes together quickly with simple shaping and seaming.

Before You Get Started
A few quick tips to make Earl extra cute:
- Work with smooth, light-colored yarns so you can see your stitches clearly.
- Keep your tension even—gentle stuffing helps the shape look crisp.
- Use the mattress stitch for invisible seams.
- Making for a young child? Swap safety eyes for embroidered eyes.
Tools/Materials Needed
Yarn (scraps):
- Yarn A – Brown
- Yarn B – Cream
- Yarn C – Light Brown
- Yarn D – White
- Yarn E – Blue
- Yarn F – Black (for facial embroidery)
Needles: 3.5 mm/US 4 straight needles
Notions: Yarn needle, scissors, tape measure
Other: 2 x toy safety eyes, polyfill stuffing
Finished Size
Earl the Teabag measures approximately 4 in (10 cm) tall, 4 in (10 cm) wide, with a 2 in (5 cm) side girth.
Measurements are taken after light stuffing and seaming; your results may vary slightly based on yarn, needle size, tension, and stuffing.

Abbreviations
- CO – Cast on
- K – Knit
- P – Purl
- KFB – Knit into the front and back of the stitch (increase)
- K2tog – Knit the next two stitches together (decrease)
- P2tog – Purl the next two stitches together (decrease)
- St st / Stocking stitch – Knit RS rows, purl WS rows
- Rep – Repeat
- Patt – Pattern
- RS – Right side
- WS – Wrong side
Pattern Instructions
Worked flat in pieces and seamed.
Use mattress stitch for assembly unless otherwise noted.
Legs (Make 2) – Yarn C (Light Brown)
CO 6 sts.
Row 1: Purl.
Rows 2-11: Work in St-St for 10 rows, starting with a knit row.
Row 12: K2, KFB, K2, KFB. (8sts)
Rows 13-19: Work in St-St for 7 rows.
Row 20 (RS): K2tog to end. (4 sts)
Cut a length of yarn and sew through the remaining sts on the needle.
Continue to seam using mattress stitch, lightly stuffing as you go.
Secure the top of the leg and weave in ends.
Body Pieces (Make 2) – Yarn A (Brown) then Yarn B (Cream)
In Yarn A CO 16 sts.
Row 1: K1, P1 to end.
Row 2: P1, K1, to end.
Rows 3-8: Rep rows 1 and 2 a further 3 times (6 rows in total).
Change to Yarn B
Rows 9-28: Rep rows 1 and 2 a further 10 times (20 rows in total).
Row 29: P2tog, work in patt to last 2 sts, K2tog. (14 sts)
Row 30: Work in patt – k1, P1 to end.
Row 31: K2tog, work in patt to last 2 sts, P2tog. (12 sts)
Row 32: P1, K1 to end.
Row 33: K1, P1 to end.
Row 34: P1, K1 to end.
Bind off.
Bottom Piece – Yarn A (Brown)
CO 16 sts.
Row 1: K1, P1 to end.
Row 2: P1, K1 to end.
Rows 3-12: Rep rows 1 and 2.
Bind off.
Side Triangles – Yarn A (Brown) then Yarn B (Cream)
In Yarn A – CO 10 sts.
Row 1: K1, P1 to end.
Row 2: P1, K1 to end.
Rows 3-8: Rep rows 1 and 2.
Change to Yarn B.
Row 9: K1, P1 to end.
Row 10: P1, K1 to end.
Row 11: P2tog, work in patt to last 2 sts, K2tog. (8 sts)
Row 12: K1, P1 to end.
Row 13: P1, K1 to end.
Row 14: K1, P1 to end.
Row 15: K2tog, work in patt to last 2 sts, P2tog. (6 sts)
Row 16: P1, K1 to end.
Row 17: K1, P1 to end.
Row 18: P1, K1 to end.
Row 19: K1, P1 to end.
Row 20: P1, K1 to end.
Row 21: P2tog, work in patt to last 2 sts, K2tog. (4 sts)
Row 22: K1, P1 to end.
Row 23: P1, K1 to end.
Row 24: K1, P1 to end.
Row 25: P1, K1 to end.
Row 26: K1, P1 to end.
Row 27: K2tog, P2tog. (2 sts)
Row 28: P1, K1 to end.
Row 29: K2tog. (1 st)
Fasten off.
Teabag Tag (Make 2) – Yarn E (Blue)
CO 8 sts.
Rows 1-2: Knit.
Row 3: Knit.
Row 4: K2, P to last 2 sts, K2.
Row 5: Knit.
Rows 6-11: Rep Rows 4 and 5.
Rows 12-13: Knit.
Bind off.

Making Up / Finishing
- Face: On one body piece (front), insert and secure the safety eyes. With Yarn F (Black), embroider a small smile.
- Attach Bottom & Legs: Seam the bottom piece to the front body lower edge with mattress stitch, stitching the legs into place as you go.
- Join Back & Sides: Seam the back body to the bottom edge. Seam the side triangles to the bottom as well, forming the teabag shape.
- Close Seams & Stuff: Mattress-stitch up the sides, leaving the top open. Lightly stuff with polyfill, then seam the top closed. Pinch the upper corners and add a couple of stitches to hold the “teabag” pinch in place.
- Teabag String & Tag:
- Cut a 7 in / 18 cm length of Yarn D (White). Tie a small knot at one end.
- Sew through the center top of the head; tuck the knot inside using your yarn needle.
- Leave 5–6 in (13–15 cm) of string; tie a larger knot at the free end.
- Sandwich the knot between the two blue tag pieces and seam all around with mattress stitch.
- Weave in any loose ends.
Earl is ready to steep in compliments!

FAQs & Extra Tips
- Skill level? Easy—simple rib, stockinette, and basic increases/decreases.
- Gauge? Not critical for this plush. Keep your fabric firm so stuffing doesn’t show.
- Substitutions? Use DK or light-worsted scraps; keep needle size small for a dense fabric.
- No safety eyes? Embroider eyes with Yarn F (Black) for the safest softie option.
- Make it an ornament: Add a hanging loop to the tag or a tiny loop at the top seam.
- Series idea: Knit a trio—Earl (Cream), Minty (add a green tag), Chai (warm beige body).

Free Printable
If you prefer to work from a printed pattern or just want a version you can take on the go, I’ve got you covered!
You can print the teabag knitting pattern below to keep it handy while you knit.
Earl The Teabag - Free knitting Pattern
Knit Earl the Teabag—a quick, beginner-friendly mini plush worked flat and seamed.
Perfect stashbuster with DK/light-worsted scraps and 3.5 mm needles.
Add safety eyes or embroider features.
Finished size: approx. 4 in tall × 4 in wide × 2 in deep.
Materials
- Yarn (scraps):
- Yarn A – Brown
- Yarn B – Cream
- Yarn C – Light Brown
- Yarn D – White
- Yarn E – Blue
- Yarn F – Black (for facial embroidery)
Tools
- Needles: 3.5 mm/US 4 straight needles
- Notions: Yarn needle, scissors, tape measure
- Other: 2 x toy safety eyes, polyfill stuffing
Instructions
Worked flat in pieces and seamed.
Use mattress stitch for assembly unless otherwise noted.
Legs (Make 2) – Yarn C (Light Brown)
CO 6 sts.
Row 1: Purl.
Rows 2-11: Work in St-St for 10 rows, starting with a knit row.
Row 12: K2, KFB, K2, KFB. (8sts)
Rows 13-19: Work in St-St for 7 rows.
Row 20 (RS): K2tog to end. (4 sts)
Cut a length of yarn and sew through the remaining sts on the needle.
Continue to seam using mattress stitch, lightly stuffing as you go.
Secure the top of the leg and weave in ends.
Body Pieces (Make 2) – Yarn A (Brown) then Yarn B (Cream)
In Yarn A CO 16 sts.
Row 1: K1, P1 to end.
Row 2: P1, K1, to end.
Rows 3-8: Rep rows 1 and 2 a further 3 times (6 rows in total).
Change to Yarn B
Rows 9-28: Rep rows 1 and 2 a further 10 times (20 rows in total).
Row 29: P2tog, work in patt to last 2 sts, K2tog. (14 sts)
Row 30: Work in patt - k1, P1 to end.
Row 31: K2tog, work in patt to last 2 sts, P2tog. (12 sts)
Row 32: P1, K1 to end.
Row 33: K1, P1 to end.
Row 34: P1, K1 to end.
Bind off.
Bottom Piece – Yarn A (Brown)
CO 16 sts.
Row 1: K1, P1 to end.
Row 2: P1, K1 to end.
Rows 3-12: Rep rows 1 and 2.
Bind off.
Side Triangles – Yarn A (Brown) then Yarn B (Cream)
In Yarn A - CO 10 sts.
Row 1: K1, P1 to end.
Row 2: P1, K1 to end.
Rows 3-8: Rep rows 1 and 2.
Change to Yarn B.
Row 9: K1, P1 to end.
Row 10: P1, K1 to end.
Row 11: P2tog, work in patt to last 2 sts, K2tog. (8 sts)
Row 12: K1, P1 to end.
Row 13: P1, K1 to end.
Row 14: K1, P1 to end.
Row 15: K2tog, work in patt to last 2 sts, P2tog. (6 sts)
Row 16: P1, K1 to end.
Row 17: K1, P1 to end.
Row 18: P1, K1 to end.
Row 19: K1, P1 to end.
Row 20: P1, K1 to end.
Row 21: P2tog, work in patt to last 2 sts, K2tog. (4 sts)
Row 22: K1, P1 to end.
Row 23: P1, K1 to end.
Row 24: K1, P1 to end.
Row 25: P1, K1 to end.
Row 26: K1, P1 to end.
Row 27: K2tog, P2tog. (2 sts)
Row 28: P1, K1 to end.
Row 29: K2tog. (1 st)
Fasten off.
Teabag Tag (Make 2) – Yarn E (Blue)
CO 8 sts.
Rows 1-2: Knit.
Row 3: Knit.
Row 4: K2, P to last 2 sts, K2.
Row 5: Knit.
Rows 6-11: Rep Rows 4 and 5.
Rows 12-13: Knit.
Bind off.
Making Up / Finishing
Please refer to the photographs in the blog post for help if needed.
- Face: On one body piece (front), insert and secure the safety eyes. With Yarn F (Black), embroider a small smile.
- Attach Bottom & Legs: Seam the bottom piece to the front body lower edge with mattress stitch, stitching the legs into place as you go.
- Join Back & Sides: Seam the back body to the bottom edge. Seam the side triangles to the bottom as well, forming the teabag shape.
- Close Seams & Stuff: Mattress-stitch up the sides, leaving the top open. Lightly stuff with polyfill, then seam the top closed. Pinch the upper corners and add a couple of stitches to hold the “teabag” pinch in place.
- Teabag String & Tag:
- Cut a 7 in / 18 cm length of Yarn D (White). Tie a small knot at one end.
- Sew through the center top of the head; tuck the knot inside using your yarn needle.
- Leave 5–6 in (13–15 cm) of string; tie a larger knot at the free end.
- Sandwich the knot between the two blue tag pieces and seam all around with mattress stitch.
- Weave in any loose ends.
Earl is ready to steep in compliments!
Notes
Finished Size
Earl the Teabag measures approximately 4 in (10 cm) tall, 4 in (10 cm) wide, with a 2 in (5 cm) side girth.
Measurements are taken after light stuffing and seaming; your results may vary slightly based on yarn, needle size, tension, and stuffing.
Abbreviations
- CO - Cast on
- K – Knit
- P – Purl
- KFB – Knit into the front and back of the stitch (increase)
- K2tog – Knit the next two stitches together (decrease)
- P2tog – Purl the next two stitches together (decrease)
- St st / Stocking stitch – Knit RS rows, purl WS rows
- Rep – Repeat
- Patt – Pattern
- RS – Right side
- WS – Wrong side
Want More Free Patterns?
- Free Printable Knitting Patterns
- Free Printable Crochet Patterns
- Share your teabag on Facebook here – Handylittleme Facebook group — join the conversation in the comments section!
Just made this. Not perfect I think he’s a seconds T-Bag but I will keep practicing. I couldn’t do the mattress stitch though, maybe it’s because I’ve only done it on stocking stitch.
Thank you
Hello Katrina,
That’s awesome — “seconds T-Bag” made me smile! 😊
Mattress stitch can be fiddly (especially off stockinette), so you’re doing great.
Keep practicing—you’ve got this, and thanks for making it!
Louise