Pop Art Granny Square Pattern (Free Printable)
THIS ARTICLE CONTAINS AFFILIATE LINKS THAT SUPPORT HANDY LITTLE ME CONTENT AND FREE PATTERNS.Bring a burst of color and graphic flair to your crochet with the Pop Art Granny Square!
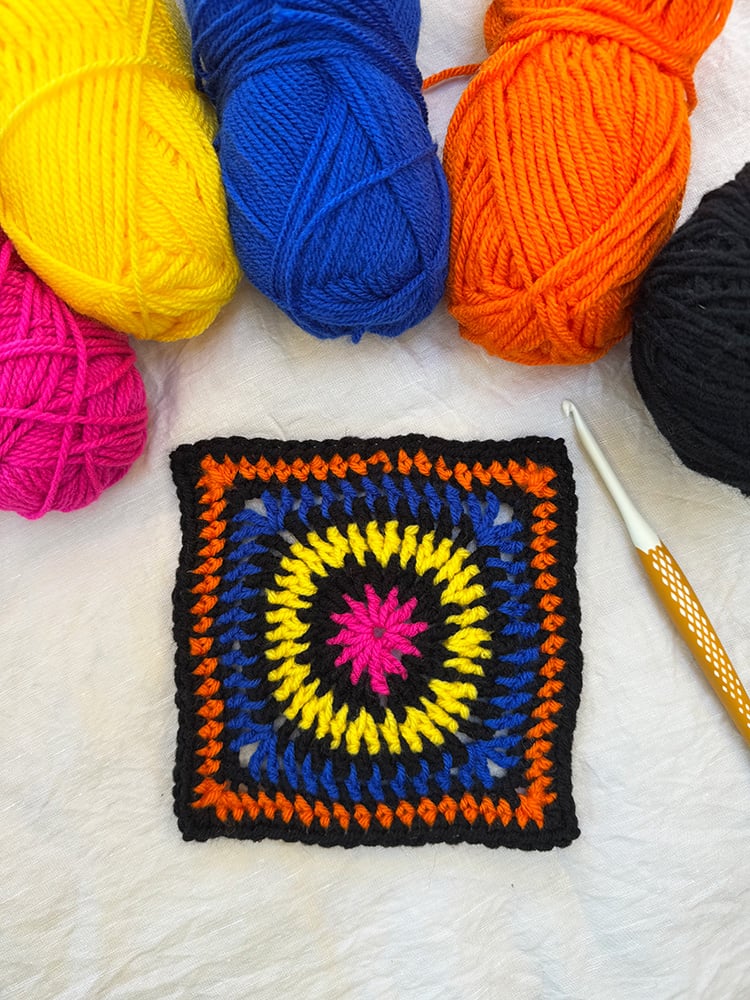
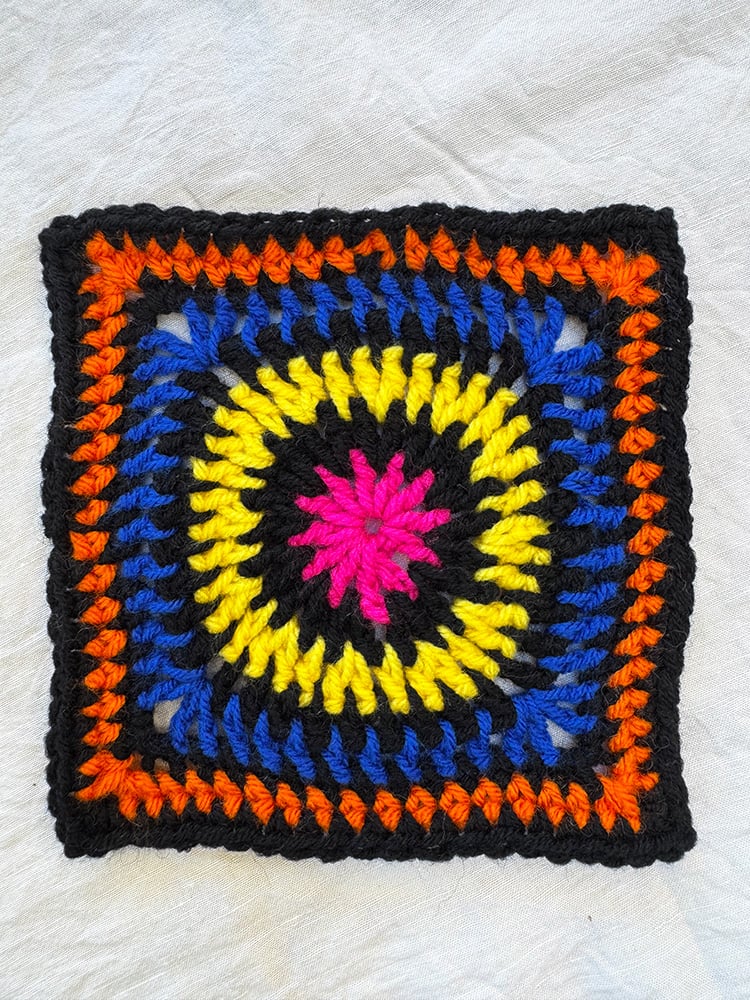
Inspired by bold lines, high contrast, and vintage comic-book energy, this design alternates bright shades with black to create eye-catching bullseye rings that evolve into a perfect square.
Whether you’re stash-busting or planning a palette, this square is pure crochet fun with a modern twist.
This tutorial includes color planning tips and a free printable for your project notebook.

Before You Get Started
A few things to consider before you begin:
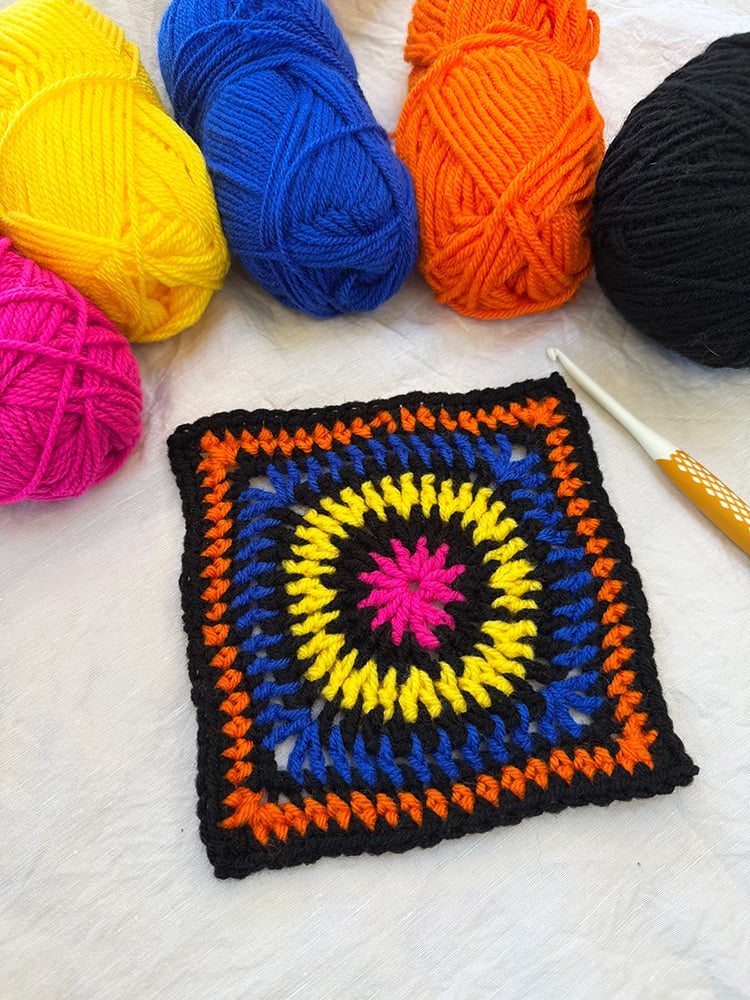
- Choose 3–4 saturated, bright yarns for a high-contrast look.
- Use black yarn between rounds to enhance the “pop art” contrast.
- Aran or worsted weight yarn works best.
- Great for stashbusting or experimenting with color theory.
- Use a 5mm (H/8) hook for a balanced fabric.
Tools & Materials Needed
- 3 or 4 bright-colored yarns (worsted/aran weight)
- Black yarn (for contrast and borders)
- 5mm (H/8) crochet hook
- Yarn needle
- Scissors
- Blocking mat + pins (optional)
Abbreviations (US Crochet Terms)
- ch – chain
- sl-st – slip stitch
- sc – single crochet
- hdc – half double crochet
- dc – double crochet
- st – stitch
- rep – repeat
Color Guide (Example Palette)
- Round 1: Bright Color A – e.g., Pink
- Round 2: Black
- Round 3: Bright Color B – e.g., Yellow
- Round 4: Black
- Round 5: Bright Color C – e.g., Aqua
- Round 6: Black
- Round 7: Bright Color D – e.g., Orange
- Round 8 (Optional): Final Black Border
Tip: Try alternating your starting colors for visual rhythm, while always finishing with black for cohesion.
Pattern Instructions
Round 1 – Bright Color A (Pink)
Ch 4, sl-st into 1st ch to form a ring.
Ch 3 (counts as dc), work 11 dc into ring.
Join with sl-st to top of ch-3. (12 dc)
Break off.
Round 2 – Black
Join yarn with sl-st in any dc.
Ch 3 (counts as dc), dc in same st.
2 dc in each st around.
Join with sl-st to top of ch-3. (24 dc)
Break off.
Round 3 – Bright Color B (Yellow)
Join in any st, ch 3, 2 dc in next st.
Repeat around: (1 dc in next st, 2 dc in next)
Join with sl-st to top of ch-3. Break off.
Round 4 – Black
Join in any st, ch 3, dc in next st.
Work 1 dc in each st. (36 sts total)
Join with sl-st to top of ch-3. Break off.
Round 5 – Bright Color C (Aqua)
This is where the shape transitions from circle to square!
Join in any st, ch 3, 1 dc in next 2 sts.
(2 dc, ch 2, 2 dc) in next st to form a corner.
1 dc in next 8 sts, then another corner.
Repeat to form all four corners.
Join with sl-st to top of ch-3. Break off.
Round 6 – Black
Join in any st, ch 1, work 1 sc in each st across each side.
In each ch-2 corner space: (2 sc, ch 1, 2 sc)
Join with sl-st to top of ch-1. Break off.
Round 7 – Bright Color D (Orange)
Repeat Round 6.
Continue the square shape, working (2 sc, ch 1, 2 sc) in each corner.
Join with sl-st to top of ch-1. Break off.
Optional Round 8 – Final Black Border
Repeat Round 6 again in black.
Helps visually frame each square and simplifies seaming.
Finishing
- Weave in all ends with a yarn needle
- Lightly steam block or pin and spray to set the shape
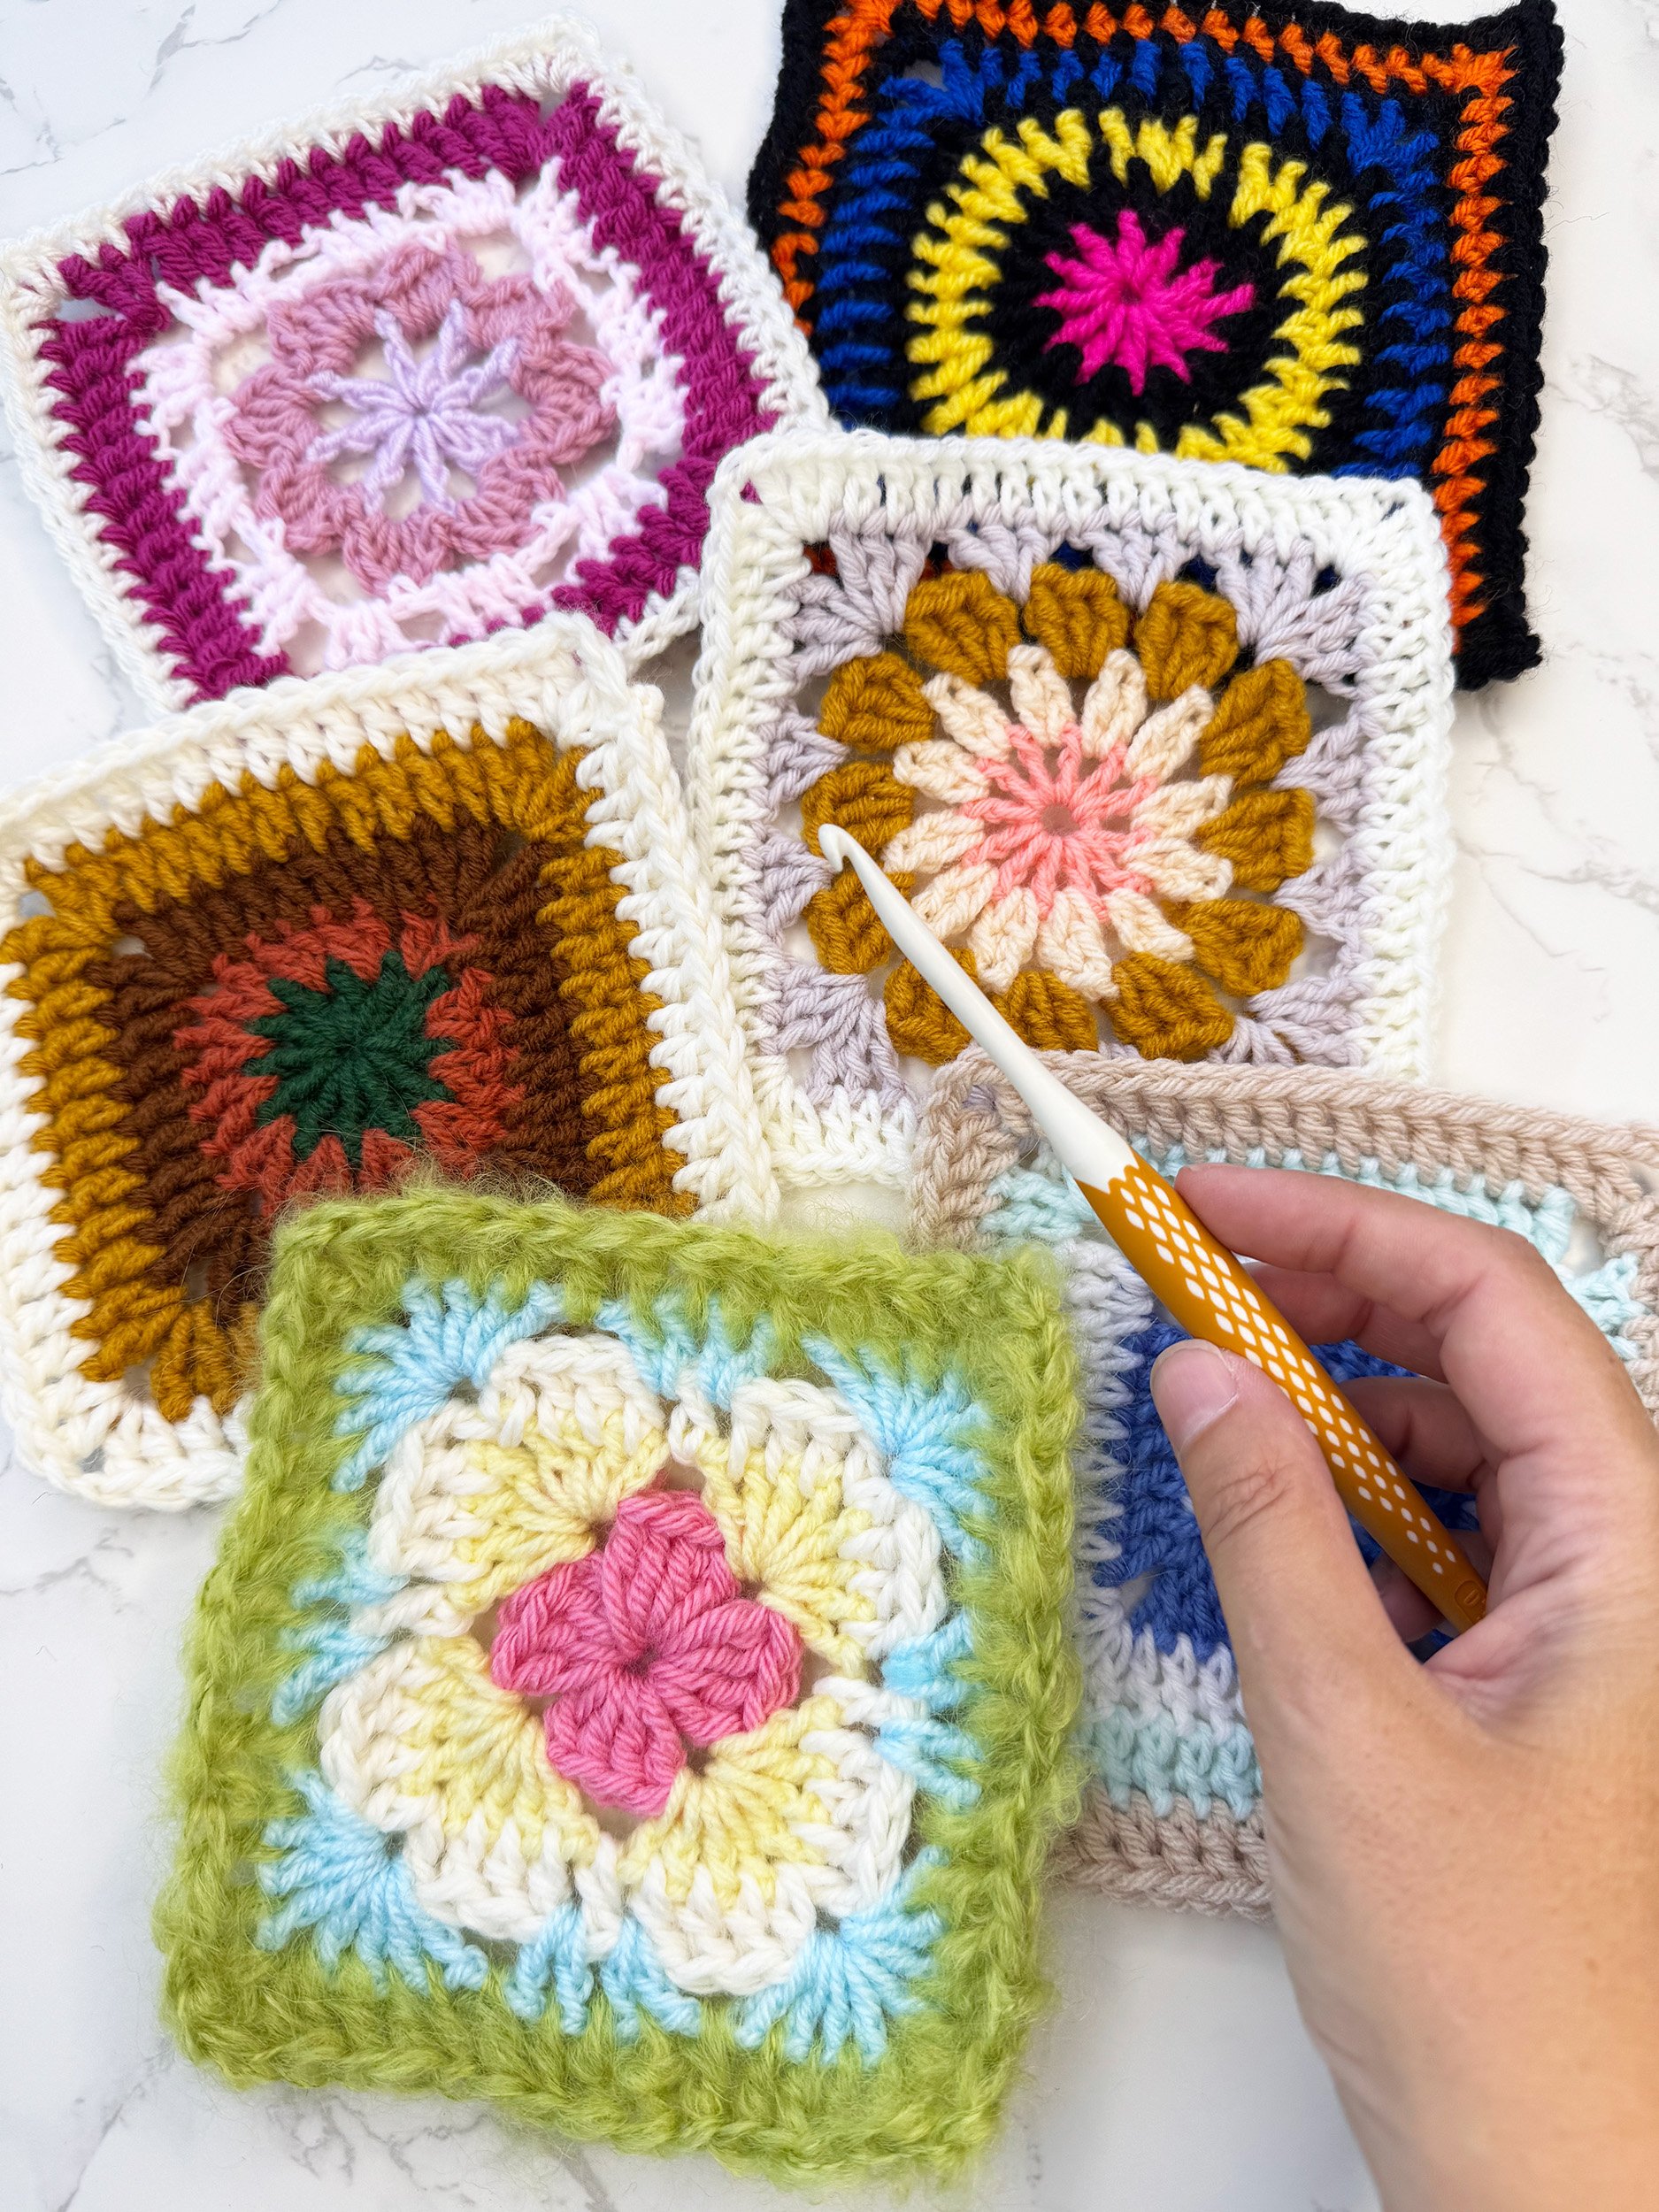
- Stack your finished squares and admire your mini art gallery!
FAQs & Color Planning Tips
→ Why is it called the “Pop Art” granny square?
The vivid color blocks and bold black framing evoke the feel of classic pop art — think Roy Lichtenstein or vintage comic panels!
→ What if I don’t want to use black?
You can substitute with charcoal, navy, or even white — just make sure the color creates enough contrast with your brights.
→ Can I use fewer colors?
Yes! Even two colors can be impactful.
Try one bright + black for a simplified palette.
→ How can I join the squares?
Seam them using whip stitch, mattress stitch, or continuous join-as-you-go (JAYG) — the black border makes it easy to align stitches neatly.
Free Printable
Want to keep this tutorial handy while you crochet? Grab the free printable version of the pattern below!
Whether you’re curled up on the couch or taking your project on the go, this easy-to-follow card makes it simple to work through each round at your own pace.
Pop Art Granny Square Instructions

Learn how to crochet the Pop Art Granny Square — a bold, colorful design with vibrant rings and graphic black borders.
This easy-to-follow guide walks you through each round, from the starting circle to the squared-off corners.
Perfect for blankets, bags, or mixing and matching with other modern granny squares.
Materials
- 3 or 4 bright-colored yarns (worsted/aran weight)
- Black yarn (for contrast and borders)
- Color Guide (Example Palette)
- Round 1: Bright Color A – e.g., Pink
- Round 2: Black
- Round 3: Bright Color B – e.g., Yellow
- Round 4: Black
- Round 5: Bright Color C – e.g., Aqua
- Round 6: Black
- Round 7: Bright Color D – e.g., Orange
- Round 8 (Optional): Final Black Border
- Tip: Try alternating your starting colors for visual rhythm, while always finishing with black for cohesion.
Tools
- 5mm (H/8) crochet hook
- Yarn needle
- Scissors
- Blocking mat + pins (optional)
Instructions
Round 1 – Bright Color A (Pink)
Ch 4, sl-st into 1st ch to form a ring.
Ch 3 (counts as dc), work 11 dc into ring.
Join with sl-st to top of ch-3. (12 dc)
Break off.
Round 2 – Black
Join yarn with sl-st in any dc.
Ch 3 (counts as dc), dc in same st.
2 dc in each st around.
Join with sl-st to top of ch-3. (24 dc)
Break off.
Round 3 – Bright Color B (Yellow)
Join in any st, ch 3, 2 dc in next st.
Repeat around: (1 dc in next st, 2 dc in next)
Join with sl-st to top of ch-3. Break off.
Round 4 – Black
Join in any st, ch 3, dc in next st.
Work 1 dc in each st. (36 sts total)
Join with sl-st to top of ch-3. Break off.
Round 5 – Bright Color C (Aqua)
This is where the shape transitions from circle to square!
Join in any st, ch 3, 1 dc in next 2 sts.
(2 dc, ch 2, 2 dc) in next st to form a corner.
1 dc in next 8 sts, then another corner.
Repeat to form all four corners.
Join with sl-st to top of ch-3. Break off.
Round 6 – Black
Join in any st, ch 1, work 1 sc in each st across each side.
In each ch-2 corner space: (2 sc, ch 1, 2 sc)
Join with sl-st to top of ch-1. Break off.
Round 7 – Bright Color D (Orange)
Repeat Round 6.
Continue the square shape, working (2 sc, ch 1, 2 sc) in each corner.
Join with sl-st to top of ch-1. Break off.
Optional Round 8 – Final Black Border
Repeat Round 6 again in black.
Helps visually frame each square and simplifies seaming.
Finishing
- Weave in all ends with a yarn needle
- Lightly steam block or pin and spray to set the shape
- Stack your finished squares and admire your mini art gallery!
Notes
Abbreviations (US Crochet Terms)
- ch – chain
- sl-st – slip stitch
- sc – single crochet
- hdc – half double crochet
- dc – double crochet
- st – stitch
- rep – repeat
Recommended Products
As an Amazon Associate and member of other affiliate programs, I earn from qualifying purchases.
Loved this tutorial?
Don’t forget to pin it for later and tag @handylittleme on Instagram with your finished Pop Art Granny Squares!
Want More Like This?
- Granny Square Pattern: Crochet The Perfect Square (Free Printable)
- Carnival Confetti Crochet Granny Square (Free Printable)
- Sunset Square (Stashbuster Granny Square Pattern + Free Printable)
- Ocean Breeze Granny Square (Free Stashbuster Pattern + Printable)
- Berry Patch Granny Square Crochet Pattern (Free Printable)
- Retro Bloom Granny Square Crochet Pattern (Free Printable)
- How To Crochet A Granny Square Blanket (Free Pattern)
- 40 Free Granny Square Crochet Patterns (Easy Ideas)
- Granny Square Crochet Bookmark Pattern (Free Printable)
- How To Join Granny Squares The Easy Way!
- Crochet Granny Square Coaster Pattern (Free Printable)