Granny Square Pattern: Crochet The Perfect Square (Free Printable)
THIS ARTICLE CONTAINS AFFILIATE LINKS THAT SUPPORT HANDY LITTLE ME CONTENT AND FREE PATTERNS.Looking for the perfect granny square pattern?
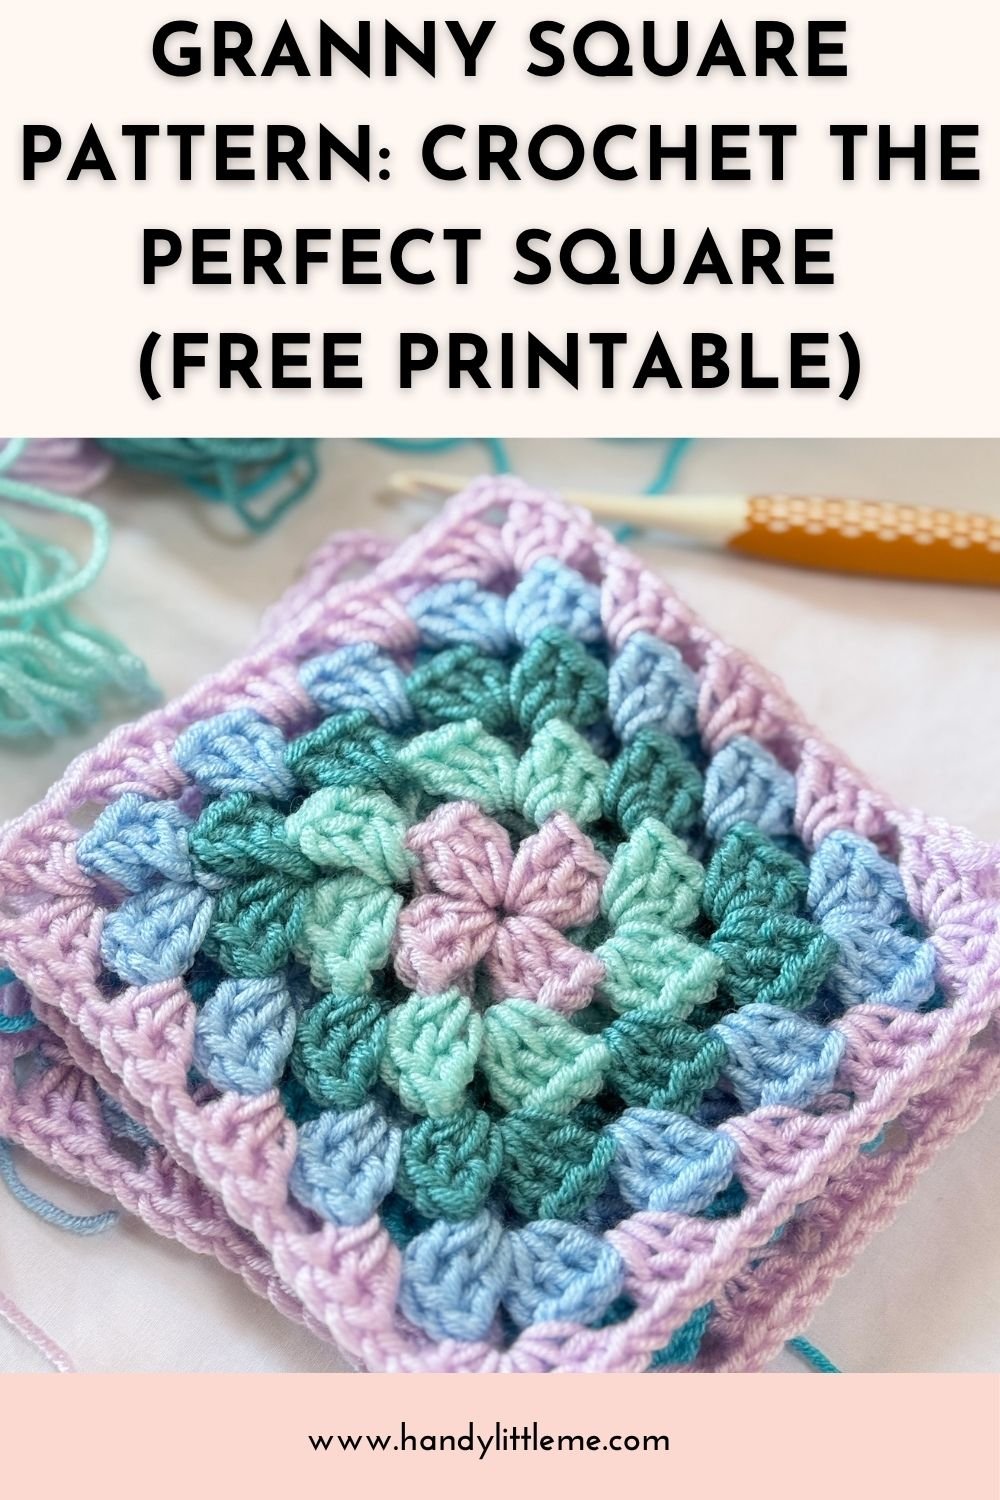
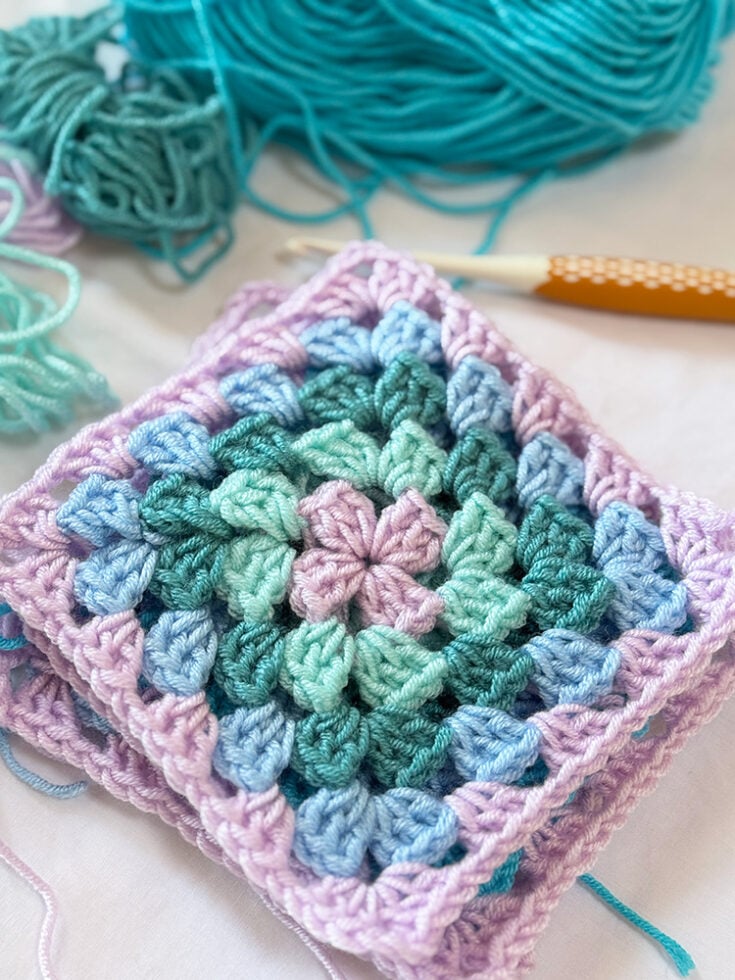
This easy, step-by-step tutorial will show you how to crochet a traditional granny square using five different colors – with a free printable included for convenience.
Granny squares are one of the most popular and versatile designs in the world of crochet.
Whether you’re a complete beginner or just want a simple, satisfying make, this basic crochet granny square pattern is a great place to start.
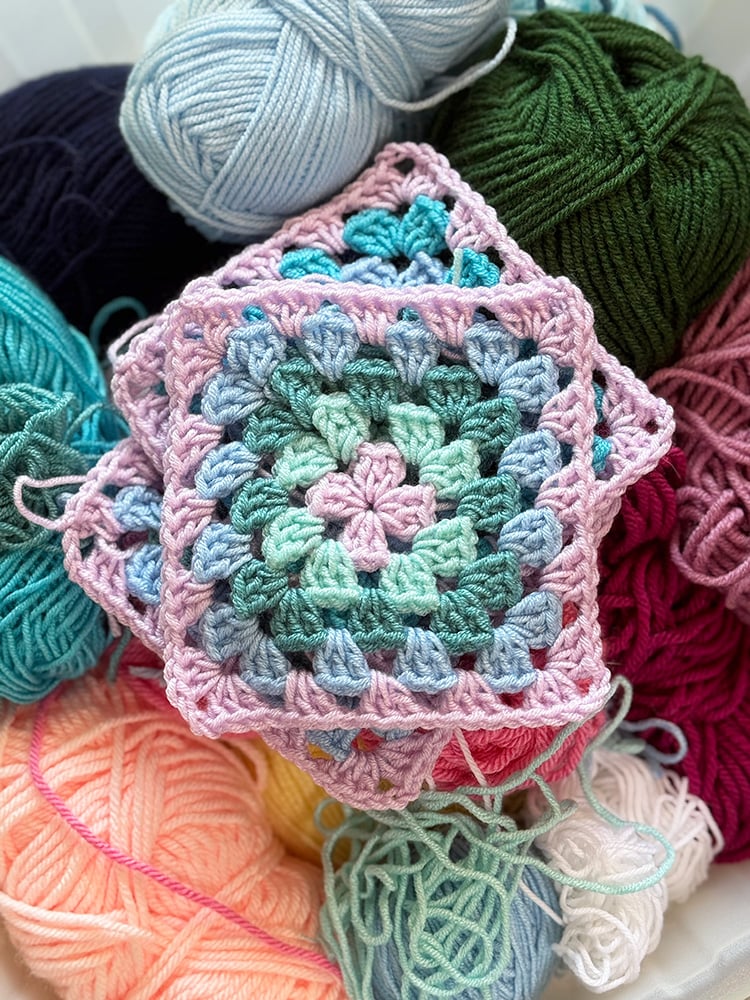
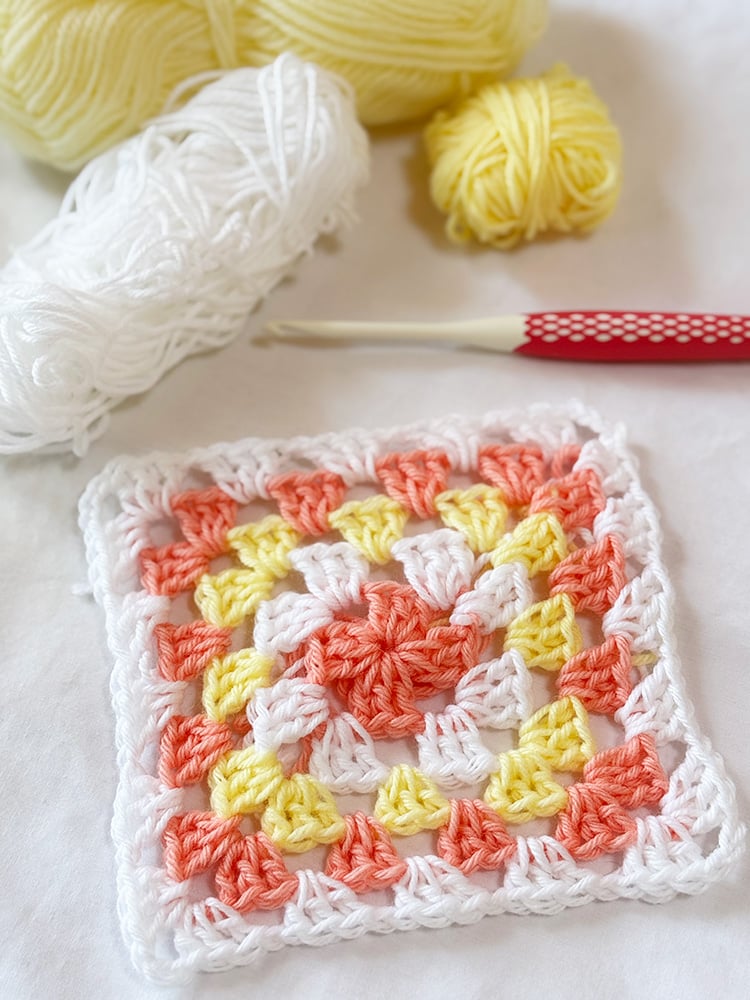
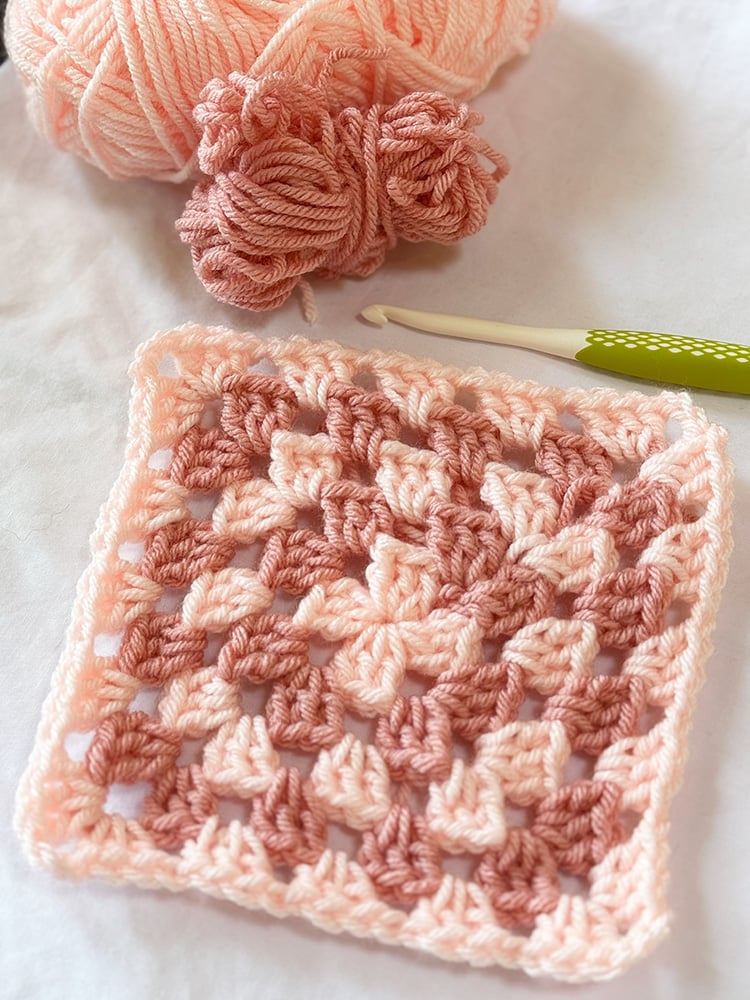
Each round uses a new color, creating a vibrant layered look that’s ideal for exploring color combinations.
It’s also a fantastic stashbuster project, perfect for using up leftover yarn from your other crochet projects.
These simple squares can be turned into beautiful blankets, bucket hats, square motif cushions, and so much more.
Before You Get Started
Here are a few helpful notes before you begin this square tutorial:
- This basic granny square uses double crochet stitches, chain spaces, and slip stitches (sl st).
- Start with a magic ring or the traditional chain-4 ring, depending on your preference.
- Change yarn color at the beginning of each round for a bold, two-color granny or multi-color square design.
- Perfect as your very first project, or a quick win for experienced makers.
Tools & Materials Needed
- Worsted weight yarn in 5 different colors (or as many as you like!)
- 5 mm crochet hook
- Tapestry needle or yarn needle (to weave in loose ends)
- Stitch marker (optional)
- Scissors
Tip: Using white yarn as a base creates clean color transitions.
Granny Square Pattern
This easy pattern uses basic crochet stitches, making it ideal for those new to the craft.
The color changes give it a fun, unique texture, while the step-by-step rounds create a traditional granny square structure.
Abbreviations (US Terms)
- approx – approximately
- beg – begin(ning)
- ch – chain
- dc – double crochet
- rep – repeat
- rnd(s) – round(s)
- sl-st – slip stitch
- sp – space
- st(s) – stitch(es)
- tog – together
Step-By-Step Instructions
- Skill Level: Easy
- Type of project: Square motif
- Size of the granny: Approx 5″ x 5″ (depending on the type of yarn and tension)
- History of the granny: A classic design that dates back generations — always trending during Granny Square Day!
Rnd 1 – Center Ring (Color 1)
- Ch 4, join with sl st to first ch to form a ring (or start with a magic ring).
- Ch 6 (counts as 1 dc + ch-3 corner sp).
- (3 dc, ch 3) 3 times into the ring.
- 2 dc into ring.
- Join with sl st to 3rd ch of beg ch-6.
Color Change: Join Color 2 for the next round.
Rnd 2 – Forming Corners
- Sl st into ch-3 space.
- Ch 6, 3 dc into same ch-3 space.
- *Ch 1, (3 dc, ch 3, 3 dc) in next ch-3 space.
- Repeat from * two more times.
- Ch 1, 2 dc in first ch-3 space.
- Join with sl st.
Color Change: Join Color 3.
Rnd 3 – Expanding the Shape
- Sl st into ch-3 space.
- Ch 6, 3 dc in same space.
- *(Ch 1, 3 dc) in next ch-1 space, ch 1, (3 dc, ch 3, 3 dc) in next ch-3 space.
- Repeat from * two more times.
- Ch 1, 3 dc in last ch-1 sp, ch 1, 2 dc in first ch-3 sp.
- Join with sl st.
Color Change: Join Color 4.
Rnds 4 & 5 – Larger Squares
- Sl st into ch-3 sp, ch 6, 3 dc in same space.
- (Ch 1, 3 dc) in each ch-1 space until next corner, ch 1.
- (3 dc, ch 3, 3 dc) in ch-3 space.
- Repeat around the square shape.
- End final round with 2 dc in beg corner, join with sl st.
Color Change: Join Color 5 for Round 5.
Fasten off. Use your tapestry needle to weave in all loose ends.
FAQs & Tips
→ Can I use fewer or more rounds?
Yes! Adjust the number of rounds for larger squares or smaller motifs.
Try corner-to-corner granny square techniques for variation.
→ What kind of square projects can I make?
These squares are ideal for square blankets, bags, cardigans, coasters, or even heart granny square combinations.
→ What’s the only difference in each round?
You’re adding more dc clusters in the sides while keeping the corners consistent with (3 dc, ch 3, 3 dc).
→ Is this a good project for beginners?
Absolutely! This is a great project for learning basic stitches like double crochet, working in ch-3 spaces, and improving your color confidence.
→ Can I use this in my own granny square designs?
Yes! Mix and match with solid granny squares, basic crochet granny, or different granny patterns.
Free Printable
Want to keep this tutorial handy while you crochet? Grab the free printable version of the pattern below!
It includes step-by-step instructions, stitch abbreviations, and a color-coded layout, perfect for printing or saving to your device.
Whether you’re curled up on the couch or taking your project on the go, this easy-to-follow card makes it simple to work through each round at your own pace.
How To Crochet A Granny Square – Free Printable Pattern
Learn how to crochet a classic granny square with this easy step-by-step pattern.
Perfect for beginners, this printable guide walks you through each round using simple stitches, color changes, and clear instructions.
Great for blankets, hats, cushions, and stashbusting projects.
Materials
- Worsted weight yarn in 5 different colors (or as many as you like!)
Tools
- 5 mm crochet hook
- Tapestry needle or yarn needle (to weave in loose ends)
- Stitch marker (optional)
- Scissors
Instructions
- Skill Level: Easy
- Type of project: Square motif
- Size of the granny: Approx 5" x 5" (depending on type of yarn and tension)
- History of the granny: A classic design that dates back generations — always trending during Granny Square Day!
Rnd 1 – Center Ring (Color 1)
- Ch 4, join with sl st to first ch to form a ring (or start with a magic ring).
- Ch 6 (counts as 1 dc + ch-3 corner sp).
- (3 dc, ch 3) 3 times into ring.
- 2 dc into ring.
- Join with sl st to 3rd ch of beg ch-6.
Color Change: Join Color 2 for next round.
Rnd 2 – Forming Corners
- Sl st into ch-3 space.
- Ch 6, 3 dc into same ch-3 space.
- *Ch 1, (3 dc, ch 3, 3 dc) in next ch-3 space.
- Repeat from * two more times.
- Ch 1, 2 dc in first ch-3 space.
- Join with sl st.
Color Change: Join Color 3.
Rnd 3 – Expanding the Shape
- Sl st into ch-3 space.
- Ch 6, 3 dc in same space.
- *(Ch 1, 3 dc) in next ch-1 space, ch 1, (3 dc, ch 3, 3 dc) in next ch-3 space.
- Repeat from * two more times.
- Ch 1, 3 dc in last ch-1 sp, ch 1, 2 dc in first ch-3 sp.
- Join with sl st.
Color Change: Join Color 4.
Rnds 4 & 5 – Larger Squares
- Sl st into ch-3 sp, ch 6, 3 dc in same space.
- (Ch 1, 3 dc) in each ch-1 space until next corner, ch 1.
- (3 dc, ch 3, 3 dc) in ch-3 space.
- Repeat around the square shape.
- End final round with 2 dc in beg corner, join with sl st.
Color Change: Join Color 5 for Round 5.
Fasten off. Use your tapestry needle to weave in all loose ends.
Notes
Abbreviations (US Terms)
- approx - approximately
- beg - begin(ning)
- ch - chain(s)
- dc - double crochet
- rep - repeat
- rnd(s) - round(s)
- sl st - slip stitch
- sp(s) - space(s)
- st(s) - stitch(es)
- tog - together
Recommended Products
As an Amazon Associate and member of other affiliate programs, I earn from qualifying purchases.
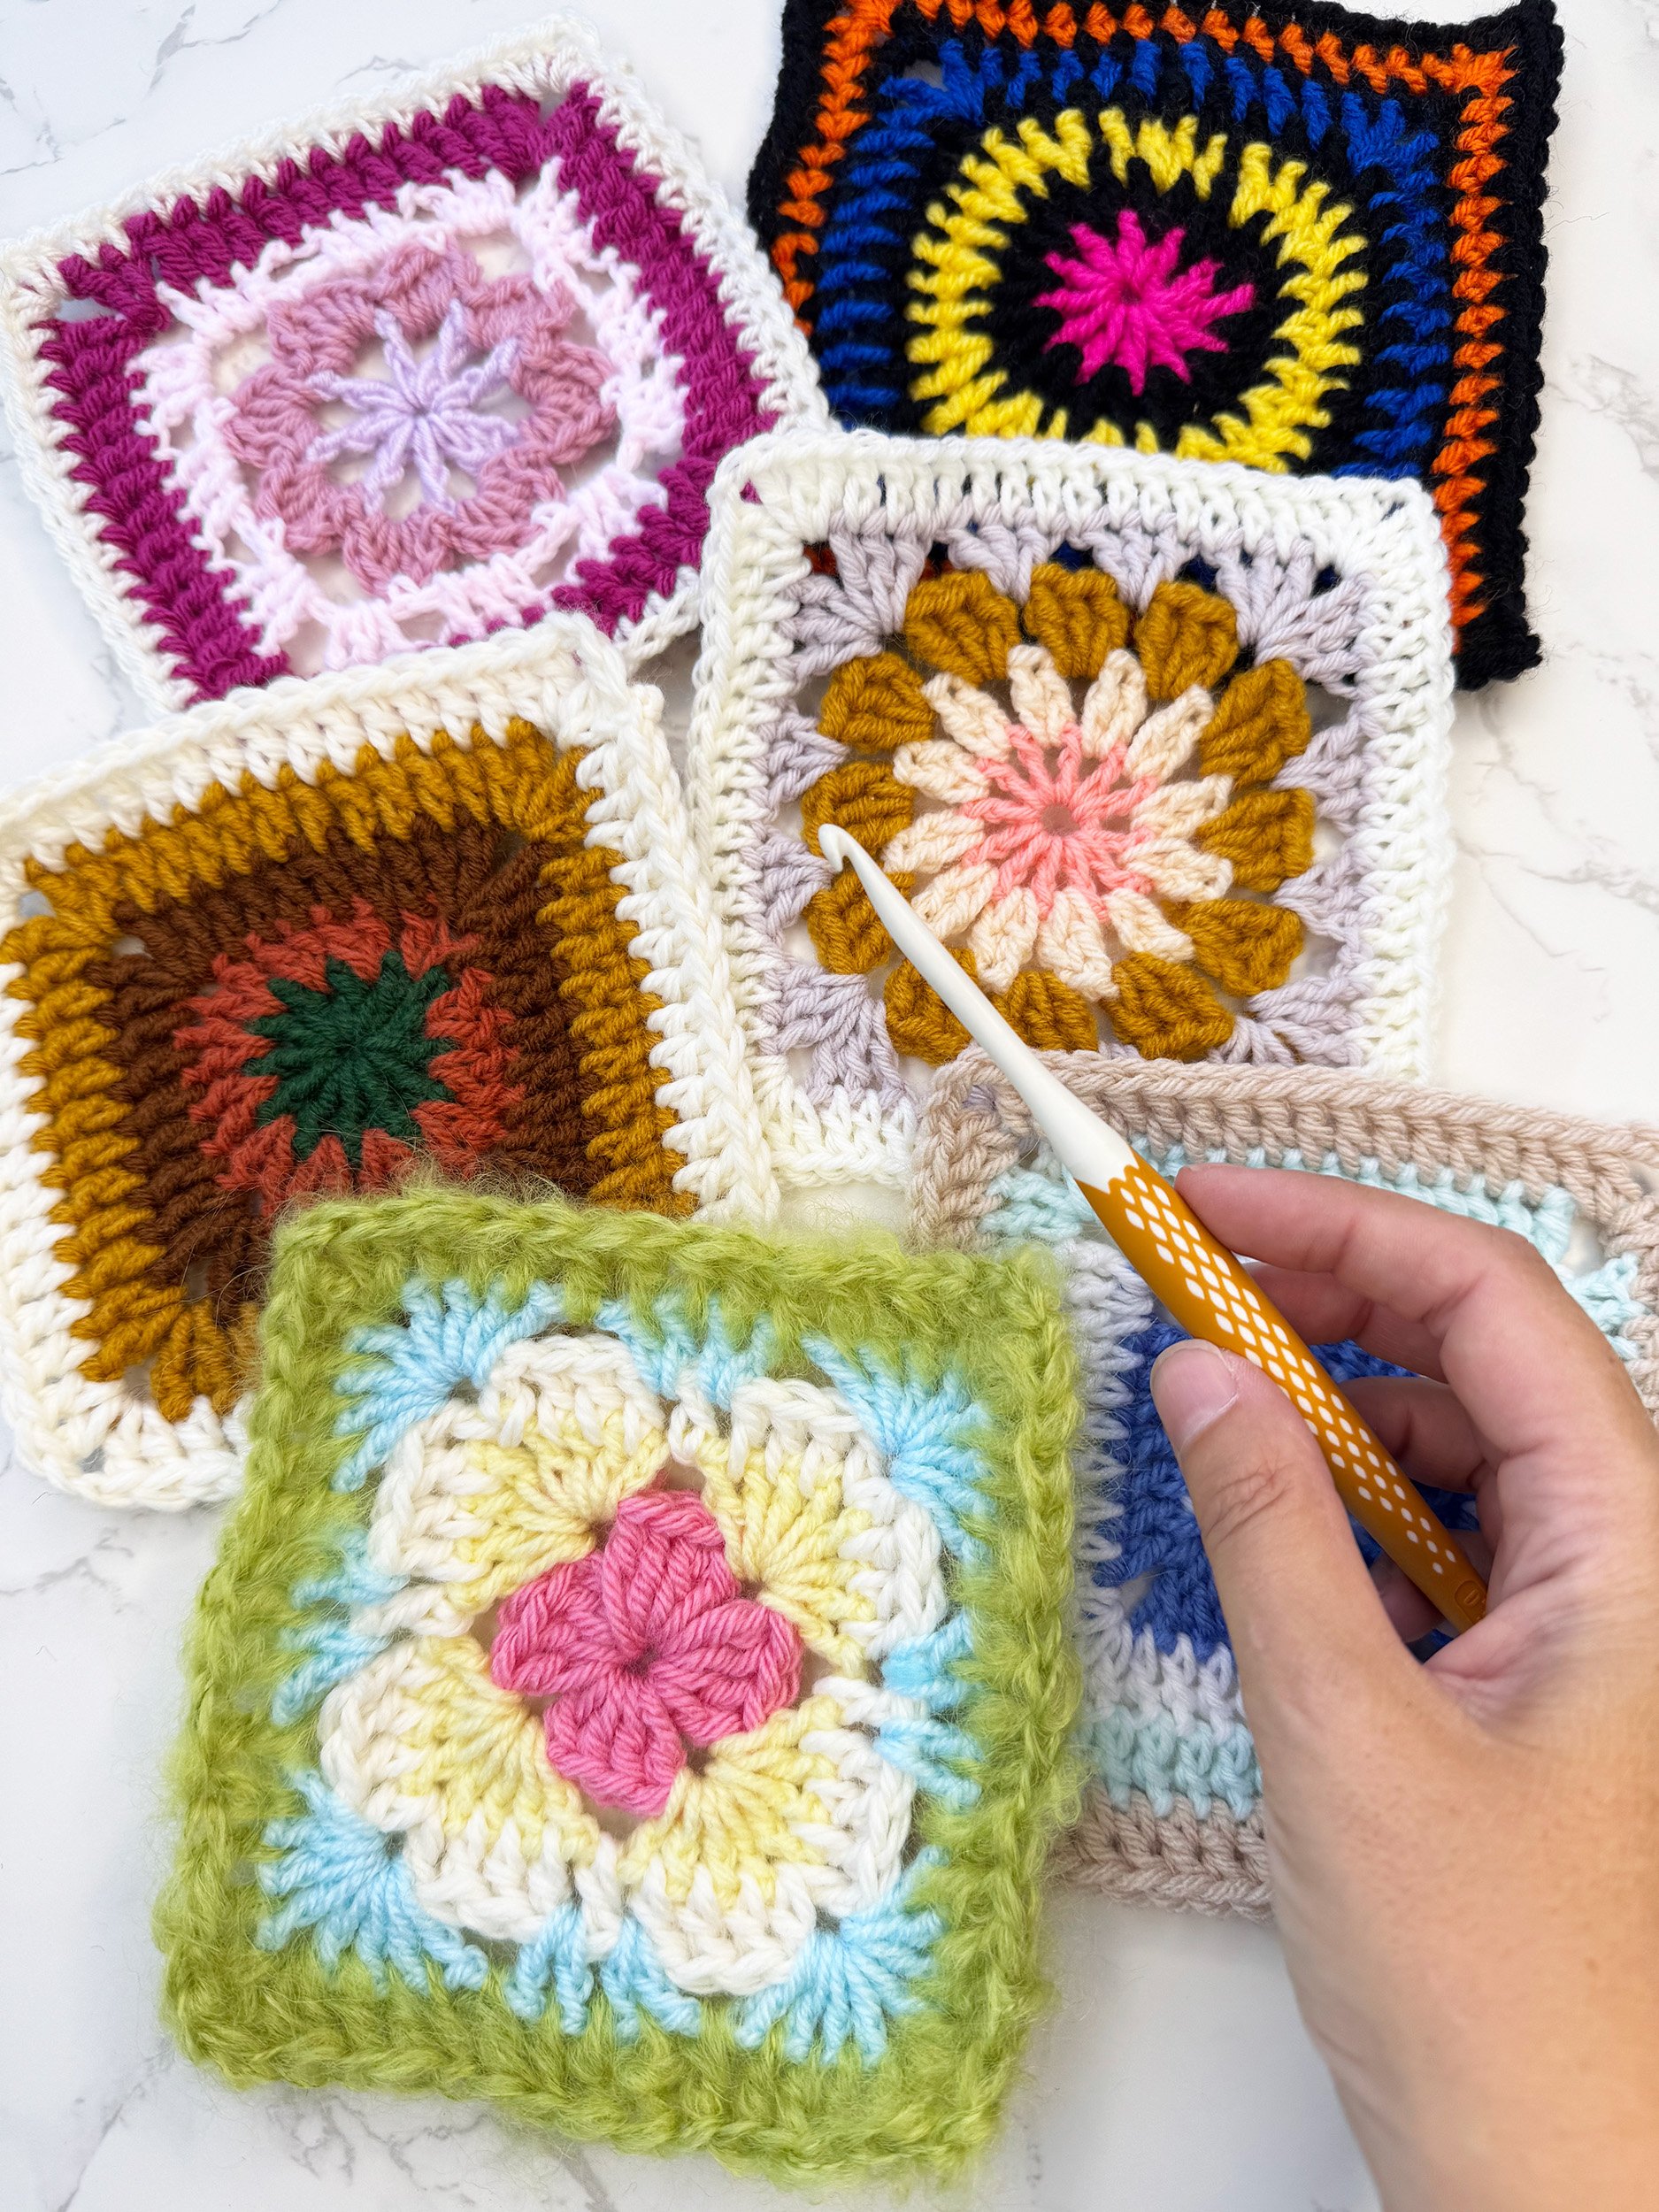
Explore More Granny Square Crochet Patterns
- Granny Square Crochet Top Pattern
- How To Crochet A Granny Square Blanket
- 30 Free Crochet Granny Square Bag Patterns
- Crochet Triangle Shawl Pattern (Granny Stripe)
- Granny Square Bucket Hat Crochet Pattern
- Granny Square Dishcloth
- Granny Square Bag Pattern
- 40 Free Granny Square Crochet Patterns
- Carnival Confetti Crochet Granny Square (Free Printable)
- Ocean Breeze Granny Square (Free Stashbuster Pattern + Printable)
- Berry Patch Granny Square Crochet Pattern (Free Printable)
- Sunset Square (Stashbuster Granny Square Pattern + Free Printable)
- Pop Art Granny Square Pattern (Free Printable)
- Retro Bloom Granny Square Crochet Pattern (Free Printable)
- Granny Square Crochet Bookmark Pattern (Free Printable)
- How To Join Granny Squares The Easy Way!
- Crochet Granny Square Coaster Pattern (Free Printable)
Don’t forget to bookmark this blog post or pin it for later!
Final Thoughts
Whether it’s your first round of crochet ever or your hundredth granny square, this simple square pattern is a beautiful, easy-to-master design that opens the door to so many different ways of creating.
Try different colors, experiment with texture, or explore easy crochet patterns, and most importantly, have fun!
Good luck and happy crocheting!
Share Your Work
I’d love to see your finished granny squares!
Tag me on Instagram @handylittleme or use #handylittleme to show off your makes.
Join the Handy Little Me Facebook Group to share photos, ask questions, and connect with other makers.
i would love to have the pattern in your blog post ‘How To Crochet For Beginners | Learn to Crochet’ right under where you list the abbreviations. beige granny square.
Hello, I don’t think I have a pattern for that, but there is a post with 20 free granny squares, it might be in there – you can see that post here – https://www.handylittleme.com/granny-square-crochet-patterns/ Thanks for visiting! 🙂
How do you suggest to join the squares for the granny square? I did not see that listed. I prefer to not have a ridge or lace type work between squares. Something simple
Hello Linda,
You could single-crochet the squares together, it leaves a ridge separating each square and gives a bit of texture to the finished item.
Or you could use the slip stitch method, which is another popular method to join granny squares.
Like the Single Crochet join method, you do slip stitch crochet instead of single crochet.
It gives a much flatter seamline.
You can do the join to the front of the project or the back of the project.
I hope that helps!
Louise