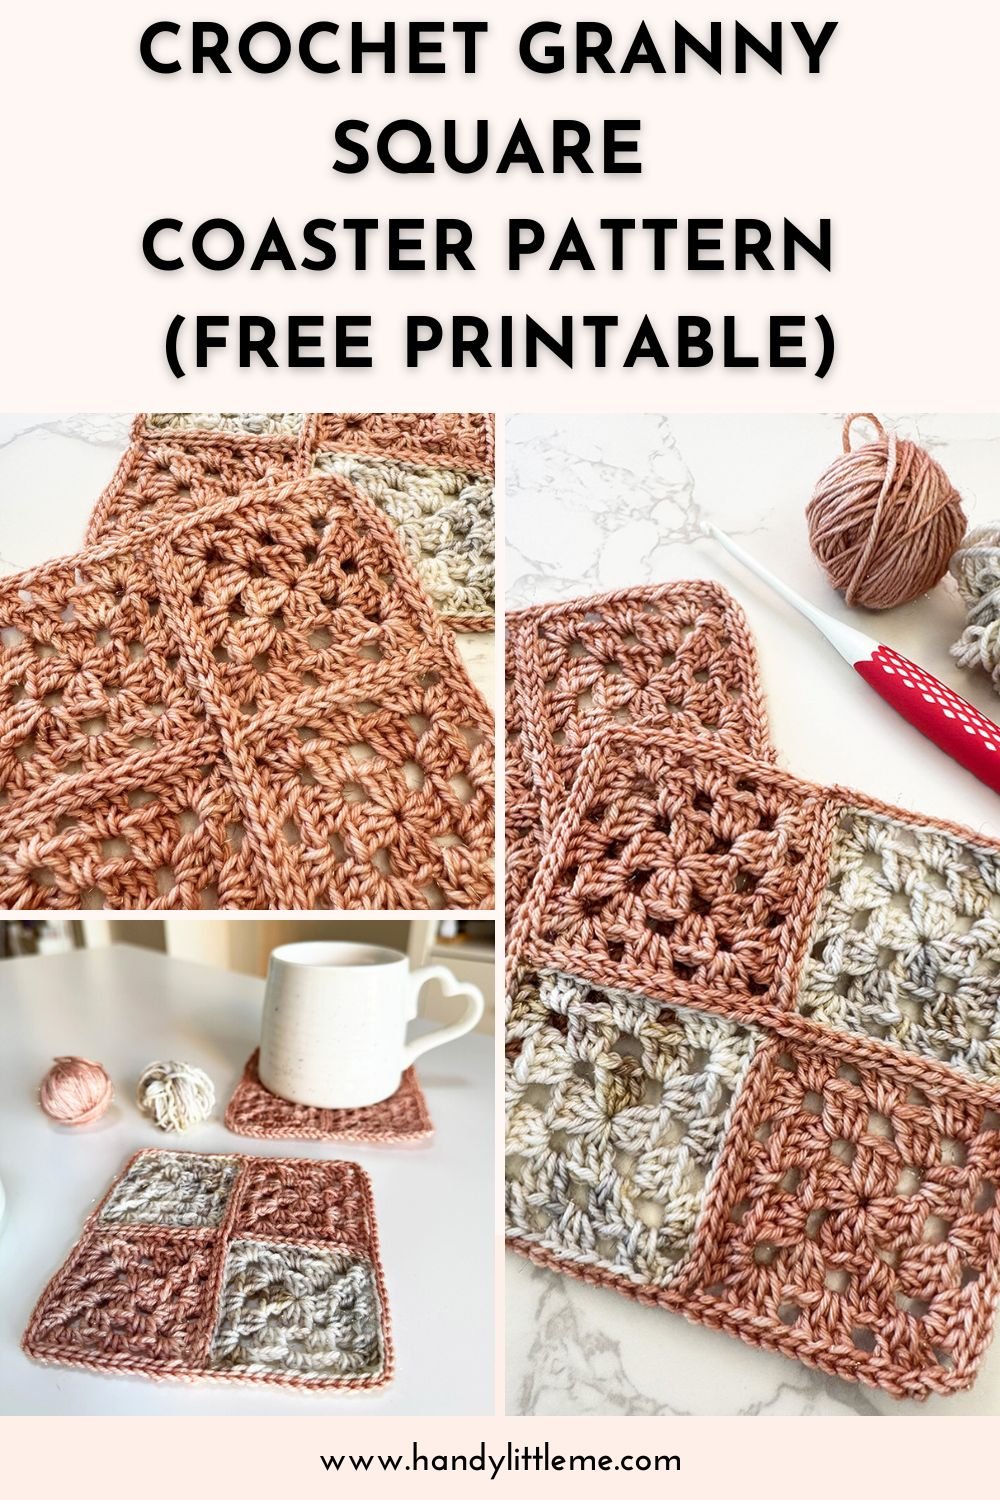
Crochet Granny Square Coaster Pattern (Free Printable)
THIS ARTICLE CONTAINS AFFILIATE LINKS THAT SUPPORT HANDY LITTLE ME CONTENT AND FREE PATTERNS.Whether you’re new to crochet or looking for a relaxing weekend project, these crochet coasters are quick, colorful, and perfect for stash-busting those leftover mini skeins or bits of scrap yarn.
Using three colors of fingering-weight yarn and a 3.5 mm / US E-4 hook, you’ll make four small squares, join them with a smooth flat slip stitch seam, and finish with a simple border.
The result? A charming handmade set of coasters — modern, minimal, and endlessly customizable.
They’re a perfect project for adding a pop of color to your coffee table or gifting as part of a seasonal color home decor set.
Before You Get Started
A few things to keep in mind before diving in:
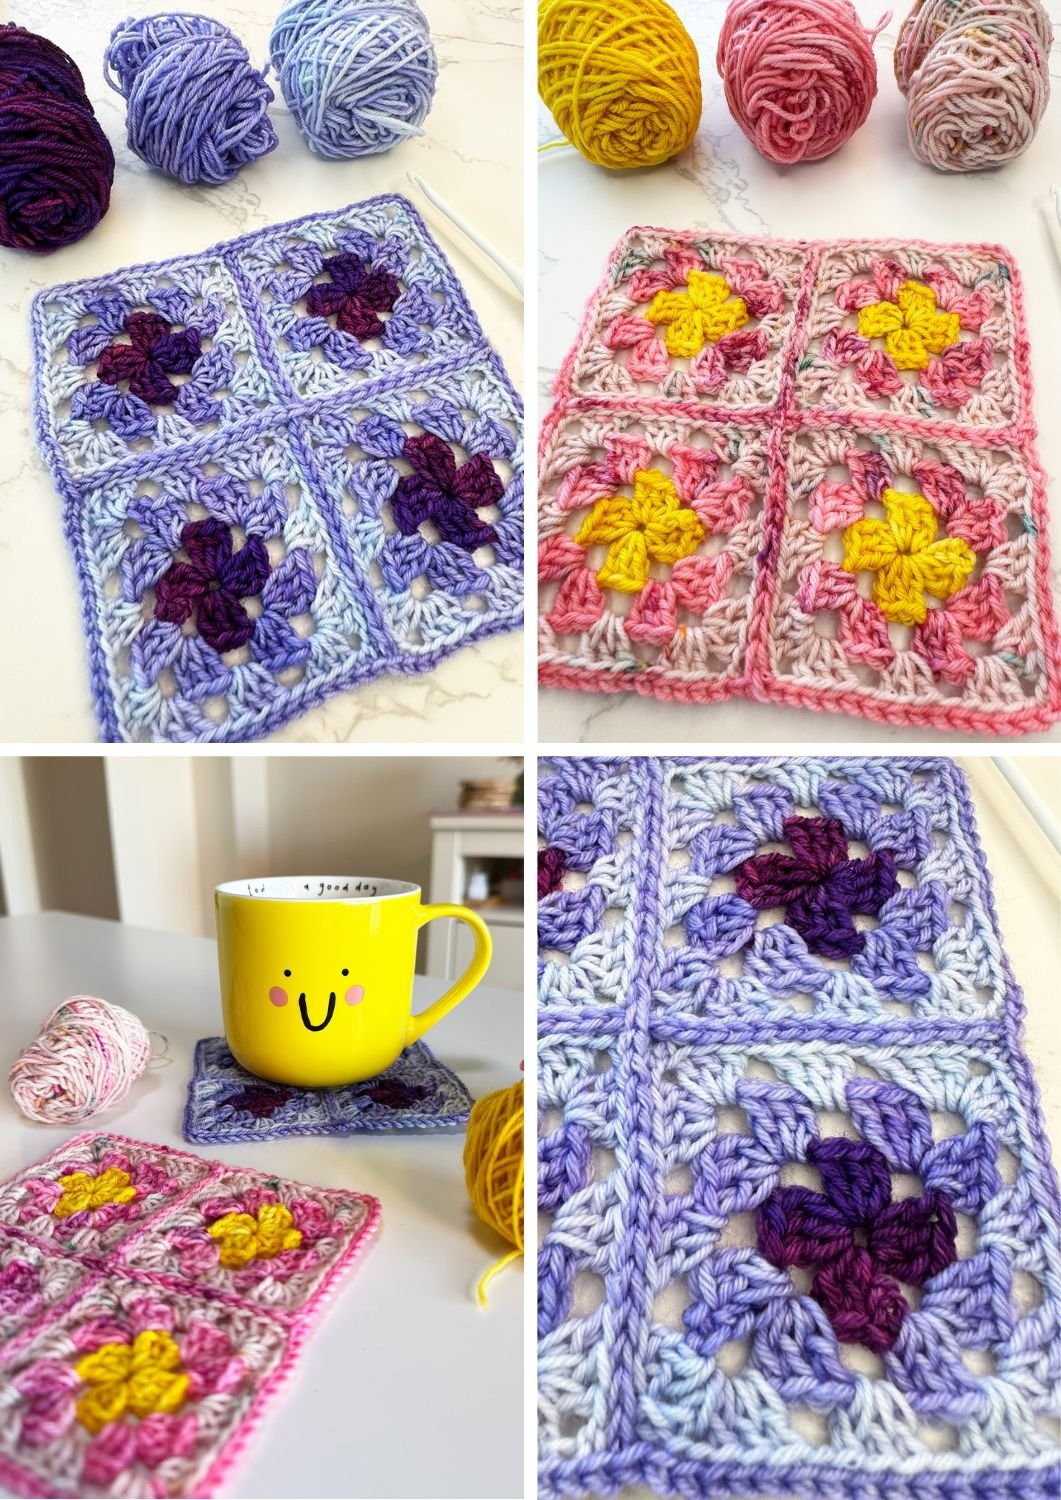
- Feel free to play with color! Try neutrals, brights, or even seasonal colors to suit your home or make great gifts.
- You’ll need basic stitches: chain, double crochet, and slip stitch.
- Use cotton yarn or any durable natural fiber to help your coasters stand up to moisture from a cup of coffee or cold drinks.
- This is a free crochet pattern using US terms.
Tools & Materials
- Fingering weight yarn – 3 colors (scraps or mini skeins)
- US E-4 /3.5 mm crochet hook
- Tapestry needle
- Scissors
- Blocking mat + pins (optional for shaping)
Want a solid color version?
Prefer a minimalist look or want to skip the color changes? No problem!
Simply work all three rounds using the same yarn.
Just ignore the color change instructions and continue with your chosen shade — the square pattern stays exactly the same.
This also makes a lovely single color option that fits well with neutral palettes or farmhouse-style decor.
Abbreviations (US Terms)
UK Conversion Tip: Replace all “dc” with “tr” if using UK crochet terms.
- ch – chain
- dc – double crochet
- sl-st – slip stitch
- sp – space
- beg – beginning
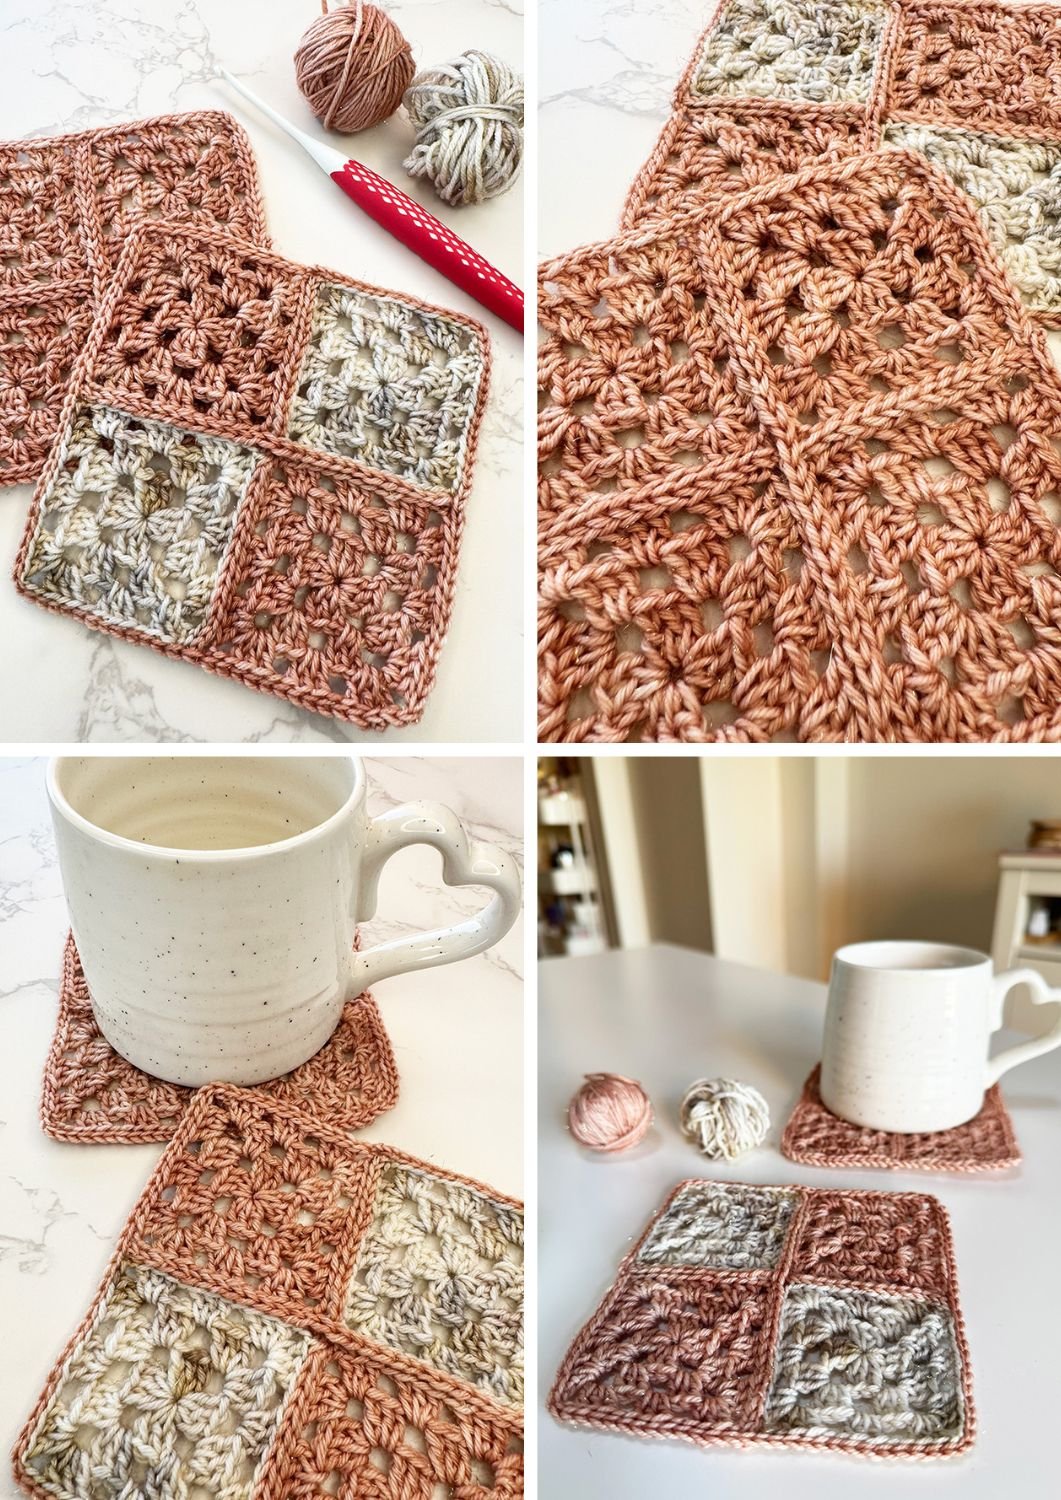
How To Crochet The Granny Square Coaster
You’ll make four squares, then seam and border them.
Each square has three rounds in three different colors.
Round 1 – Center Ring (Color 1)
- Ch 4 and join with a sl st to the first ch to form a ring (or begin with a magic ring).
- Ch 6 (counts as 1 dc + ch-3 corner sp),
- Into the ring, work:
(3 dc, ch 3) three times,
2 dc, - Join with a sl st to the 3rd ch of the beg ch-6,
- Fasten off.
- Join Color 2 for the next round.
Round 2 – Forming Corners (Color 2)
- Sl st into the ch-3 corner space.
- Ch 6, 3 dc into same ch-3 space,
- Ch 1, (3 dc, ch 3, 3 dc) in next ch-3 space — repeat 2 more times,
- Ch 1, 2 dc in first corner,
- Join with sl st to the 3rd ch of beg ch-6,
- Fasten off.
- Join Color 3 for the final round.
Round 3 – Expanding the Shape (Color 3)
- Sl st into the ch-3 corner space.
- Ch 6, 3 dc in same space,
- (Ch 1, 3 dc) in next ch-1 space, ch 1, (3 dc, ch 3, 3 dc) in next ch-3 space — repeat 2 more times,
- Ch 1, 3 dc in last ch-1 space, ch 1, 2 dc in first ch-3 space,
- Join with sl st to the 3rd ch of beg ch-6,
- Fasten off and weave in all ends.
Make 4 squares total.
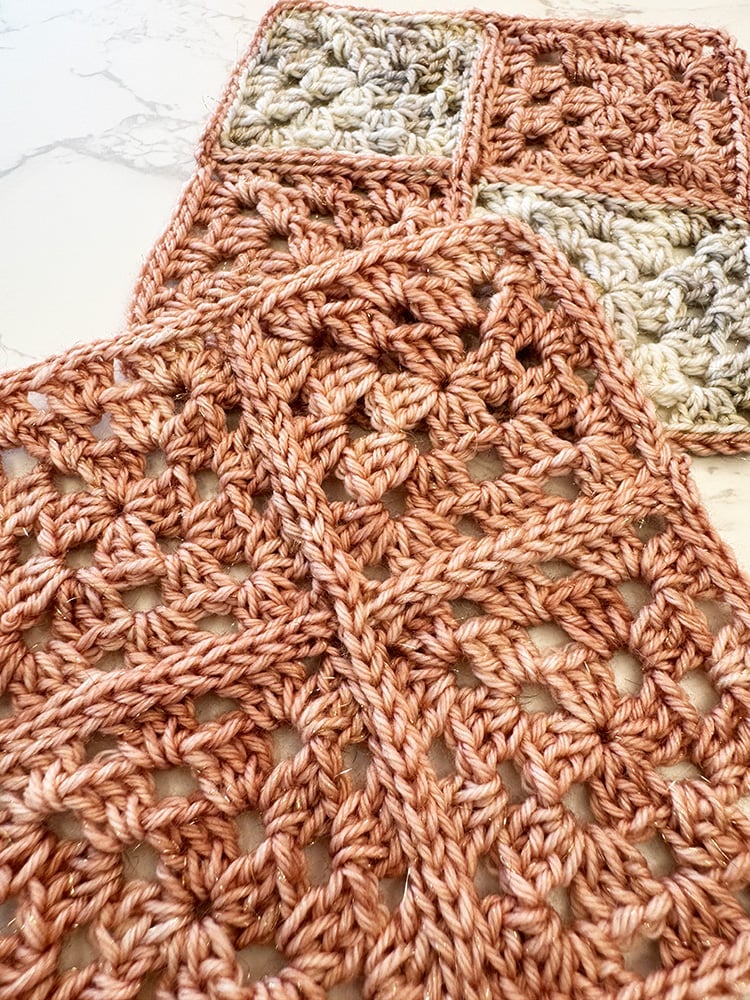
How To Join The Squares – Flat Slip Stitch Seam
To join your granny squares into one coaster:
- Lay the squares in a 2×2 arrangement, right sides facing up.
- Working with one pair of squares at a time, place them right side facing up.(so the right sides face outward).
- Insert your hook through the back loops only of both squares along the edge.
- Use one of your yarn colors to slip stitch along the seam — this creates a subtle, flat join that lies nearly invisible from the front.
- Repeat for all square seams (horizontal and vertical joins).
Final Border: Once all four squares are joined, continue with the same yarn and slip stitch around the entire outer edge, making sure to slip stitch into the edges of each square evenly.
Optional: Add a single round of sc stitches in your favorite color to frame the whole piece.
Blocking Your Granny Square Coaster (Optional but Recommended)
Blocking is the final step that helps your crochet squares lay flat, hold their shape, and look polished — especially useful for joined pieces like coasters.
What You’ll Need:
- A blocking mat or foam board
- Rust-proof pins or T-pins
- A spray bottle filled with clean water
- A ruler or tape measure (for squaring edges evenly)
How to Block Your Coaster:
- Weave in all loose ends first.
- Lay your joined coaster flat on a blocking mat, gently shaping it into a square.
- Use a ruler to check that all corners are even and aligned.
- Pin each corner and edge down securely to hold the shape.
- Lightly mist the piece with water using your spray bottle — enough to dampen, not soak.
- Leave it to dry completely (usually 6–12 hours, depending on the yarn and humidity).
- Once dry, remove the pins — your coaster should now be flat and crisp!
Tip: Always check your yarn label.
Some fibers (like wool) respond well to steam blocking, but others (like acrylic) may need special care, like gentle pin-and-spray only.
Avoid direct heat unless you’re confident it’s safe for your yarn.
FAQs & Tips
→ Can I use DK or worsted yarn instead?
Yes, just adjust your hook size (4 mm/US G-6 for DK, 5 mm/US H-8 for worsted weight yarn) and expect a larger coaster.
→ What’s a flat slip stitch seam?
It’s a joining technique that creates a nearly invisible seam by slip stitching through back loops only.
It keeps your crochet fabric flat and neat.
→ How do I block my coaster?
Lightly mist the finished piece with water and pin it to a square shape.
Let it dry completely for crisp edges.
→ Can I make more squares?
Absolutely! Turn this into a placemat, wall hanging, or even a full blanket.
→ Can I make a bigger set?
Definitely! Turn this idea into a placemat, runner, or full-size throw.
These little squares are the building blocks of countless crochet projects.
Free Printable
Want to keep this tutorial handy while you crochet? Grab the free printable version of the pattern below!
Whether you’re curled up on the couch or crafting on the go, this easy-to-follow card makes it simple to work through each round at your own pace.
Crochet Granny Square Coaster Pattern

Make these beautiful crochet granny square coasters with this free pattern and step-by-step tutorial.
Perfect for using up scrap yarn, these quick and easy coasters add a handmade touch to your coffee table and make great gifts.
Materials
- Fingering weight yarn – 3 colors (scraps or mini skeins)
Tools
- US E-4 /3.5 mm crochet hook
- Tapestry needle
- Scissors
- Blocking mat + pins (optional for shaping)
Instructions
How To Crochet The Granny Square Coaster
You’ll make four squares, then seam and border them.
Each square has three rounds in three different colors.
Round 1 – Center Ring (Color 1)
- Ch 4 and join with a sl st to the first ch to form a ring (or begin with a magic ring).
- Ch 6 (counts as 1 dc + ch-3 corner sp),
- Into the ring, work:(3 dc, ch 3) three times,2 dc,
- Join with a sl st to the 3rd ch of the beg ch-6,
- Fasten off.
- Join Color 2 for the next round.
Round 2 – Forming Corners (Color 2)
- Sl st into the ch-3 corner space.
- Ch 6, 3 dc into same ch-3 space,
- Ch 1, (3 dc, ch 3, 3 dc) in next ch-3 space — repeat 2 more times,
- Ch 1, 2 dc in first corner,
- Join with sl st to the 3rd ch of beg ch-6,
- Fasten off.
- Join Color 3 for the final round.
Round 3 – Expanding the Shape (Color 3)
- Sl st into the ch-3 corner space.
- Ch 6, 3 dc in same space,
- (Ch 1, 3 dc) in next ch-1 space, ch 1, (3 dc, ch 3, 3 dc) in next ch-3 space — repeat 2 more times,
- Ch 1, 3 dc in last ch-1 space, ch 1, 2 dc in first ch-3 space,
- Join with sl st to the 3rd ch of beg ch-6,
- Fasten off and weave in all ends.
Make 4 squares total.
How To Join The Squares – Flat Slip Stitch Seam
To join your granny squares into one coaster:
- Lay the squares in a 2x2 arrangement, right sides facing up.
- Working with one pair of squares at a time, place them right side facing up.(so the right sides face outward).
- Insert your hook through the back loops only of both squares along the edge.
- Use one of your yarn colors to slip stitch along the seam — this creates a subtle, flat join that lies nearly invisible from the front.
- Repeat for all square seams (horizontal and vertical joins).
Final Border: Once all four squares are joined, continue with the same yarn and slip stitch around the entire outer edge, making sure to slip stitch into the edges of each square evenly.
Optional: Add a single round of sc stitches in your favorite color to frame the whole piece.
Notes
Abbreviations (US Terms)
UK Conversion Tip: Replace all "dc" with "tr" if using UK crochet terms.
- ch - chain
- dc - double crochet
- sl-st - slip stitch
- sp - space
- beg - beginning
Want To Make More Granny Projects?
- Granny Square Crochet Top Pattern
- How To Crochet A Granny Square Blanket
- 30 Free Crochet Granny Square Bag Patterns
- Crochet Triangle Shawl Pattern (Granny Stripe)
- Granny Square Bucket Hat Crochet Pattern
- Granny Square Dishcloth
- Granny Square Bag Pattern
- 40 Free Granny Square Crochet Patterns
- Carnival Confetti Crochet Granny Square (Free Printable)
- Ocean Breeze Granny Square (Free Stashbuster Pattern + Printable)
- Berry Patch Granny Square Crochet Pattern (Free Printable)
- Sunset Square (Stashbuster Granny Square Pattern + Free Printable)
- Pop Art Granny Square Pattern (Free Printable)
- Retro Bloom Granny Square Crochet Pattern (Free Printable)
- Granny Square Crochet Bookmark Pattern (Free Printable)
Share Your Work
I’d love to see your finished granny squares!
Tag me on Instagram @handylittleme or use #handylittleme to show off your makes.
Join the Handy Little Me Facebook Group to share photos, ask questions, and connect with other makers.