
Blocking Knits: How To Block Knitting Step By Step
THIS ARTICLE CONTAINS AFFILIATE LINKS THAT SUPPORT HANDY LITTLE ME CONTENT AND FREE PATTERNS.Blocking knits is one of those finishing steps that can completely transform your project.
It helps to even out your stitches, smooth the knitted fabric, open up lacework, and shape your finished project to the measurements given in the pattern.
Blocking is especially helpful for knitted sweaters, cardigans, shawls, and projects made in separate pieces that need to be seamed together.
In this guide, you will learn how to block knitting using wet blocking, spray blocking, and steam blocking, along with how to choose the safest method for your yarn.
Always check the care instructions on your yarn label before you begin—and if you are unsure, test your chosen blocking method on your gauge swatch first.

Save this article
Enter your email address and we'll send it to your inbox.
By entering your email, you agree to receive patterns, tutorials, and updates from Handy Little Me. Unsubscribe at any time.
What Is Blocking In Knitting?
Blocking is the process of wetting, spraying, or steaming a knitted item before shaping it to the correct measurements and allowing it to dry.
The moisture helps the yarn fibers relax so the stitches can settle into place.
Depending on the yarn and the blocking method you use, it can improve the shape, drape, and overall appearance of your finished knitting.
Some projects only need to be gently smoothed into shape, while lace shawls and individual sweater pieces may need to be carefully pinned to specific measurements.
Blocking is not just for professional knitters.
It is a simple finishing technique that can make a big difference to even the most beginner-friendly project.

Why Should You Block Your Knits?
After spending hours knitting a project, it can be tempting to cast off, weave in the ends, and start wearing it straight away!
However, taking a little extra time to block your knitting can give it a much more polished finish.
Blocking can help to:
- Even out slightly uneven stitches.
- Smooth and relax the knitted fabric.
- Open up lace and decorative stitch patterns.
- Shape a garment to the finished measurements.
- Straighten edges and corners.
- Help separate sweater pieces fit together more easily.
- Improve the drape of shawls, scarves, and garments.
- Settle colorwork and textured stitch patterns.
- Remove small creases caused by knitting or storage.
Blocking can also remove excess dye, dust, or oils left on the yarn after you have been handling it.

What Blocking Can And Cannot Fix
Blocking can improve the appearance of your knitting, but it cannot fix every problem.
It may help to disguise small differences in tension and make slightly uneven stitches look more consistent.
It can also help you adjust the dimensions of a wool project by a small amount.
However, blocking cannot:
- Correct the wrong stitch count.
- Repair a dropped stitch.
- Fix incorrectly worked shaping.
- Permanently stop stockinette stitch from curling.
- Turn a badly fitting sweater into the correct size.
- Correct a large gauge difference.
- Undo overstretched or heat-damaged fibers.
It is best to think of blocking as a finishing and shaping technique rather than a way to repair mistakes.
Things To Check Before Blocking
Before you place your finished project into water or reach for the steam iron, there are a few things you should check.
1. Read The Yarn Label
The yarn label should give you care instructions for washing, drying, and using heat.
Always follow those instructions, particularly if you are working with delicate yarn, hand-dyed yarn, or a blend of different fibers.
You can see more information in my guide on how to read a yarn label.
2. Block Your Gauge Swatch
Your gauge swatch is the perfect place to test how the yarn will react.
Measure the swatch before blocking, block it using your chosen method, and then measure it again once it is completely dry.
This will show you whether the yarn grows, shrinks, changes texture, or releases any color.
It can also help you decide which blocking method will give you the best results.
3. Check For Color Bleeding
Strongly colored and hand-dyed yarns may release some dye when they are placed in water.
Test a small piece of leftover yarn or your gauge swatch first, especially if your project contains very dark and very light colors together.
Use cool or lukewarm water and avoid leaving a colorwork project folded while it is wet, as this may allow the darker dye to transfer onto the lighter sections.
4. Measure Your Project
Check the finished measurements given in your knitting pattern before blocking.
If you are blocking a sweater or individual garment pieces, keep a tape measure nearby so you can shape everything accurately.
Do not simply stretch the knitting as far as it will go.
The aim is to shape it to the correct measurements without distorting the stitches.
5. Check Your Loose Ends
You can weave in your loose ends before blocking, but avoid trimming them too closely until your knitting is completely dry.
The knitted fabric may move slightly during blocking, and leaving a small tail will help prevent an end from pulling free.
Blocking Tools You May Need
You do not need to buy lots of specialist tools to start blocking knits.
Many of the things you need may already be in your home.
Useful blocking tools include:
- Blocking mats.
- Rust-proof T-pins or blocking pins.
- Blocking wires.
- A clean basin or sink.
- A spray bottle.
- A tape measure or ruler.
- Clean towels.
- A gentle wool wash.
- A steam iron or garment steamer.
- Sock blockers.
- A small fan to help with drying.
Blocking Mats
Blocking mats are normally made from thick interlocking foam.
They create a large, flat surface and allow you to push pins into the mat without damaging the floor underneath.
Many blocking mats also have grid lines, which can help you keep edges and corners straight.
Children’s interlocking play mats can be a more affordable alternative.
You could also use a yoga mat, a padded ironing board, a corkboard, or a clean carpeted floor covered with towels.
If you use a bed, place a clean towel or tightly stretched sheet over it first.
Just remember that the bed may be out of use until the knitting is completely dry!
Blocking Pins
Always use rust-proof pins when blocking wet or damp knitting.
T-pins and comb-style blocking pins are helpful for keeping your work in place.
Use enough pins to hold the fabric evenly.
Placing pins too far apart can create little points or scallops along an edge.
Blocking Wires
Blocking wires are particularly useful for lace shawls, scarves, and projects with long straight edges.
The wires are threaded through the edge stitches and then secured with a smaller number of pins.
This can help you create smooth, straight edges without using hundreds of individual pins.
Which Blocking Method Should You Use?
The best method will depend on the yarn fiber, the type of project, and the result you want to achieve.
| Yarn or project | Recommended blocking method |
|---|---|
| Wool and most animal fibers | Wet blocking |
| Lace shawls | Wet blocking with pins or wires |
| Superwash wool | Wet or spray blocking; avoid overstretching |
| Alpaca | Gentle wet or spray blocking |
| Cotton and linen | Wet or spray blocking |
| Acrylic | Spray blocking or very cautious steam blocking |
| Wool blends | Follow the care instructions for the most delicate fiber |
| Delicate or lightly shaped pieces | Spray blocking |
| Small items and quick touch-ups | Spray blocking |
Whichever method you choose, always handle your knitting gently and allow it to dry completely before moving it.
How To Wet Block Knitting
Wet blocking is one of the most common methods for blocking knits.
It works particularly well for wool, many other animal fibers, and lace projects.
You Will Need
- A clean basin or sink.
- Cool or lukewarm water.
- A small amount of gentle wool wash.
- Clean towels.
- Blocking mats or another flat surface.
- Rust-proof pins.
- A tape measure.
Wet Blocking Instructions
- Fill a clean basin or sink with cool or lukewarm water.
- Add a small amount of gentle wool wash if required.
- Place your knitted item into the water and gently press it down until it is fully saturated.
- Allow it to soak for around 15 to 20 minutes, or follow the instructions given on your wool wash.
- Do not rub, twist, or agitate the knitting, as this could cause wool fibers to felt.
- Carefully lift the project from the water, supporting its full weight with both hands.
- Gently squeeze out the excess water. Do not wring or twist the fabric.
- Place the knitting onto a clean towel.
- Roll the towel up with the knitting inside and press gently to remove more moisture. You can stand on the rolled towel if the project is particularly wet.
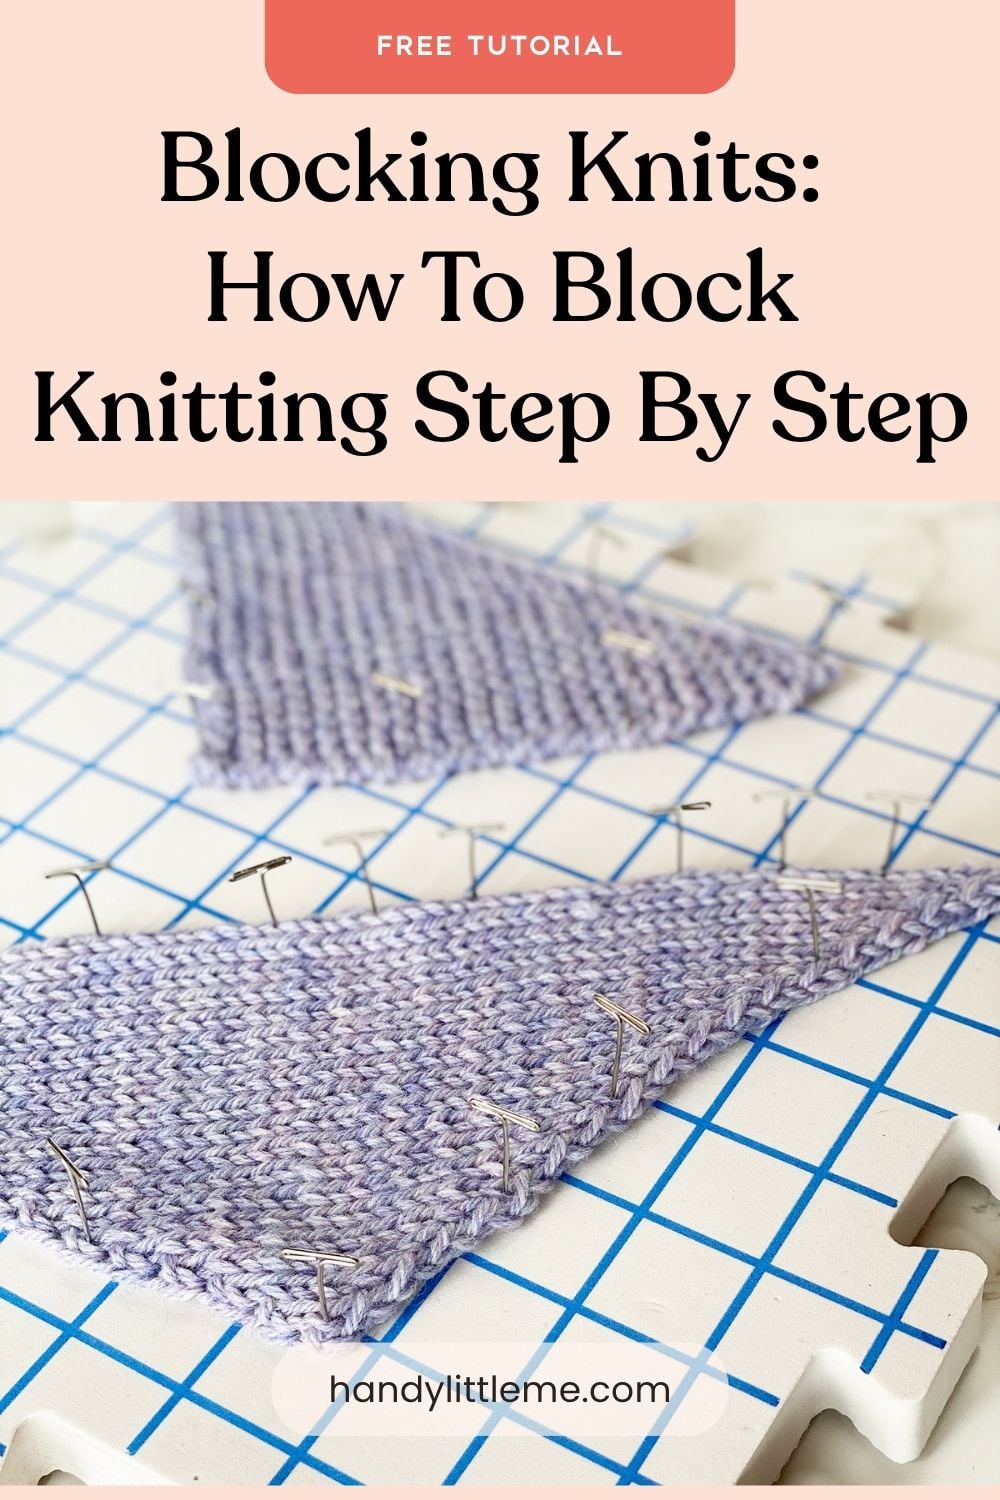
- Unroll the towel and place the damp knitting onto your blocking mats.
- Smooth the project into shape, using the pattern measurements as your guide.
- Pin the knitting if it needs to hold a particular shape or measurement.
- Leave it flat until it is completely dry.
A lightweight project may dry within several hours, while a thick wool sweater or blanket could take 24 to 48 hours.

How To Spray Block Knitting
Spray blocking is a gentle method that works well when your project only needs a little shaping.
It is also the blocking method I like to use most often because it is simple, gentle, and easy to control.
You Will Need
- Blocking mats or another flat surface.
- Rust-proof pins.
- A spray bottle filled with cool water.
- A tape measure.
Spray Blocking Instructions
- Place the dry knitted item onto your blocking mats.
- Gently smooth the knitting into shape.
- Measure the project and adjust it to the dimensions given in the pattern.
- Pin the edges into place, adding enough pins to create smooth lines.
- Lightly spray the knitting with cool water until it is evenly damp.
- Do not soak the fabric. It should be damp rather than dripping wet.
- Leave the project pinned in place until it is completely dry.
- Remove the pins carefully and check the finished measurements.
Spray blocking is useful for small projects, delicate knits, cotton yarn, and projects that do not need the stronger shaping created by wet blocking.
It is also a good way to refresh something that has already been blocked and only needs a little reshaping.
How To Steam Block Knitting
Steam blocking uses heat and moisture to relax the fibers.
It can be useful for quick shaping, but it must be done carefully because not all yarn fibers tolerate heat.
Never place the hot iron directly onto your knitting.
You Will Need
- Blocking mats or a padded ironing surface.
- Rust-proof pins.
- A steam iron or garment steamer.
- A clean, damp cloth if required.
- A tape measure.
Steam Blocking Instructions
- Check the yarn label to make sure the fiber can tolerate heat and steam.
- Test the method on your gauge swatch before using it on the finished project.
- Place the knitting on a blocking mat or padded surface.
- Smooth and pin the item to the correct measurements.
- Hold the steam iron or garment steamer above the fabric without touching it.
- Allow the steam to pass through the knitted fabric.
- Keep the iron or steamer moving rather than concentrating the heat in one area.
- Allow the knitting to cool and dry completely before removing the pins.
You can also place a damp cloth over the knitting before applying steam, but the iron should only make contact with the cloth—not the knitted stitches underneath.
Be especially careful when steam blocking cables, bobbles, and other raised textures.
Direct pressure can flatten the stitches and permanently change their appearance.

How To Block Different Yarn Fibers
Different fibers respond to blocking in different ways.
This is why checking your yarn label and testing a gauge swatch are so important.
Wool And Other Animal Fibers
Wool normally responds very well to wet blocking.
The water allows the fibers to relax and bloom, which can soften the fabric and make the stitches appear more even.
Use cool or lukewarm water and avoid rubbing, twisting, or agitating the fabric.
Mohair, cashmere, silk, and other delicate animal fibers should be handled gently and blocked according to the yarn manufacturer’s instructions.
Superwash Wool
Superwash wool can be wet blocked, but it may grow more than you expect when it becomes wet.
Support the full weight of the project when lifting it from the water and shape it carefully to the correct measurements.
Testing a blocked gauge swatch is particularly helpful when knitting a garment with superwash wool.
Alpaca
Alpaca is beautifully soft and drapey, but it can stretch when wet and does not have the same elasticity as sheep’s wool.
Use a gentle wet or spray-blocking method and avoid stretching the fabric too firmly.
A heavy alpaca garment should always be fully supported while wet.
Cotton And Linen
Cotton and linen can be wet or spray blocked.
These fibers can become very heavy when wet, so support the entire project when moving it.
Cotton does not have the same natural elasticity as wool and may need to be reshaped each time it is washed.
Linen often softens and improves with repeated washing and use.
Acrylic Yarn
Acrylic is sensitive to heat, so it must be treated carefully.
Water may help to smooth and shape an acrylic project, making spray blocking a gentle place to start.
Steam can permanently change acrylic fibers, affecting their texture, elasticity, and drape. This is sometimes known as “killing” the acrylic.
If you choose to use steam:
- Test it on a swatch first.
- Keep the iron or steamer above the fabric.
- Never allow the hot iron to touch the yarn.
- Keep the heat moving.
- Do not stretch the fabric excessively.
- Remember that any heat-related change may be irreversible.
For an acrylic project that only needs light shaping, I would try spray blocking first.
Blended Yarns
If your yarn contains several different fibers, treat it according to the most delicate fiber in the blend.
For example, a wool and silk blend should be handled gently and kept away from high heat.
Always follow the care instructions on the yarn label.
How To Block Sweater Pieces
If you are knitting a seamed sweater or cardigan, blocking the separate pieces before seaming can make the finishing process much easier.
Lay the front, back, and sleeves on your blocking surface.
Use the measurements given in the pattern schematic to shape each piece.
Make sure matching pieces, such as the two sleeves, are the same length and width.
Avoid overstretching the ribbed cuffs, hem, or button bands, as this can cause them to lose their elasticity.
Once the pieces are completely dry, remove the pins and seam them together.
You can also give the completed garment a gentle final block after seaming to help the seams settle and improve the overall shape.
If your sweater was knitted seamlessly, block the completed garment flat and shape the body, neckline, and sleeves to the finished measurements.
How To Block Lace And Shawls
Blocking is especially important for lace knitting.
Lace can look wrinkled or gathered when it first comes off the needles.
Blocking opens the yarn overs and allows the stitch pattern to become much more visible.
Wet blocking normally gives lace the most dramatic result.
After soaking and gently removing the excess water, lay the shawl on your blocking mats.
Use blocking wires for straight edges and rust-proof pins for points, curves, and scalloped borders.
Work slowly around the shawl, adjusting the pins until the lace is open and the shape is even.
Do not pull so firmly that the stitches become distorted or the yarn is placed under too much strain.
Leave the shawl pinned until it is completely dry.

How To Block Knitted Socks
Blocking socks is not always essential, but it can help the stitches settle and give the socks a more polished shape.
Sock blockers are particularly useful if you are photographing the socks or giving them as a gift.
To wet block your socks:
- Soak them in cool or lukewarm water for around 15 minutes.
- Lift them carefully from the water and gently squeeze out the excess moisture.
- Roll them in a clean towel and press to remove more water.
- Place the damp socks onto your sock blockers.
- Smooth the fabric and make sure the cuffs, heels, and toes are positioned correctly.
- Leave them to dry completely.
If you do not have sock blockers, gently shape the socks by hand and lay them flat on a clean towel to dry.
Always check the yarn label first, particularly if the sock yarn contains wool or other animal fibers.

How To Block A Knitted Blanket
A knitted blanket can be challenging to block simply because of its size.
If you do not have enough blocking mats, cover a clean carpeted floor with towels or stretch a clean sheet tightly over a bed.
For a large wool blanket, you can wet block it if you have enough space and can safely support its weight.
However, spray blocking is often easier for blankets that only need the edges straightened or the corners shaped.
Lay the blanket flat and measure each side.
Pin the corners first, followed by the center point of each edge.
Continue adding pins between these points until the sides are straight and the blanket is evenly shaped.
Lightly spray the blanket with water and allow it to dry completely before removing the pins.
If you have pets, block the blanket in a room where they cannot walk over the fabric or disturb the pins.
Blocking Knits FAQ
Do You Have To Block Every Knitting Project?
No, you do not have to block every knitting project.
Simple dishcloths, practice swatches, and small items may not need formal blocking.
However, garments, lace shawls, colorwork, and projects made in separate pieces will normally benefit from it.
If you are unsure, test the blocking method on your gauge swatch first.
Should You Block Knitting Before Or After Seaming?
For a seamed garment, blocking the individual pieces before assembly can make seaming easier and help you match the pieces accurately.
You can then give the finished garment a light final block to help the seams settle.
Seamless garments are normally blocked after the knitting is complete.
Always follow the instructions given in your pattern.
Does Blocking Make Knitting Bigger?
Blocking can make knitting slightly larger, particularly if the fabric relaxes or is stretched during the process.
Superwash wool, alpaca, cotton, and some loose fabrics may grow more noticeably when wet.
Blocking should not be used to make a badly fitting garment several sizes larger.
Use the pattern measurements and your blocked gauge swatch as your guide.
Can Blocking Fix Uneven Stitches?
Blocking can help small differences in tension look more even because the fibers relax and settle.
However, it cannot completely fix very loose stitches, twisted stitches, dropped stitches, or pattern errors.
How Long Does Knitting Take To Dry After Blocking?
The drying time depends on the yarn, project size, room temperature, and amount of moisture used.
A small spray-blocked item may dry in a few hours.
A wool sweater or thick blanket may take 24 to 48 hours.
Do not remove the pins or move the knitting until it is completely dry.
A small fan can help improve airflow, but avoid placing delicate knitting directly beside a heater or radiator.
Does Blocking Knitting Last Permanently?
Blocking normally lasts until the item is washed again.
After washing, reshape the project and allow it to dry flat. This is essentially a gentle re-blocking.
Steam can cause permanent changes to synthetic fibers such as acrylic, which is why it must be used very carefully.
Can You Block Knitting Without Blocking Mats?
Yes, you can block knitting without specialist mats.
You can use:
- A clean towel on a carpeted floor.
- A yoga mat.
- A padded ironing board.
- Children’s foam play mats.
- A corkboard.
- A bed covered with a tightly stretched sheet or towel.
Make sure the surface is clean, water-resistant, and thick enough to protect anything underneath from the pins.
Can You Block Acrylic Knitting?
Yes, acrylic knitting can be blocked.
Spray blocking is the gentlest place to start.
Steam may relax acrylic more effectively, but heat can permanently change or damage the fibers.
Always test it on a swatch first and never touch the yarn with the hot iron.
Should You Weave In The Ends Before Blocking?
You can weave in your ends before blocking, particularly if you want the finished fabric to settle around them.
However, avoid trimming the yarn tails too closely until the project is completely dry.
Some knitters prefer to weave in the final ends after blocking, especially on lace or a project that will be stretched significantly.
Can You Dry Blocked Knitting In The Sun?
A little gentle sunlight may help your project dry, but strong or prolonged sunlight can fade some yarn colors, particularly hand-dyed yarn.
It can also cause parts of the project to dry faster than others.
It is normally better to place the knitting in a warm, shaded area with good airflow.
If you do put it outside, keep it in the shade and check it regularly.
Can You Over-Block Knitting?
Yes, it is possible to over-block knitting.
Stretching the fabric too far can distort the stitches, flatten textures, and cause the finished project to lose its shape.
This is especially important with ribbing, alpaca, superwash wool, and delicate lace.
Pin your project to the measurements given in the pattern rather than stretching it as far as possible.
Finishing Your Knitting Project
Blocking may feel like one more step when you are excited to wear or use your finished project, but it is often worth the extra time.
It can help your stitches settle, improve the shape and drape of the fabric, and give your knitting a beautifully finished appearance.
The most important things to remember are to check the yarn label, test your gauge swatch, choose the correct method for the fiber, and handle your knitting gently.
Once your project is completely dry, carefully remove the pins, weave in or trim any remaining ends, and enjoy your beautifully finished knit!
Hi. I really enjoyed your explanations on blocking. I have a question. Is it o to bring my garment outside to block under the sun and expeditate the drying?
Thanks,
Isa
Hello Isa,
I think that depends on how strong the sun is where you are, because it could possibly fade your yarn, the hand-dyed yarns especially could have some color fade.
If you live in a place with extreme heat, I would place it in the shade for an hour to see how that goes.
If you live in an place that is not so hot, you could place it in the sun for an hour or so and keep an eye on it to see how it’s going.
I hope that helps!
Louise
How to block blanket with out “blocking mat”?
Hello Dana,
You could try to stretch an old sheet over your bed – tight so it is not loose over the covers and then stretch your blanket across and pin it.
You need enough tension to hold it into place and so that it has the desired shape.
I hope that helps!
Louise