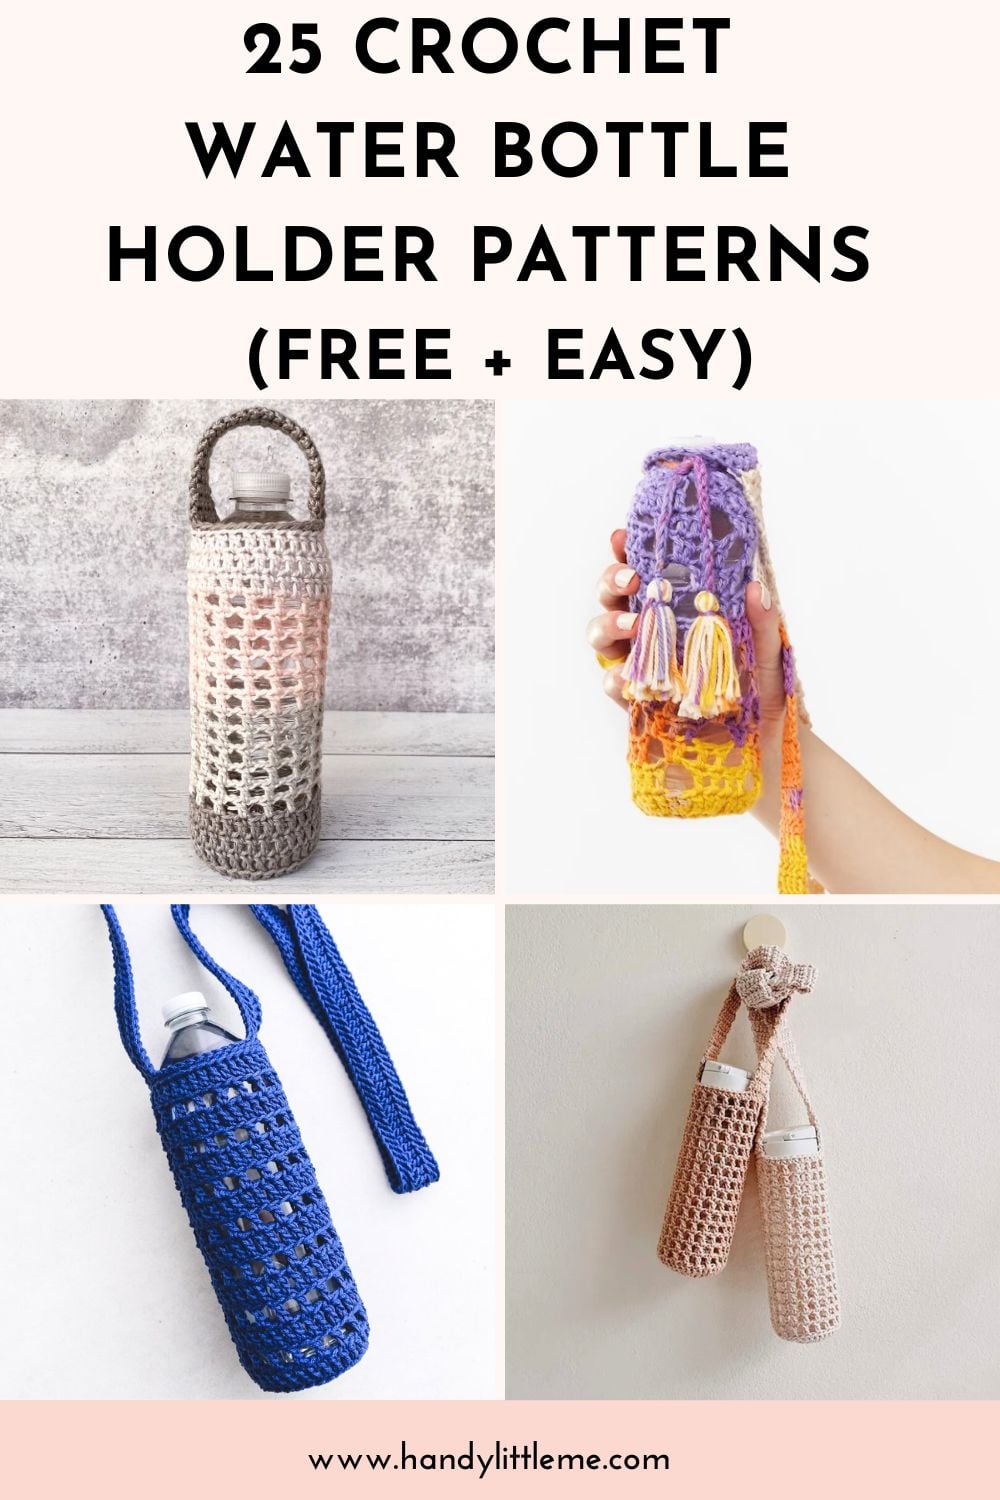
25 Crochet Water Bottle Holder Patterns (Free + Easy)
THIS ARTICLE CONTAINS AFFILIATE LINKS THAT SUPPORT HANDY LITTLE ME CONTENT AND FREE PATTERNS.In this blog post, you will see 25 crochet water bottle holder patterns (free + easy).
Whether you’re a beginner or an experienced crocheter, these patterns offer a variety of styles and techniques to suit your preferences.
From simple designs for quick projects to more intricate patterns that showcase your skills, you’ll find something that inspires you.
Get ready to keep your hands free while staying hydrated and stylish!
Save this article
Enter your email address and we'll send it to your inbox.
By entering your email, you agree to receive patterns, tutorials, and updates from Handy Little Me. Unsubscribe at any time.
25 Free Crochet Water Bottle Holder Patterns
Make your own crochet water bottle holder with these 25 free patterns; easy, beginner-friendly designs with crossbody straps, mesh styles, and cute everyday options.
Happy Crocheting!

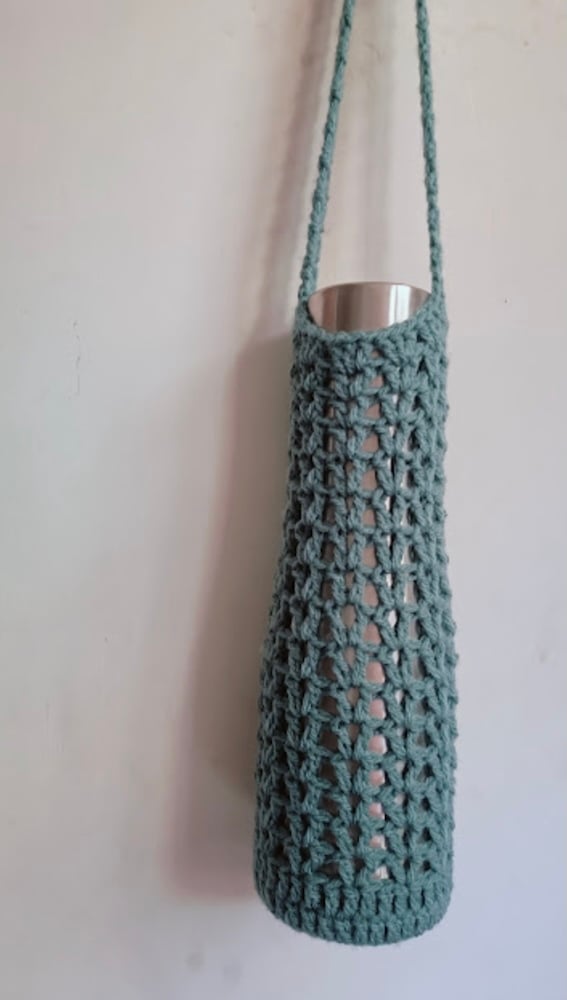
Water Bottle Holder by Viv Crochets
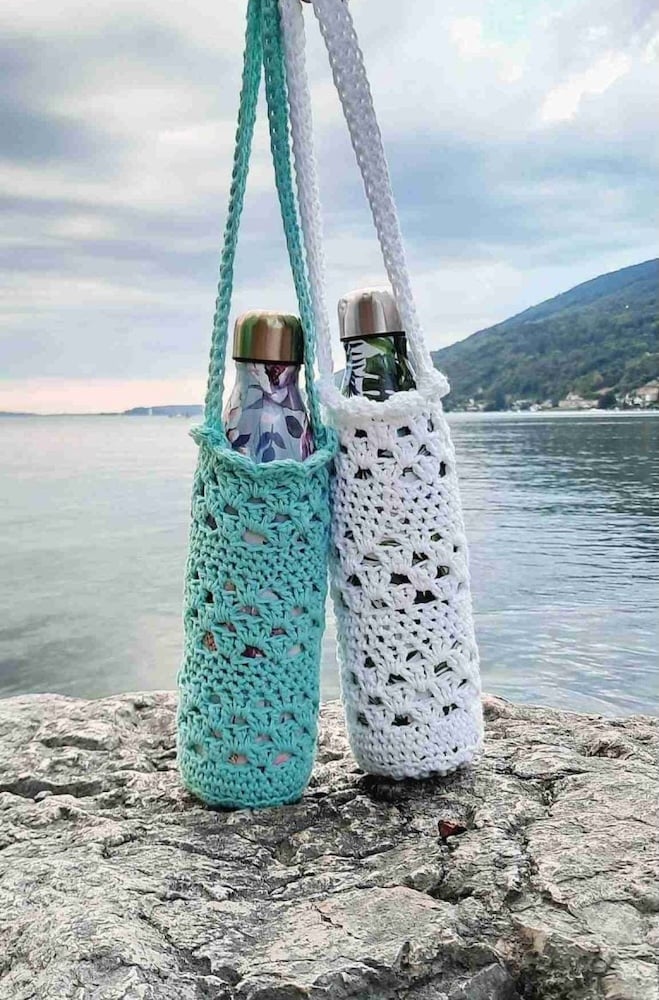
This free crochet pattern uses medium (worsted) weight yarn and a 5.5 mm (I) hook size to create a cute crochet water bottle holder with a breathable mesh design.
It’s worked in rounds from a magic circle, and the strap size can be adjusted for different-sized water bottles or reusable bottles.
The clear, detailed instructions and a video tutorial make this a great project for absolute beginners.
Super Simple Crocheted Water Bottle Carrier by Deliberate Owl
A great way to practice basic crochet stitches, this beginner-friendly, easy pattern starts with a round base and works up the body of the bag in continuous rounds.
The sturdy carrying strap is crocheted directly onto the holder for extra durability.
Perfect for reusable water bottles, it’s a practical make for everyday life.
Crochet Water Bottle Holder by Sarah Maker
This crochet bottle holder pattern uses light worsted weight yarn and a 4 mm hook, combining double crochet stitches, single crochet stitches, increases, and decreases.
The step-by-step, detailed instructions walk you through each stitch for a professional finish.
It’s an easy way to make a breathable holder that fits most plastic water bottles.
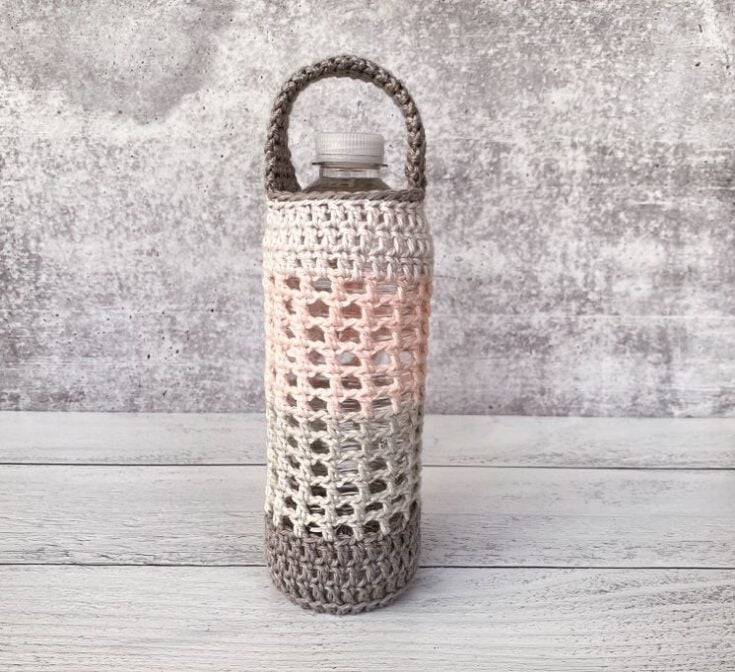
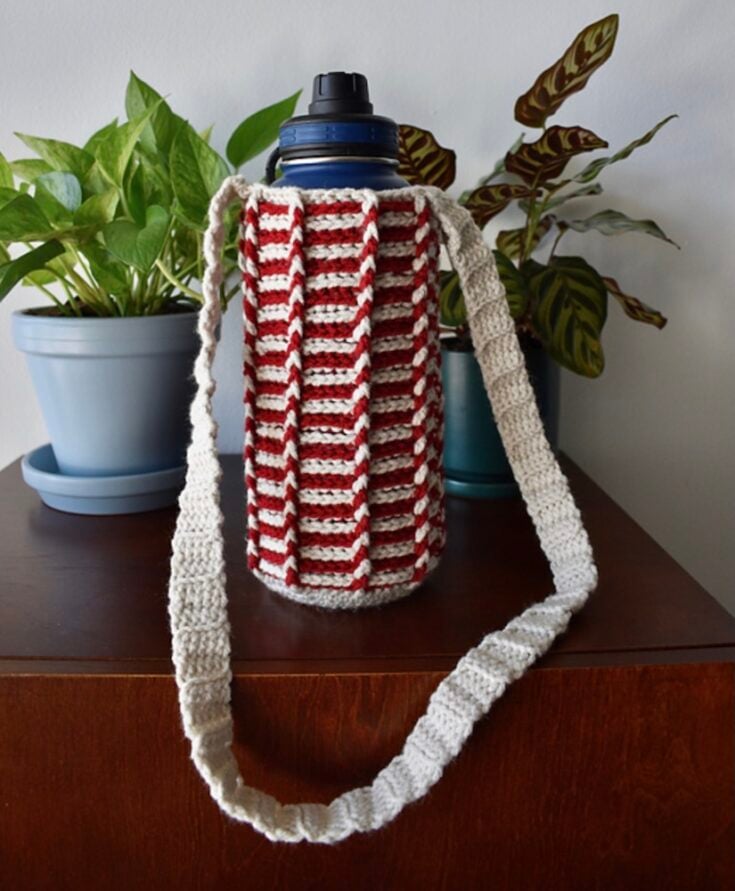
Bergen Bottle Cozy by Lion Brand Yarns
Crocheted with medium/worsted weight yarn and a 5 mm (H-8) hook, this cozy is a functional design worked from the bottom up.
The open lace chain spaces and simple st clusters create beautiful texture and a perfect fit for stainless steel water bottles.
This free crochet pattern includes detailed instructions and easy customization options.
Grab the free pattern on Lion Brand Yarns.
Don’t Forgetty Your Yeti Bottle Cozy by Bernat
Made with bulky Bernat Maker yarn and a 5.5 mm (I) hook, this easy project features playful color changes and a fun yeti design.
This is an intermediate pattern that's perfect for experienced makers.
Grab the free pattern on Yarnspirations.
Water Bottle Holder by The Lazy Hobby Hopper
This easy crochet water bottle holder is perfect for carrying your drink on walks or outings.
Made with light worsted yarn and simple stitches, it features a mesh body and adjustable strap.
Quick to make and practical, it fits most standard-sized bottles.

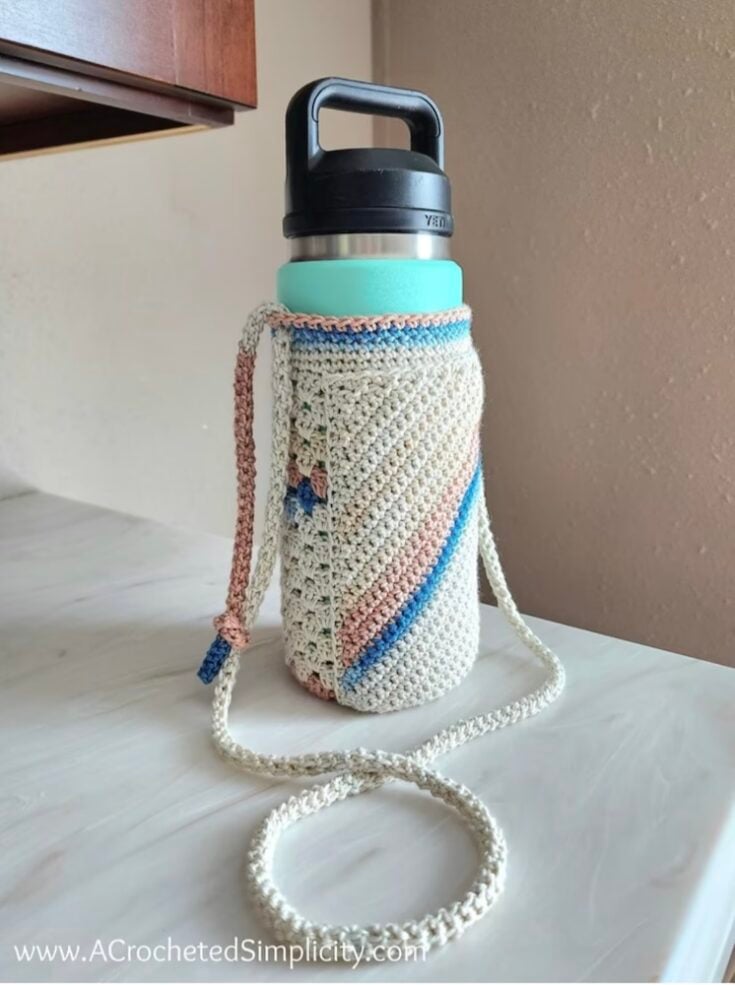
Water Bottle Holder by A Crocheted Simplicity
A hands-free crochet water bottle holder featuring a roomy phone pocket and your choice of stationary or adjustable strap.
Worked bottom-up with a granny-stitch body and C2C pocket, it includes instructions for DK or worsted weight and easy size tweaks for different bottles.
A quick, practical make—perfect for walks, hikes, and everyday errands.
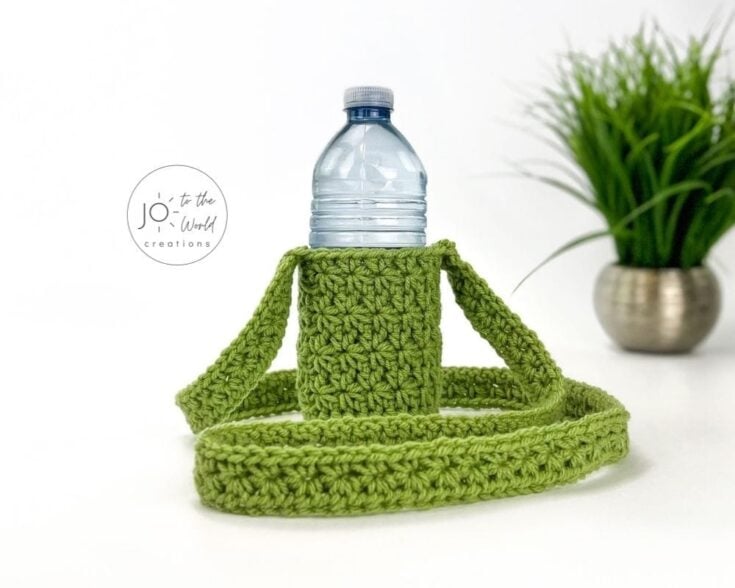
Water Bottle Holder Crochet Pattern by Jo to the World
Made with worsted weight yarn and a 5 mm hook, this pattern begins with a magic circle and clear, detailed instructions to guide each next row.
Worked with the star stitch, this project has a wonderful texture.
The flexible pattern fits different-sized water bottles.
Crochet Water Bottle Holder Pattern by Crochet Dreamz
This free crochet pattern calls for worsted weight yarn and a 3.75 mm hook, using basic crochet stitches for a breathable mesh texture.
It’s a quick, easy project that’s both fun and practical for reusable water bottles.
You can fit a standard water bottle or adjust the size for a specific size.
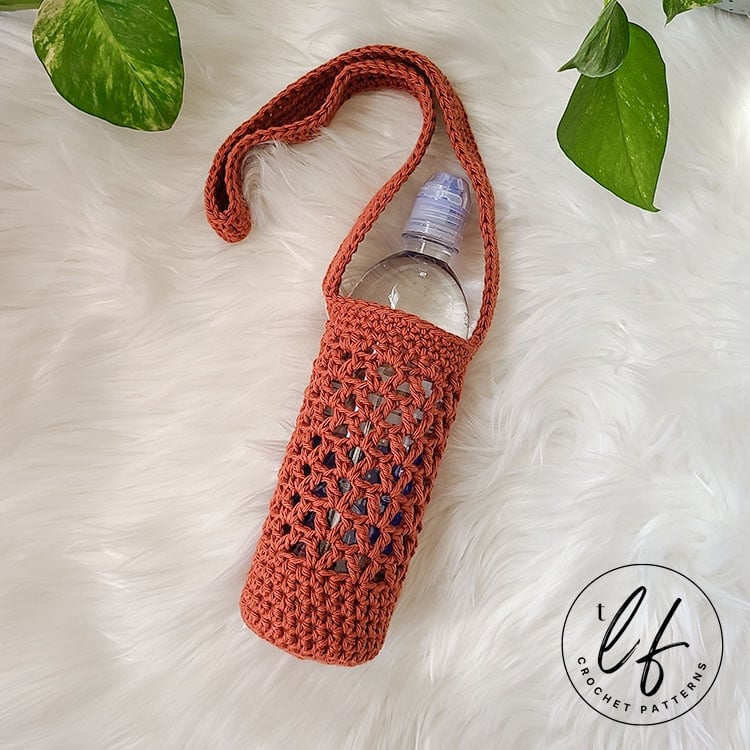
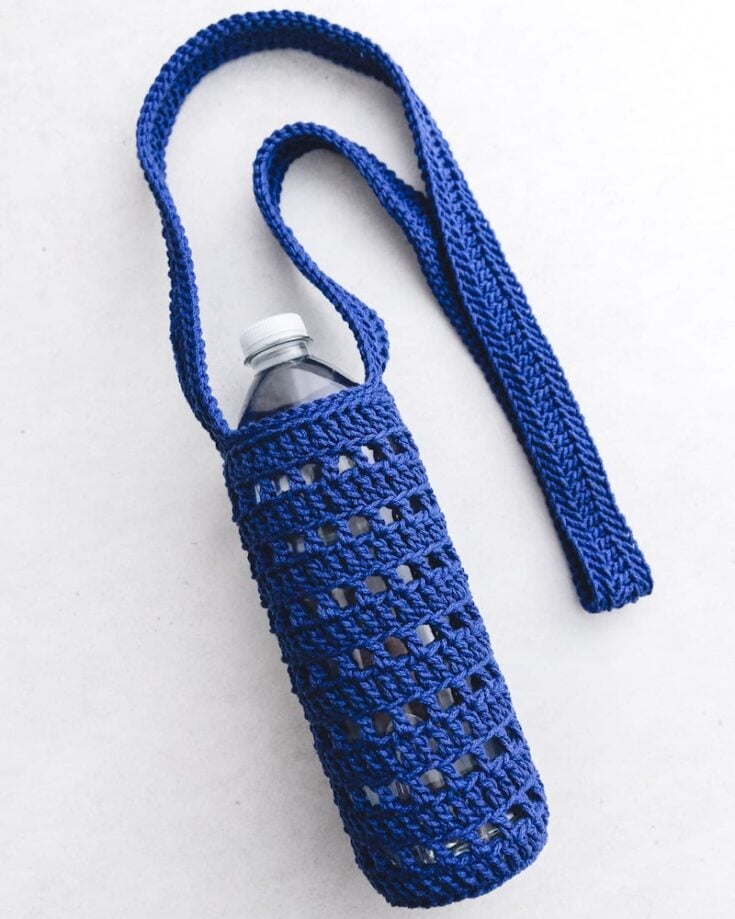
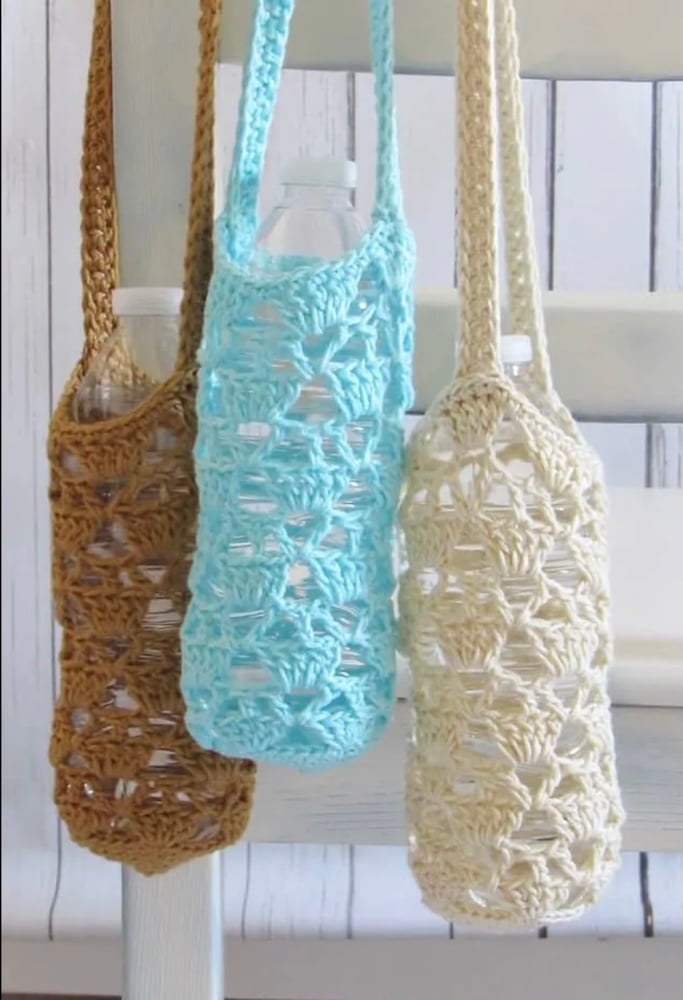
Traveler’s Water Bottle Bag Pattern by The Loophole Fox
Made with worsted weight yarn and a 5 mm hook, this pattern features airy chain spaces and a sturdy carrying strap worked along the side of the strap for added strength.
It’s a functional design that’s light, stylish, and easy to carry.
Perfect for hikes, errands, or everyday life.

Star Stitch Bottle Holder by CAAB Crochet
This pattern uses worsted weight yarn and a 5.5 mm hook to highlight the textured st cluster known as the star stitch.
The project uses basic techniques with detailed instructions to create a stylish holder.
The design is sturdy, practical, and perfect for reusable bottles.
Gelato Water Bottle Bag by Markéta Videcká
Crocheted with sport weight yarn and a 3 mm hook, this crochet bottle holder pattern blends color and texture beautifully.
A fun make that fits most water bottle sizes.
Grab the free pattern on Ravelry.

Crayon Water Bottle Cozy by Crystalized Designs
This easy project uses worsted weight yarn and a 5 mm hook, making it a great way to use up leftover yarn.
A longer strap makes this a functional design and a cute crochet water bottle holder in one.
Clear, detailed instructions guide you through every next stitch, ideal for absolute beginners.
Crochet Water Bottle Holder by Love Life Yarn
This free crochet pattern uses DK weight yarn and a 4 mm hook, beginning with a magic circle and built with basic crochet stitches.
A perfect, easy project for everyday life and reusable water bottles.
This fits a standard water bottle, but you can customize it.
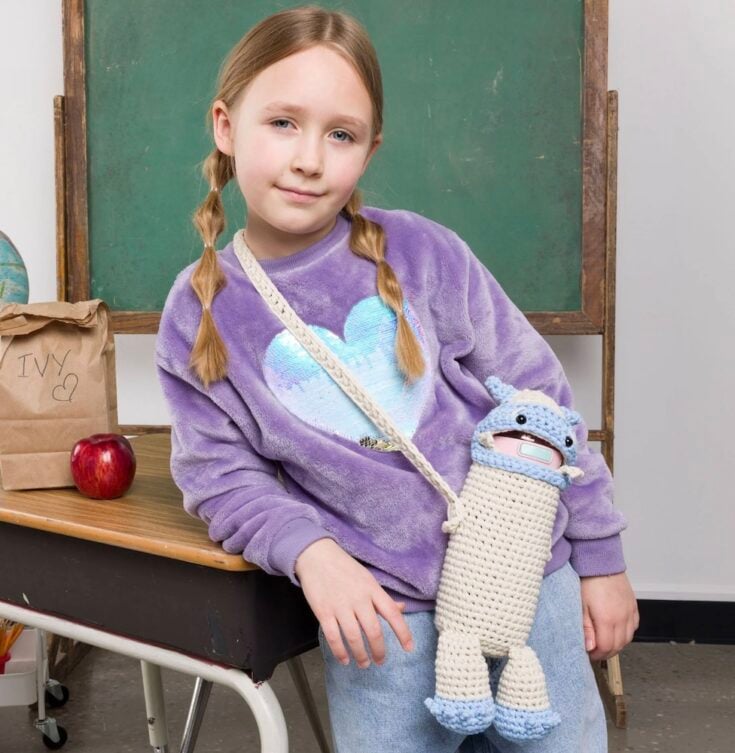
Monster Water Bottle Holder by Nana’s Crafty Home
This adorable little cutie uses medium weight yarn and a 6 mm hook to create a fun monster design, complete with eyes and teeth.
The video tutorial walks you through each stitch, making it a complete guide for absolute beginners.
It’s a great way to make kids love carrying their reusable bottles.
Crochet Water Bottle Cozy by Brittany Rene
A free crochet pattern made with worsted weight yarn and a 4 mm hook.
Perfect for carrying your reusable bottle.
Grab the free PDF on Ravelry.

Water Bottle Holder by Kelly Spenhoff
Using light worsted yarn and a 4.5 mm hook, this crochet bottle holder pattern combines simplicity and strength.
It’s a great way to practice basic techniques while creating a functional design that fits most reusable water bottles.
The neat top border gives it a refined look for everyday life.
Grab the free PDF on Love Crafts.
Water Bottle Holder with Phone Pocket by Jennifer Renaud
Crocheted with worsted weight yarn and a 5 mm hook, this functional design includes a handy phone pocket on the opposite side.
The detailed instructions make assembling the compartments and attaching the end of the strap simple. It’s a smart, stylish, and practical holder for everyday life.
Grab the free PDF on Love Crafts.
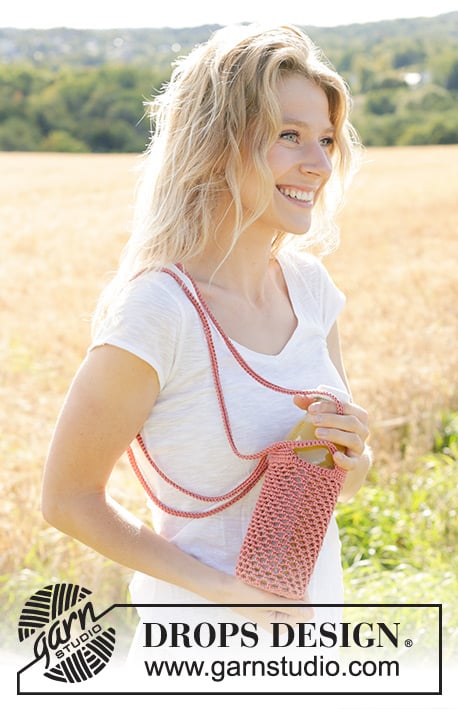
Bottle Cozy Pattern by DROPS Design
Worked in DK yarn with a 3 mm hook, this cozy features textured st clusters for grip and structure.
The pattern teaches you to use stitch markers and follow even next rows for perfect alignment.
The pattern is available in various languages.
Roo Water Bottle Holder with Phone Pouch by Fosbas Designs
Using DK weight yarn and a 4 mm hook, this free crochet pattern creates a dual-pocket carrier for a bottle and phone.
The detailed instructions explain how to join on the opposite side and secure the end of the strap neatly.
A practical, stylish, easy project for everyday life.
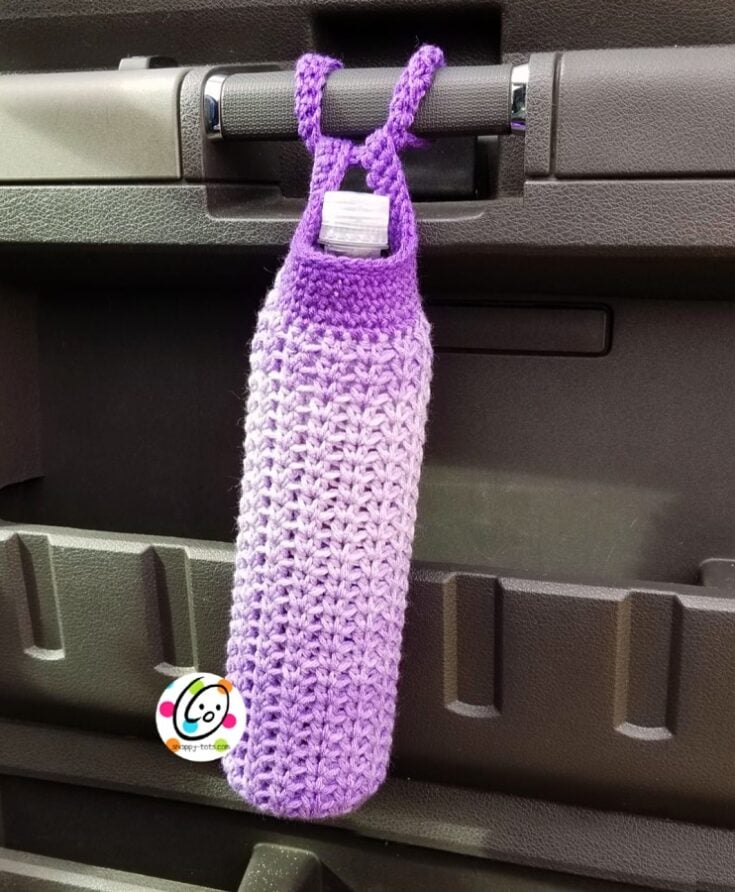
Snappy Friend Water Bottle Holder by Snappy Tots
This free crochet pattern uses worsted weight yarn and a 5 mm hook to make a fun, character-inspired holder.
Worked from a magic circle in continuous rounds, it’s a great way to build your crochet skills while creating something cute and functional.
The photos help you follow each stitch with ease.
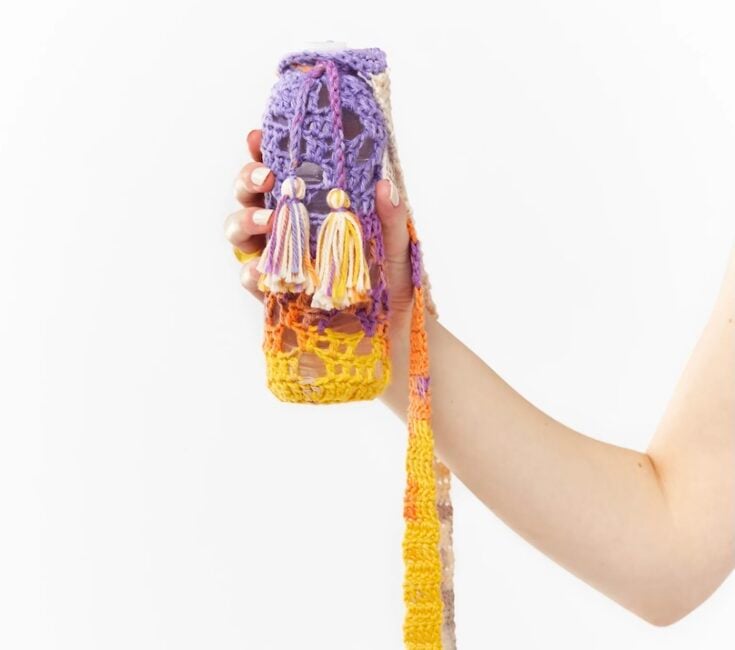
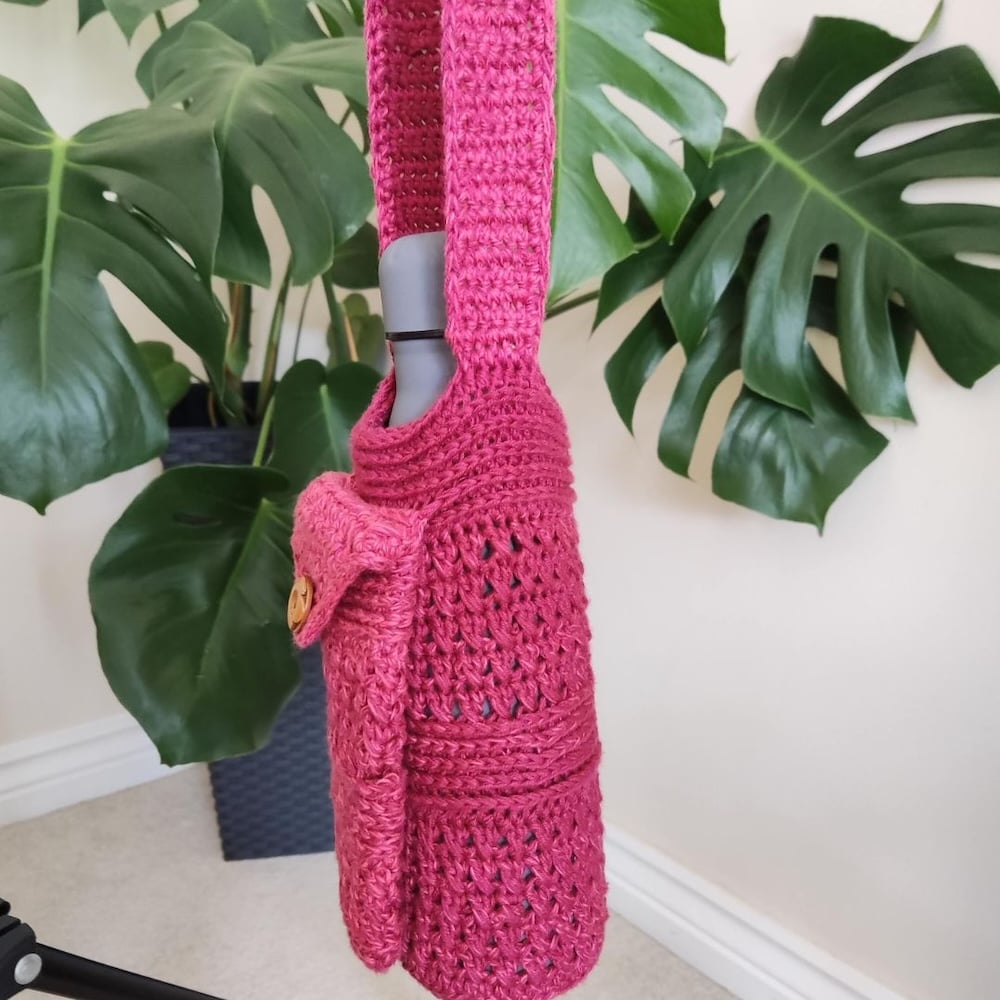
Boho Water Bottle Holder by Premier Yarns
Crocheted with worsted weight yarn and a 5 mm hook, this design features open chain spaces, decorative fringe, and a sturdy carrying strap.
It’s a great way to use scrap yarn and practice double crochet stitches.
A trendy, functional design perfect for reusable water bottles and market days.
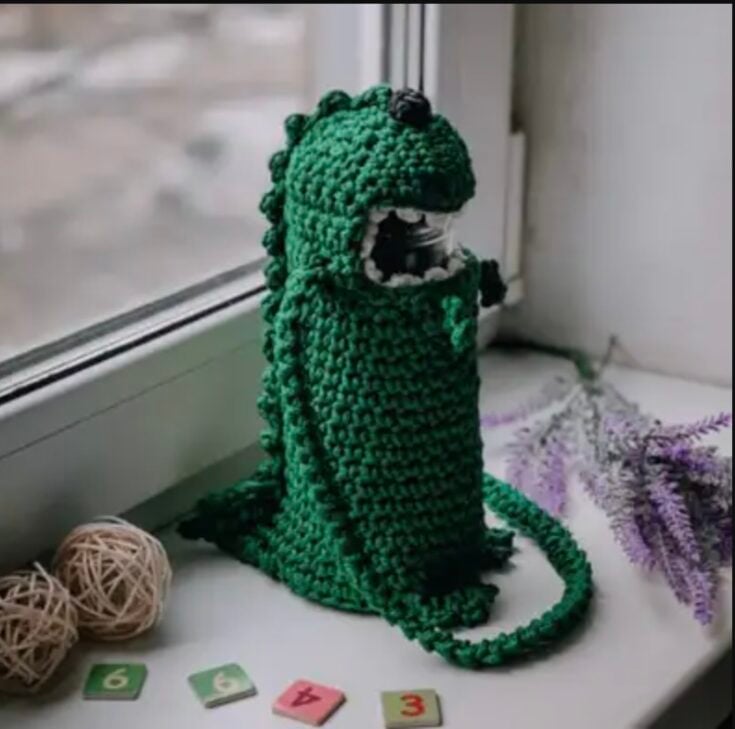
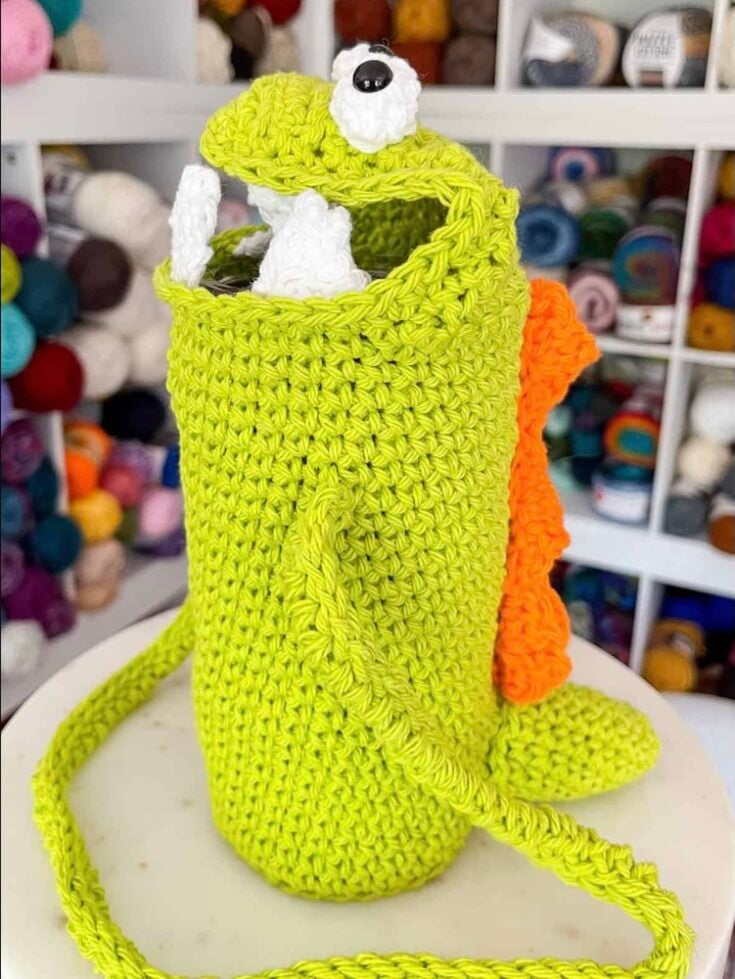
Dinosaur Water Bottle Holder by Hook Vibes
Made with worsted weight yarn and a 4.5–5 mm hook, this cute crochet water bottle holder features spikes and texture inspired by dinosaurs.
Starting from a magic circle, it uses basic crochet stitches and simple color changes.
A fun, easy project that makes hydration more playful.
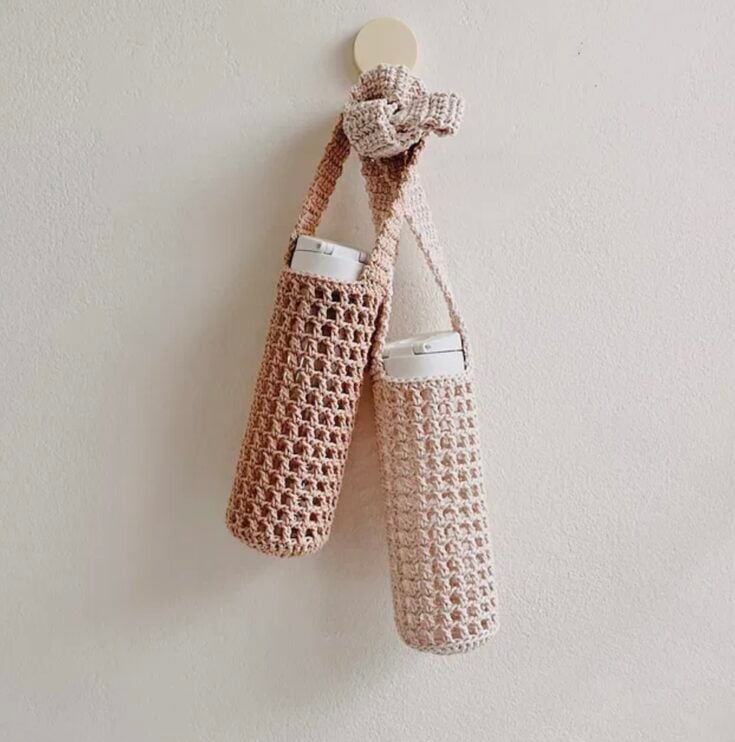
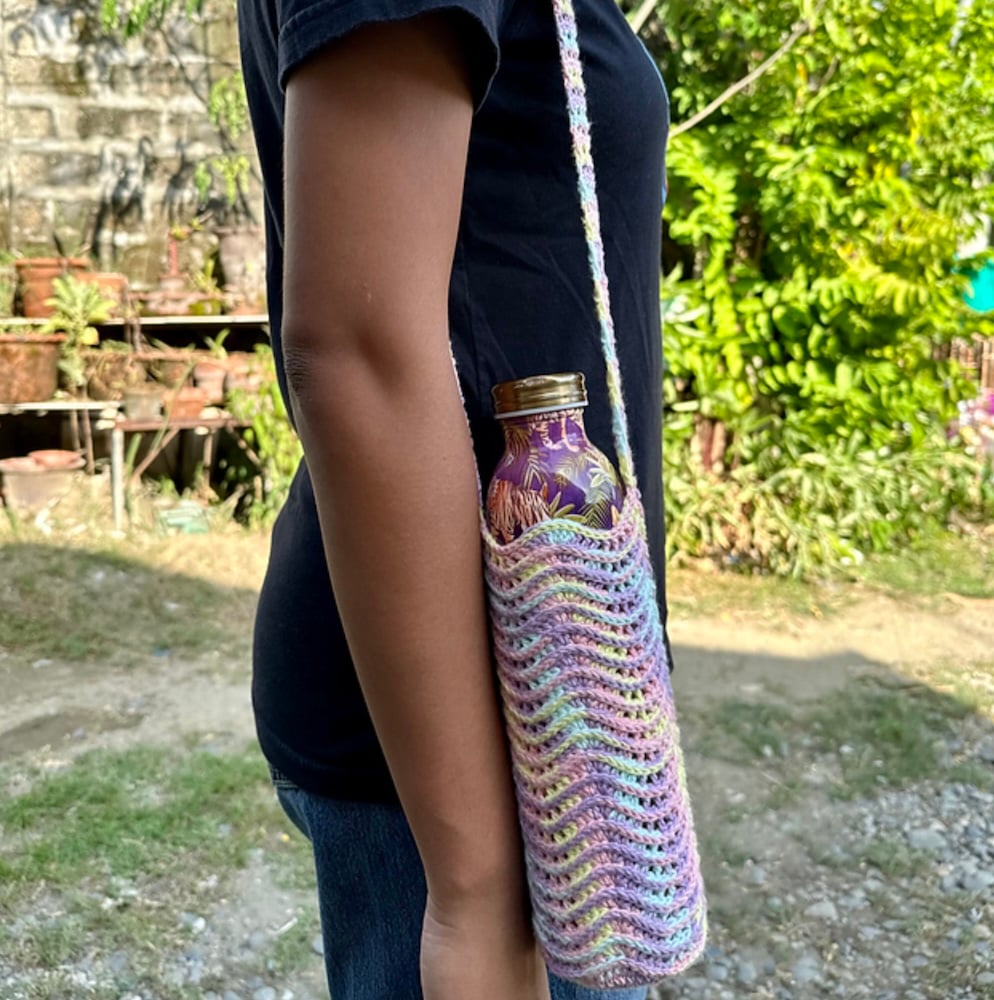
Easy Mesh Bottle Holder by Meemanan
This easy pattern uses sport weight yarn and a 3.5 mm hook to create a breathable mesh body with chain spaces.
It’s adjustable to different water bottle sizes, ensuring a perfect fit every time.
Add a longer strap for comfort and style in everyday life.
A quick project that will add a touch of charm to your everyday routine.
Grab the free PDF on Ravelry.
Free Water Bottle Holder Crochet Pattern by Start Crochet
Made with worsted weight yarn and a 4.5 mm hook, this free crochet pattern combines a solid base and an open mesh body of the bag.
It teaches basic techniques like working in rounds and securing the end of the strap neatly.
With detailed instructions and fit tips, it’s ideal for absolute beginners.
What Yarn Should You Use for a Crochet Water Bottle Holder?
The best yarn for a crochet water bottle holder is cotton, which is strong, absorbent, and durable.
Cotton holds its shape well, even when wet, making it ideal for everyday use or outdoor adventures.
DK weight yarn (3) or worsted weight yarn for a sturdy but flexible texture.
Some of my favorites are: Lily Sugar’n Cream, Paintbox Cotton Aran, or Lion Brand 24/7 Cotton.
You can also use cotton-blend yarns for added softness or stretch, but avoid 100% acrylic, as it can stretch out and doesn’t absorb moisture well.
Helpful Resources
What Are The Best Crochet Stitches For A Water Bottle Cover?
The best stitches for a crochet water bottle holder are simple and breathable, so your bottle stays secure but not insulated:
- Single crochet (sc): Tight and sturdy for the base. Learn how to single crochet here. – How to Single Crochet (SC) for Beginners + Video
- Double crochet (dc): Quick and open for the sides. Learn how to double crochet here. – How To Double Crochet (dc) For Beginners
- Mesh stitch (ch 1, sk 1, dc): Perfect for a lightweight, airy look.
- Star stitch or shell stitch: Add texture and visual interest. Learn how to crochet the star stitch here. – Star Stitch Crochet Tutorial (Easy For Beginners)
Combining solid stitches at the bottom with open mesh stitches along the body creates a perfect balance between structure and flexibility.
What Supplies Do You Need To Crochet A Water Bottle Holder?
You only need a few simple crochet tools to get started:
- Yarn: Cotton DK or Worsted weight.
- Crochet hook: 4 mm (G-6) to 5.5 mm (I-9), depending on your yarn. – Crochet Hook Sizes Chart (A Free Conversion Guide)
- Scissors: To trim your yarn ends neatly.
- Tapestry needle (yarn needle): For weaving in ends and joining the strap.
- Stitch markers: Optional, but helpful for marking the start of rounds. – What Are Stitch Markers?
- Measuring tape: Useful for checking the base diameter and strap length.
- Optional extras include a carabiner clip or D-ring if you want to attach your holder to a bag or backpack.
What Techniques Do You Need To Know To Make A Water Bottle Holder?
You’ll use a few beginner-friendly crochet techniques — no advanced skills needed!
- Magic ring (or chain circle): To start the round base.
- Working in the round: The body is built from the bottom up without turning rows.
- Increasing stitches: Expands the circular base evenly to fit your bottle.
- Chain and join rounds: Creates open mesh designs and keeps edges neat.
- Attaching a strap: Crochet or sew the strap directly to the body for strength.
- Weaving in ends: Finish your piece cleanly and securely.
Once you’ve mastered these simple techniques, you can create any style, from solid, structured cozies to light and lacy holders perfect for summer outings.
How To Customize A Crochet Water Bottle Holder
One of the best things about crocheting your own water bottle holder is how easy it is to customize!
You can adjust the size, color, stitch pattern, and strap style to make it uniquely yours.
Here are a few fun ways to personalize your project:
1. Adjust the size -To fit a larger bottle, add a few more increase rounds at the base before working up the sides.
For a smaller bottle, stop increasing earlier.
You can also make the holder taller or shorter by adding or removing body rounds.
2. Play with colors –Use variegated yarn for a self-striping effect with no color changes needed.
Try color blocking or stripes to match your outfits or accessories.
For a trendy touch, use ombre or gradient yarn cakes that shift colors as you crochet.
3. Choose different stitches – Swap the mesh body for shell, puff, or star stitches to add texture.
Try front post and back post stitches for ribbed or woven looks.
Mix solid stitches at the bottom with open stitches at the top for balance.
4. Customize the strap
Make a crossbody strap, short handle, or even a wrist loop depending on how you want to carry it.
Crochet a thicker strap for extra support or add a macramé cord for a boho vibe.
You can even attach metal rings, carabiners, or adjustable sliders for a professional finish.
5. Add embellishments
Decorate with buttons, appliqués, beads, or patches for personality.
Add a small pocket for keys, lip balm, or a phone.
Crochet a drawstring top to secure your bottle during hikes or workouts.
6. Try different yarns
Use cotton for a sturdy, washable everyday holder.
Choose acrylic for bright colors and stretch.
Try macramé cord or recycled yarn for a durable, eco-friendly option.
Crochet Lessons
If you are new to the craft and need help with the crochet basics, check out more free how-to resources here: Crochet Lessons (With Video Tutorials).
This includes crochet abbreviations, UK and US terms, how to make a slipknot, foundation chain (ch), crocheting the single crochet stitch, the half double crochet stitch (hdc), crocheting through the front loop, and more.
If you need more video tutorials, check out my YouTube channel here – Handy Little Me – YouTube.
For extra help and to connect with more makers from the crafting community, check out the Handylittleme Knitting and Crochet Community Facebook group.
You can also find us on social media platforms, including Ravelry, Pinterest, Instagram, Twitter, Etsy, and TikTok.
More Free Crochet Patterns
- 70 Useful Crochet Projects To Make For Your Home
- 27 Free Crochet Plant Hanger Patterns (Easy Projects)
- 27 Free Crochet Table Runner Patterns (Modern Ideas)
- 17 Crochet Basket Patterns: Free, Easy, Step By Step
- 37 Easy Crochet Dishcloth Patterns (+ Free Beginner Pattern)
- How To Crochet Potholders (Free + Easy Pattern)
- Chunky Crochet Blanket (Super Easy Free Pattern!)
- 50 Stash Busting Crochet Projects (Quick Patterns)