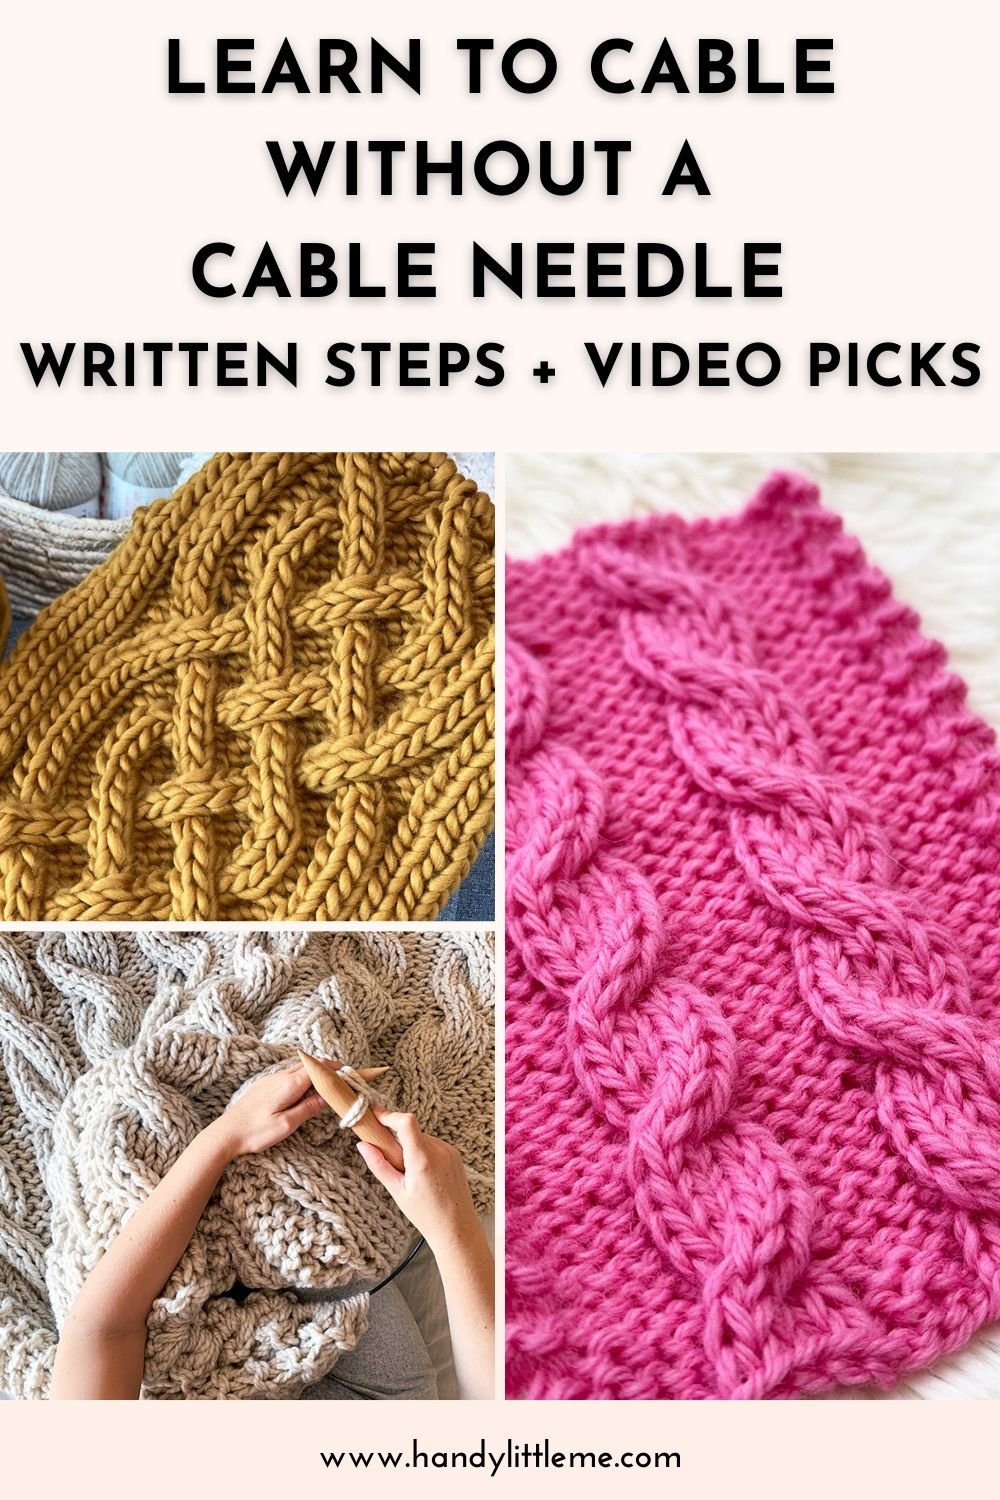
Learn To Cable Without A Cable Needle: Written Steps + Video Picks
THIS ARTICLE CONTAINS AFFILIATE LINKS THAT SUPPORT HANDY LITTLE ME CONTENT AND FREE PATTERNS.In this blog post, you’ll learn how to cable knit without a cable needle using a simple, beginner-friendly method that’s quick once you get the hang of it.
If you’re new to cables (or you just don’t want to juggle an extra tool), this technique lets you create that classic twisted cable look by crossing stitches directly on your needles.
Scroll down for the written steps, plus tips to avoid dropped stitches and a handy video section if you want to see the move in action.
Save this article
Enter your email address and we'll send it to your inbox.
By entering your email, you agree to receive patterns, tutorials, and updates from Handy Little Me. Unsubscribe at any time.
Learn To Cable Without A Cable Needle (Quick Tutorial)
Best for
- small cables like 1-over-1 (example: C2B) and 2-over-2 (example: C4B)
- yarns that aren’t extremely slippery
- knitters who want speed and less fiddling
You’ll use
- your knitting needles
- your working yarn
- (optional) a little patience the first few times 😅
The basic idea
Instead of sliding stitches onto a cable needle, you’ll temporarily let a few stitches hang (in front or in back), knit the next stitches, then pick up the loose stitches and knit them.
You’re still crossing stitches—just without the extra needle.
Right-Leaning Cable Without A Cable Needle (2-over-2 Right / C4B)
This creates a cable that leans to the right.
In many patterns, this is written as C4B (cable 4 back).
Steps:
- Knit to the point where the cable begins.
- Slip the next 2 stitches purlwise from the left needle and let them hang at the back of your work.
- Knit the next 2 stitches from the left needle.
- Carefully pick up the 2 “hanging” stitches with the left needle.
- Knit those 2 stitches.
✅ You’ve made a 2-over-2 right cable—no cable needle needed.
Tip: If you’re worried about dropping them, lightly hold the hanging stitches against the work with your thumb while you knit the next stitches.

Left-Leaning Cable Without A Cable Needle (2-over-2 Left / C4F)
This creates a front-crossing cable that leans to the left.
In many patterns, this is written as C4F (cable 4 front).
Steps:
- Knit to the point where the cable begins.
- Slip the next 2 stitches purlwise from the left needle and let them hang at the front of your work.
- Knit the next 2 stitches from the left needle.
- Carefully pick up the 2 “hanging” stitches with the left needle.
- Knit those 2 stitches.
✅ You’ve made a 2-over-2 left cable—no cable needle needed.
Tip: Make sure the stitches don’t twist as you pick them up (check stitch orientation) so your cable looks neat.

Extra-easy option: 1-over-1 cable (tiny cable)
If you’re nervous about letting stitches hang, start with a 1-over-1 cable first.
It’s the same method, just fewer stitches off the needle at once.
Quick note on larger cables
This no-needle method is best for smaller crosses.
For larger cables, using a cable needle can feel more secure.
If you want to do it the old-fashioned way with a cable needle, take a look at this video tutorial here: How To Knit Cables (C4F and C4B)
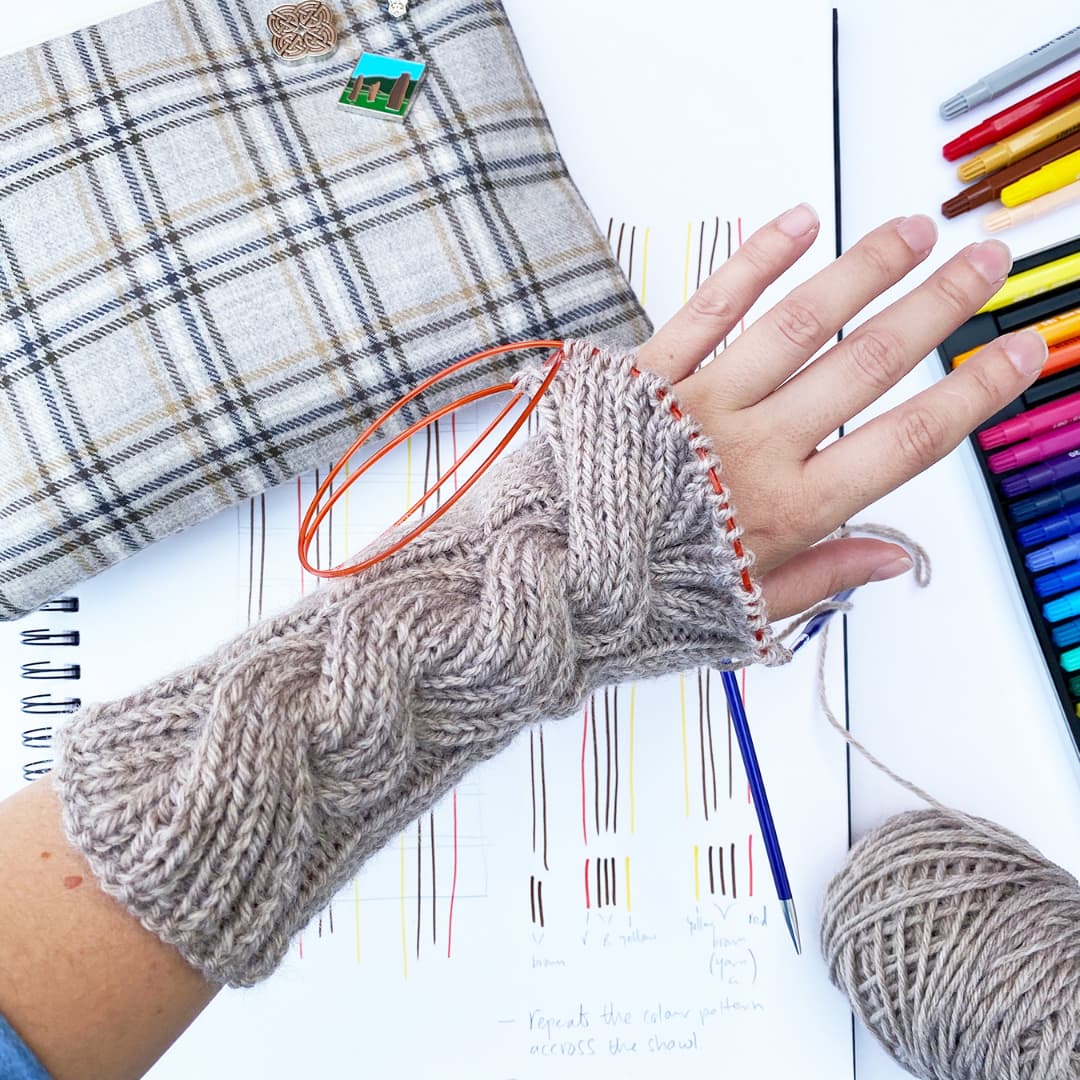
Related Post: Celtic Cable Knit Headband Pattern

Video Tutorials (Video Picks)
I don’t have a video tutorial for this technique yet, so I’ve rounded up a few excellent cable-without-a-cable-needle demos with instructions from other creators.
These are really helpful if you want to see the stitch move step-by-step.
How To Cable Without A Cable Needle
I don’t have a video for this technique yet, so I’ve curated a few great tutorials from other creators to help you see the stitch move in real time.
These videos pair perfectly with the written steps above, especially if you’re a visual learner or want reassurance before trying it on your needles.
Credits: All videos belong to their respective creators. I’m linking them here as helpful learning resources.
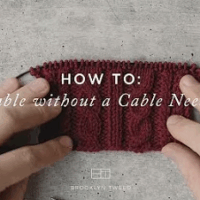
How To: Cable Without a Cable Needle - Brooklyn Tweed
New to cables (or just feeling a bit nervy)?
These beginner-friendly videos go slowly, explain what’s happening as the stitches cross, and show clear close-ups so you can follow along without panic.
2/2 RC Without a Cable Needle - AC Techniques
These tutorials focus on the right-leaning 2-over-2 cable (often written as C4B or RC).
Watch these if your pattern says to hold stitches to the back—or if you want a clean, classic cable twist that leans right.

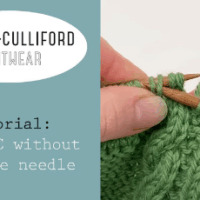
How to Knit the 2/2 LC Cable Without a Cable Needle - Olive Knits
These tutorials show the left-leaning 2-over-2 cable (often written as C4F or LC).
Choose these if your pattern tells you to hold stitches to the front—perfect for balancing cables or working mirrored designs.
Tips For Knitting Cables Without A Cable Needle
Knitting cables without a cable needle can feel a bit scary at first (hello, dangling stitches), but it gets easier fast.
- Use a lifeline if you’re nervous: thread scrap yarn through a row every so often so you can safely undo mistakes.
- Practice on small cables first (1/1 or 2/2) before attempting wider cables.
- Keep your tension steady. Loose stitches are more likely to slip off while they’re hanging.
- Use sharper-tipped needles if you struggle to pick up the loose stitches cleanly.
- Go slowly with slippery yarns (smooth cotton and some acrylics can slide around).
- Try a grippier wool while you learn—your stitches will behave better.
What Is Cable Knitting?
Cable knitting is a technique that creates a textured, twisted pattern that looks like braided or intertwined ropes.
It works by crossing groups of stitches over each other.
Traditionally, you’d slip a few stitches onto a cable needle, hold them in front or behind your work, knit the next stitches, then knit the held stitches.
That crossing creates the raised, 3D cable effect we love in sweaters, scarves, hats, and cozy blankets.
Cables can be worked flat or in the round.
Learn how to work cables in the round here: Knitting Cables In The Round (A Beginner’s Guide)
Are There Many Cable Stitches?
Yes—there are loads of cable stitch variations, from simple twists to complex braided designs.
Basic cables might cross two small groups of stitches (like a 1-over-1 cable), while more advanced cables can include multiple crossings, braids, and interlocking shapes.
Cables can lean left or right, cross over each other, and combine with other textures like ribbing or moss stitch for even more interest.
Cable variations include: left twist, right twist, plaited cables, rope cables, honeycomb, Aran cables, fishtail, and more.
Related post: 8 Cable Stitch Knitting Patterns

What Is A Mock Cable?
A mock cable is a technique that mimics the look of a traditional cable without the classic stitch crossing.
Instead of moving stitches across each other, mock cables use a combination of knit and purl stitches, plus increases or decreases, to create a raised, cable-like effect.
If cables feel intimidating, mock cables can be a great stepping stone.
They give you that textured look with fewer moving parts.

Can You Do A Cable Stitch Without A Cable Needle?
Yes—and once you get the hang of it, it can feel quicker than using a cable needle.
The technique is simple:
- slip a few stitches off the left needle
- let them hang in front or behind (depending on cable direction)
- knit the next stitches
- pick up the loose stitches and knit them
It takes a little practice at first, but it’s a great method for small cable crosses and makes your knitting flow feel smoother.
What Can I Use Instead Of A Cable Needle?
If you do want something to hold stitches temporarily, but you don’t have a cable needle, try:
- Double-Pointed Needle (DPN): an extra knitting needle that works like a cable needle and holds stitches neatly.
- Bobby pin / hair clip: helpful for small cables.
- Toothpick: okay for tiny yarn weights (but fragile).
- Tapestry needle: can hold a few stitches in a pinch.
- Paperclip: bend slightly to form a hook shape.
- Twist-tie: bend into a gentle curve so stitches don’t slide off.
These alternatives work best for smaller cables—not big, chunky crosses.
Can You Use A Normal Sewing Needle As A Cable Needle?
Not really. Sewing needles are too thin, smooth, and short to hold knitting stitches securely.
They also don’t have the shape cable needles usually have (often slightly curved), which helps prevent stitches from slipping off.
Are Cable Needles Necessary?
Cable needles aren’t strictly necessary, but they can be helpful, especially for beginners or wider/more complex cable patterns.
They hold stitches securely while you cross them, reducing the risk of dropped stitches.
That said, if you’re working with small cables and want to move faster, the no-cable-needle method is a great skill to learn.
Knitting Lessons
If you are new to the craft and need help with the knitting basics, check out more free how-to resources here: Knitting Lessons (With Video Tutorials).
And if you need more video tutorials to help you practice your basic knitting skills, check out my YouTube channel here. – Handy Little Me – YouTube.
For extra help and to connect with more makers, check out the Handylittleme Facebook group.
If you also love to crochet, check out easy patterns here. – Free Crochet Patterns
You can also find us on social media, Pinterest, Instagram, Twitter, Etsy, and TikTok.
Patterns You May Be Interested In…
Check out the patterns below to find your next stitch or knitting project.
- Free Celtic Cable Dishcloth Knitting Pattern
- Chunky Cable Knit Blanket Pattern (Free Easy Throw)
- Celtic Cable Fingerless Gloves Pattern
- Men’s Aran Sweater Knitting Pattern
- 31+ Free Cable Stitch Patterns To Knit (+ Tutorials)
- Chunky Celtic Cable Knit Sweater Pattern
- Knitted Arm Warmers (Celtic Cable Stitch Pattern)
- 30+ Free Cable Knitting Patterns
- Bookmark Knitting Pattern (Celtic Cable)
- 20 Celtic Cable Knitting Patterns (Free)
- 17 Cable Knit Hat Patterns