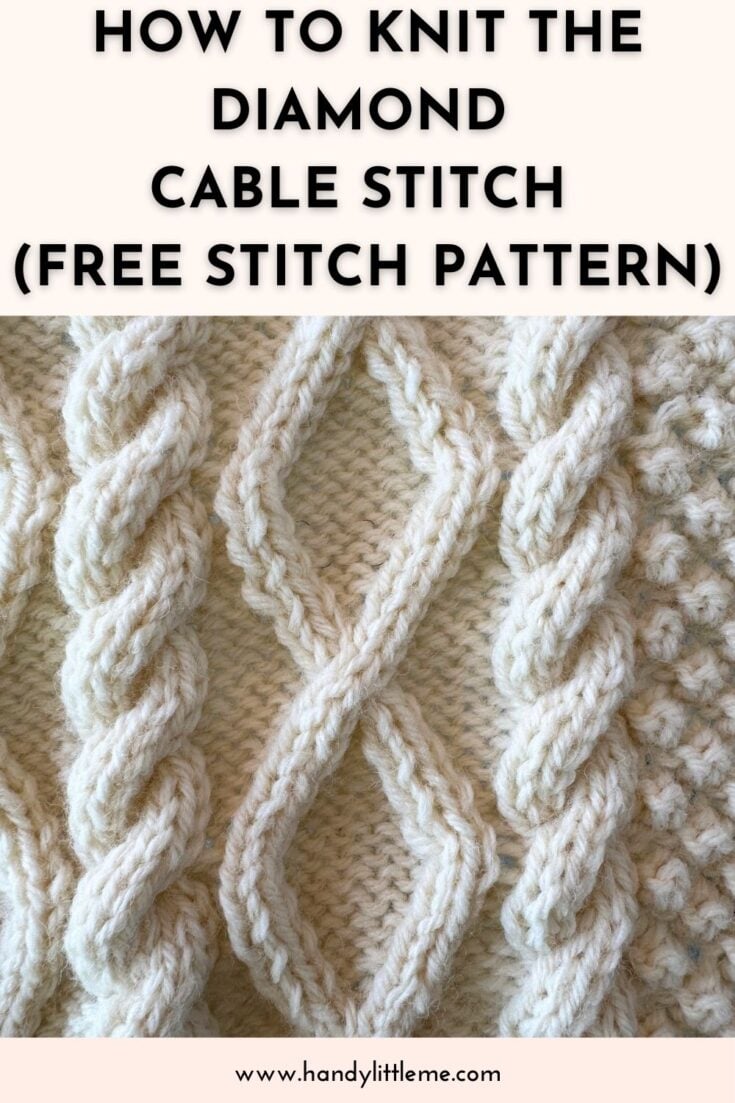
How To Knit The Diamond Cable Stitch (Free Stitch Pattern)
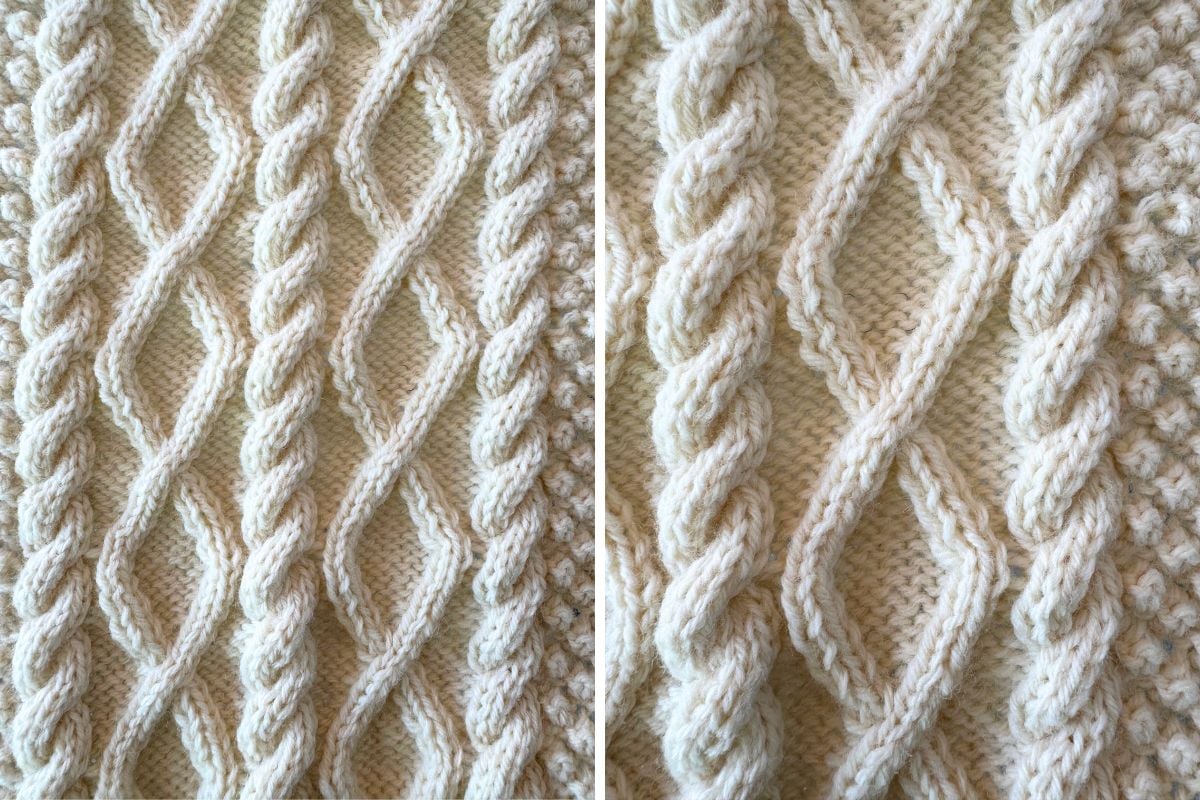
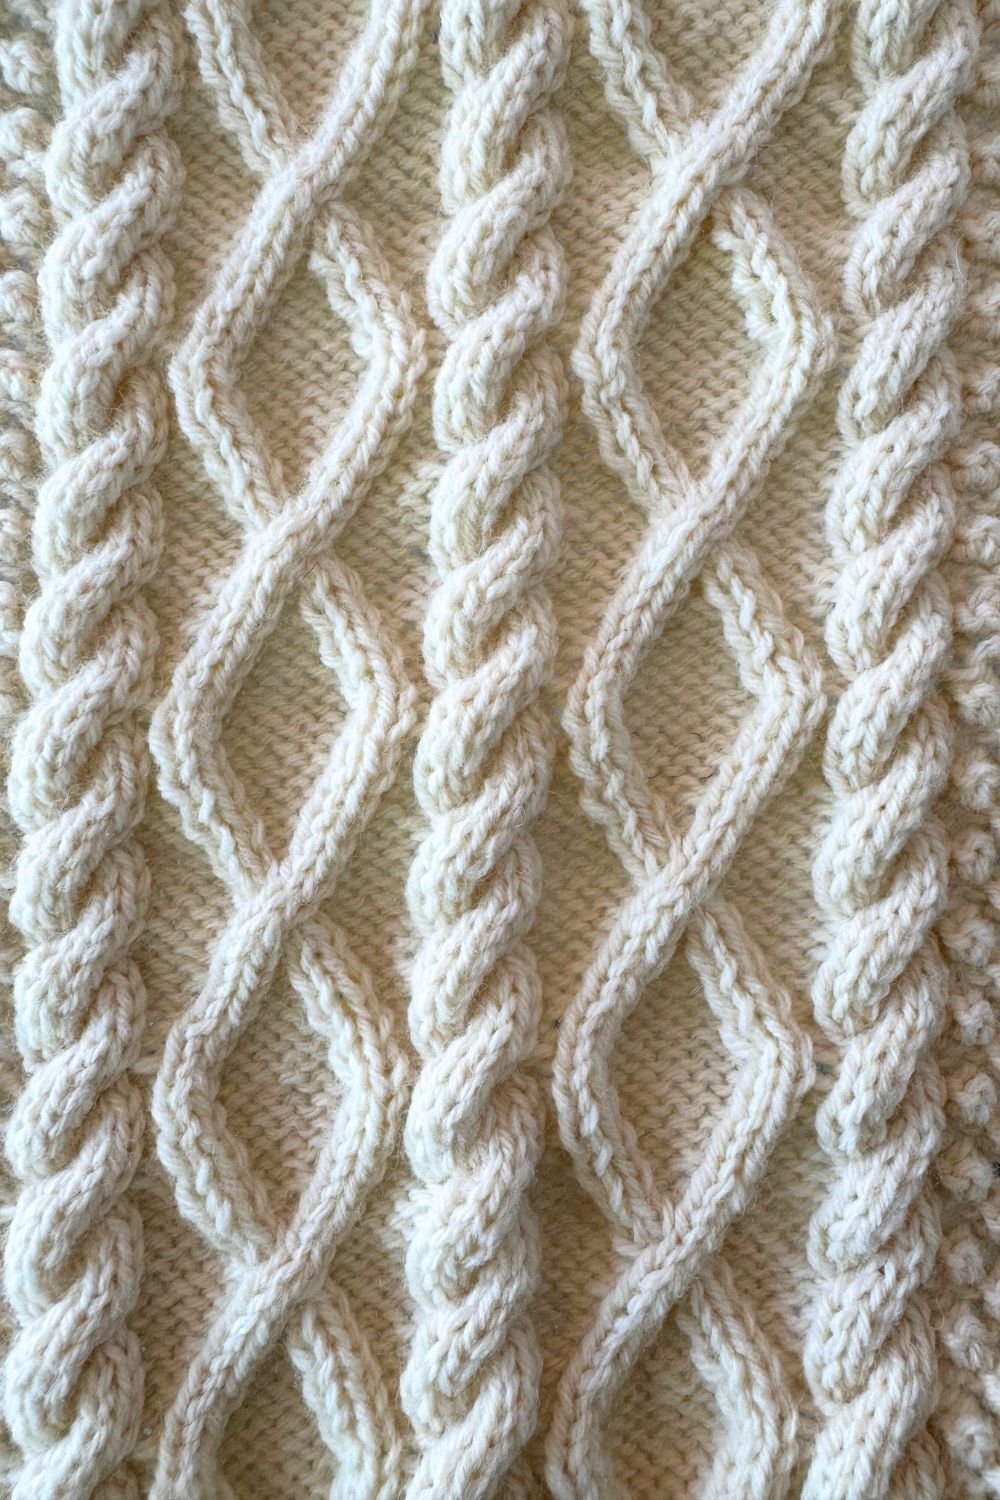
THIS ARTICLE CONTAINS AFFILIATE LINKS THAT SUPPORT HANDY LITTLE ME CONTENT AND FREE PATTERNS.The diamond cable stitch is a classic Aran cable pattern that creates raised, interlocking diamonds, a rich texture that looks gorgeous on sweaters, hats, and cable blankets.
This tutorial gives you clear instructions, helpful tips, and a clean pattern row-by-row so you can swatch the panel or plug it into a fully realized knitted project.
Scroll down for the free pattern instructions.
Before You Get Started
A few things to know at a glance:
- Skill level: Intermediate – great if you’re ready for a new challenge or a “passion project.”
- Background: The diamond panel sits on a background of reverse st st (reverse stockinette).
- Tools: You’ll work standard knit stitches and purl stitches, and use a cable needle to cross stitches to the front/back.
- Sizing & gauge: Swatch first. For garments/blankets, match the gauge in your pattern. For practice, gauge isn’t critical.
- Reading the fabric: RS = right side (raised cables), WS = wrong side (purl background).
- Tip: Keep an even tension on WS rows – neat WS fabric makes the diamonds pop on the RS.
Tools/Materials
- Yarn: Any smooth yarn with good stitch definition (wool or cotton is great). For practice, try worsted/Aran weight yarn. ~20–30 g (≈ 20–30 meters) is plenty for a swatch.
- Needles: Size to suit your yarn (needle size per ball band). Many knitters like US 7–9 (4.5–5.5 mm) for worsted/Aran.
- Cable needle (CN): Straight or hook-style.
- Notions: Stitch markers, row counter or notebook, tapestry needle for finishing.
- Optional: Blocking pins/mats or a steamer.
Abbreviations
- CO – cast on
- K – knit
- P – purl
- RS – right side
- WS – wrong side
- st(s) – stitch(es)
- cont – continue
Cable abbreviations
- C4B – Slip 2 sts to CN and hold at back; K2, then K2 from CN.
- T3B – Slip next st to CN and hold at back; K2 from left hand needle, then P1 from CN.
- T3F – Slip next 2 sts to CN and hold at front; P1 from left hand needle, then K2 from CN.

Step-By-Step: How the Diamond Cable Works
1. Cast on & setup
- For a tidy swatch, CO 20 sts: 4 edge sts, 12-st diamond panel, 4 edge sts.
- Work a couple of setup rows in reverse st st (RS purl, WS knit) if you like a border.
2. Crossing stitches form the diamonds
- The crosses (T3F/T3B) “lean” stitches left/right to outline each diamond.
- Midway, a wider cross (C4B/C6B) tightens the center for a crisp, faceted look.
3. Repeat consistently
- The written pattern row-by-row below spans Rows 1–18.
- Repeat Rows 1–18 to stack diamonds vertically.
Tip: Place markers around the 12-st panel so RS/WS stitches on the edges stay relaxed and even (instant hygge knitting vibes).
Pattern Instructions (Row-by-Row)
Panel: 12 sts on a background of reverse st st.
Sample swatch: CO 20 sts (4 edge sts · 12 panel · 4 edge sts).
- Work edge sts in reverse stockinette (on RS: P edges; on WS: K edges).
- The rows listed below describe the 12-st diamond panel; add your edge stitches as noted.
Row 1 (RS): P3, T3B, T3F, P3.
Row 2 (WS): K3, P2, K2, P2, K3.
Row 3: P2, T3B, P2, T3F, P2.
Row 4: K2, P2, K4, P2, K2.
Row 5: P1, T3B, P4, T3F, P1.
Row 6: K1, P2, K6, P2, K1.
Row 7: T3B, P6, T3F.
Row 8: P2, K8, P2.
Row 9: T3F, P6, T3B.
Row 10: K1, P2, K6, P2, K1.
Row 11: P1, T3F, P4, T3B, P1.
Row 12: K2, P2, K4, P2, K2.
Row 13: P2, T3F, P2, T3B, P2.
Row 14: K3, P2, K2, P2, K3.
Row 15: P3, T3F, T3B, P3.
Row 16: K4, P4, K4.
Row 17: P4, C4B, P4.
Row 18: K4, P4, K4.
Repeat Rows 1–18 for the diamond cable pattern.
Use the swatch as a free knitting stitch reference for your ultimate knitting stitch library.
Free Printable
If you prefer to work from a printed pattern or just want a version you can take on the go, I’ve got you covered!
You can print the pattern below to keep it handy while you knit.
Diamond Cable Stitch
Print-ready Diamond Cable Stitch how-to: a one-page, row-by-row reference. Includes tools, abbreviations, swatch setup, and the 18-row repeat—perfect for intermediate knitters.
Materials
- Yarn: Any smooth yarn with good stitch definition (wool or cotton are great). For practice, try worsted/Aran weight yarn. ~20–30 g (≈ 20–30 meters) is plenty for a swatch.
Tools
- Needles: Size to suit your yarn (needles size per ball band). Many knitters like US 7–9 (4.5–5.5 mm) for worsted/Aran.
- Cable needle (CN): Straight or hook-style.
- Notions: Stitch markers, row counter or notebook, tapestry needle for finishing.
- Optional: Blocking pins/mats or a steamer.
Instructions
Step-By-Step: How the Diamond Cable Works
1. Cast on & setup
- For a tidy swatch, CO 20 sts: 4 edge sts, 12-st diamond panel, 4 edge sts.
- Work a couple of setup rows in reverse st st (RS purl, WS knit) if you like a border.
2. Crossing stitches form the diamonds
- The crosses (T3F/T3B) “lean” stitches left/right to outline each diamond.
- Midway, a wider cross (C4B/C6B) tightens the center for a crisp, faceted look.
3. Repeat consistently
- The written pattern row-by-row below spans Rows 1–18.
- Repeat Rows 1–18 to stack diamonds vertically.
Tip: Place markers around the 12-st panel so RS/WS stitches on the edges stay relaxing and even (instant hygge knitting vibes).
Pattern Instructions (Row-by-Row)
Panel: 12 sts on a background of reverse st st.Sample swatch: CO 20 sts (4 edge sts · 12 panel · 4 edge sts).
- Work edge sts in reverse stockinette (on RS: P edges; on WS: K edges).
- The rows listed below describe the 12-st diamond panel; add your edge stitches as noted.
Row 1 (RS): P3, T3B, T3F, P3.
Row 2 (WS): K3, P2, K2, P2, K3.
Row 3: P2, T3B, P2, T3F, P2.
Row 4: K2, P2, K4, P2, K2.
Row 5: P1, T3B, P4, T3F, P1.
Row 6: K1, P2, K6, P2, K1.
Row 7: T3B, P6, T3F.
Row 8: P2, K8, P2.
Row 9: T3F, P6, T3B.
Row 10: K1, P2, K6, P2, K1.
Row 11: P1, T3F, P4, T3B, P1.
Row 12: K2, P2, K4, P2, K2.
Row 13: P2, T3F, P2, T3B, P2.
Row 14: K3, P2, K2, P2, K3.
Row 15: P3, T3F, T3B, P3.
Row 16: K4, P4, K4.
Row 17: P4, C4B, P4.
Row 18: K4, P4, K4.
Repeat Rows 1–18 for the diamond cable pattern.
Use the swatch as a free knitting stitch reference for your ultimate knitting stitch library.
Notes
Abbreviations
- CO – cast on
- K – knit
- P – purl
- RS - right side
- WS – wrong side
- st(s) – stitch(es)
- cont – continue
Cable abbreviations
- C4B – Slip 2 sts to CN and hold at back; K2, then K2 from CN.
- T3B – Slip next st to CN and hold at back; K2 from left hand needle, then P1 from CN.
- T3F – Slip next 2 sts to CN and hold at front; P1 from left hand needle, then K2 from CN.
Variations & Project Ideas
- Variations: Try a double diamonds cable knitting stitch, twisted diamonds (use ktbl inside), honeycomb fills, or lace-filled/open diamonds.
- Great projects: Cardigans, scarves, headbands, hats, cushions, and full-sized cozy throw/cable blanket.
- Decor: Add diamond panels to home decor: runners, pillow fronts—mix with different cable stitches for a sampler look.
Blocking Guide (Do You Need to Block Cables?)
Yes, gentle blocking evens tension and sharpens the cable lines.
- Wool: Steam lightly from above; don’t press the cable ridges.
- Plant fibers: Wet block; pat diamonds to shape.
- Acrylic: Hover steam only; avoid direct pressure to keep definition.
Always swatch-test first.
Related Post: Blocking Knits – How To Block Knitting Guide
FAQs & Tips
Is this an Aran stitch pattern?
Yes. Diamonds are a traditional Aran motif (often linked with prosperity).
They look fantastic alone or flanked by ropes/plaits.
Chart or written?
You can follow the pattern instructions above (written) or convert to a chart if you prefer to “see” the cable pattern.
Related Post: How To Read A Knitting Chart
How do I keep edges neat?
Work the edge stitches in consistent reverse st st and don’t tug on the yarn after crossings.
What if I don’t have a cable needle?
You can carefully drop-and-rearrange, but a small cable needle is friendlier—especially while learning.
How big is a repeat in cm?
It depends on yarn/needles/gauge.
Measure your blocked swatch and note the width/height in cm to plan repeats.
Troubleshooting at a glance:
- Laddering beside cables → tighten the first stitch after each cross.
- Uneven diamonds → check you’re working T3B/T3F with stitches held to the correct side (back/front).
- Lost track on a WS row → count purls between raised columns before the next cross.
Want to Learn More?
- Knitting Lessons – Cast on, bind off, read a chart, and more (perfect for fellow knitters leveling up).
- Different Cable Stitches & Patterns – Explore braids, ropes, honeycomb, and plaits.
- Share your swatch on Facebook here – Handylittleme Facebook group — join the conversation in the comments section!
More Cable Stitches And Patterns
- Men’s Aran Sweater Knitting Pattern
- Aran Dog Sweater Knitting Pattern
- 8 Cable Stitch Knitting Patterns
- 31+ Free Cable Stitch Patterns To Knit (+ Tutorials)
- Celtic Cable Dishcloth Knitting Pattern (+ Free PDF)
- Highlander Cable Knit Hat Pattern
- Chunky Cable Knit Blanket Pattern (Free Easy Throw)
- Cable Hat Free Knitting Pattern | The Bordeaux
- How To Knit A Simple Cable Pattern (+ Video Tutorial)