How To Knit The Honeycomb Cable Stitch (Free Pattern)
THIS ARTICLE CONTAINS AFFILIATE LINKS THAT SUPPORT HANDY LITTLE ME CONTENT AND FREE PATTERNS.If you love cables but want something with a bold, modern texture, this one’s for you.
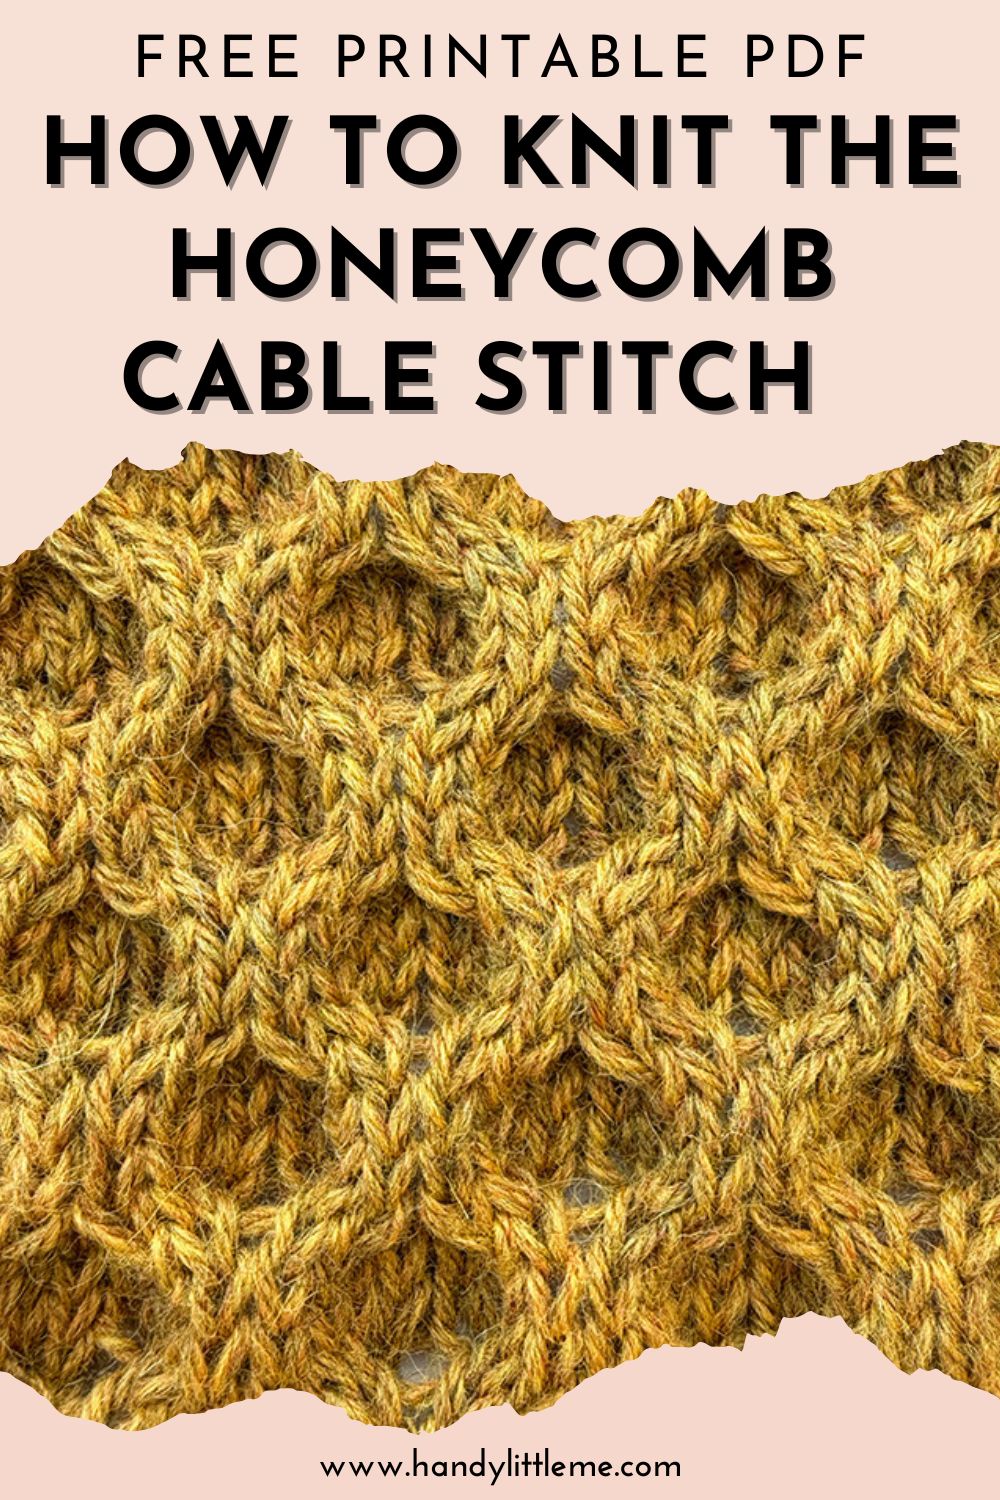
The honeycomb cable stitch creates those hexagonal shapes of the honeycomb and builds into a heavily textured fabric that looks amazing in cozy projects.
This tutorial walks you through a neat, structured stitch pattern you can use for a swatch, then scale up into projects like sweaters, scarves, or blankets.
Why You’ll Love This Stitch
- The design looks intricate, but it uses only simple cable stitches (seriously).
- It’s a great choice when you want a dense fabric with lots of depth.
- Perfect if you like simple cables but want something that feels more “designed.”
What You’ll Need
- Yarn (a smooth, light-to-medium color shows the texture best)
- Leftovers from a skein of dk-weight yarn or worsted-weight yarn is plenty for practice
- Knitting needles appropriate for your yarn
- A cable needle
- Scissors + tapestry needle
Needle Tip (for texture + drape)
If your fabric feels too tight, try larger needles; if it feels too loose and the cables look sloppy, go down to smaller needles.

Skill Notes Before You Start
You’ll be working a repeating cable motif over a set width, so it helps to understand the structure:
- The stitch is worked over multiples with edge stitches added for a tidy border.
- You’ll see repeat sections marked with asterisks, so it’s easy to track.
- This pattern uses a clear row repeat, which makes it relaxing once you get going.
This cable pattern is formed by crossing stitches either to the front of your work or to the back of your work.
If you’ve never cabled before, you can still do it; just move stitches temporarily, then work them in order.
Abbreviations
Here are the abbreviations used in the pattern:
- C4B = Cable 4 Back
- C4F = Cable 4 Front
- K = Knit
- P = Purl
- rep = Repeat
- RS / rs = Right side
- WS = Wrong side
- st(s) = Stitch(es)
You’ll notice the right side is where the cable texture really pops, while the wrong side shows the reverse bumps and purls more clearly.
How To Work The Cable Crosses
If you’re new to cables: the idea is to hold a small group of stitches aside, then work the next stitches, then return to the held stitches.
- C4F: slip 2 sts to your cable needle and hold at the front of work, K2, then K2 from cable needle
- C4B: slip 2 sts to your cable needle and hold at the back of work, K2, then K2 from cable needle
Helpful detail: when you resume, you’ll insert the tip into the stitches sitting on the left needle and work them in the new order.

Stitch Multiple
- Honeycomb Cable: Multiple of 8 sts plus 4
- The sample is knit with 4 edge stitches on either side.
Pattern Instructions (Swatch)
Work the setup first, then follow the rows below exactly.
Setup
- Cast on 44 sts
- Work K1, P1 rib for 2 rows
Honeycomb Cable Stitch Pattern (Rows 1–8)
- Row 1 (RS): K4, P2, *C4B, C4F; rep from * to last 6 sts, P2, K4.
- Row 2 (WS): K4, K2, purl to last 6 sts, K2, K4.
- Row 3: K4, P2, knit to last 6 sts, P2, K4.
- Row 4: Rep Row 2.
- Row 5: K4, P2, *C4F, C4B; rep from * to last 6 sts, P2, K4.
- Row 6: Rep Row 2.
- Row 7: K4, P2, knit to last 6 sts, P2, K4.
- Row 8: K4, K2, purl to last 6 sts, K2, K4.
Repeat Rows 1–8 until your sample measures around 6.5 inches.
Finish
Cast off in 1×1 ribbing to match the beginning.

Free Printable
To make this project even easier, I’ve created a free printable version of the honeycomb cable knit pattern.
You can keep it handy while you work, no need to keep checking your phone or scrolling through the blog.
It’s perfect for printing out or saving to your tablet for easy access anytime.
How To Knit The Honeycomb Cable Stitch Pattern

This honeycomb cable creates a bold, textured fabric that looks brilliant on hats, cowls, and cozy sweaters.
The pattern uses an 8-stitch repeat, with edge stitches added to keep your swatch neat.
Materials
- Any worsted weight yarn
- Scrap yarn will do for this sample - around 40 meters
Tools
- 5 mm /US 8 knitting needles
- Cable needle
- Tape measure
- Scissors
- Yarn needle
Instructions
Stitch Multiple
- Multiple of 8 sts + 4
- Sample shown: 44 sts (includes 4 edge stitches on each side)
Setup
Cast on 44 sts.
Work 1x1 ribbing (K1, P1) for 2 rows.
Stitch Pattern (Rows 1–8)
- Row 1 (RS): K4, P2, *C4B, C4F; rep from * to last 6 sts, P2, K4.
- Row 2 (WS): K4, K2, purl to last 6 sts, K2, K4.
- Row 3: K4, P2, knit to last 6 sts, P2, K4.
- Row 4: Rep Row 2.
- Row 5: K4, P2, *C4F, C4B; rep from * to last 6 sts, P2, K4.
- Row 6: Rep Row 2.
- Row 7: K4, P2, knit to last 6 sts, P2, K4.
- Row 8: K4, K2, purl to last 6 sts, K2, K4.
Repeat Rows 1–8 until your piece measures about 6.5 inches (or your desired length).
Finish
- Cast off in 1x1 ribbing (K1, P1) to match the start.
Notes
Abbreviations
- C4F: slip 2 sts to your cable needle and hold at the front of work, K2, then K2 from cable needle
- C4B: slip 2 sts to your cable needle and hold at the back of work, K2, then K2 from cable needle
- K = Knit
- P = Purl
- rep = Repeat
- RS = Right side
- WS = Wrong side
- st(s) = Stitch(es)
Project Ideas
Once you’ve nailed the texture, this stitch is beautiful in statement accessories and home makes.
Try it as a panel in a honeycomb wrap, or use it in smaller sections for a quick knit gift.
Check out more intricate and simple cables below.
- 8 Cable Stitch Knitting Patterns
- 12 Traditional Irish Aran Knitting Stitches And Meanings
- Cable Shrug Knitting Pattern (Outlander Inspired)
- 31+ Free Cable Stitch Patterns To Knit (+ Tutorials)
- Celtic Cable Dishcloth Knitting Pattern (+ Free PDF)
- Highlander Cable Knit Hat Pattern
- Chunky Cable Knit Blanket Pattern (Free Easy Throw)
- Cable Hat Free Knitting Pattern | The Bordeaux
- How To Knit A Simple Cable Pattern (+ Video Tutorial)