
Baby Beanie Hat Pattern (Cable Knit)
THIS ARTICLE CONTAINS AFFILIATE LINKS THAT SUPPORT HANDY LITTLE ME CONTENT AND FREE PATTERNS.This cable knit baby beanie is a lovely project for knitters who are comfortable with the basics and ready to practice cables in the round.
Sized for babies aged 6–12 months, the hat is worked in worsted/Aran yarn using two coordinating colors. It has a folded ribbed brim, a textured cable design, and a pom-pom for a cozy finish.
Scroll down for the free pattern and printer-friendly version.
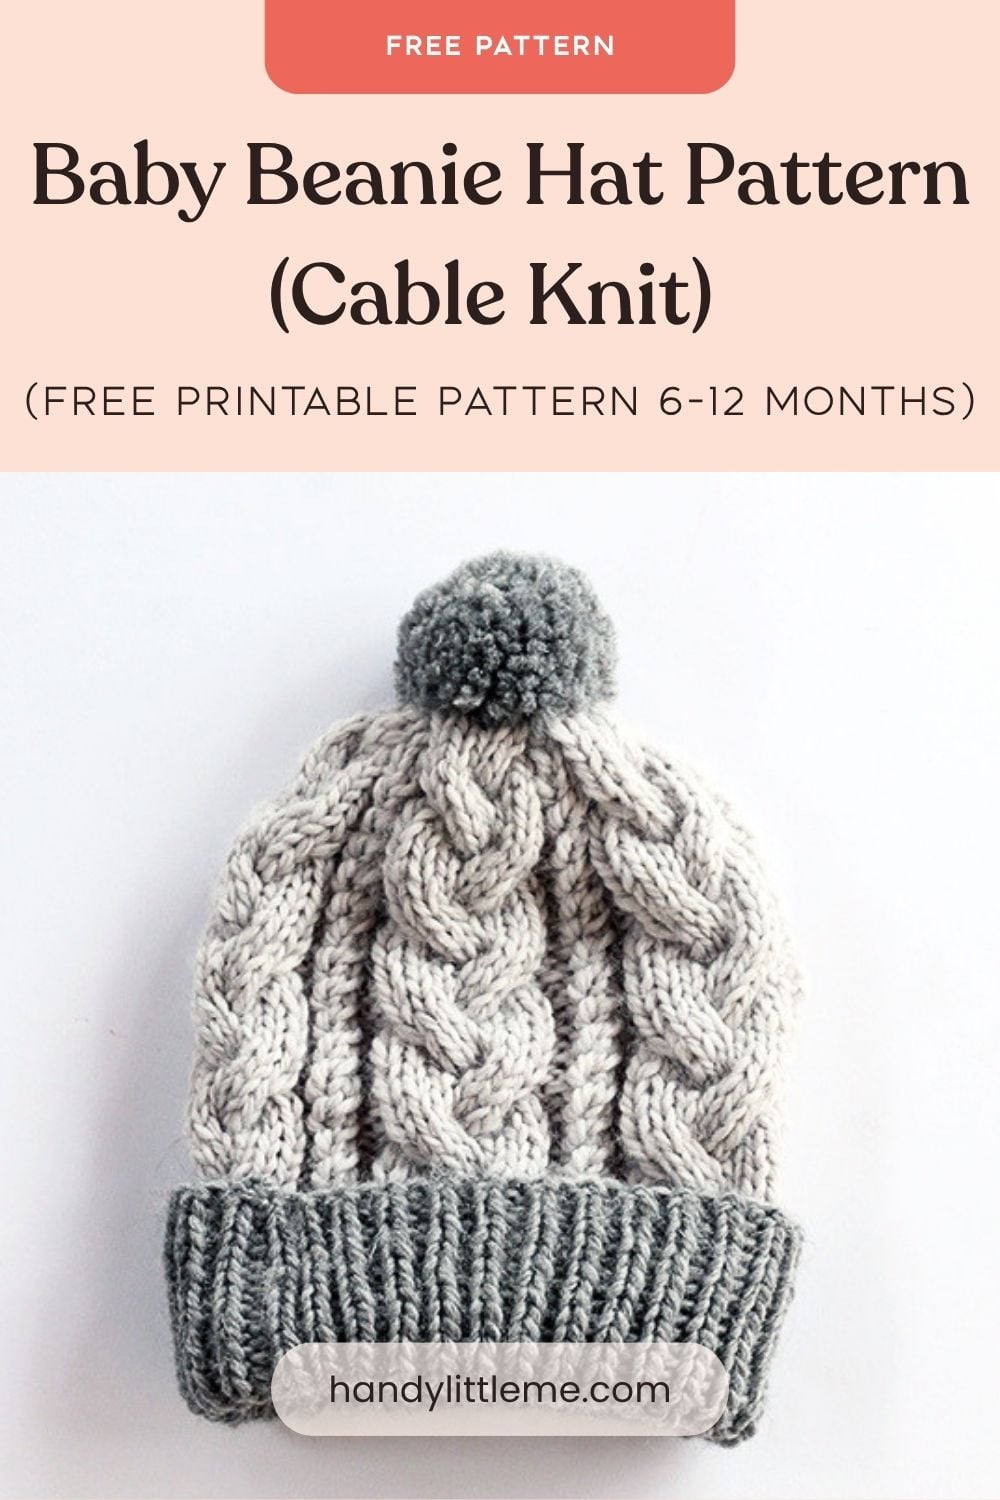
An Intermediate-Level Baby Hat Pattern
This intermediate-level knitting pattern is worked in the round.
You will need to know how to knit and purl, increase and decrease stitches, follow cable instructions, and knit in the round.
You may also need double-pointed needles to shape the crown.

Helpful Resources
This baby beanie pattern is great for any intermediate-level knitters.

Baby Beanie Hat Pattern (Cable Knit)
Purchase the inexpensive ad-free, printable PDF pattern in my shop here.
Pattern Notes
Skill Level – Intermediate
The hat knits up quickly, and the simple design makes for a relaxing and enjoyable knit.
The hat is knit from the bottom up, starting with the folded ribbed brim and working up, changing color and starting the cable stitch patterns.
You can use any worsted-weight yarn in baby-friendly fibers, including acrylic, yarns from Lion Brand, and any of your other favorite yarns.
The hat band and pom pom are made in a coordinating color; however, you could make this hat in stripes if you wish.
Scroll down for the free pattern, or purchase the printer-friendly, ad-free PDF from my shop.
Copyright Info
- Please do not copy, sell, redistribute, or republish this pattern.
- If you wish to share this pattern, link to the pattern page only.
- You may sell items produced using this pattern.
- Do NOT use copyrighted photos for your product listing.
- For the copyright T&C, please read my Terms of Use.
Size Information
Size – 6–12 months
- To fit a head circumference of approximately 18–20 inches/46–51 cm.
- Finished width lying flat: 5.5 inches.
- Finished length lying flat, excluding the pom-pom: 9 inches.
Baby head sizes can vary, so measure the recipient’s head if possible.
Gauge
16 stitches and 24 rows = 4 inches/10 cm using the larger 5 mm (US 8) needles.
The Supplies You Need…
Yarn
- 1 skein of yarn – Kartopu Melange Wool in Grey/100 g (3.5 oz)/170 m (185 yd)
- 1 skein of yarn – Kartopu Melange Wool in Light Grey/100 g (3.5 oz)/170 m (185 yd)
- Worsted weight yarn/Aran weight yarn
- Yarn weight: Medium 04
- Yarn Weight Guide (+ Conversion Chart)
The original yarn may no longer be widely available.
You can substitute any worsted/Aran-weight yarn that gives you the correct gauge.
Choose a soft, washable, baby-friendly fiber and avoid anything too fluffy or loosely spun.
Knitting Needles
- Set of 4 mm (US 6) 16-inch circular needles.
- Set of 5 mm (US 8) 16-inch circular needles.
- You may also need a set of 5 mm (US 8) double-pointed needles for the decreases.
- 5 mm (US 8) Cable needle.
Notions
Other Tools
- Pom-pom maker Clover 2 – 1/2 inch Large.
Abbreviations
Knitting Abbreviations And Terms (US And UK)
- CO – Cast on
- Cont – Continue(ing)
- C2B – Cable 2 back – slip the next st onto a cable needle and hold at the back of the work, K1, then K1 from the cable needle.
- C4B – Cable 4 back – slip the next 2 sts onto a cable needle and hold at the back of the work, K2, then K2 from the cable needle.
- C6B – Cable 6 back – slip the next 3 sts onto a cable needle and hold at the back of the work, K3, then K3 from the cable needle.
- C6F – cable 6 forward – slip the next 3 sts onto a cable needle and hold at the front of the work, K3, then K3 from the cable needle.
- K – Knit
- K2tog – Knit the next 2 stitches together
- M1 – Make one stitch
- P – Purl
- P2tog – Purl the next 2 stitches together
- PM – Place marker
- Rep – Repeat
- St(s) – Stitch(es)
Pattern Instructions
- Yarn A – Grey
- Yarn B – Light Grey
Using 4 mm (US 6) 16″ circular needles and Yarn A, Cast on 62 sts, join in the round and pm, being careful not to twist the sts.
Round 1: *K1, P1 – rep from * to end of the round.
Repeat round 1 until the brim of the hat measures 4 inches.
Change to 5 mm (US 8) 16″ circular needles.
Next round: *K5, M1, – rep from * to last 2sts, K1, M1, K1. (75 sts).
Change to Yarn B.
- Round 1: *K9, P2, K2, P2 – rep from * to the end of the round.
- Round 2: *C6B, K3, P2, C2B, P2 – rep from * to the end of the round.
- Round 3: Rep round 1.
- Round 4: *K9, P2, C2B, P2 – rep from * to the end of the round.
- Round 5: Rep round 1.
- Round 6: *K3, C6F, P2, C2B, P2 – rep from * to the end of the round.
- Round 7: Rep round 1.
- Round 8: Rep round 4.
Repeat Rounds 1–8 until the piece measures 8 inches from the cast-on edge, finishing after Round 8 before beginning the crown decreases.
Crown Decreases
You may need to change to 5 mm (US 8) double-pointed needles when there are too few stitches to work comfortably on the circular needles.
Round 1: *[K2tog, K1] 3 times, P2tog, K2, P2tog; repeat from * to the end of the round. (50 sts)
Round 2: *K6, P1, K2tog, P1; repeat from * to the end of the round. (45 sts)
Round 3: *K6, P1, K1, P1; repeat from * to the end of the round. (45 sts)
Round 4: *C4B, K2, P2tog, P1; repeat from * to the end of the round. (40 sts)
Round 5: *[K2tog, K1] twice, P2tog; repeat from * to the end of the round. (25 sts)
Round 6: *K2tog twice, P1; repeat from * to the end of the round. (15 sts)
Round 7: K2tog around to the final stitch, then K1. (8 sts)
Cut the yarn, leaving a tail of approximately 10 inches.
Thread the tail through the remaining 8 stitches, pull tightly to close the top, and secure it on the wrong side.
Weave in any remaining yarn ends.
Make a pom-pom using Yarn A and attach it securely to the top of the hat.
Free Printable Pattern
Would you like a printer-friendly copy to keep with your project?
Select the Print Pattern button on the pattern card below, enter your email address when prompted, and you’ll be able to print the pattern for free.
Cable Knit Baby Beanie
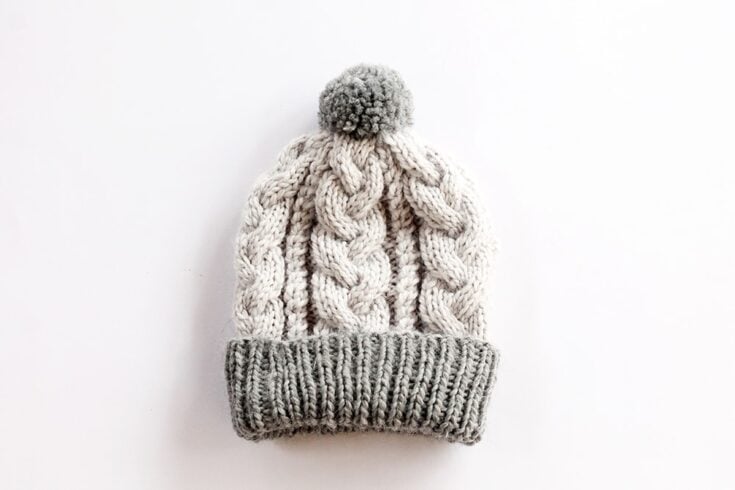
Knit a cozy cable baby beanie for ages 6–12 months with this intermediate-level pattern.
Worked in the round using worsted/Aran-weight yarn, the hat features a folded ribbed brim, a textured cable design, and a coordinating pom-pom.
Materials
- 1 skein of yarn - Kartopu Melange Wool in Grey/100 g (3.5 oz)/170 m (185 yd)
- 1 skein of yarn - Kartopu Melange Wool in Light Grey/100 g (3.5 oz)/170 m (185 yd)
- Worsted weight yarn/Aran weight yarn
- Yarn weight: Medium 04
- The original yarn may no longer be widely available.
- You can substitute any worsted/Aran-weight yarn that gives you the correct gauge.
- Choose a soft, washable, baby-friendly fiber and avoid anything too fluffy or loosely spun.
Tools
- Set of 4 mm (US 6) 16-inch circular needles.
- Set of 5 mm (US 8) 16-inch circular needles.
- You may also need a set of 5 mm (US 8) double-pointed needles for the decreases.
- 5 mm (US 8) Cable needle.
- Tape measure
- Darning needle/yarn needle
- Scissors
- Stitch markers
- Pom-pom maker Clover 2 – 1/2 inch Large.
Instructions
Main Body Hat Instructions
- Yarn A - Grey
- Yarn B - Light Grey
Using 4 mm (US 6) 16" circular needles and Yarn A, Cast on 62 sts, join in the round and pm, being careful not to twist the sts.
Round 1: *K1, P1 - rep from * to end of the round.
Repeat round 1 until the brim of the hat measures 4 inches.
Change to 5 mm (US 8) 16" circular needles.
Next round: *K5, M1, - rep from * to last 2sts, K1, M1, K1. (75 sts).
Change to Yarn B.
- Round 1: *K9, P2, K2, P2 - rep from * to the end of the round.
- Round 2: *C6B, K3, P2, C2B, P2 - rep from * to the end of the round.
- Round 3: Rep round 1.
- Round 4: *K9, P2, C2B, P2 - rep from * to the end of the round.
- Round 5: Rep round 1.
- Round 6: *K3, C6F, P2, C2B, P2 - rep from * to the end of the round.
- Round 7: Rep round 1.
- Round 8: Rep round 4.
Repeat Rounds 1–8 until the piece measures 8 inches from the cast-on edge, finishing after Round 8 before beginning the crown decreases.
Crown Decreases
You may need to change to 5 mm (US 8) double-pointed needles when there are too few stitches to work comfortably on the circular needles.
Round 1: *[K2tog, K1] 3 times, P2tog, K2, P2tog; repeat from * to the end of the round. (50 sts)
Round 2: *K6, P1, K2tog, P1; repeat from * to the end of the round. (45 sts)
Round 3: *K6, P1, K1, P1; repeat from * to the end of the round. (45 sts)
Round 4: *C4B, K2, P2tog, P1; repeat from * to the end of the round. (40 sts)
Round 5: *[K2tog, K1] twice, P2tog; repeat from * to the end of the round. (25 sts)
Round 6: *K2tog twice, P1; repeat from * to the end of the round. (15 sts)
Round 7: K2tog around to the final stitch, then K1. (8 sts)
Cut the yarn, leaving a tail of approximately 10 inches.
Thread the tail through the remaining 8 stitches, pull tightly to close the top, and secure it on the wrong side.
Weave in any remaining yarn ends.
Make a pom-pom using Yarn A and attach it securely to the top of the hat.
Notes
Abbreviations
- CO - Cast on
- Cont - Continue(ing)
- C2B - Cable 2 back - slip the next st onto a cable needle and hold at the back of the work, K1, then K1 from the cable needle.
- C4B - Cable 4 back - slip the next 2 sts onto a cable needle and hold at the back of the work, K2, then K2 from the cable needle.
- C6B - Cable 6 back - slip the next 3 sts onto a cable needle and hold at the back of the work, K3, then K3 from the cable needle.
- C6F - cable 6 forward - slip the next 3 sts onto a cable needle and hold at the front of the work, K3, then K3 from the cable needle.
- K - Knit
- K2tog - Knit the next 2 stitches together
- M1 - Make one stitch
- P - Purl
- P2tog - Purl the next 2 stitches together
- PM - Place marker
- Rep - Repeat
- St(s) - Stitch(es)
Size Information
Size - 6–12 months
- To fit a head circumference of approximately 18–20 inches/46–51 cm.
- Finished width lying flat: 5.5 inches.
- Finished length lying flat, excluding the pom-pom: 9 inches.
Baby head sizes can vary, so measure the recipient’s head if possible.
Gauge
16 stitches and 24 rows = 4 inches/10 cm using the larger 5 mm (US 8) needles.
More Cable Knitting Patterns
You may also like these free knitting patterns:
Share your work with us…
I love seeing your finished projects on social media.
If you enjoyed making the baby beanie, I’d love to see yours on Instagram, be sure to tag me @handylittleme.
If you are on Facebook, stop by the Facebook group and share a photo.
You can also find me on Etsy and Pinterest.
I’d love to see your work!
Louise,
Thank you so much for your generous posting of these great patterns. They are beautiful and very welcome during this unusual & troubling time.
Very sincerely,
N.K.C.
Hello Nancy, thank you so much for your kind words, I’m so happy you like the patterns! Happy knitting 🙂
Thank you for your generosity in sharing your patterns. I now have some meaningful projects for the days ahead. I will definitely purchase from you in the future. Stay safe and take care.
Hello Maureen, thank you so much for your kind words!
I hope you enjoy the patterns, take care, Louise 🙂
Hi,
Love this pattern but am wondering if the gauge is measured using size 6 needles or size 8?
I look forward to hearing back from you.!
Linda
Hello Linda, the gauge was worked out with the larger size needles used in the pattern.
I hope that helps!
Louise
Thankyou for sharing this wonderful pattern. I am looking for a pattern for a 2-3 year old. Can your pattern be adapted for this as it is such a lovely pattern. Look forward to hearing back from you. xx
Hello Alison,
Sorry I only have this pattern for size 6-12 months for now.
To adjust you would have to cast on more stitches and work out the cable repeats evenly.
This hat pattern may interest you – https://www.handylittleme.com/kids-beanie-knitting-pattern/
Thanks,
Louise
Hello, I’m from Indonesia and I’m thankful for your baby beanie hat pattern. It’s my favorite WIP now. Can’t wait until it finishes and show to you. Thank you so much.
Hello Elisa,
I’m so happy that you are enjoying the pattern.
I would love to see a photo when you are finished, you can add it to the Handy Little Me Facebook group or tag me on Instagram @handylittleme.
Happy knitting!
Louise
Hi! I’m working on this hat right now & just wondering at what round of the pattern do you need to end on before starting the decrease rounds? This is my first time doing cables, and I’m in love with them!! Thank you so much for this beautiful pattern! I tweaked it a bit since I didn’t want the fold up brim. It is turning out so cute!
Hello Anna,
You will end the final round before the decreases – on round 8 so that you complete the 8 rounds of the pattern before you start to shape.
I hope that helps!
Louise
I am fairly new to knitting. In this pattern, in round 2 : C6B, K3, P2, C2B, P2
Does this mean cable 3 to the back K3, knit the 3 from the cable and then knit 3 again before the P2?
Thank you,
Hello Pari,
You would knit the cable C6B (see the abbreviations) and after that knit 3 sts, then purl 2sts, C2B, then Purl 2 sts.
These 3 sts that are after the C6B are not included in the cable.
I hope that helps!
Louise
Thank you that helps. I love this hat and want to knit it for my grandchild. Thank you for your quick response.
Have a good day!
I love this pattern! I just have a question regarding the start of the decreases. When it states, “k2tog, k1- 3 times…” I’m assuming this means the 2 together and a k1 3 times. Otherwise it would just say k3? Thanks for helping out an over thinker! 😊
Hello Vanessa, yes that is correct – you would K2tog (decrease), then K1 – 3 times.
So – K2tog, K1, K2tog, K1, K2tog, K1.
This doesn’t mean to K3.
I hope that helps!
Louise
Knitting loose. 2 needles.Tried 72 sts. Too big. Tried 58 stitches for beanie, too small . Have to knit 2 sizes smaller needles.
Charity DK Pullskein Acrylic wool .need help.
Best wishes
Rosaly
Hi Rosaly,
Thank you for your comment! It sounds like you’re adjusting the stitch count to get the right fit, which is a great approach.
Since you’re using Charity DK Pullskein Acrylic, and finding 72 stitches too big and 58 too small, knitting with two sizes smaller needles should help tighten the gauge.
Alternatively, you could try casting on 64 or 66 stitches as a middle ground, depending on how much smaller you need the beanie.
Another option is to check your gauge swatch to see how many stitches per inch you’re getting and adjust accordingly.
Let me know how it goes. 😊
Best wishes,
Louise