One Skein Knit Hat Pattern (Easy Quick Simple Cable)
THIS ARTICLE CONTAINS AFFILIATE LINKS THAT SUPPORT HANDY LITTLE ME CONTENT AND FREE PATTERNS.This one skein knit hat pattern is an excellent project for anyone learning to knit cables in the round.
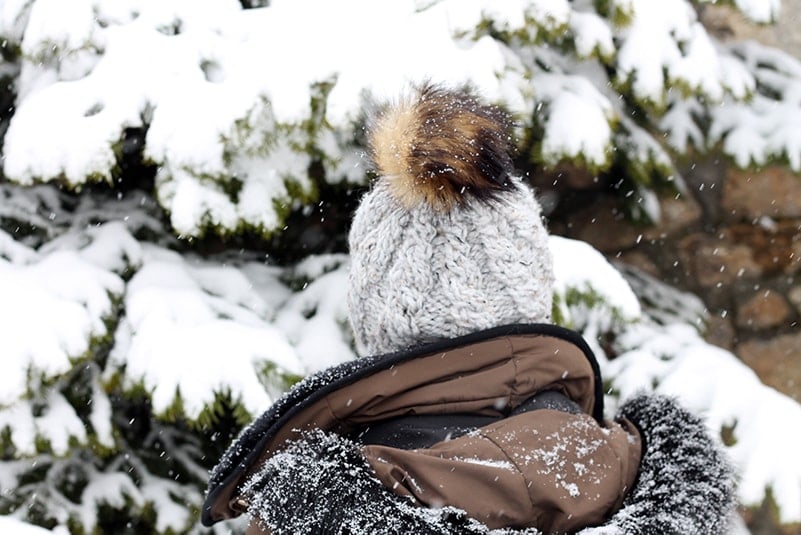
I wanted to share with you a warm, cozy knitted hat that will be perfect to wear during the colder months.
Scroll down to view the free pattern, or you can grab the printer-friendly ad-free PDF here.

Free Hat Pattern
Get the ad-free, printable PDF pattern here.
Notes
The easy hat knits up quickly in super bulky yarn, and the simple 4-stitch cable design makes for a relaxing and enjoyable knit.
The one skein of yarn used in the super bulky yarn weight is a great option for hat patterns as they knit up really fast.
This easy knit hat would make a great last minute gift and can be made as unisex gifts, perfect for the whole family.
Skill Level – Intermediate.
Size – Adults sizes = Adult medium
Finished measurements – laying flat and unstretched = 18 inches circumference / 9 inches long without pom.
Gauge – 10 sts and 15 rounds = 4 in/10 cm in Stockinette stitch
Copyright Info
- Please do not copy, sell, redistribute, or republish this pattern.
- If you wish to share this pattern, link to the pattern page only.
- You may sell items produced using this pattern.
- Do NOT use copyrighted photos for your product listing.
- For the copyright T&C, please read my Terms of Use.
The Supplies You Need…
Yarn
- 1 skein of Lion Brand Wool-Ease Thick and Quick in Grey Marble
- Super bulky/super chunky/14-ply yarn.
- Yarn Weight Guide (+ Conversion Chart)
Needle Size
- 8 mm (US 11) 16″ circular knitting needles
- 10.00 mm (US 15) 16″ circulars
- Cable needle
- Please note that you may have to change your needles to decrease the hat if working on the circulars is too tight.
- This would mean using a set of size 10mm double-pointed needles (DPNs).
- If you do not have those, you could use a 60cm/24″ cable and use the magic loop technique. (View Tutorial – Magic loop knitting | step by step)
Notions
- Tape measure
- Darning needle/tapestry needle
- Scissors
- Stitch marker
Other Materials
- Faux fur pom pom
- Or a Clover pom pom maker to make a jumbo pompom.

Abbreviations / Knitting Abbreviations And Terms (US And UK) List
- CO – Cast on
- C4F – Cable 4 forward (Slip the next two stitches onto a cable needle and hold at the front of the work. Knit the next two stitches from the left-hand needle and then knit the two stitches on the cable needle)
- CN – Cable needle
- K – Knit
- K2tog – Knit the next 2 stitches together
- P – Purl
- PM – Place marker
- P2tog – Purl the next 2 stitches together
- Rep – Repeat
- Rnd (Rnds) – Round(s)
- Sl – Slip one (or more) stitch(es)
- St(s) – Stitch(es)
Pattern Instructions
You will knit from the bottom up (the brim), starting with the bottom ribbing…
With 8 mm (US 11) circular needles: CO 54 sts (longtail cast on) – join in the round and pm, being careful not to twist sts.
1st round: K1, P1 – rep to the end of the round.
Cont to work in K1, P1 rib every round for 2 inches.
Change to 10mm (US 15) circular needles and work the following:
- *P2, K4 – rep from * to the end of the round.
- *P2, K4 – rep from * to the end of the round.
- *P2, C4F – rep from * to the end of the round.
- *P2, K4 – rep from * to the end of the round.
Rep rounds 1 to 4 until the hat measures approximately 7 inches from the cast-on edge.
(End on round 2, ready for round 3.)
Decrease:
- Round 1: *P2, sl next 2 sts onto the cable needle and hold in front of work, K2tog, then K2 from CN, rep from * to the end of the round.
- Round 2: *P2, K3 – rep from * to the end of the round.
- Round 3: *P2tog, sl next st onto the cable needle and hold in front of work, K2tog, then K1 from CN, rep from * to the end of the round.
- Round 4: *P1, K2 – rep from * to the end of the round.
- Round 5: *P1, sl 1 st onto the cable needle and hold in front of work, K1, then K1 from CN, rep from * to the end of the round.
- Round 6: *P1, K2 – rep from * to the end of the round.
- Round 7: *P1, K2tog – rep from * to the end of the round.
- Round 8: *P1, K1 – rep from * to the end of the round.
- Round 9: *K2tog – rep from * to the end of the round.
- Round 10: Knit all sts.
Cut yarn, thread through the rem sts, and pull up to close and secure.
Weave in all loose ends.
Attach the pom pom (either made from yarn or faux fur).
Idea: You can make the pom pom in a contrasting color.

An Easy And Quick One Skein Hat
A great quick knit project; you can make the hat in around 2-3 hours, depending on how fast you knit!
This warm hat uses less than one skein of Lion Brand Wool-Ease Thick and Quick yarn (a super bulky weight yarn).
You can also add a pom-pom made from yarn to the top of the hat or a faux fur pom pom.
It has a little slouch, but if you wish to make it more slouchy, you can adjust the length easily to make it a slouchy hat knit.
Related Post: How To Knit A Hat For Complete Beginners (+ Video Tutorial)

Can You Knit A Hat With One Skein Of Yarn?
Yes, you can knit a hat with just one skein of yarn!
The amount of yarn needed for a hat generally depends on the yarn weight, hat size, and the specific pattern you’re following.
For a basic knit hat pattern using worsted weight yarn (which is a common weight), one skein, typically around 200-220 yards, is usually sufficient to knit an average adult-sized hat.
However, larger or more intricate patterns may require slightly more yarn.
If you’re concerned about having enough yarn, choosing a pattern specifically designed for one skein projects or estimating yarn requirements based on the pattern’s instructions can be helpful.
Also, keep in mind that if you’re using a different yarn weight or making alterations to the pattern (like adding extra length or embellishments), it might affect the amount of yarn needed.
It’s always a good idea to check the yarn requirements mentioned in the pattern or do a gauge swatch before starting to ensure you have enough yarn to complete the project.
The Cable Knit Stitch
This pattern is a great project for advanced beginner knitters or intermediate knitters, as the cable stitch shown in the hat pattern is a great beginner cable for anyone who has not worked cables before.
The hat is knit in the round and has a textured stitch pattern.
The pattern may look a little daunting if you are a beginner who has never picked up the needles before.

The Cable Stitch Explained
The cable stitch used in this pattern is C4F – Cable four forward.
A tip for remembering which way a cable will twist, either to the front or the back of the work, is to think of this;
- The RIGHT way – these stitches are held behind – C4B
- The LEFT way – these stitches are held in the front – C4F
The abbreviation used in this pattern is explained below:
- C4F – Cable 4 forward.
- Slip the next two stitches onto a cable needle and hold it at the front of the work.
- Knit the next two stitches from the left-hand needle and then knit the two stitches on the cable needle.
Resources and tutorials you may find helpful in following this pattern
This pattern is great for any advanced beginners or intermediate knitters.
- Knitting cast-on methods
- Knitting Lessons
- How to knit – a complete beginner’s guide
- How to cast on knitting
- How to cast off knitting for total beginners (step by step)
- How to knit garter stitch
- How to knit the purl stitch (for beginners + a video tutorial)
- How to knit stockinette stitch (for beginners)
- How to read knitting patterns for beginners
- Knitting abbreviations and terms (US and UK)
- How to knit rib stitch
- How to join knitting in the round with circular knitting needles
- You should be comfortable working cable stitches and using a cable needle.

More Cable Knitting Patterns
For more patterns featuring cables, please take a look at these posts:
Free Knitting Patterns For Christmas
- Knit Tree Skirt Pattern (Free And Easy Christmas DIY)
- 28 Free Christmas Stocking Knitting Patterns (The Best)
- 30+ Free Christmas Knitting Patterns (Best Knitted Ideas)
- 30 Christmas Sweater Knitting Patterns (Jumper Ideas)
- 17 One Skein Knitting Patterns {Easy + Quick}
- 35 Free Knitted Christmas Decorations (Knitting Patterns)
- 27 Free Christmas Knitting Patterns For Babies
- 33 Free Christmas Knitting Patterns For Kids
- 13 Vintage Knitted Christmas Stocking Patterns
- Tartan Christmas Decorations (Plaid Knitting Pattern)
- The 50+ Best Free Knitted Gifts For Christmas
- Christmas Blanket Knitting Pattern (Free + Festive!)
- How To Make A Chunky Knit Pillow Cover- Free Pattern
- Table Runner Knitting Pattern
- Knit Placemat Pattern
- Free Sock Knitting Pattern (Easy + Simple For Beginners)
- How To Make An Easy Pom Pom Christmas Tree DIY Craft
- How To Make A Christmas Wreath (Easy Homemade DIY)
- Christmas Tree Hat Knitting Pattern
- Dog Santa Outfit Costume DIY (Free Knitting Pattern)
- How To Knit A Christmas Stocking
- Beret Hat Free Knitting Pattern (Fisherman’s Rib)
- 47 Holiday Knitting and Crochet Patterns
- 44 Handmade Gifts – The Best Ideas For Everyone On Your List
- Dog Christmas Hat Pattern
- Knitted Elf Hat Pattern
- Knitted Santa Hat
Share your work with us…
I love seeing your finished projects.
If you enjoyed making the pattern, I’d love to see yours on Instagram, be sure to tag me @handylittleme.
If you are on Facebook, stop over to the handylittleme Facebook group and share a photo.
I’d love to see your work!
New follower here…had to come back and let you know that I just finished this hat! With your awesome video I was able to knit using magic loop. I had learned that technique years ago but was too intimidated by it at the time (also the instructor wasn’t very patient with newbies). I’m so proud of myself for completing this project (with your help!) On to mittens!
Happy Holidays!
Hello Maria, thank you so much for your kind words, I’m so happy you enjoyed making the hat and using the magic loop tutorial, I hope that you enjoy the mittens too! Happy holidays 🙂
Thanks for the free pattern. The hat turned out great. However, for me & my friends’ heads, 7.5” of body+brim before decreasing made the hat much too tall. Then the decrease formed a strange sort of nub on the top of the hat. I found that starting the decrease after the hat measured around ~5.5” and only working decrease rounds 1-7 made a much better looking hat. Just thought I would share in case others would like to modify the pattern to be shorter.
Hi Allison,
Thanks for the notes!
Louise