Beret Hat Free Knitting Pattern (Fisherman’s Rib)
THIS ARTICLE CONTAINS AFFILIATE LINKS THAT SUPPORT HANDY LITTLE ME CONTENT AND FREE PATTERNS.This Fisherman’s rib beret hat knitting pattern is a great project for an advanced beginner.
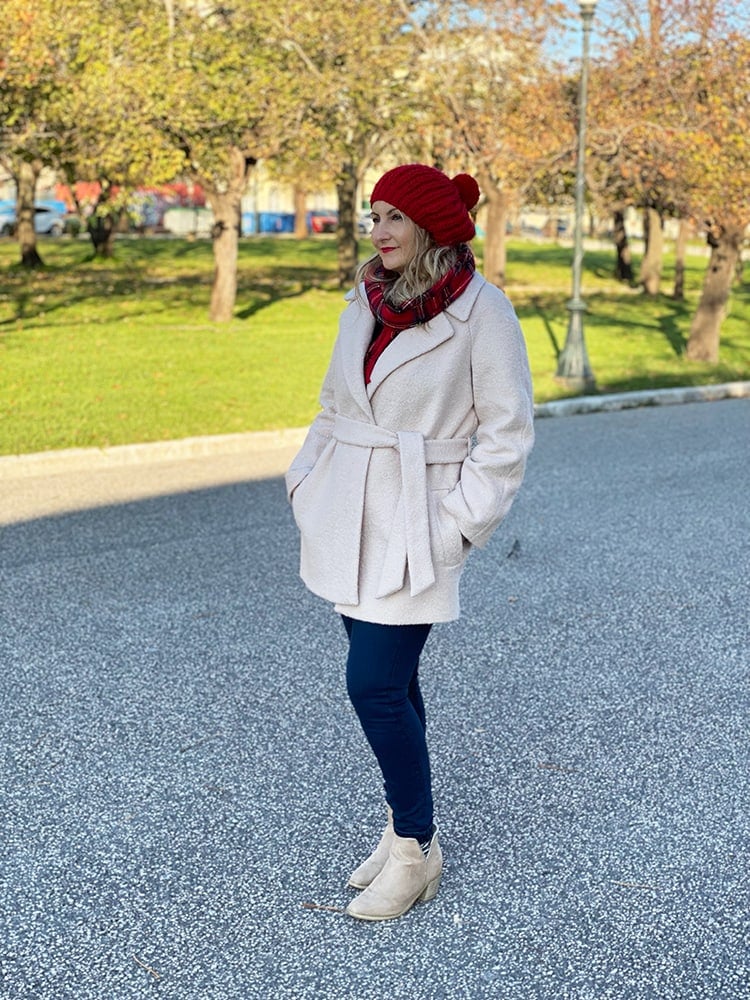
This beret finishes with a pom pom sewn into the center on top.
Scroll down to view the free pattern, or grab an inexpensive, printer-friendly, ad-free PDF here.

Fisherman’s Rib Beret Hat Knitting Pattern
Purchase the inexpensive, ad-free, PDF printable pattern in my shop here.
Skill Level – Easy
Notes
This Red Beret Knitting Pattern will allow you to create a slouchy beret in a fisherman rib stitch pattern.
This beret is knit flat – back and forth on straight needles and seamed to finish.
*Please note this beret pattern is the same pattern as the Sky Boat Knitted Beret Pattern, knit in a different yarn, and a pom pom has been added.
Copyright Info
- Please do not copy, sell, redistribute, or republish this pattern.
- If you wish to share this pattern, link to the pattern page only.
- You may sell items produced using this pattern.
- Do NOT use copyrighted photos for your product listing.
- In all product listings, please credit Handy Little Me (Louise Bollanos) as the designer.
- For the copyright T&C, please read my Terms of Use.
Size
- To fit a regular-sized head (around 22 inches).
- Diameter – 10 inches/26 cms
Gauge – 10×10 cm/4×4 inches = 10 sts/14 rows using larger needles in pattern.
The Supplies You Need
Yarn
- 1 x We Are Knitters – The Petite Wool (100g) in the color – Red.
- Please note that the yarn used is made with 100% wool.
- You can substitute with any Bulky/Chunky/12 Ply.
- Yarn weight – Bulky Weight Yarn.
Needles
Notions + Pom Pom Maker
- Tape measure
- Darning needle
- Scissors
- Pom Pom Maker – Clover 2.5 inches/65mm

Abbreviations
- Beg – Beginning
- Cont – Continue
- CO – Cast on
- Foll – Following
- K – Knit
- P – Purl
- P1B – Purl one stitch below
- P3tog – Purl the next 3 stitches together
- Patt – Pattern
- SL1K – Slip one stitch knit ways
- St – Stitch
- Rem – Remaining
- Rep – Repeat
- RS – Right side
- WS – Wrong side
Pattern Instructions
With 7 mm (US 10.5) needles cast on 61 sts.
- Row 1 (RS): K2, *P1, K1* rep from * to last st, K1.
- Row 2 (WS): K1, *P1, K1* rep from * to end.
- Rep the last 2 rows – 3 times more.
Change to 8 mm (US 11) needles and work in patt as follows:
- Row 1 (RS): SL1K, K1, *P1B, K1* rep from * to last st, K1.
- Row 2: (WS): SL1K, *P1B, K1* rep from * to end.
- Rep these 2 rows 7 times more, then 1st row again.
Decrease
Keeping continuity of patt – shape as follows:
- Next row: Patt 5, P3tog, (Patt 9, P3tog) 4 times, Patt 5. (51sts).
- Work 2 rows.
- Next row: Patt 4, P3tog (Patt 7, P3tog) 4 times, Patt 4. (41sts).
- Work 2 rows.
- Next row: Patt 3, P3tog (Patt 5, P3tog) 4 times, Patt 3. (31sts)
- Work 2 rows.
- Next row: Patt 2, P3tog (Patt 3, P3tog) 4 times, Patt 2. (21sts)
- Work 2 rows.
- Next row: SL1K, *P3tog, K1* rep from * to end. (11sts)
Making Up
Break yarn and thread through the rem sts, draw up tightly, and fasten off securely.
Using a flat seam like the mattress stitch, sew up the hat and weave in any loose ends.

A Knitted Beret For Straight Needles
The beret was knit flat – back and forth on straight needles.
It is then seamed using an invisible seam, the mattress stitch.
This hides the seam so you can’t see it at all, only on the inside.
The hat is really easy for anyone who is new to knitting and wants to make something amazing for themselves or to gift!

Knit A Hat
Hats are the perfect project for all makers!
Whether you are knitting an easy, snug beanie or a hat with a slouchy fit.
Or a more complex pattern with big or small cables, vines, lace, and intricate stitches on the body of the hat.
Find your perfect fit here – Hats + Headbands

A Beret Hat
This beret has been knit with bulky/chunky/12-ply yarn and was a joy to knit in The Petite Wool from We Are Knitters.
It has a ribbed brim, and the main body is knit in Fisherman’s rib; it has just enough slouch but is also really stylish to wear!
You can see more beret patterns here:
- Slouchy Knit Beret Pattern (The Bordeaux)
- Beret Knitting Pattern (Beginner Friendly!)
- Scottish Beret Outlander Knitting Pattern
More Winter Knitting Patterns

Resources and tutorials you may find helpful in following this pattern
This pattern is great for any advanced beginner knitters.
- Knitting cast-on methods
- Knitting Lessons
- How to cast on knitting
- How to cast off knitting for total beginners (step by step)
- How to knit garter stitch
- How to knit the purl stitch (for beginners + a video tutorial)
- How to knit stockinette stitch (for beginners)
- How to read knitting patterns for beginners
- Knitting abbreviations and terms (US and UK)
- You can see help for seaming using the mattress stitch (the mattress stitch-how to seam knitting)

What Is The Correct Way To Wear A Beret?
Wearing breath can be a stylish and distinctive accessory, and there are several ways to wear it.
Here’s a general guide on how to wear a beret:
- Placement on the Head:
- The beret is traditionally worn tilted to one side. It’s not meant to sit flat on top of your head.
- Tilt the bar at an angle that feels comfortable to you. Commonly, people tilt it to the right or left.
- Positioning:
- The beret is usually positioned just above the eyebrows and slightly to one side. It can be worn over one ear or positioned more centrally on the head, depending on personal preference and style.
- Hair:
- If you have long hair, you can choose to tuck it into the beret or let it flow out. Experiment with both styles to see which looks and feels better for you.
- Military Style:
- In a more traditional or military style, the beret may have a small emblem or badge on the front. In this case, position the beret so that the emblem is centered above the left eye.
- Fit:
- Ensure that the beret fits snugly on your head without being too tight. It should be secure enough to stay in place but not so tight that it causes discomfort.
- Material and Season:
- Consider the material of the beret and the weather. In colder weather, you might pull the bets slightly further down your forehead, while in milder weather, you can wear it higher.
- Casual or Formal:
- Berets can be worn in both casual and more formal settings. The way you wear it and pair it with your outfit can convey different styles.
- Classic French Berets:
- Tilt the classic French beret at a slight angle to one side, positioning it just above the eyebrows for an effortlessly chic look. Allow the beret to slouch slightly to the side, and ensure it sits comfortably without being too tight or too loose on the head.

What Is The Best Yarn Weight For A Knitted Beret?
The best yarn weight for a knitted beret depends on various factors, and each weight offers a unique aesthetic and level of warmth.
Worsted weight yarn, aran weight yarn, and DK weight yarn are commonly favored for berets, striking a balance between substance and drape.
These yarns create berets that are warm enough for cooler seasons while maintaining a comfortable weight.
However, bulky weight yarns can also be an excellent choice, particularly for those seeking a quicker knit and a more substantial, cozy feel.
Bulky weight berets often have a chunkier and more textured appearance, providing extra warmth and a stylish, relaxed look.
Ultimately, the choice of yarn weight for a knitted beret comes down to personal preference, the desired season of wear, and the specific characteristics one envisions for the finished accessory.
- Learn everything about yarn weights here – Yarn Weight Guide {+ Conversion Chart}
- Learn everything about yarn fibers here – Yarn Types Explained: A Guide To Different Fibers

How Long Does It Take To Knit A Beret?
The time required to knit a beret depends on various factors, such as the complexity of the pattern, the knitter’s skill level, yarn thickness, and needle size.
A simple beret pattern with basic stitches might take a few hours to a day for an experienced knitter, while more intricate patterns or those incorporating special techniques could extend the timeframe.
Yarn weight and needle size play a role, as thicker yarn and larger needles generally result in quicker progress.
Whereas lighter yarn and smaller needles take more time.
Beginners may require more time, and consistent dedication to knitting sessions impacts overall speed.
As a rough estimate, completing a project could range from a day for an experienced and focused knitter to a few days or more for those still learning or tackling a more intricate design.
How Do You Block A Beret?
To block a beret, begin by ensuring the fiber content is suitable for blocking; some respond well to wet blocking, while others may require steam blocking or be unsuitable for blocking altogether.
After finishing the beret, weave in loose ends and decide on the blocking method.
For wet blocking, soak the beret in lukewarm water with mild detergent, gently squeeze out excess water, and shape it on blocking mats or towels, securing it with T-pins.
For steam blocking, hover a steam iron over the beret without touching it, shape the beret, and allow it to cool.
In both methods, let the beret air-dry completely before removing the pins, ensuring it holds its desired shape.
The magic of blocking helps set the final form, smooth out stitches, and enhance the overall appearance of the beret.
Learn everything about blocking here – Blocking Knits – How To Block Knitting Guide.

Can You Knit A Hat On Straight Needles?
This pattern will show you how to knit a hat with straight needles for complete beginners, working flat, back and forth.
This is a great project for anyone who is learning how to knit.
Check out the free knitting pattern here – How To Knit A Hat For Complete Beginners (+ Video Tutorial).

Knitting Lessons
If you are a new knitter and need help with the knitting basics, check out the knitting lessons here – Knitting Lessons (With Video Tutorials).
There, you will find step-by-step tutorials for all the different knitting techniques a newbie needs to know.
Including how to cast on, how to knit the knit stitch, the stockinette stitch, the rib stitch, the garter stitch, the mattress stitch, short rows and a list of knitting abbreviations, and more.
And if you need more video tutorials, check out my YouTube channel here – Handy Little Me – YouTube.
Free Knitting Patterns For Christmas
- Knit Tree Skirt Pattern (Free And Easy Christmas DIY)
- 28 Free Christmas Stocking Knitting Patterns (The Best)
- 30 Christmas Sweater Knitting Patterns (Jumper Ideas)
- 30+ Free Christmas Knitting Patterns (Best Knitted Ideas)
- 17 One Skein Knitting Patterns {Easy + Quick}
- 35 Free Knitted Christmas Decorations (Knitting Patterns)
- 27 Free Christmas Knitting Patterns For Babies
- 33 Free Christmas Knitting Patterns For Kids
- 13 Vintage Knitted Christmas Stocking Patterns
- Tartan Christmas Decorations (Plaid Knitting Pattern)
- The 50+ Best Free Knitted Gifts For Christmas
- Christmas Blanket Knitting Pattern (Free + Festive!)
- How To Make A Chunky Knit Pillow Cover- Free Pattern
- Holly Jolly Dishcloth Knitting Pattern (Free Printable)
- Candy Cane C2C Dishcloth (Free Printable Knitting Pattern)
- 17+ Nordic Knits For Christmas – Free Patterns
- 25 Free Knitted Christmas Baubles And Ornaments
- 15+ Free Knitted Advent Calendar Patterns
- Knitted Christmas Bauble Cover (Free Printable)
- 10 Free Christmas Tree Skirt Knitting Patterns
- Free Chunky Christmas Tree Skirt Knitting Pattern (Large Yarn)
- How To Make An Easy Pom Pom Christmas Tree DIY Craft
- How To Make A Christmas Wreath (Easy Homemade DIY)
- Christmas Tree Hat Knitting Pattern
- Dog Santa Outfit Costume DIY (Free Knitting Pattern)
- 47 Holiday Knitting and Crochet Patterns
- 44 Handmade Gifts – The Best Ideas For Everyone On Your List
- Dog Christmas Hat Pattern
- Knitted Elf Hat Pattern
- Knitted Santa Hat
Share your work with us…
I love seeing your finished projects on social media.
If you enjoyed making the beret, I’d love to see yours on Instagram, be sure to tag me @handylittleme.
If you are on Facebook, stop over to the handylittleme Facebook group and share a photo.
I’d love to see your work!
This is a lovely beret; however, I crochet. Is there any chance this could/would be made as a crochet pattern? I’m an “adventurous beginner” and would welcome the opportunity to make a crochet version. The symmetry is very appealing.
Louise, thank you for this beauty!
Warm regards,
Carol Brown
Hello Carol,
I’m so happy you like the beret, I am designing items for fall/winter 22 so perhaps a beret could be in there somewhere.
I’ll see what I can do.
Happy making!
Louise
How many stiches would you need if you did this in the round??? bc I lost my straight knitting needles that I mainly use 🙁
Hello Dayna,
You would cast on the same number of stitches to knit the hat in the round.
But you can knit it flat with circular needles also – back and forth.
I used my circulars to knit everything – I rarely use straight needles now.
I hope that helps!
Louise