Skye Boat Knitted Beret Pattern
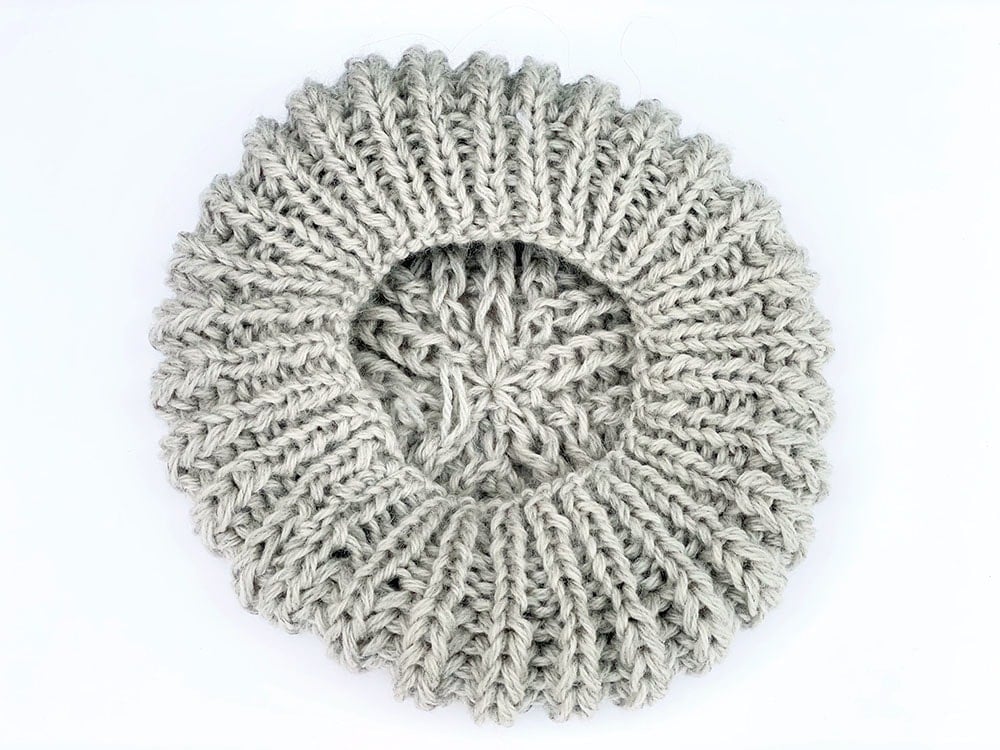
THIS ARTICLE CONTAINS AFFILIATE LINKS THAT SUPPORT HANDY LITTLE ME CONTENT AND FREE PATTERNS.The Skye Boat Knitted Beret Pattern will allow you to create a slouchy beret in the style of the MacKenzie clan grey berets seen worn in all seasons of the Outlander series.
This beret is knit flat – back and forth on straight needles.
Scroll down for the free pattern or you can purchase a printer-friendly ad-free PDF here.

Inspired By the Clan Mackenzie Berets From The Outlander Series
I designed three berets as part of my new Outlander Collection inspired by the clan Mackenzie.
This beret has been knit with bulky/chunky/12-ply yarn and has a really good fit.
Just enough slouch but also really stylish to wear!
You can see more beret patterns here:

Knitted Beret Pattern Straight Needles
The beret was knit flat – back and forth on straight needles.
It is then seamed using an invisible seam, the mattress stitch.
This hides the seam so you can’t see it at all, only on the inside.
The hat is really easy for anyone who is new to knitting and wants to make something amazing for themselves or to gift!
If you are new to knitting, check out this guide. – How to Knit – A Complete Beginner’s Guide

More Outlander Knitting Patterns
I wanted to make an Outlander collection of knits that are inspired by both Claire and her daughter Brianna, from Sontag shawls, mittens, and scarves.
Check out all of the Outlander free knitting patterns here – The Outlander Pattern Library
You can see a roundup of Outlander Knitting Patterns here. – Outlander Patterns {Beginner + Intermediate}
There are also the Outlander Pattern Collection Ebooks you can view in my shop below:
Popular Patterns
- Outlander Carolina Shawl Pattern
- Claire’s Rent Shawl Knitting Pattern
- Outlander Brianna Fingerless Gloves Pattern
- Outlander Claire’s Cable Knit Wrist Warmers
- Outlander Cowl Knitting Pattern (Claire Season 1)
- Jenny’s Shawl Knitting Pattern (Outlander Knit)
- Journeycake Sontag Shawl Knitting Pattern
- Highlander Cable Knit Hat Pattern

Resources and tutorials you may find helpful in following this pattern:
This pattern is great for any beginner knitters.
- Knitting cast-on methods.
- Knitting Lessons
- How to cast on knitting
- How to cast off knitting for total beginners (step by step)
- How to knit garter stitch
- How to knit the purl stitch (for beginners + a video tutorial)
- How to knit stockinette stitch (for beginners)
- How to read knitting patterns for beginners
- Knitting abbreviations and terms (US and UK)
- How to knit rib stitch patterns (1×1 and 2×2 ribbing)
- You can see help for seaming using the mattress stitch (the mattress stitch – how to seam knitting).

Notes
Skill Level – Basic (Beginner)
The beret hat knits up quickly and the simple design makes for a relaxing and enjoyable knit.
You can wear it like a Scottish Highlander or as a classic French beret.
Perfect for a wintry day, this beret beanie will look chic in any color.
Size
- To fit a regular-sized head (around 22 inches).
- Diameter – 10 inches/26 cms
Gauge – 10×10 cm/4×4 inches= 9 sts/11 rows using larger needles (8 mm/US 11) in the stitch pattern.
Copyright Info
- Please do not copy, sell, redistribute, or republish this pattern.
- If you wish to share this pattern, link to the pattern page only.
- You may sell items produced using this pattern.
- Do NOT use copyrighted photos for your product listing.
- In all product listings please credit Handy Little Me (Louise Bollanos) as the designer.
- For the copyright T&C please read my Terms of Use.

The Supplies You Need
Yarn
- Yarn – Rowan Kid Classic 50g/140 m/153 yds x 2 in the color Pumice 00888
Yarn notes
- Please note that this gorgeous yarn used is made with lambswool (wool) and kid mohair.
- You can substitute with any Aran/Worsted weight yarn/10 Ply yarn.
- Yarn weight – Medium Weight Yarn 04/Worsted/Aran/10 Ply
- I knit this yarn with two strands together for a heavier chunky/bulky knit.
- If you want to knit with one single strand only then you will need Bulky weight yarn/Chunky/12 Ply yarn.

Abbreviations
- Beg – Beginning
- Cont – Continue
- CO – Cast on
- Foll – Following
- K – Knit
- P – Purl
- P1B – Purl one stitch below
- P3tog – Purl the next 3 stitches together
- Patt – Pattern
- SL1K – Slip one stitch knit ways
- St – Stitch
- Rem – Remaining
- Rep – Repeat
- RS – Right side
- WS – Wrong side
Pattern Instructions
With the smaller needles – 7 mm (US 10.5) needles cast on 61 sts.
- Row 1 (RS): K2, *P1, K1* rep from * to last st, K1.
- Row 2 (WS): K1, *P1, K1* rep from * to end.
- Rep the last 2 rows – 3 times more.
Change to 8 mm (US 11) needles and work in patt as follows for the main body of the hat:
- Row 1 (RS): SL1K, K1, *P1B, K1* rep from * to last st, K1.
- Row 2: (WS): SL1K, *P1B, K1* rep from * to end.
- Rep these 2 rows 7 times more, then 1st row again.
Decrease
Keeping continuity of patt – shape as follows:
- Next row: Patt 5, P3tog, (Patt 9, P3tog) 4 times, Patt 5. (51sts).
- Work 2 rows.
- Next row: Patt 4, P3tog (Patt 7, P3tog) 4 times, Patt 4. (41sts).
- Work 2 rows.
- Next row: Patt 3, P3tog (Patt 5, P3tog) 4 times, Patt 3. (31sts)
- Work 2 rows.
- Next row: Patt 2, P3tog (Patt 3, P3tog) 4 times, Patt 2. (21sts)
- Work 2 rows.
- Next row: SL1K, *P3tog, K1* rep from * to end. (11sts)
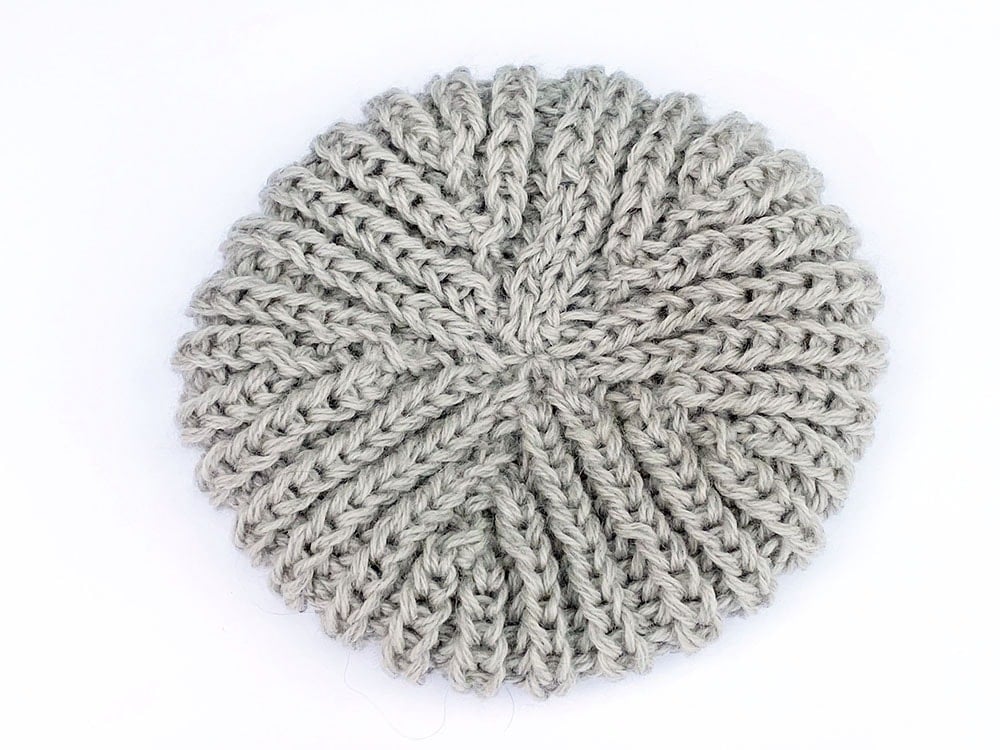
Making Up
Break yarn and thread through the rem sts, draw up tightly, and fasten off securely.
Using a flat seam like the mattress stitch seam up the hat and weave in any loose ends.


Share your work with us…
I love seeing your finished projects on social media.
If you enjoyed making the free knitting pattern, I’d love to see yours on Instagram, be sure to tag me @handylittleme.
If you are on Facebook, stop over to the handylittleme Facebook group and share a photo.
You can also find me on Ravelry, Etsy, and Pinterest.
I’d love to see your work.
Happy knitting!
Hi
I am very confused on the decrease. When you say patt do you mean the the first patt on 7mm needles or the 2nd patt on 8mm needles >
When you say work 2 rows is this in patt also rows 1 & 2 ?
apologies
Mari
Hello Mari-Louise,
You are only using the 7mm (US 10.5) needles for the brim section of that hat – this is t make it a little tighter when you wear it.
When you complete the decreases, you are using the 8mm (US 11) needles.
From the part in the pattern where it says to change to those size needles, you will only use them to work the rest of the pattern.
Where it says to work 2 rows in the pattern, this means to continue in the pattern you are already working in –
Row 1 (RS): SL1K, K1, *P1B, K1* rep from * to last st, K1.
Row 2: (WS): SL1K, *P1B, K1* rep from * to end.
I hope that helps!
Louise
Thanks so much yes I did finally work it out and its perfect.
I’m new to knitting and would love to knit this beautiful hat. I’m just confused what these mean: Patt 5, Patt 4, Patt 3 etc
Hello Annie,
This means to work in the established pattern for 5 stitches, etc.
So if you have been working in 2×2 ribbing, for example, you would continue to work in rib for 5 stitches.
I hope that helps!
Louise
Hi there, I love this pattern and I really want to knit it but I just cannot get the right gauge. Even using 14ply wool and 10mm needles I still get around 12 stitches per 4 inches. I don’t think I’m a particularly tight knitter. I can usually knit to gauge with most patterns. Do you have any ideas? Do I just keep trying bigger and bigger needles? Thank you
Hello Sarah,
You can try to use 12 ply yarn with 8mm/(US 11) size needles.
14 Ply and 10 mm needles will make the hat too large I think.
Bulky yarn or two strands of worsted knit together would be better.
The gauge is 10×10 cm/4×4 inches= 9 sts/11 rows using larger needles (8 mm) in stocking stitch.
I hope that helps,
Louise
Thank you for your reply Louise. With 14ply wool and 10mm needles my stitches are still too small for the gauge, I am getting 12 stitches rather than the required 9 over 4 inches so if I tried 12ply wool and 8mm needles I would have even more stitches. I guess I just wanted to check that the gauge is definitely correct before I give up trying to make this pattern. I will maybe try again using double 12 ply or something.
I think you will have to continue to experiment with different yarn weights and needle sizes to get somewhere closer to the correct gauge.
And try it in the actual stitch pattern – not the ribbing for the brim band.
OK thank you. The pattern says to check the gauge in stocking stitch so I have been doing that. Should I use the pattern stitch to check the gauge instead?
Ok, try it with the larger needles in the stitch pattern that is used for the 8 mm/US 11 needles after the ribbing band.
Hi there. I have a question regarding this part:
Next row: Patt 5, P3tog, (Patt 9, P3tog) 4 times, Patt 5. (51sts).
Work 2 rows.
Does it mean 2 rows including the one we just completed, or two more rows?
Hello Shirin, it means work two more rows – not including the one you just worked.