Basket Weave Knit Stitch (Free Printable)
THIS ARTICLE CONTAINS AFFILIATE LINKS THAT SUPPORT HANDY LITTLE ME CONTENT AND FREE PATTERNS.The basket weave knit stitch is a beautiful and easy way to add rich texture to your knitting.
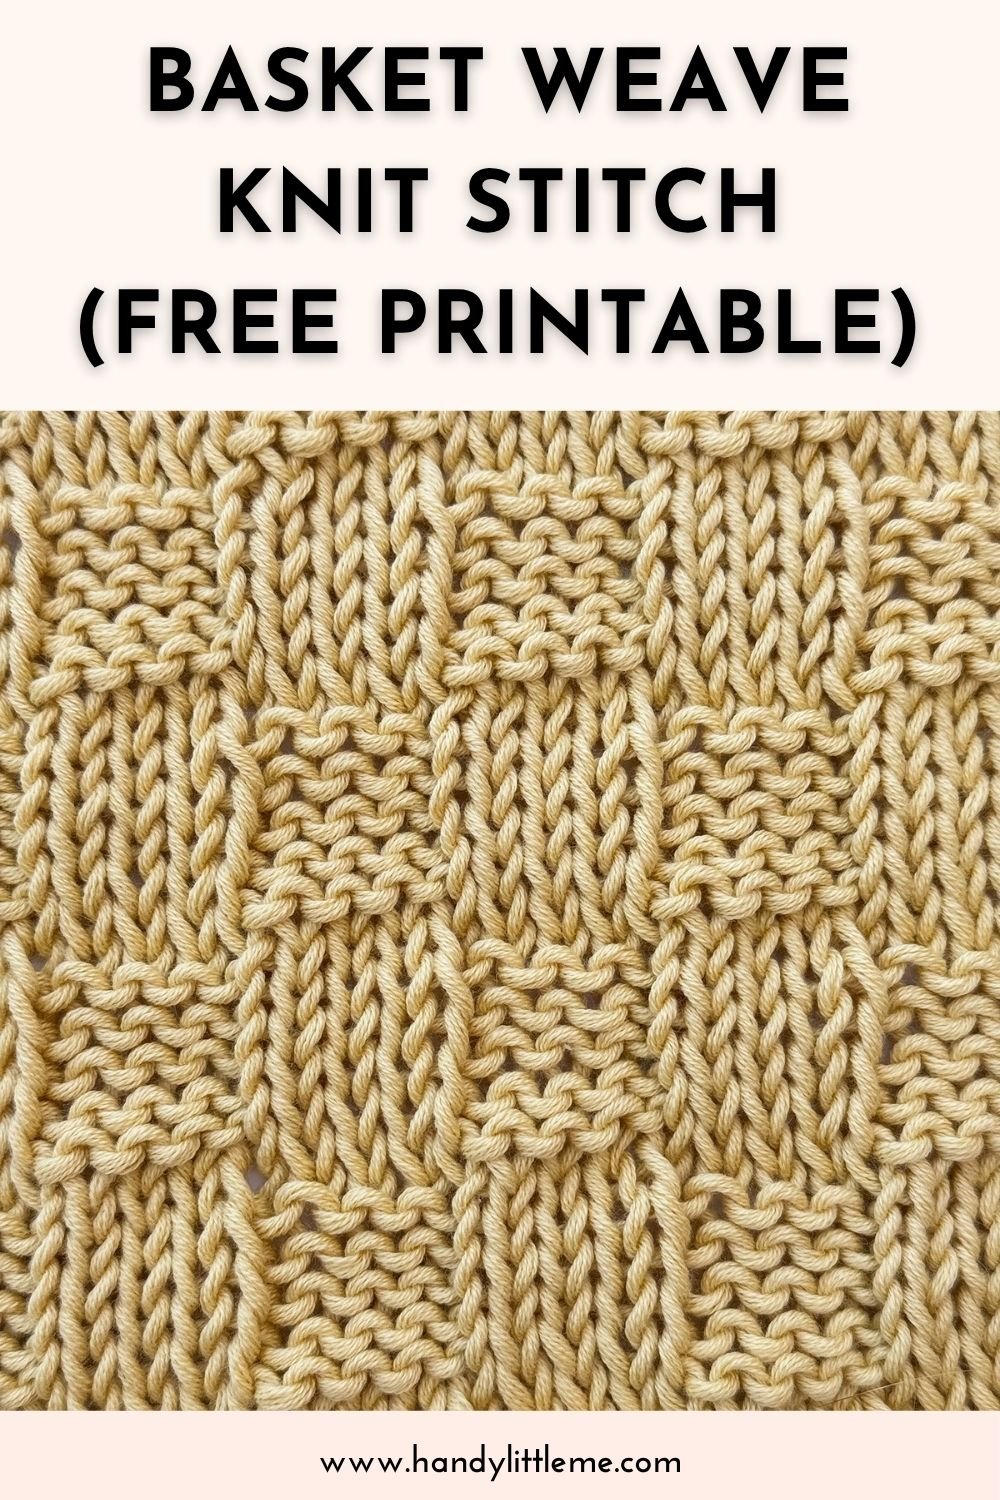
It’s perfect for beginners and creates a woven, checkerboard effect using simple combinations of knit and purl stitches.
This tutorial will walk you through the process step-by-step—including a dishcloth pattern you can use to practice the stitch.
You’ll also find a free printable pattern, a video tutorial, and plenty of helpful tips to get started.
Before You Begin
Here’s what to know before diving in:
- The basket weave stitch is created with blocks of knit and purl stitches.
- It’s easy to learn and creates a dense, textured fabric.
- You’ll practice both the knit (K) and purl (P) stitches in repeated sections.
- A dishcloth is a great beginner project—quick, practical, and satisfying!
Supplies You’ll Need
- Yarn
→ The Pima Cotton by We Are Knitters (3.5 oz / 100g / 232 yds)
→ You can also use any DK or worsted weight cotton yarn - Needles
→ US 7 (4.5 mm) or US 8 (5 mm) straight knitting needles - Notions
- Yarn/darning needle
- Scissors
- Stitch markers (x2)
- Tape measure (optional)
Stitch Abbreviations + Tips
Written in US knitting terms
- CO – Cast on
- K – Knit
- P – Purl
- PM – Place Marker
- SM – Slip Marker
- St(s) – Stitch(es)
- Rep – Repeat
- RS – Right Side
- WS – Wrong Side
Tip: Using stitch markers makes it easier to manage the side garter borders and keep track of the basket weave pattern sections.

Step-by-Step Pattern Instructions
➤ Cast On
Cast on a multiple of 8 + 6 stitches.
For a dishcloth, cast on 46 stitches (40 + 6).
➤ Garter Border Setup
These rows prevent the edges from curling.
- Row 1 (RS): Knit all stitches
- Row 2 (WS): Knit all stitches
- Repeat Rows 1 and 2 4 more times (6 rows total)
➤ Begin the Basket Weave Pattern
- Row 1 (RS): K3, PM, K to last 3 sts, PM, K3
- Rows 2–6: K3, SM, K4, P4; rep from * to marker, SM, K3
- Row 7 (RS): K3, SM, K to last 3 sts, SM, K3
- Rows 8–12: K3, SM, P4, K4; rep from * to marker, SM, K3
Repeat Rows 1–12 four times (or until approx. 9.5 inches long)
➤ Finishing the Pattern
- Knit 6 rows in garter stitch for the top border
- Bind off all stitches knitwise on a right-side row
- Weave in all loose ends with your yarn needle
- Block if desired to smooth and shape the final cloth
Finished Size + Gauge
- Finished Size: 10 in. × 10 in. (26 × 26 cm)
- Gauge: 17 sts × 24 rows = 4 in. (10 cm) in pattern
Note: Gauge isn’t critical, but tighter fabric = better scrubbing ability for dishcloths.
Tips For Success
- Keep edge stitches slightly loose to avoid inward pulling.
- Cotton yarn can shrink—wash and block before use if needed.
- Want to adjust size? Just follow the rule: cast on a multiple of 8 + 6.
What Is The Basket Weave Stitch?
The basketweave stitch mimics the appearance of woven baskets. It alternates blocks of knit and purl stitches to create a checkerboard texture with subtle 3D appeal.
It’s made by dividing your fabric into sections:
- Rows of K4, P4
- Then switch to P4, K4
This repeating structure creates beautiful texture with minimal effort.
What Can You Knit With The Basket Weave Stitch?
This stitch is a favorite for adding texture and interest to projects. Here’s what you can make with it:
- Dishcloths + washcloths
- Baby blankets + afghans
- Scarves and shawls
- Sweaters and cardigans (use it for panels or detail sections)
- Tote bags, cushion covers, and more!
The dense fabric is both beautiful and practical—perfect for home décor and accessories.
Printable Pattern + Video Tutorial
If you prefer to work from a printed pattern or just want a version you can take on the go, I’ve got you covered!
You can print the pattern below to keep it handy while you knit.
It’s a simple, easy-to-follow design that’s perfect for relaxing with a project you’ll actually use.
Basket Weave Knit Stitch

Knitting a dishcloth using the basketweave stitch is a fun and practical project, perfect for both beginners looking to practice their knitting skills and experienced knitters seeking a quick and satisfying task.
The basketweave stitch creates a textured pattern design that resembles a woven basket, which is not only attractive but also effective for scrubbing dishes.
Trying out stitch patterns in the form of dishcloths is a great way to practice your skills.
Materials
- Yarn
- 1 x ball of The Pima Cotton yarn from We Are Knitters.
- This yarn is 3.5 oz/100g/232 yds/212 m.
- You can make two dishcloths with this amount of cotton yarn.
- Or – 1 x 50g cotton yarn suitable for 4.5 mm (US 7) knitting needles or 5 mm (US 8) needles.
- Any DK/light worsted/8 ply yarn or Aran/worsted/10 ply yarn.
- I would recommend using cotton.
Tools
- Needle Size
- Knitting needles (size US 7 or 8 / 4.5mm or 5 mm (US 8) Knitting needles usually work well with medium-weight cotton yarn)
- Notions
- Darning needle/yarn needle
- Scissors
- Tape measure
- Stitch marker x 2
Instructions
Basket Weave Stitch Dishcloth Pattern
This woven look stitch pattern is created using an even number of stitches.
Cast On
Begin by casting on a multiple of 8 stitches plus 6 extra stitches. For a standard-size dishcloth, casting on 46 stitches works well (40 + 6 = 46).
Setup Rows
Row 1 (Right Side): Knit all stitches.
Row 2 (Wrong Side): Knit all stitches.
These two rows create a garter stitch border, which helps prevent the edges from curling.
Repeat rows 1 and 2 a further 4 times (6 rows in garter stitch in total).
Basketweave Pattern
Row 1 (RS): K3, PM, K to the last 3 sts, PM, K3.
Rows 2 – 6: K3, SM, *K4, P4; rep from * to marker, SM, K3.
Row 7: K3, SM, K to the last 3 sts, SM, K3.
Rows 8 – 12: K3, SM, *P4, K4; rep from * to marker, SM, K3.
Repeat the Pattern
Repeat rows 1-12 four times (slipping the markers as you work) until the piece measures around 24 cm/9.5 inches from the cast-on edge.
Finishing Rows
Knit 6 rows to create a garter stitch border at the top.
Bind Off
Bind off/cast off all stitches knitwise on the right side. This ensures a neat edge.
Weaving in Ends
You can use a yarn needle to weave in any loose ends securely.
Block your work if necessary.
Tips:
- Be sure to keep your edge stitches somewhat loose to prevent the sides from pulling inwards.
- Wash your dishcloth before first use, as cotton can sometimes shrink or change texture.
Notes
Size Information
Finished size – 26 x 26 cm/10 x 10 inches.
Gauge – 17 sts x 24 rows = 4 × 4 inches/10 x 10 cm in the pattern.
Gauge is not critical for this project, but aiming for a denser fabric will enhance the scrubbing ability of the dishcloth.
Knitting Abbreviations
- CO – Cast on
- Cont – Continue
- K – Knit
- P – Purl
- PM – Place a marker
- SM – Slip marker
- St(s) – Stitch(es)
- Rep – Repeat
- RS – Right side
- WS – Wrong side
More Knitting Lessons
If you’re just getting started, visit my Knitting Lessons page to learn:
- How to cast on
- How to bind off
- How to knit, purl, and combine stitches
- Knitting stitch patterns
- Fixing common mistakes
- US vs UK knitting terms
Visit Knitting Lessons (With Video Tutorials)
Explore Free Beginner Knitting Patterns
Yarn Weight Guide + Conversion Chart
Yarn Fiber Guide – Learn About Materials
Share Your Project!
I love seeing what you make!
If you knit this pattern, tag me on Instagram @handylittleme or use the hashtag #handylittleme for a chance to be featured.
You can also join the Handy Little Me Facebook Group to share your finished projects, ask questions, and connect with fellow makers.
Happy Knitting!