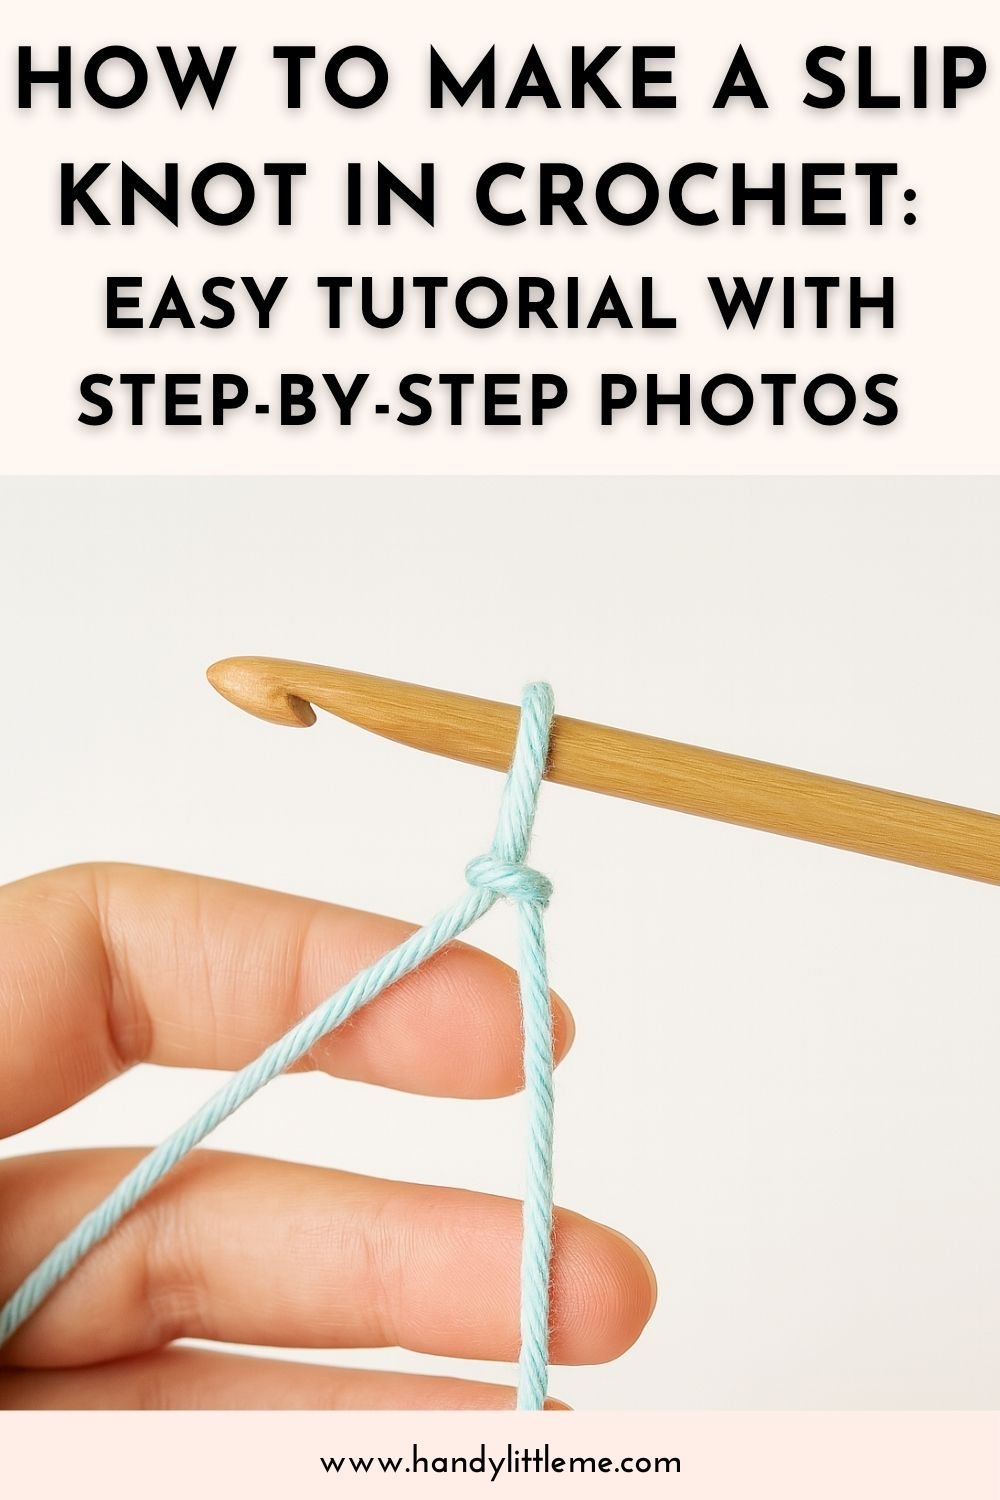
How to Make a Slip Knot in Crochet: Easy Tutorial With Step-by-Step Photos
THIS ARTICLE CONTAINS AFFILIATE LINKS THAT SUPPORT HANDY LITTLE ME CONTENT AND FREE PATTERNS.A slip knot is the first loop you’ll make in nearly every crochet (and knitting) project.
It’s quick to learn, easy to adjust, and forms the foundation for your starting chain.
It’s a fundamental technique you will use in your crochet journey.
This tutorial will walk you through two beginner-friendly ways to make the perfect slip knot, with and without a hook, plus FAQs and tips to get it right every time.
Before You Get Started
Here are a few things to know before making your first slip knot:
Don’t pull too tight! You’ll need the loop to move freely on your hook when you begin chaining.
Choose a soft, smooth yarn in a light color so you can see your stitches easily.
Use a medium or large crochet hook (5mm / US H-8 or larger) to start.
The yarn tail is the end not attached to the ball.
You’ll use it to make your slip knot.
Tools + Materials
Optional: Stitch markers, tape measure, or a pattern that begins with a chain
Yarn: Any practice yarn like worsted weight, cotton, or acrylic
Hook: Size 5mm (US H-8) or larger
Method 1: How to Make a Slip Knot Using a Crochet Hook
This is the most common method for crocheters and a great place to start.
After a little consistent practice, it will become muscle memory.
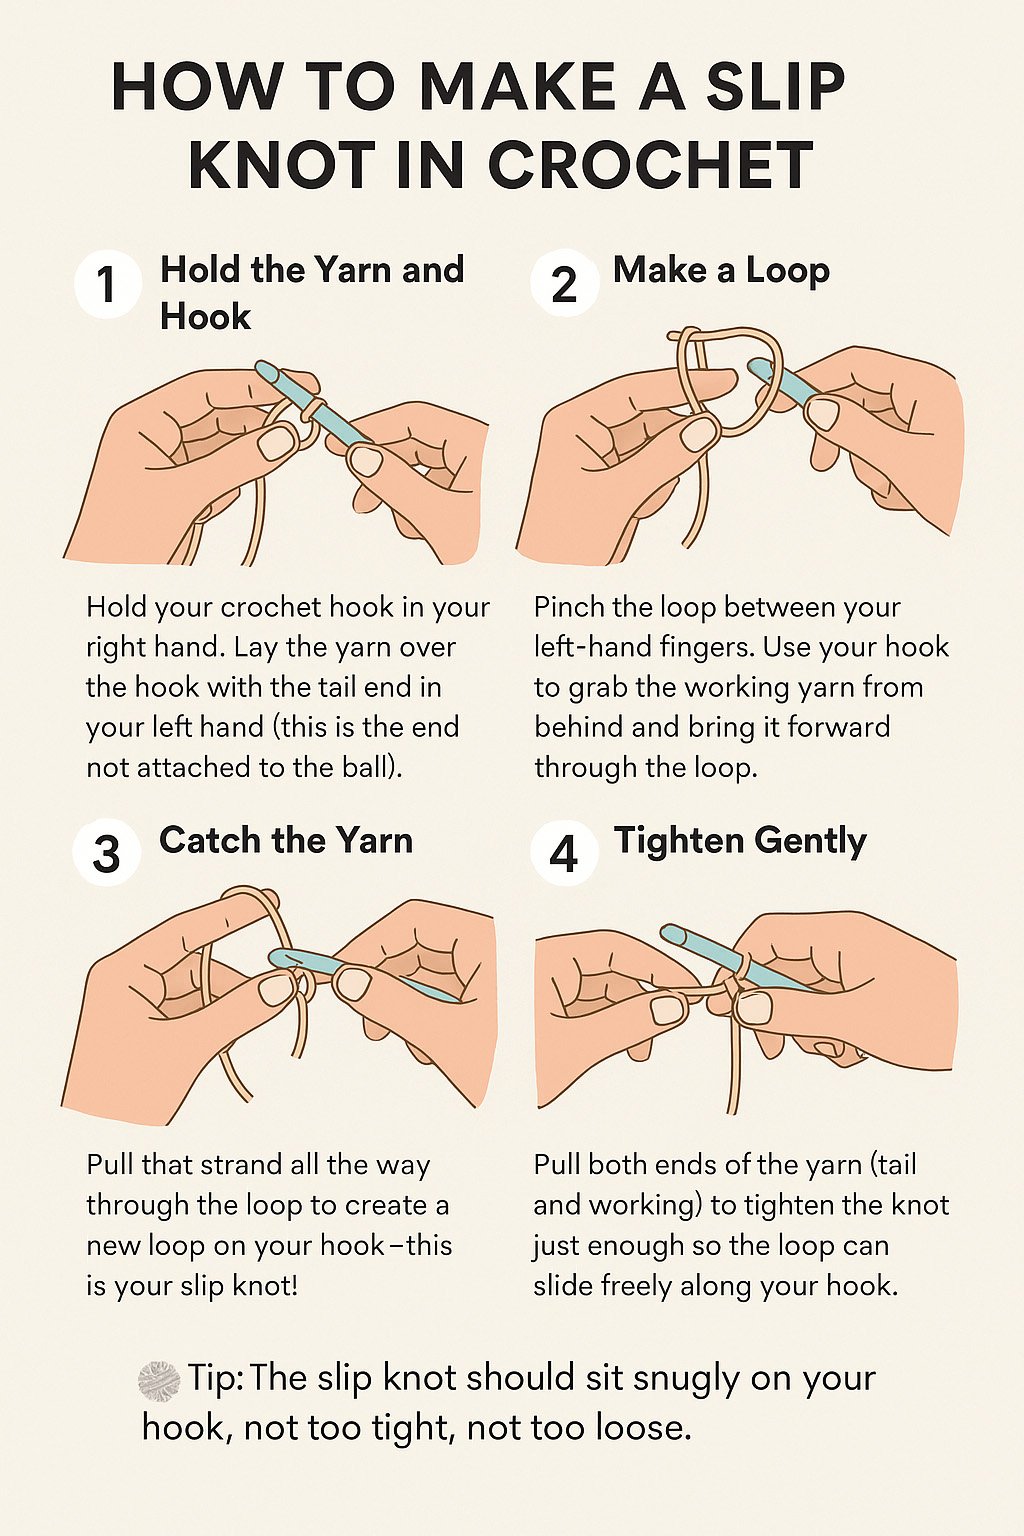
1. Hold the Yarn and Hook
Hold your crochet hook in your right hand. Lay the yarn over the hook with the tail end in your left hand (this is the end not attached to the ball).
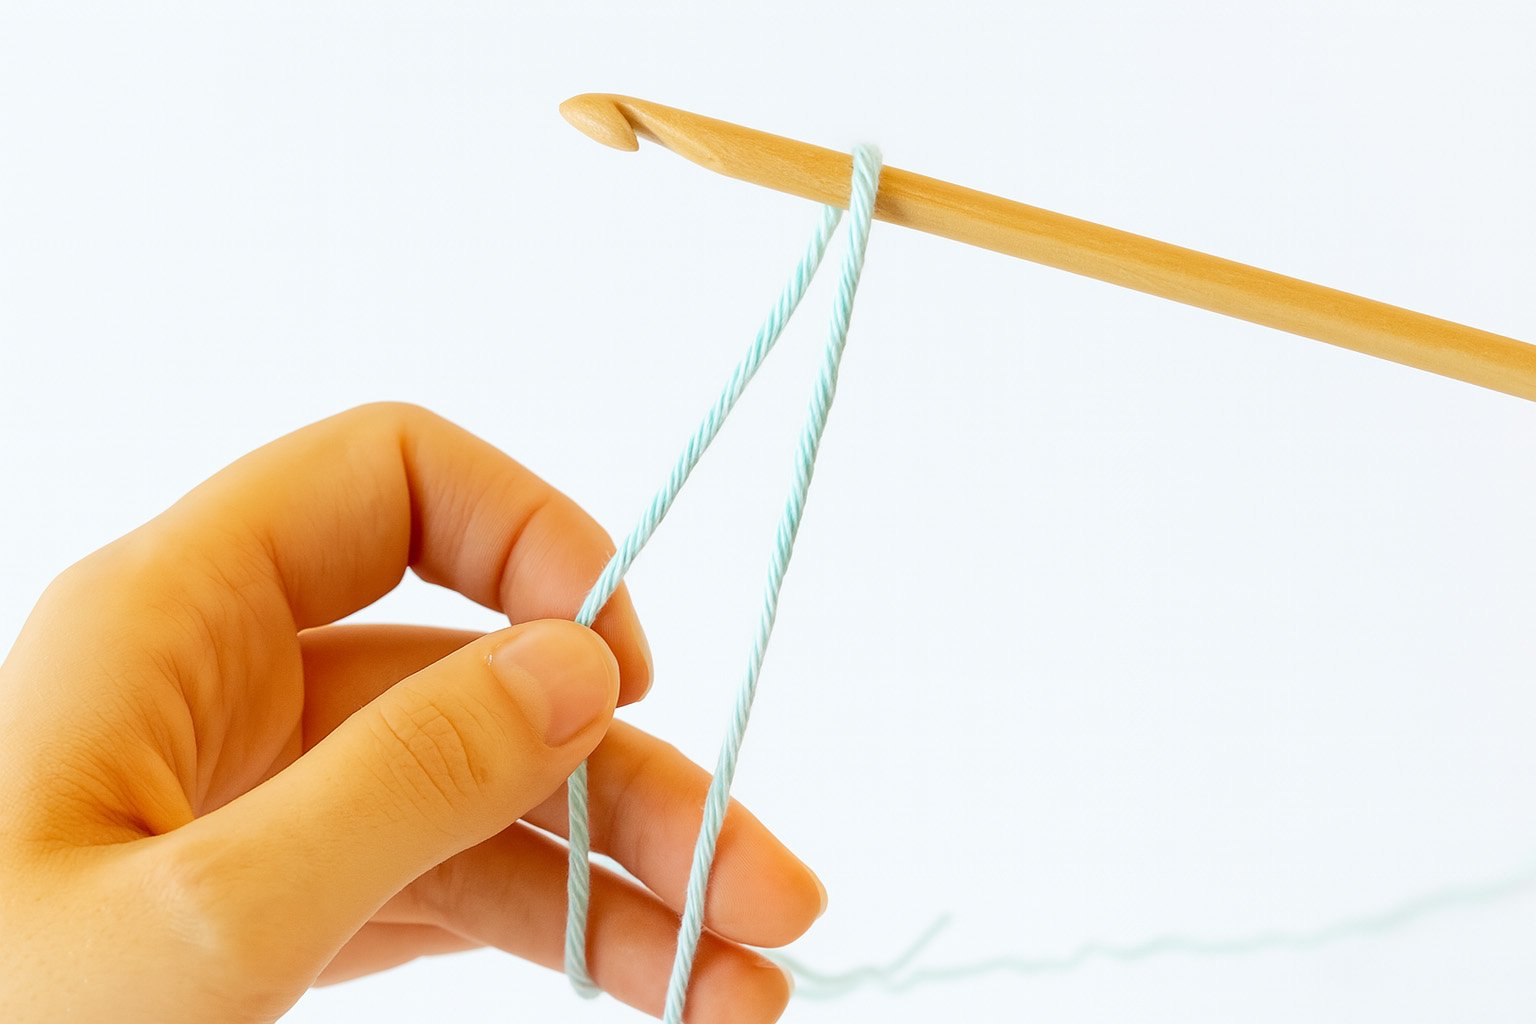
2. Make a Loop
Twist the yarn into a loop so that the tail end crosses over the working yarn (the strand going to the ball).

3. Catch the Yarn
Pinch the loop between your left-hand fingers. Use your hook to grab the working yarn from behind and bring it forward through the loop.
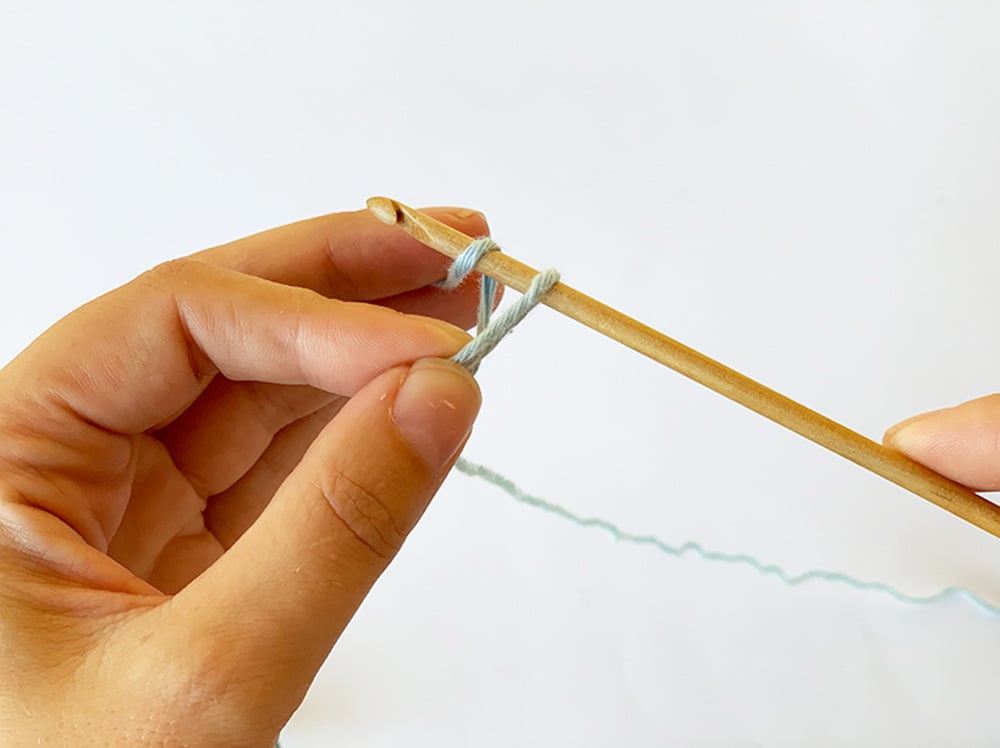
4. Pull Through
Pull that strand all the way through the loop to create a new loop on your hook—this is your slip knot!
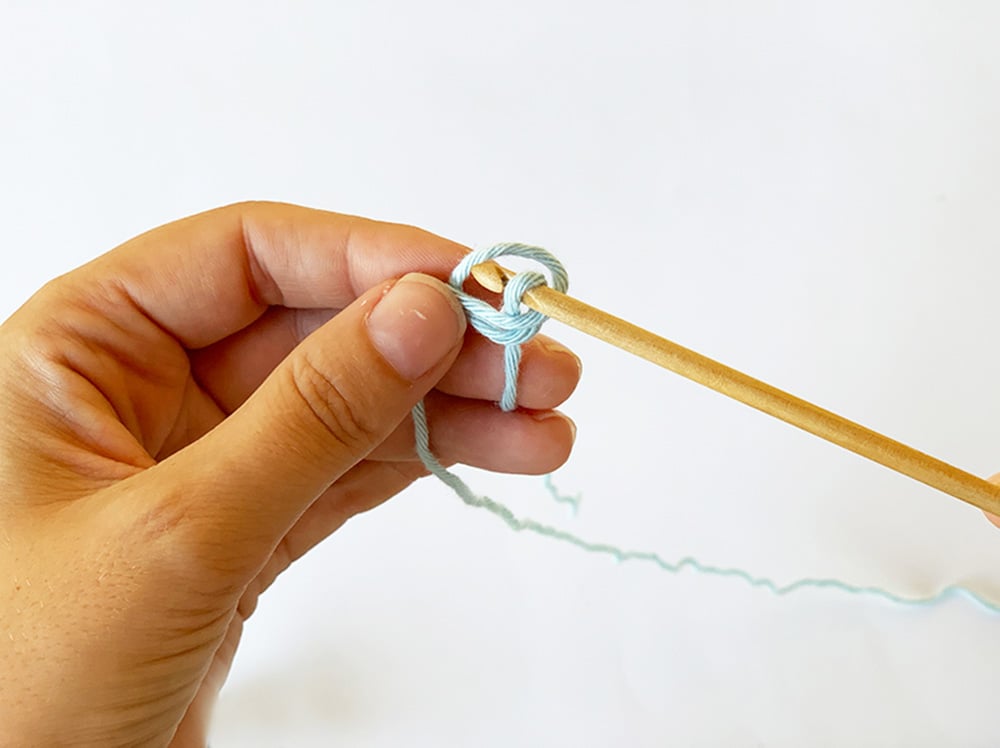
5. Tighten Gently
Pull both ends of the yarn (tail and working) to tighten the knot just enough so the loop can slide freely along your hook.
🧶 Tip: The slip knot should sit snugly on your hook, not too tight, not too loose.

Method 2: How to Make a Slip Knot Using Just Your Fingers
Prefer to use your hands?
This easy method is perfect if you’re not ready to pick up the hook just yet.
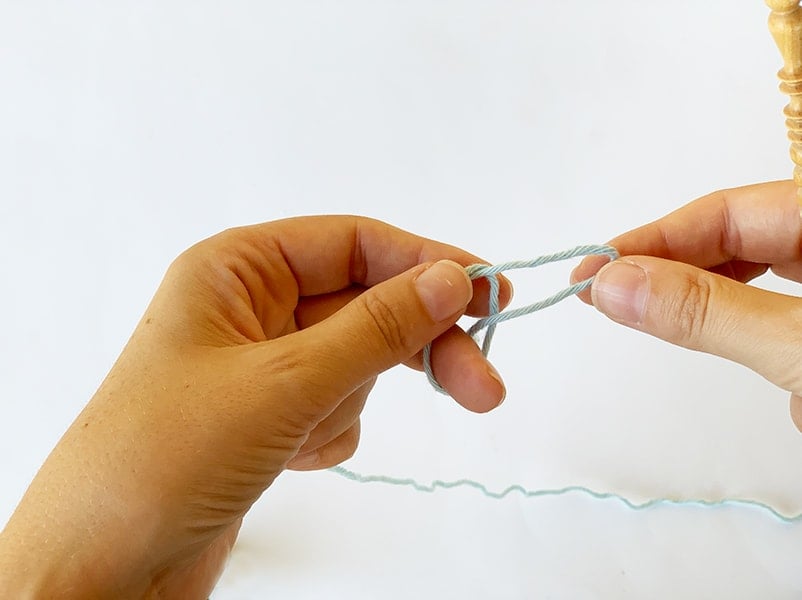
1. Wrap Yarn Around Your Fingers
Wrap the yarn around your left middle finger, with the end attached to the yarn ball being held in your hand and the free tail end loosely hanging over your index finger.

2. Pull Through
Using your right hand, grab the tail end and pull it through the loop created on your fingers.
3. Tighten the Knot
You should now have a loose slip knot on your hook.
To tighten this up a little bit, you can pull gently on both ends.
Don’t make it too tight, as you will need to continue to work with this to make a crochet chain (also known as a foundation chain).
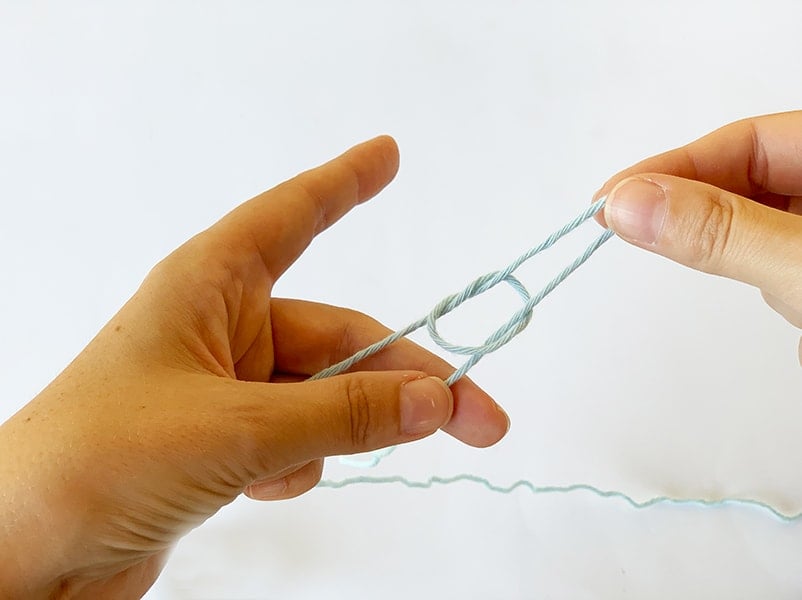
4. Place the Loop on the Hook
Slip the new loop onto your crochet hook and gently pull both ends to adjust.
🧶 Tip: This method is fast, portable, and great for making a slip knot without tools.

FAQs + Extra Tips
➤ Do you need a slip knot in knitting projects?
Yes! Knitting patterns also use a slip knot as a starting point.
It forms the first loop on your knitting needle before casting on additional stitches.
Find step-by-step instructions on how to knit here – How To Knit – A Complete Beginner’s Guide
➤ What is a sliding knot, and is it used in crochet?
This technique is used for many different purposes, but it’s most commonly used in jewelry-making and decorative crafts where you need an adjustable closure or tension, such as in bracelets, necklaces, or drawstring bags.
In crochet, it’s sometimes used in accessories (like drawstrings), but not for creating fabric.
Don’t confuse it with the magic ring, which is used in amigurumi to start crocheting in the round.
➤ What is the strongest slip knot?
The standard slip knot is the best for crochet—it’s a secure and adjustable loop that won’t slip loose during stitching.
It’s also easy to undo if needed.
This knot is favored for its strength, security, and ease of adjustment, making it ideal for starting chains or attaching yarn to a hook.
Want to Keep Crocheting?
Once your slip knot is secure, you’re ready to start your chain stitches.
Here are some beginner-friendly tutorials to help you keep going:
- How to Start a Crochet Chain (Beginner Guide)
- How to Single Crochet (SC)
- How to Crochet for Beginners: Step-by-Step Guide
- Yarn Weight Guide (+ Yarn Conversion Chart)
- Crochet Hook Sizes Chart (A Free Conversion Guide)
You can also find us on all social media, Instagram, TikTok, and our Facebook Group for more tutorials, support, and inspiration.
Popular Crochet Patterns to Try Next
To continue your crafting, check out these free patterns.