How To Knit An I-Cord: 4 Easy Methods + Tips
THIS ARTICLE CONTAINS AFFILIATE LINKS THAT SUPPORT HANDY LITTLE ME CONTENT AND FREE PATTERNS.If you’ve ever wanted to add neat cord edging, strong drawstrings, flexible ties, purse straps, or decorative loops to your knitting patterns, learning how to make an i-cord is a must.
This simple technique uses only a few stitches and works up quickly on double-pointed or circular needles.
In this guide, you’ll learn what an i-cord is, who invented it, different methods for making one, how many stitches you need, and tutorials on how to knit one.
I-Cord Tutorials
Ready to learn how to knit an I-cord? Explore the tutorials below for 4 easy methods, with tips for a neat finish.
Happy Knitting!
How to Knit an I-Cord by Tin Can Knits
This friendly, beginner-focused tutorial walks you through knitting a classic i-cord using simple steps and clear photos.
Tin Can Knits explains the technique in a straightforward way that helps you understand exactly what’s happening as you slide the stitches and form the tube.
If you want an easy, welcoming introduction backed by clean visuals, this is an excellent starting point.

How to Knit an I-Cord for Beginners by Nimble Needles
This detailed guide breaks down the I-cord technique with crisp, close-up photography and thoughtful notes on tension, needle choice, and common mistakes.
The tutorial explains not just how to make an I-cord, but why the sliding method creates a perfectly rounded tube.
It’s ideal for visual learners who appreciate precision and thorough explanations.
I-Cord Tutorial by Purl Soho
Purl Soho offers a beautifully photographed, minimalist tutorial that teaches the basic i-cord method with calm, easy-to-follow instructions.
The clean layout and clear step progression make the technique feel simple and approachable, even for beginners.
If you love polished visuals and a straightforward teaching style, this tutorial is a lovely resource.
I-Cord Edge Tutorial by Elizabeth Smith Knits
This tutorial shows you how to work an i-cord edge, adding a smooth, rounded finish along the sides of your knitting.
With step-by-step instructions and helpful guiding notes, Elizabeth Smith makes the technique accessible even if it’s your first time trying applied edging.
It’s a great choice if you want to transform your project edges with a tidy, professional look.

How to Knit an Attached I-Cord by Wool & Beyond
Wool & Beyond demonstrates how to attach an i-cord directly to your work, creating a seamless decorative or functional trim.
The tutorial includes clear process photos and practical advice for maintaining even tension as you connect the cord edge.
If you’re looking to elevate your finishing techniques with a clean, integrated i-cord, this guide is a strong pick.
I-Cord Bind Off Tutorial by Andrea Rangel
This tutorial teaches the i-cord bind off with a step-by-step approach that breaks the technique into manageable, easy-to-understand motions.
Andrea Rangel highlights key details like yarn management and the rhythm of binding off while forming the cord simultaneously.
It’s an excellent resource for knitters who want a polished, rounded edge on shawls, blankets, and garments.
What Is An I-Cord?
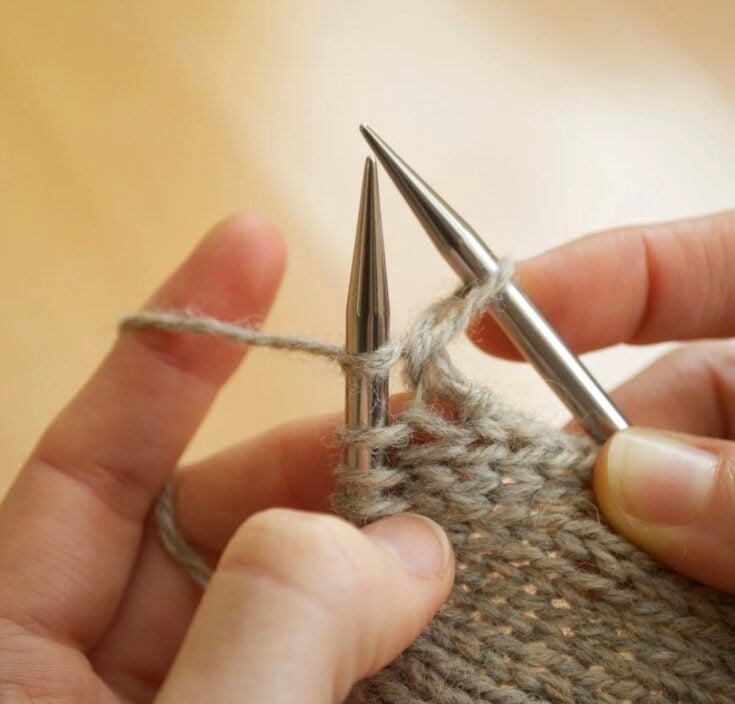
An I-cord is a knitted tube created by working a small number of stitches—usually 2–5—without turning the work.
Instead, you slide your live stitches to the end of the needle and knit them again, pulling the working yarn across the back of the work to create the tube.
Because the yarn travels across the back on every row, the cord naturally forms a smooth, rounded, sturdy tube.
Elizabeth Zimmermann and the invention of the i-cord
The legendary knitting teacher Elizabeth Zimmermann coined the term “I-cord” and popularized this method in her books and TV series.
While knitted cords existed long before, Zimmermann streamlined the modern approach and gave the technique its iconic name.
What is I-cord knitting used for?
I-cords are wonderfully versatile and pop up in countless knitting patterns.
They’re commonly used for:
- Drawstrings
- Ties for hats, baby booties, and cardigans
- Purse straps
- Button loops
- Bag handles
- Decorative embellishments
- Applied edging or I-cord edge
- Flexible piping
- Loops for hanging items
- Finishing techniques like the I-cord bind off
Holiday Uses For I-Cords
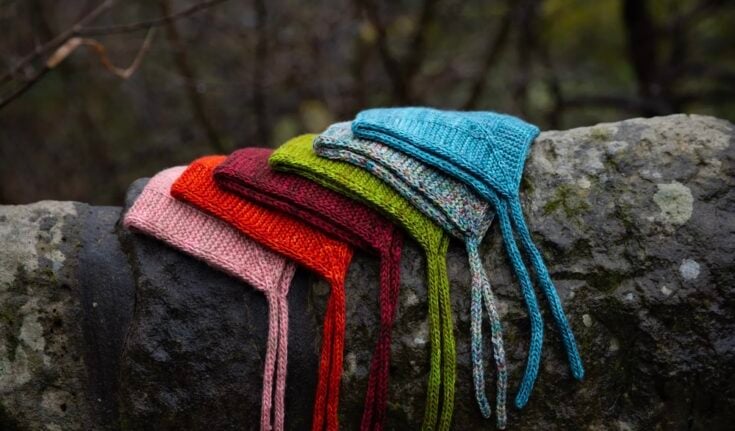
I-cords make perfect ornament hangers
If you knit holiday ornaments—like mini hats, stockings, baubles, stars, or hearts—an i-cord makes an ideal hanger because it’s sturdy, flexible, and blends seamlessly with handmade projects.
It looks far more intentional than ribbon or string, can be customized to any length, and matches perfectly when you use the same yarn or color theme as the ornament itself.
To make one, simply knit a 2–3 stitch I-cord, form a loop, and attach it with a tapestry needle.
This creates a strong, neat hanger that works especially well for knitted stockings and tree decorations.
Candy-cane striped I-cords
For festive flair, you can knit candy-cane striped I-cords using two contrasting colors.
By alternating colors every row (or every few rows) and sliding the stitches back to the left needle each time, the color changes naturally spiral around the tube, creating a classic candy-cane effect.
These striped cords are perfect for stocking loops, garland-style ties, ornament hangers, decorative edging, or even for knitting the candy-cane decorations themselves.
It’s a simple, charming way to add a touch of holiday magic to your handmade pieces.
Festive Makes
Are There Different Methods To Knit An I-Cord?
Yes!
While the classic method uses DPNs, there are multiple ways to knit an I-cord depending on your tools and preference.
Here are the most common techniques:
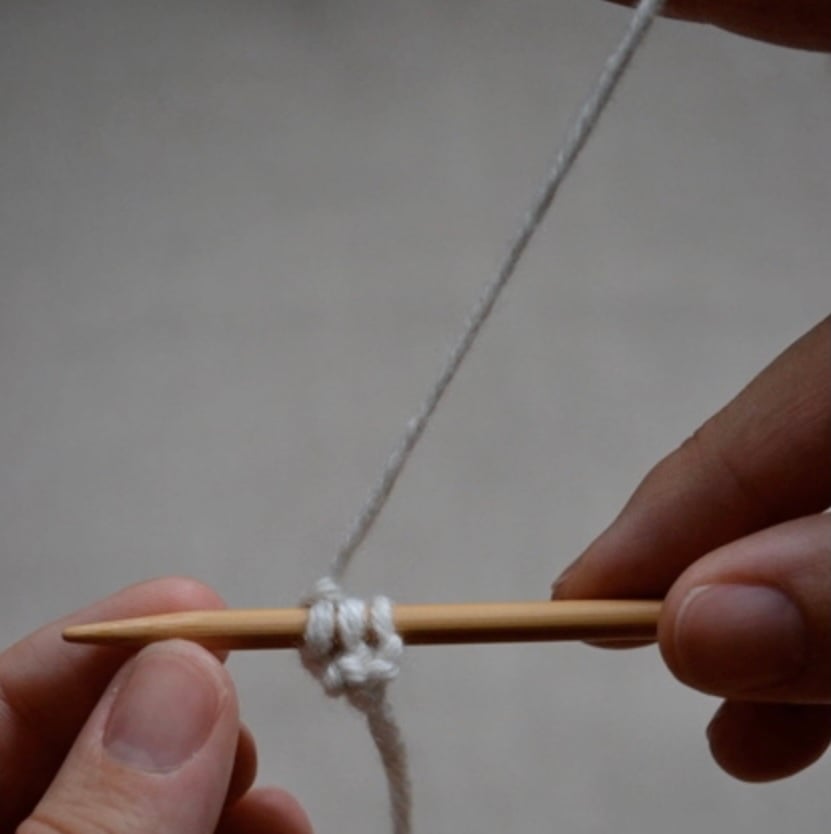
1. Classic i-cord on double-pointed needles (DPNs)
This is the traditional method:
- Cast on 3–4 stitches onto a DPN.
- Knit the stitches.
- Slide them to the other end without turning.
- Knit again, pulling the yarn firmly across the back.
A great trick is to tug the working yarn slightly on each slide to keep the tube snug.
2. I-cord on a circular needle
If you don’t have DPNs, a circular needle works too.
The cable simply acts like an extended needle.
3. I-cord on straight needles (flat I-cord)
Works well for short cords.
The slipped yarn at the back naturally forms a tube.
4. Applied I-cord (attached as you knit)
Perfect for decorative edges and borders.
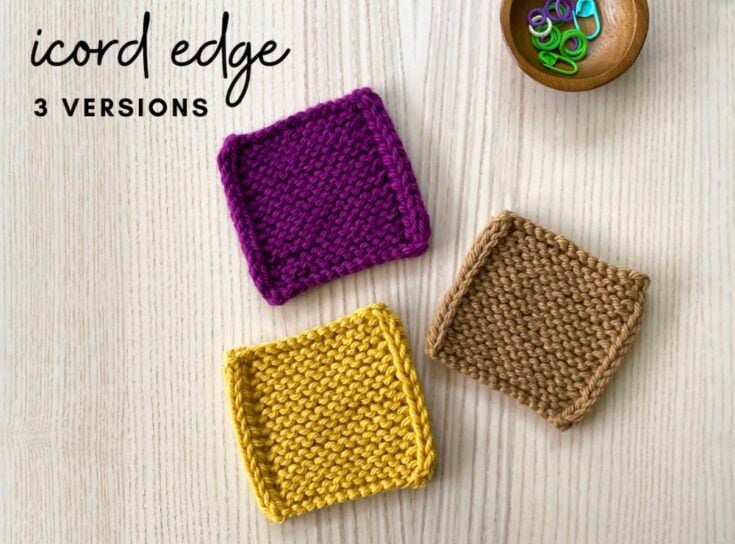
5. I-cord edging
Instead of finishing an edge, this is worked as part of the fabric itself.
Slip the first 2–3 stitches of every row, and they form a natural cord edge.
6. I-cord bind-off
Creates a smooth, rounded trim.
Check out more bind-off methods here. – Cast Off Knitting Methods
7. Loom, French knitter, or I-cord machine
Excellent for long cords or quick projects.
FAQs About I-Cords
1. How many stitches should an I-cord have?
The number of stitches you will need for an I cord depends on the thickness you want.
Usually 3 stitches, but 2–5 stitches are common.
2. What is an I-cord bind off used for?
An I-cord bind off creates a clean, rounded border on:
It’s worked while binding off your live stitches.
Learn how to cast off here. – How To Bind Off Knitting For Total Beginners (Cast Off)
3. Can you knit an I-cord with two stitches?
Yes, a 2-stitch I-cord creates a delicate, thin cord great for ties, loops, and ornament hangers.
4. Can you work an I-cord on circular needles?
Yes. You use circular needles the same way as DPNs
5. Is the I-cord a stitch pattern?
An I-cord is not considered a stitch pattern—it’s a technique.
Instead of creating a flat, repeating fabric, an I-cord forms a small knitted tube by working a few stitches in a specific way.
So while it uses basic knit stitches, an I-cord functions as a construction method, not a traditional stitch pattern.
Related post: 41 Different Knitting Stitches For All Skill Levels
6. Can you make an I-cord with any yarn weight?
Yes, I-cords work with every yarn weight.
Whether you’re using lace, fingering, DK, worsted, chunky, or jumbo yarn, the i-cord technique stays exactly the same. The only things that change are: the look of the knit cord, the number of stitches, and the knitting needles.
Learn more about yarn weights here. – Yarn Weight Guide (+ Yarn Conversion Chart)
7. Can you crochet an I-cord?
Yes, you can crochet an I-cord, and the result is very similar to a knitted I-cord, a sturdy, rounded cord that’s perfect for ties, straps, loops, and edging.
The most common method uses a very small number of stitches (usually 2 or 3) and works them in a way that mimics the structure of a knitted tube.
Learn how to crochet the I-cord in this pattern. – Swimsuit Cover Up Crochet Pattern (Atlantis)
8. Is an I-cord the same as a knitted tube?
Yes, but with a twist.
An i-cord is a knitted tube, but it’s created in a very specific way: you work a very small number of stitches, you don’t turn your work, and instead of flipping your knitting, you slide the stitches back to the left needle after each row.
This simple but clever construction is what forms the cord into a tidy, rounded tube without needing to knit in the round.
Knitting Lessons
If you are new to the craft and need help with the knitting basics, or want more tips and tricks, check out these helpful tutorials: Knitting Lessons (With Video Tutorials).
You can also check out this step-by-step guide on how to knit for beginners. – How To Knit – A Complete Beginner’s Guide
If you need more video tutorials, check out my YouTube channel here. – Handy Little Me – YouTube.
For extra help and to connect with more makers from the crafting community, check out the Handylittleme Facebook group.
If you also love to crochet, check out easy patterns here. – Free Crochet Patterns
You can also find us on social media, Ravelry, Pinterest, Instagram, Twitter, Etsy, and TikTok.