How To Make Up Claire’s Blue Cardigan (Tutorial)
THIS ARTICLE CONTAINS AFFILIATE LINKS THAT SUPPORT HANDY LITTLE ME CONTENT AND FREE PATTERNS.The How to makeup Claire’s blue cardigan tutorial will help you to stitch your raglan cardigan together easily.
When you are ready to make up your blue cardigan, you may need some help putting it all together.
This tutorial will show you step by step how to fit all of your cardigan pieces together and in which order to seam.
Please note that before seaming, you may wish to block all of the pieces.
You can see a tutorial on how to do this here – Blocking Knits – How To Block Knitting Guide

Mattress Stitch
To seam the pieces together, I used the mattress stitch.
This is my preferred way of seaming because you get a nice finished hidden seam that looks neat.
You can see how to seam using this stitch in the tutorial here – Mattress Stitch – How To Seam Knitting

Sewing Up Knitting
Sewing up your knitting may seem like a big deal, and it can be, but once you get into it and start off right, then you will have your finished garment ready to wear.
Seaming does take a while, and sometimes, you will need to pull things out to seam again to get them into the right place.
This is all part of the process!

Resources and Tutorials
The following resources and tutorials may help you:
- Blocking Knits – How To Block Knitting Guide
- Mattress Stitch – How To Seam Knitting
- Outlander Claire’s Blue Cardigan Knitting Pattern
- How To Knit A Pocket
- How To Knit A Buttonhole

How To Make Up The Blue Cardigan

Use this step by step tutorial to help you to make up your knitted raglan cardigan.
Materials
- Finished raglan cardigan pieces.
Tools
- Darning needle
- Scissors
- Pins
- Tape measure
Instructions
- When seaming use the mattress stitch or a flat stitch. Seam the left front sleeve seam to the sleeve edge - matching up the markers. The right sides should be facing you. Pin the sides together if you need to - this can help to keep everything in place as you seam.

- Sew The Other Sleeve Seam To The Back Piece. Match up the markers. The right sides of both pieces will be facing you and be seamed together.
- Seam the shoulder sections - placing the 6 shoulder cast off sts to the 6 rows of raglan sleeve top - matching the markers.
 You will now see that your left front sleeve seam, sleeve seams and back sleeve seam are all joined.
 - Now you need to join the sleeve seams on the other side. Start with the back piece and the sleeve. Seam the sleeve seam to the back piece sleeve seam with the right sides facing you.
- Now you need to join the sleeve seam to the right front. Seam the sleeve seam to the right front sleeve seam with the right sides facing you. Now you will see that all of the sleeve seams (the raglans) have been seamed.

- Seam the neck extensions to the cardigan along the neckline. Then seam the ends of the neck extensions together. You can see how they will look when joined and stitched into place here:
- Seam the sleeve seams and side seams. Use the ends left to start your seaming and remove any markers as you work.
- Catch down the pocket linings and pocket tops. Start with the pocket linings and secure the edges into place. To stitch the pocket down, you can whipstitch one stitch at the edge of the pocket where you can see a purl bump. Then you can continue to do that on every purl stitch bump on every other row. You can do that on all of the three pocket edges you can see on the wrong side.
 With a simple stitch catch the side edges of the pocket tops to secure them into place.
 - Sew on the buttons, using the markers to guide you and measuring again to check they are where you want them to go. Remove the markers as you work. Once you have finished with the buttons, weave in all loose ends.


 You will now see that your left front sleeve seam, sleeve seams and back sleeve seam are all joined.
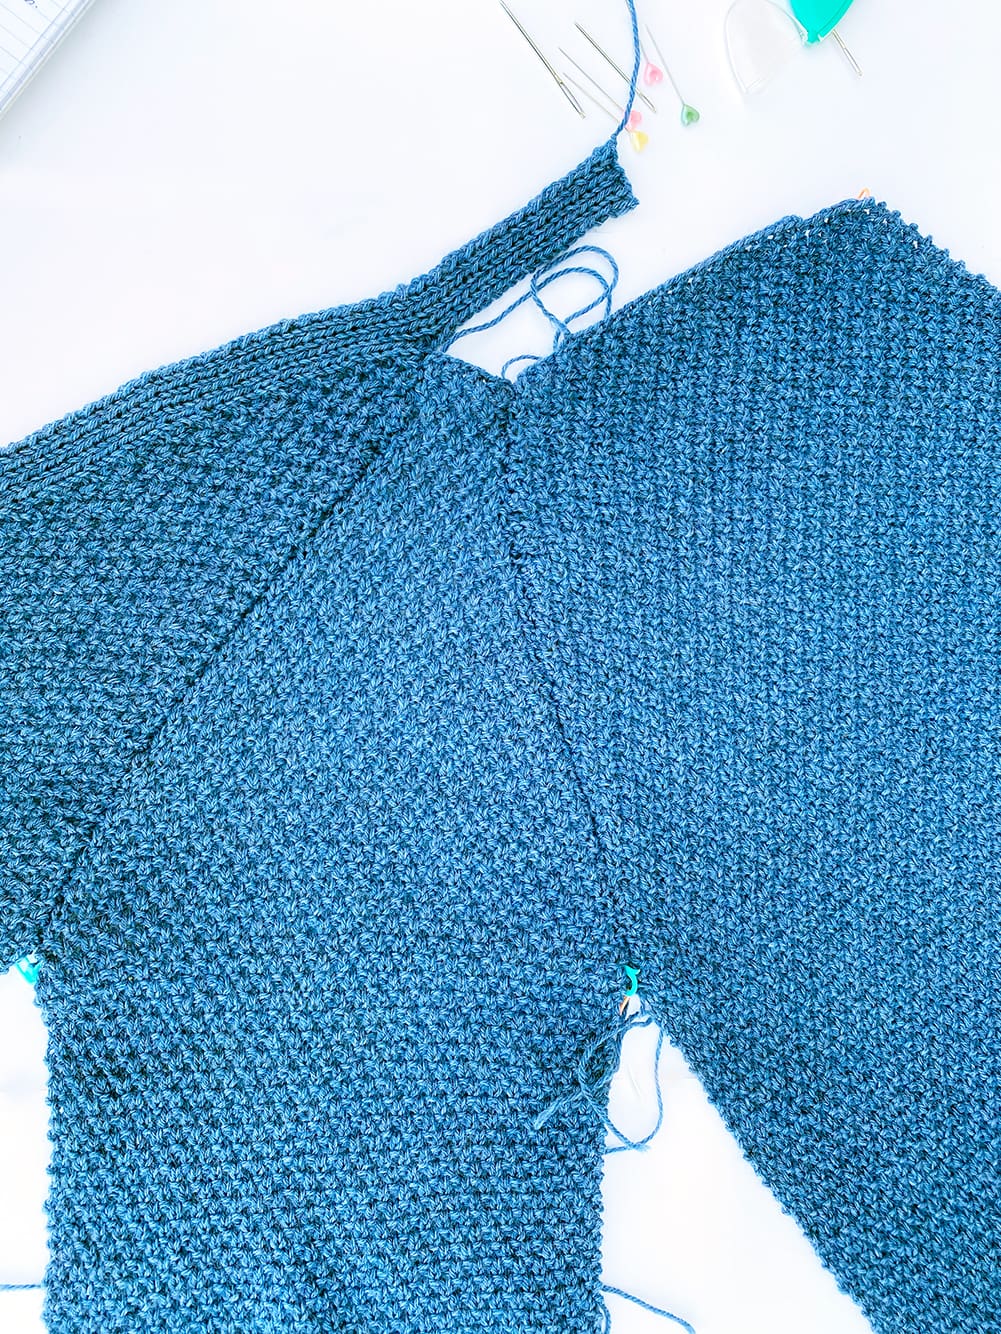

 Now you will see that all of the sleeve seams (the raglans) have been seamed.
  You can see how they will look when joined and stitched into place here:
 Use the ends left to start your seaming and remove any markers as you work.
 With a simple stitch catch the side edges of the pocket tops to secure them into place.

I hope you have enjoyed this tutorial and that it has helped you to learn more about seaming up a finished raglan cardigan.