Easy Top-Down Crescent Shawl Knitting Pattern
THIS ARTICLE CONTAINS AFFILIATE LINKS THAT SUPPORT HANDY LITTLE ME CONTENT AND FREE PATTERNS.In this post, you will see an easy top-down crescent shawl knitting pattern.
The simple construction and details allow this design to be worn with many outfits for fall.
The full pattern is free below, or you can purchase the ad-free printable PDF here.

What Is A Crescent Shawl?
Crescent shawls are very popular and can be made using a few different construction methods.
There are three ways to create a crescent shape: from side to side, with short rows, or from the top down.
Crescent shawls are very popular and a nice shape to try out once you have completed a triangle shawl.

A Basic Top-Down Crescent Shawl
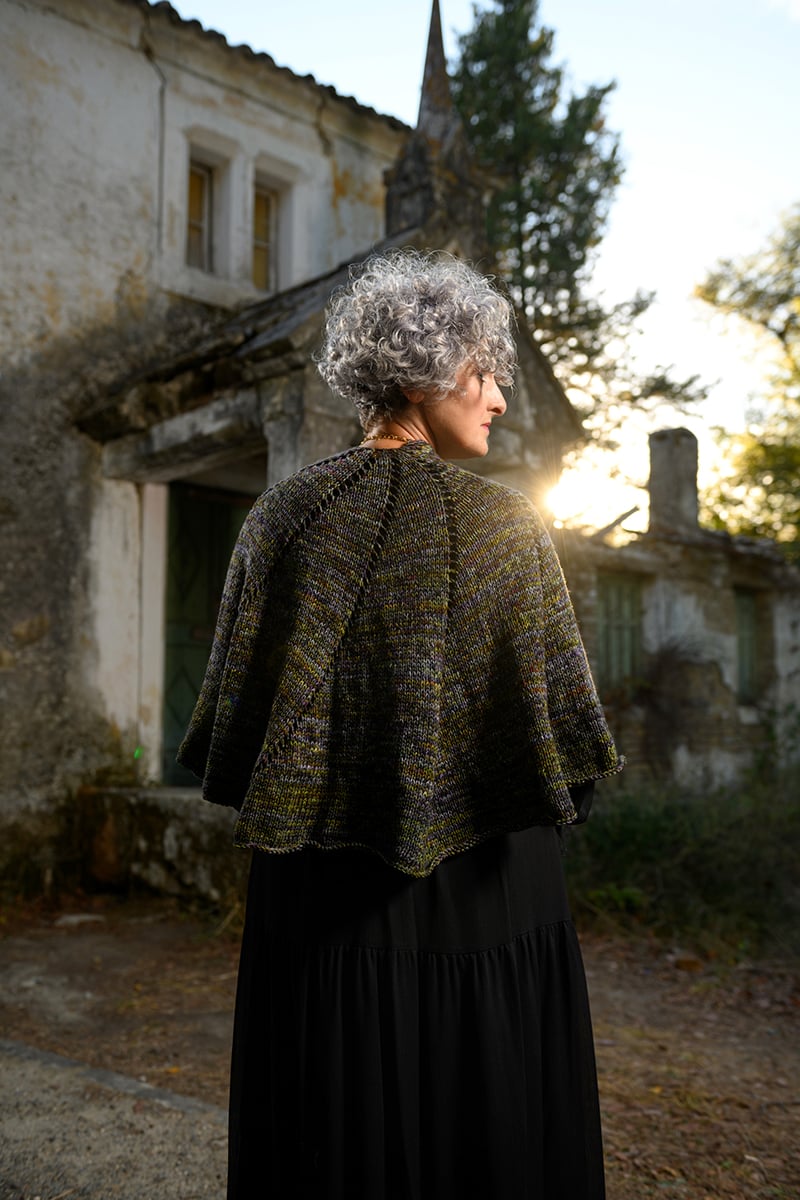
This type of shawl typically forms a half-circle or crescent shape that rests beautifully on the shoulders.
Working with a top-down approach also allows you to experiment with stitch patterns and textures as you go, making each shawl unique.
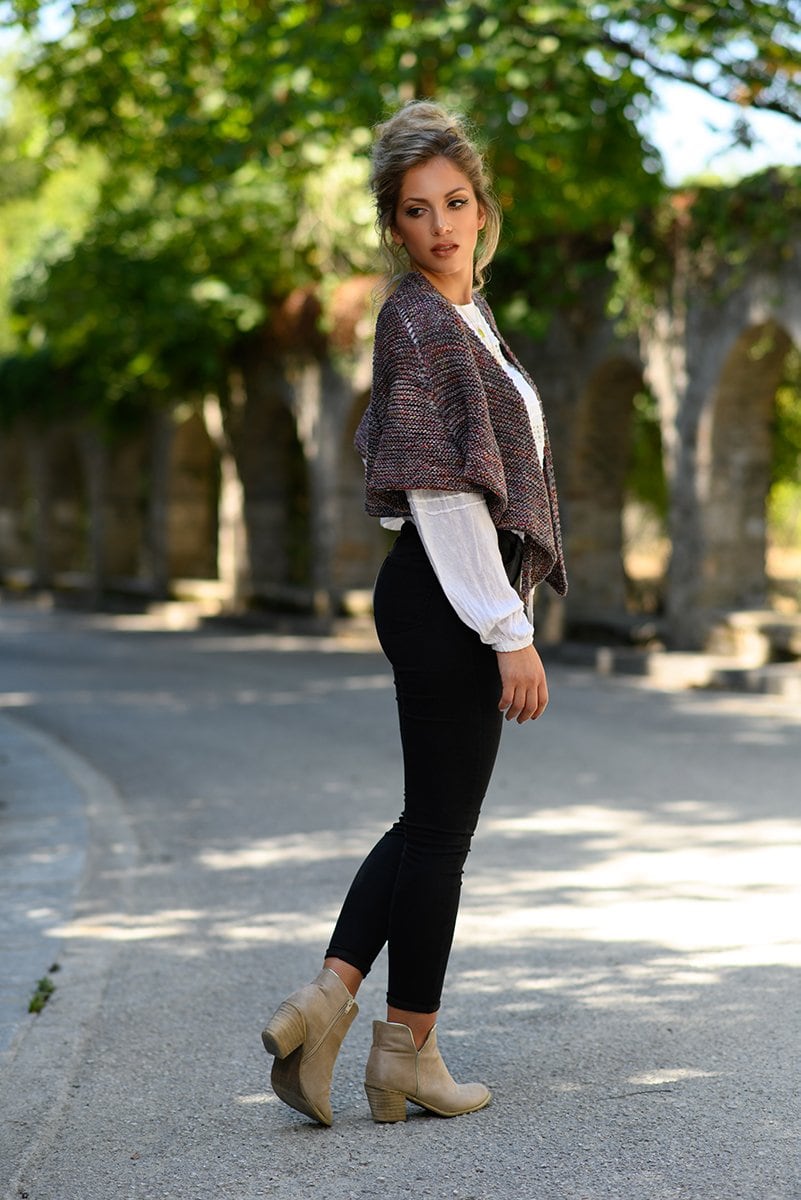
Since this is a nice crescent-shaped shawl, it pairs well with all kinds of outfits and is a delight to knit.
You can easily adjust the size and style based on your stitch count, ranging from a lightweight summer wrap to a cozy winter shawl.
The stitch pattern used in this design
This shawl is knit in garter stitch with repeated rows of yarn overs that create holes in the knitted fabric.
The shawl is knit from one end to the other and requires a lot of concentration to get those yarn-overs in a straight line!
This shawl needed 3 x skeins of Martin’s Lab Yarn – Comfy Merino/color Inferno.

Helpful resources
This shawl pattern is great for any advanced beginner knitters.
- Knitting cast-on methods
- Knitting Lessons
- How to Knit – A Complete Beginner’s Guide
- How to cast on knitting
- How to cast off knitting for total beginners (step by step)
- How to knit garter stitch
- How to knit the purl stitch (for beginners + a video tutorial)
- How to knit stockinette stitch (for beginners)
- How to read knitting patterns for beginners
- Knitting abbreviations and terms (US and UK)
- How to knit rib stitch patterns (1×1 and 2×2 ribbing)
- You can also see this tutorial on how to knit with two strands of yarn together.
- How to yarn over.

Easy Top Down Crescent Shawl Knitting Pattern
Notes
Skill Level – Easy (advanced beginner)
Top-down shawls are a wonderful type of shawl for beginners and seasoned knitters alike, offering a straightforward construction with endless possibilities for customization.
Starting from the top edge, you increase the stitch count as you work toward the bottom edge, gradually shaping the shawl into its final crescent shape.
One of the first things to consider before diving in is creating a gauge swatch, especially if you’re using a specific yarn like Cascade Yarns or Martin’s Lab Yarns (beautiful yarn colors).
This helps ensure your finished shawl will match your desired size and drape, setting you up for success with this very easy project.
There are various ways to add personality to your shawl, whether you’re looking to make it a little wrap for chilly evenings or extend it to different lengths for a more dramatic effect.
- This shawl is a crescent shawl knit from the top down.
- Crescent shawls are half-moon-shaped shawls that are worn draped around the shoulders or worn as a capelet.
- This beautiful shawl has a lovely drape when worn, thanks to its shaping and the yarn used.
Copyright Info
- Please do not copy, sell, redistribute, or republish this pattern.
- If you wish to share this pattern, please provide a link to the pattern page only.
- You may sell items produced using this pattern.
- Do NOT use copyrighted photos for your product listing.
- For the copyright T&C, please read my Terms of Use.
Size Information
Length tip to tip (wingspan) = 56 inches/142 cm.
Width at the widest point = 15 inches/38 cm.
Gauge – 16 sts/28 rows in 4 inches/10 cm in garter stitch.
A note on sizing…
This shawl can easily be adjusted to any size – you are repeating 2 rows until you reach your desired size.
Obviously, if you want to make the shawl larger, more yarn is required.
The model in the photographs is small, and this shawl is S/M size.

The Supplies You Need
Yarn
- 3 x 100g skeins of Martin’s Lab Yarn – Comfy Merino/color Inferno.
- 100% Superwash Merino.
- 437 yards/400 meters per skein of yarn.
- This is a fingering yarn weight.
- This yarn was knit with two strands together.
- Substitute with any yarn suitable for the needle size listed.
Needles
- 6 mm (US 10) 40″ circular needles.
- I used my interchangeable circular needles on a 100cm/40″ cable.
- I did not join in the round to knit the shawl.
- The shawl is worked back and forth on the needles – knit flat.
- The circular needle and cable were used to accommodate the number of stitches.
Notions
- Scissors
- Darning needle
- Tape measure.
- Stitch markers x 10
- Closed stitch marker x 1

Abbreviations
- CO – Cast on
- Cont – Continue
- K – Knit
- PM – Place marker
- SM – Slip marker
- St(s) – Stitch(es)
- Rep – Repeat
- RS – Right side
- WS – Wrong side
- YO – Yarn over
Print + Stitch
Purchase the ad-free PDF pattern
Want a clean, printable version of this pattern? You can purchase the ad-free PDF in my shop. It’s perfect for printing, saving to your device, and making without distractions.
Crescent Shawl Pattern Instructions
Worked flat knitting back and forth on two needles:
- CO 15 sts.
- Row 1 (RS): K3, (PM, YO, K1) x 4, PM, K1, (PM, K1, YO) x 4, PM, K3.
- Row 2 (WS): K to the end of the row, slipping markers.
- Row 3: K3, (SM, YO, K to marker) x 4, SM, K1, (SM, K to marker, YO) x 4, SM, K3.
- Row 4: K to the end of the row, slipping markers.
Rep rows 3 and 4 until you get your desired size.
Cast off.
Weave in all loose ends.
TIP – Place a closed stitch marker on the right side of the work so that you always know which side to do the yarn overs.

Finishing and blocking
You may wish to block your shawl; you can do that as follows:
- Make sure all ends are woven in using a tapestry needle or method of choice.
- Gently block by filling a sink or water basin with lukewarm water, and add a small amount of rinse-less wool wash.
- Place the items in the water and gently massage out any air bubbles.
- Drain water, gently squeezing out any excess from the item, then roll in a towel and stomp on the towel roll to remove any remaining water.
- Lay the item out on a towel to approx. finished wingspan measurements and allowed to dry completely.
- If you wish to learn more about blocking, you can do so here – Blocking Knits – How To Block Knitting Guide
Try A Circle Shawl Next?
Congratulations on finishing your crescent shawl!
With its graceful shape and elegant drape, a crescent shawl is a wonderful achievement and a staple piece for any knitter’s wardrobe.
Now that you’ve mastered the crescent shape, you might be ready to explore the world of circular shawls, which offer a whole new way to play with texture, lace, and structure.
The challenge is unique yet rewarding, allowing you to delve into new techniques such as shaping in the round, center-out increases, and perhaps even more complex lacework.
Hellebore Circle Shawl Knitting Pattern
You may also like…
You may also like these triangle shawls, which are a favorite shape for beginner and more advanced knitters.
- Triangular Shawl Knitting Pattern
- Love Triangle Shawl Knitting Pattern
- Diana Asymmetrical Shawl Knitting Pattern
- Knitted Triangle Shawl Pattern (Ms.M)
- Shades Of Water Shawl Knitting Pattern
- 37 Free Shawl Knitting Patterns To Make For Fall
- Scrap Yarn Shawl Knitting Pattern
- How To Knit An Easy Triangle Scarf
- Mabon Asymmetrical Shawl Knitting Pattern
Share Your Make
I love seeing your finished projects on social media.
If you enjoyed making the crescent shawl, I’d love to see yours on Instagram, tag me @handylittleme.
If you are on Facebook, visit the Handylittleme Facebook group, and share a photo.
I’d love to see your work.
Happy Knitting!
Beautiful!, I want to make it! Can I just use a 4 weight yarn?
Hello Terrie,
Yes, you can use a 4 weight yarn with one strand.
I used two strands together and it was still very light.
I hope that helps!
Louise
Thank you for sharing this pattern. I am anxious to make it. I am in the process of a move. But I will send photo when done.
Hello Judith,
I hope you enjoy the pattern!
Louise
I am going to enjoy this,thank you for sharing
Hello Loraine, I hope you enjoy the pattern 🙂
I am interested knitting for myself. Have question. I have 3-7 oz. 200 gm. 392 yd of #3 -50% cotton 50% polyester blend. Lion Brand Comfy Cotton Blend. Requires # 7 needles. Color CHAI LATTE. ( ecru, pink linen black )
This cape would be good for me as I am 4′ 10″ woman. Asking you, what would you think about working up this beautiful shawl using this blend?
Cakes were given to me. I would be honored for reply. I love your creativity and do knit and crochet smaller items for gifts.
Hello Wendy,
It’s a good idea to make a gauge swatch with your size 7 needles to ensure your stitches per inch match the pattern’s requirements, which will help your project come out the correct size.
I hope that helps!
Louise
This crescent shawl is the most beautiful piece I have ever done! The pattern is clear and gives you every instruction you need. The drape is elegant and flattering and I WILL make another. I am SO proud of what we did here. I felt like you were over my shoulder, gently guiding me through.
Hi Ellen, Oh my goodness—this made my day! 🥹💛
Thank you so much for the beautiful feedback. I’m thrilled the instructions felt clear and that the drape worked out so elegantly for you—and I LOVE that you’re planning another!
If you’re happy to share, I’d love to see your shawl—feel free to tag @handylittleme or use #handylittleme so I can cheer you on.
Also, let me know which yarn you used; I’m always curious what fibers give that perfect swoosh.
So proud of what you made—well done! 🧶✨
Louise
What does PM mean ?
Hello Kelly, it means ‘place marker’.
I would like to use a DK weight yarn for this but I am struggling to figure out if a 4.5mm needle is ok or if the 5mm is better? I tried to use the 5mm but it seemed to have too much drape for my taste but with the 4.5mm I am thinking I might have to stop doing increases at some point and was wondering if I just stop doing increases will it still drape and hold shape like the one you did? DK weight yarn is all I have to spare for this pattern.
Hi! Yes, you can use DK weight yarn for this shawl. If the 5mm needles feel too drapey, I’d go with the 4.5mm needles, especially if you prefer a little more structure.
You can stop the increase rows earlier if needed — the shawl will just be a bit smaller, but it should still hold its crescent shape. Just keep measuring as you go and make sure to leave enough yarn for the cast off. Blocking will also help the shawl relax into shape.
Happy knitting!
Louise
Is there a video tutorial to go with this pattern? I’m trying to get better at reading patterns, but I’m much better when there are tutorials to go along with it.
Hi Leigh,
I don’t have a video tutorial for this pattern at the moment, but I do plan on adding one in the future.
I completely understand — tutorials can be so helpful when you’re getting more confident with reading patterns.
I hope the written instructions are still useful, and I’ll keep this in mind for future updates.
Happy knitting,
Louise