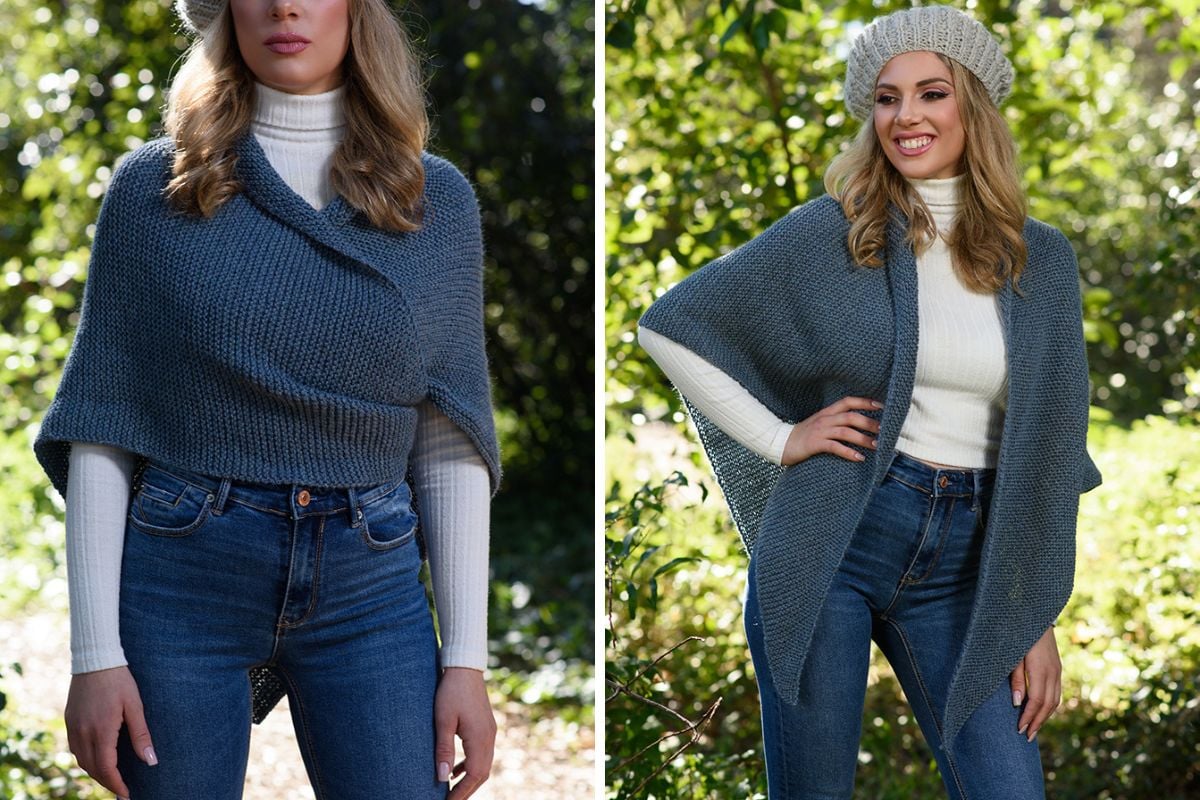
Triangular Shawl Knitting Pattern (Claire’s Strength)
THIS ARTICLE CONTAINS AFFILIATE LINKS THAT SUPPORT HANDY LITTLE ME CONTENT AND FREE PATTERNS.In this post, you will see a triangular shawl knitting pattern.
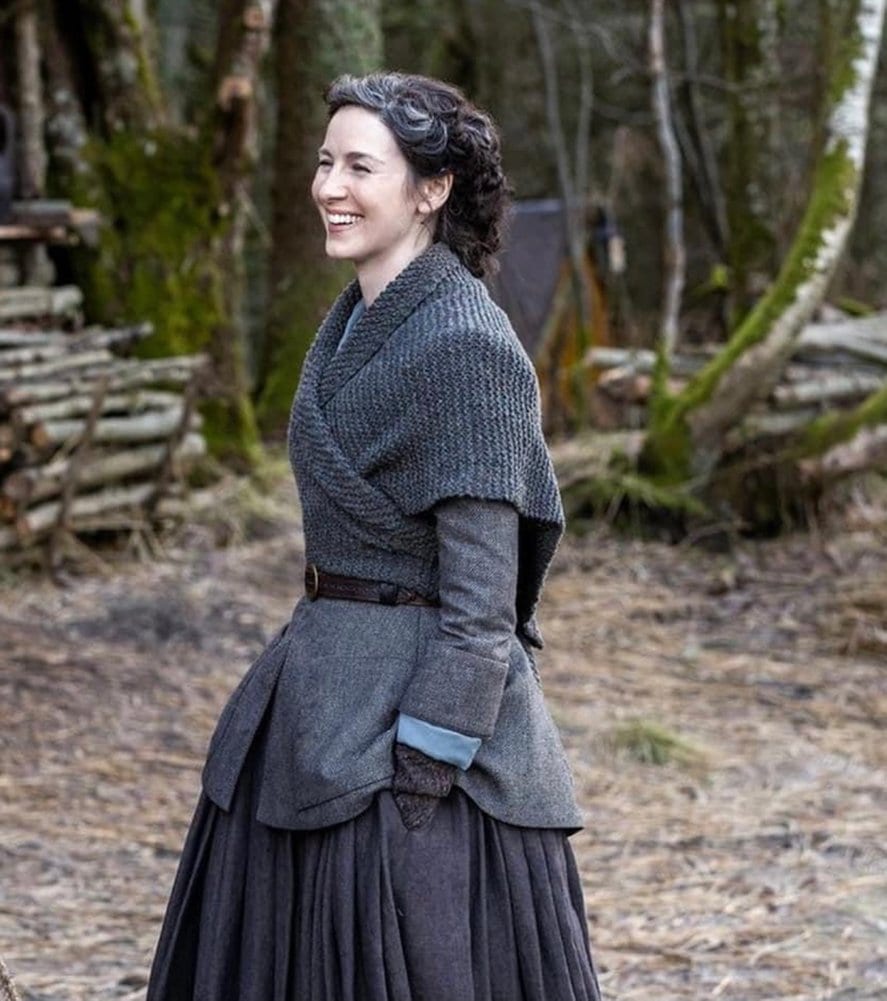
Inspired by the crossover Sontag shawl Claire wears in Outlander Season 6, this simple shawl is knit entirely in garter stitch.
It’s beginner‑friendly, grows quickly with kfb (knit front and back) increases, and can be made in three sizes, or knit until it fits you.
The full pattern is free below, or you can purchase the ad-free printable PDF here.
Before You Get Started
A few helpful notes for beginners and returning knitters:
- Choose a smooth, mid‑tone yarn so you can easily see your stitches.
- You’ll end up with a lot of stitches on the needle near the end—use a 40″/100cm circular to hold them comfortably (you’ll knit flat, not in the round).
- Place a stitch marker on the right edge to remind you where increases happen.
- This pattern uses kfb (knit front and back) on right‑side rows only. There are no body decreases.

Tools/Materials Needed
Yarn
- Cascade 220 in the colour 8836 x 4 (S) x 6 (M) x 8 (L)
- Each skein is – 100g/3.5 oz/220 yards/200 meters.
- Yarn weight – Aran/Worsted/10 Ply.
Needles
- 5mm (US 8) circular knitting needles / 40″/100cm cable.
- I used my interchangeable circular needles on a 40″/100cm cable as there were many stitches.
- I did not join in the round to knit.
Notions
- Scissors
- Tape measure
- Darning needle

Skill Level & Gauge
Skill Level: Basic / beginners
Gauge: 16 sts & 30 rows = 10×10 cm / 4×4 in in garter stitch (after blocking)
Gauge is not critical for this simple shawl, but it affects yardage and finished size.
Sizes / Measurements
You can knit until it feels comfortable—try on as you go before binding off.
- Small: Width tip‑to‑tip ~ 70 in / 178 cm; Depth top‑to‑point ~ 35 in / 89 cm
Model wears Small using 4 skeins. - Medium: Continue knitting to a larger wingspan; plan 6+ skeins.
- Large: Continue further; plan 8+ skeins.

Abbreviations
Knitting Abbreviations And Terms (US And UK)
- Beg – beginning
- Cont – continue
- K – knit
- KFB – knit into the front and back of a stitch (increase)
- Rep – repeat
- RS – Right side
- WS – Wrong side
Print + Stitch
Purchase the ad-free PDF pattern
Want a clean, printable version of this pattern? You can purchase the ad-free PDF in my shop. It’s perfect for printing, saving to your device, and making without distractions.

Step-By-Step Pattern Instructions
This triangle shawl grows by increasing on the right‑side (RS) rows only.
There is no center stitch spine; shaping happens along one edge.
1. Cast On
CO 1 stitch.
(Optional: place a stitch marker on the right edge to indicate your increase side.)
2. Begin Shaping
- Row 1 (RS): KFB.
- Row 2 (WS): K to end.
- Row 3 (RS): KFB, then K to end.
- Row 4 (WS): K to end.
3. Establish Pattern
Repeat Rows 3–4 until you reach your target size or these approximate stitch counts:
• Small: ~285 sts
• Medium: ~385+ sts
• Large: ~485+ sts
Keep going if you want a deeper wrap; this is a flexible knit and perfect for beginners.
4. Bind Off
BO loosely in knit.
If needed, go up a needle size so the edge doesn’t pucker.
5. Finishing
Weave in ends. Block lightly to smooth out garter ridges and open the fabric.
Why this works: Increasing on one side only tips the fabric into a wide triangle—clean, graphic, and very Outlander.
Video Tutorial
Need a visual walkthrough? Watch the step‑by‑step video for a similar bulky‑yarn version on my YouTube channel.
(Great if you’re a visual learner or brand new to kfb.)

FAQs & Extra Tips
Do I ever decrease?
No, shaping is all increases (kfb).
If you knit past your ideal size, you can work 2–4 WS rows evenly or add an optional edge decrease (e.g., k2tog at the increase edge for a row or two) to fine‑tune the width.
What if I want a center stitch spine?
Add a center stitch (marked with a stitch marker) and work increases on both sides of it every RS row while also increasing at the right edge.
That yields a symmetric triangle with a decorative ridge.
This shawl has a center spine, so you can see what that looks like here: Outlander Carolina Shawl Pattern
How much yarn will I need?
See sizes above.
Because garter eats yarn and you’ll have a lot of stitches near the end, keep an extra skein handy.
Can I substitute yarns?
Absolutely, choose any worsted/aran wool or wool blend you love.
Check retailers like your LYS, Yarnspirations, or your stash.
Swatch in garter to confirm drape and gauge.
Where can I track my project?
Share your WIPs and FOs on Ravelry; it’s a great place for knitters to log yardage, notes, and photos.
What else are the models wearing?
Pair this shawl with the matching Skye Boat Knitted Beret for a full Outlander vibe.
Plus, learn more about Sontag Shawls here – The Sontag Shawl – History and Patterns
Related Patterns & Collections
View more of the Outlander Season 6 collection here…

Share Your Make
If you enjoyed making the triangular shawl, I’d love to see yours on Instagram – tag me @handylittleme or #handylittleme.
If you are on Facebook, visit the handylittleme Facebook group and share a photo.
I’d love to see your work!
Copyright Info
- Please do not copy, sell, redistribute, or republish this pattern.
- If you wish to share this pattern, link to the pattern page only.
- You may sell items produced using this pattern.
- Do NOT use the copyrighted photos for your product listing.
- For the copyright T&,C please read my Terms of Use.
Helpful resources
- How to knit – A complete beginner’s guide
- Knitting Lessons
- How to cast on knitting
- How to cast off knitting for total beginners (step by step)
- How to knit garter stitch
- How to knit the purl stitch (for beginners + a video tutorial)
- How to knit stockinette stitch (for beginners)
- How to read knitting patterns for beginners
- Knitting abbreviations and terms (US and UK)
- KFB knitting – How to make an increase


Hi. I purchased the Triangular Shawl Knitting Pattern and watched your video. Do I need to double up the yarn? There’s no mention of it in this pattern but it’s doubled up in the video? Please help I’m excited to get started on this. So beautiful.
Hello Shannon,
No you don’t have to knit with two strands together for this shawl pattern.
The video link is for a similar shawl (you can see this one here = https://www.handylittleme.com/outlander-shawl-pattern/) – it follows the same design but is knit with a different yarn weight and needle size.
It’s there to help you to start the shawl pattern if you need it.
I hope that helps,
Louise
I am currently working on two versions of this using different yarns. It is fascinating to see the difference between the two. Thank you for this amazing but simple pattern.