Crochet Pumpkin Pattern: Easy Single Crochet Ribbing
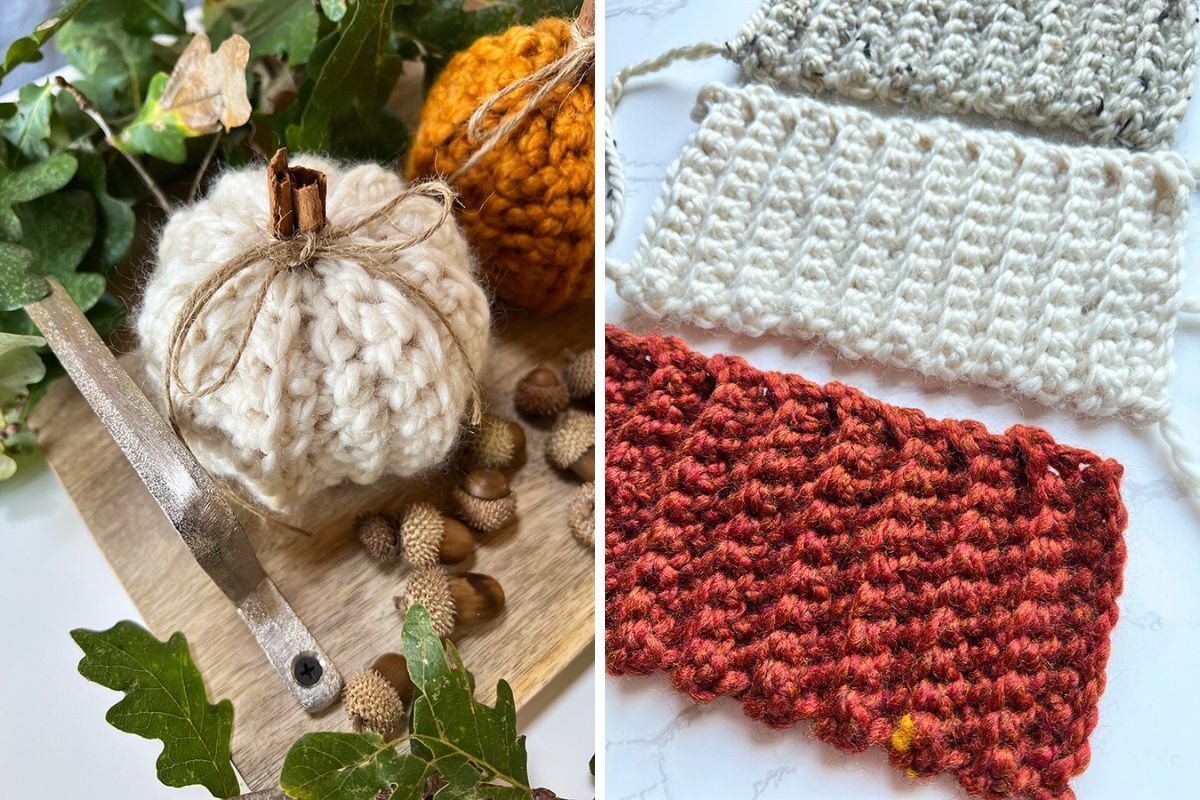
THIS ARTICLE CONTAINS AFFILIATE LINKS THAT SUPPORT HANDY LITTLE ME CONTENT AND FREE PATTERNS.This crochet pumpkin pattern uses easy single crochet ribbing to make a long rectangle, then a quick cinch, stuffing, and a cinnamon-stick stem.
It’s beginner-friendly fall fun with gorgeous texture.
Scroll down to view the free pattern, or grab your printer-friendly, ad-free PDF here.
Before You Get Started
A few quick tips to make your pumpkin perfect:
- Yarn weight: Works best with super bulky weight yarn (#6); you can also try worsted weight yarn (#4) for a small pumpkin.
- Hook size: Sample uses a 9 mm crochet hook (US M/N 13). Choose the mm crochet hook noted for your yarn.
- Tension: Avoid a tight stitch—a little ease helps your seaming and cinch.
- Tails: Leave a long tail/long strand at both ends for sewing and gathering the top of the pumpkin.
- Use a stitch marker to keep track of your repeat row count.
- Prefer visuals? See the crochet pumpkin tutorial in the video below.
- Copyright Info – Please do not copy, sell, redistribute, or republish this pattern.
Tools/Materials
Yarn
- Any super bulky weight yarn/super chunky/14-ply yarn.
- For each pumpkin, you will need around 50g.
- I used Lion Brand Wool-Ease Thick and Quick yarn in the following colors:
- Fisherman
- Wheat
- Spice
- Mustard
Hook Size
- 9 mm crochet hook (US M/N 13)
- Adjust hook size if you change yarn weight.
Notions
- Tape measure
- Tapestry needle/yarn needle
- Scissors
Other Materials
- Fiberfill/Poly-fil stuffing
- Cinnamon sticks (for the stems)
- Twine
- Hot glue gun
- Optional felt or yarn leaf

Size & Gauge
- Finished rectangle: ~5″ (H) × 8″ (W)
- Finished pumpkin: ~13″ circumference × 6″ height
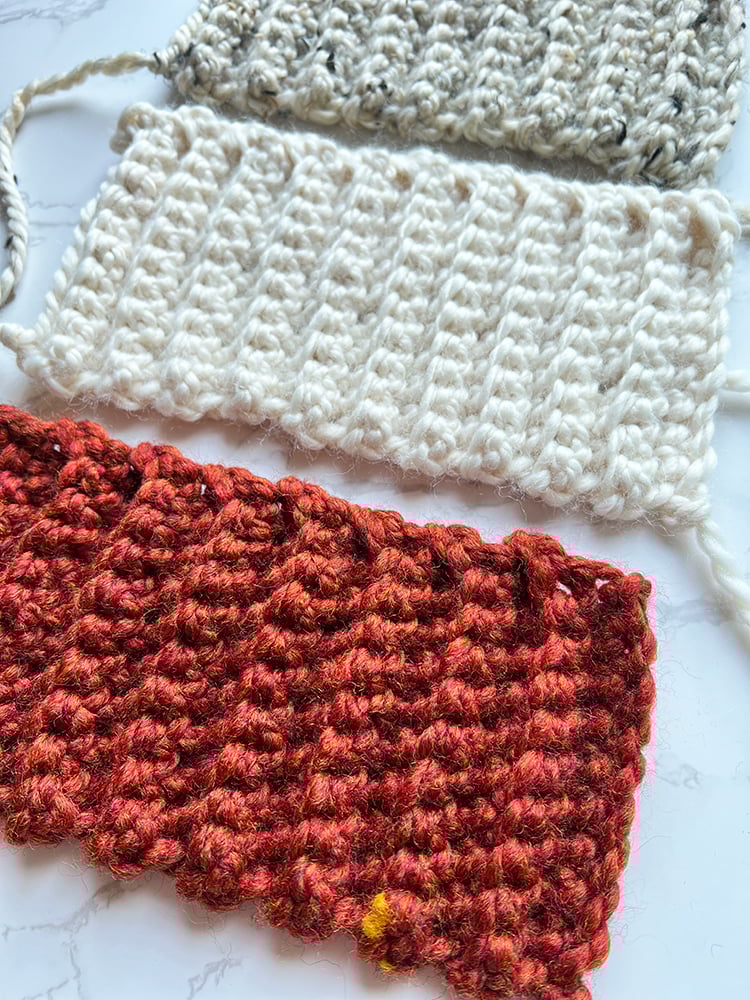
- Gauge (in sc ribbing): ~6.6 stitches × 8 rows = 4″ (10 cm) in back loop (blo) single crochet
Gauge isn’t critical for this free crochet pattern, but a similar gauge yields the sample proportions.
Abbreviations
The pattern is written using US crochet terms and abbreviations.
You can find a free PDF of both US and UK terms and abbreviations here – Crochet Abbreviations And Terms (US + UK)
- BLO – Back loop only
- CH – Chain
- Cont – Continue
- SC – Single crochet
- Rem – Remaining
- Rep – Repeat
- St(s) – Stitches
Step-By-Step Instructions
This pumpkin is worked flat as a long rectangle in sc ribbing, then seamed and gathered.
1) Foundation
- Ch 12, turn.
- Row 1 (WS): 1 sc in the 2nd ch from hook, sc in each next st to end; turn. (You’ve just placed your first stitch in the correct chain.)
- Row 2 (RS): Ch 1, sc blo in each st to end; turn.
- Rep Row 2 until the piece measures 8″ in length. Keep the RS facing you for photos if you like—both right side and wrong side show nice texture.
Tip: If you switch to worsted weight yarn, keep the same steps—your pumpkin will be smaller. Add more rows for a wider long rectangle.
2) Seam the Tube
- Fold the rectangle so the short edges meet, right sides inside (WS out).
- Thread a yarn needle with a long tail and seam the edges (mattress or whip stitch) to form a tube.
- Turn the right side out when finished so the rib texture sits on the outside.
3) Cinch the Bottom
- With a long strand and tapestry needle, work a loose running stitch around the lower edge (in and out of the edge stitches).
- Pull to cinch the opening closed. Sl st/slip stitch to secure if you like, then knot and weave inside.
4) Add Stuffing
- Fill the pumpkin with stuffing to medium firmness—too firm makes it hard to close neatly.
5) Cinch the Top of the Pumpkin
- On the opposite side, repeat the running stitch around the top edge and cinch closed, leaving a small opening if you’ll insert a stem.
- You can pull the yarn around the outside of the pumpkin, pushing the needle through the top and out of the bottom a few times to make more of a pumpkin shape if necessary.
- Secure the yarn tail. If a gap remains, take a few extra sewing passes across the opening.
Finishing (Stem & Optional Leaf)
Cinnamon-Stick Stem
- Add a dot of hot glue to the inside of the top opening and press in a cinnamon stick as the stem.
- Tie on twine for a rustic finish.
Simple Crochet Leaf (Optional)
- See a crochet leaf pattern here – Leaf Crochet Pattern
Grab The Crochet Pumpkin Pattern Bundle For Only $7!
Can you share your work with us?
I love seeing your finished projects on social media.
If you enjoyed making the crochet pumpkins, I’d love to see yours on Instagram, tag me @handylittleme.
I’d love to see your work!

FAQs & Tips
Can I use different yarns or hook sizes?
Yes. Try worsted weight yarn with a 5–5.5 mm hook for a small pumpkin.
Keep the blo ribbing and simply repeat rows until your rectangle looks proportionally “long.”
How do I avoid a wobbly seam?
Align rows carefully and seam with the wrong side out.
Keep even tension on the thread/yarn tail.
What if I want a taller pumpkin?
Start with a longer foundation chain (more than ch 12) to increase height, or add rounds after stuffing by wrapping a long tail around the body to create segment lines (secure each pass inside).
Can I work it in the round?
For an advanced variation, make a spiral tube in sc blo (no turning) or try a dc/hdc spiral.
The flat-first method here is the quickest route for beginners.
Where are the videos?
You can watch a video tutorial on my YouTube Channel showing you how to create and make up the pumpkin here.
You can also view my crochet pumpkin video tutorial playlist here.

More Free Crochet Pumpkin Patterns
You may also like these crochet pumpkin patterns…
- Free Crochet Pumpkin Pattern For Beginners (Single Crochet)
- Crochet Ribbing – Easy Ribbed Pumpkin Patterns
- Pumpkin Crochet Pattern (Free, Easy + Adorable)
- Crochet Halloween Garland (Free Printable)
- Crochet Pumpkin Coaster (Free Printable)
Helpful Resources
This pattern is basic and great for any beginner.
- You should be comfortable making a slip knot (how to make a slip knot (step by step)) and creating a chain (how to start a crochet chain).
- You should be comfortable working single crochet (how to single crochet (SC)).
- You should also be comfortable reading crochet patterns (how to read crochet patterns for beginners).
- And understanding crochet abbreviations and terms (US + UK).

Free Crochet Patterns
- Free Crochet Easter Eggs Pattern
- 50 Best Crochet Stitches For Blankets And Afghans
- 35 Free Cotton Yarn Crochet Patterns
- Crochet Dishcloth Pattern Set
- Crochet Washcloth Pattern
- How To Crochet A Blanket
- 50 Stash Busting Crochet Patterns
- Eyeball Crochet Coaster Pattern (Free Printable)
- Crochet Ghost (Free Printable)
- Crochet Cauldron Pattern (Free Printable)
- Crochet Mini Witch Hat Pattern (Free Printable)
- 40 Free Granny Square Crochet Patterns
- Crochet Blanket Sizes And How Much Yarn
- Crochet Acorn Garland Free Pattern (Fall Decor)
- 41 Free Halloween Crochet Patterns (Cute + Spooky)
