
Free Printable Single Crochet Pumpkin Pattern for Beginners
THIS ARTICLE CONTAINS AFFILIATE LINKS THAT SUPPORT HANDY LITTLE ME CONTENT AND FREE PATTERNS.In this post, you will find a free printable single crochet pumpkin pattern that is perfect for beginners.
This easy fall project is made from a simple rectangle using only single crochet stitches.
Once finished, the rectangle is seamed, stuffed, and decorated with a cinnamon-stick stem.
Use super bulky yarn to make a soft, chunky pumpkin for your fall, Halloween, or Thanksgiving decor.

An Easy Crochet Pumpkin for Beginners
This simple pumpkin is a lovely project if you are new to crochet and want to practice your single crochet stitches.
You will crochet a flat rectangle, join the short edges to form a tube, gather the bottom, and add the stuffing.
The top is then gathered and finished with a cinnamon-stick stem and a little twine.
There are no increases, decreases, complicated shaping, or color changes in the pattern.

What You Should Know Before You Begin
- Skill level: Basic
- Crochet terms: US
- Stitches used: Chain and single crochet
- Construction: Crocheted flat and seamed
- Yarn weight: Super bulky/super chunky
- Hook size: 9mm (US M/N 13)
- Gauge: Not essential, but it will affect the finished size
- Finished size: Approximately 13 inches around and 6 inches tall
- Printable: Use the Print button on the pattern card
Helpful Crochet Tutorials
If you are completely new to crochet, these beginner tutorials will help you with the basic stitches and techniques used in the pattern.
- How to make a slip knot
- How to start a crochet chain
- How to single crochet (SC)
- How to read crochet patterns for beginners
- Crochet abbreviations and terms (US + UK)
Crochet Pumpkin Video
You can also watch the right-handed video tutorial below to see how the pumpkin is crocheted and assembled.
Materials Needed
Yarn
- Any super bulky/super chunky/14-ply yarn.
- For each pumpkin, you will need around 50g.
- I used Lion Brand Wool-Ease Thick and Quick yarn in the following colors:
- Fisherman
- Grey Marble
- Cilantro
- Spice
Hook Size
Notions
- Tape measure
- Darning needle/yarn needle
- Scissors
Other Materials
- Fiberfill/Poly-fil stuffing
- Cinnamon sticks
- Twine
- Glue gun

Pattern Notes
- You may sell finished pumpkins made from this pattern, but the written pattern and photographs may not be reproduced or redistributed.
- Gauge is not critical for this project.
- Use more or fewer rows to adjust the width of the pumpkin.
- The amount of stuffing used will affect its finished shape.
- The pattern is written using US crochet terms.
Get the Free Printable Crochet Pumpkin Pattern
The complete pattern is available in the printable card below.
Select the Print button to save or print a clean copy for your project.
Easy Single Crochet Pumpkin Pattern
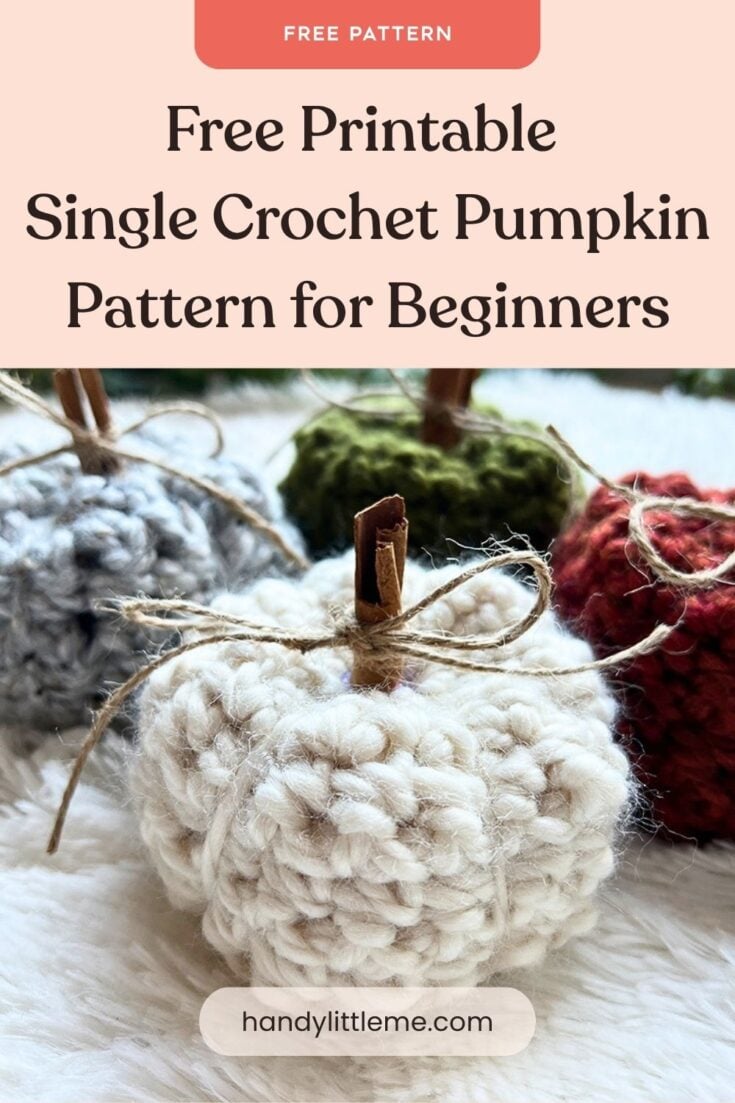
Make an easy crochet pumpkin using super bulky yarn and basic single crochet stitches.
The pumpkin is worked flat as a rectangle, then seamed, stuffed, and finished with a cinnamon-stick stem.
Materials
- Any super bulky/super chunky/14-ply yarn.
- For each pumpkin, you will need around 50g.
- I used Lion Brand Wool-Ease Thick and Quick yarn in the following colors:
- Fisherman
- Grey Marble
- Cilantro
- Spice
- Fiberfill/Poly-fil stuffing
- Cinnamon sticks
- Twine
Tools
- 9mm (US M/N 13) Hook
- Tape measure
- Darning needle/yarn needle
- Scissors
- Glue gun
Instructions
Pumpkin Body
- ch 18, turn.
- Row 1: Work 1 sc in the second ch from the hook and in each ch to the end of the row. Turn. (17 sts)
- Row 2: Ch 1 (does not count as a stitch), work 1 sc in each st to the end of the row. Turn. (17 sts)
- Rep Row 2 until the piece measures 6 inches (15 cm) from the foundation edge.
- Fasten off, leaving a long tail for seaming.
Making Up
- Step 1: Fold the rectangle so the short edges meet. Using the long yarn tail and a yarn needle, seam the edges together with mattress stitch to form a tube.
- Step 2: Work a running stitch around one open edge, weaving the needle in and out through the end stitches. Pull tightly to gather and close the bottom.
- Step 3: Secure the yarn and close any remaining hole.
- Step 4: Fill the pumpkin with fiberfill.
- Step 5: Cut another length of yarn measuring at least 12 inches. Work a running stitch around the upper edge, then pull tightly to gather and close the top.
- Step 6: Secure the yarn and weave in any loose ends.
- Step 7: Glue a cinnamon stick into the center of the top opening to create the pumpkin stem.
- Step 8: Tie a length of twine around the cinnamon stick to finish.
Notes
Abbreviations
The pattern is written using US crochet terms and abbreviations.
- CH - Chain
- SC - Single crochet
- Rem - Remaining
- Rep - Repeat
- St(s) - Stitches
Size Information
- Finished rectangle size - H 6 inches x W 8 inches.
- Finished pumpkin size - Circumference = 13 inches x H 6 inches.
Gauge
Gauge is not essential for this project.
Work at a comfortable tension, creating a firm fabric without large gaps so the stuffing does not show through.
Crochet Pumpkin FAQs
Can I use a different yarn weight?
Yes. A different yarn weight can be used, but it will change the finished size.
Choose a crochet hook suitable for your yarn and make sure the fabric is dense enough to contain the stuffing.
How can I make the pumpkin larger or smaller?
Change the length of the starting chain to adjust the height.
Crochet more or fewer rows to change the width.
Can I make this pumpkin without a glue gun?
Yes. You can securely sew a crocheted stem or a small piece of felt onto the top instead.
Is this pattern suitable for complete beginners?
Yes. You only need to know how to make a chain and work single crochet stitches.
The pumpkin is made from a rectangle, so there are no increases or decreases.

More Free Crochet Pumpkin Patterns
You may also like these crochet pumpkin patterns…
- Crochet Pumpkin (Single Crochet Ribbing)
- Crochet Ribbing – Easy Ribbed Pumpkin Patterns.
- Pumpkin Crochet Pattern (Free, Easy + Adorable)
- Crochet Acorn Garland Free Pattern (Fall Decor)
- Crochet Halloween Garland (Free Printable)
- Crochet Pumpkin Coaster (Free Printable)
Could you share your work with us…
I love seeing your finished projects!
If you make this crochet pumpkin, share a photograph on Instagram and tag me @handylittleme so I can see your work.