Crochet Easter Eggs (Free Beginner Pattern + Printable)
THIS ARTICLE CONTAINS AFFILIATE LINKS THAT SUPPORT HANDY LITTLE ME CONTENT AND FREE PATTERNS.This blog post will show a Crochet Easter Eggs Pattern (+ free beginner pattern + printable PDF).
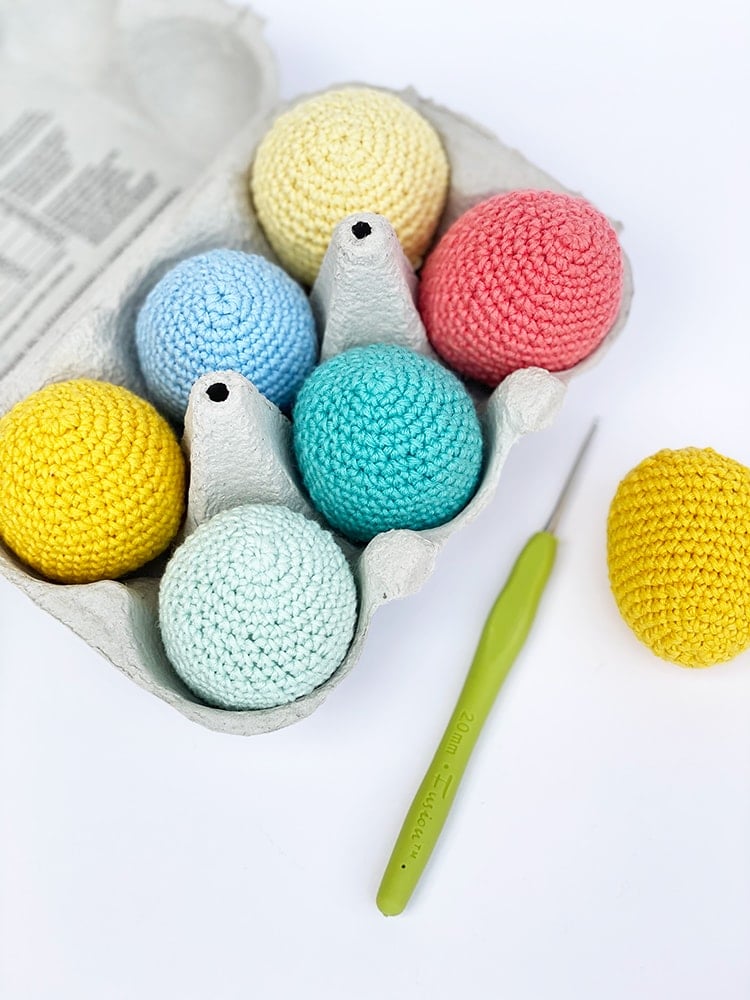
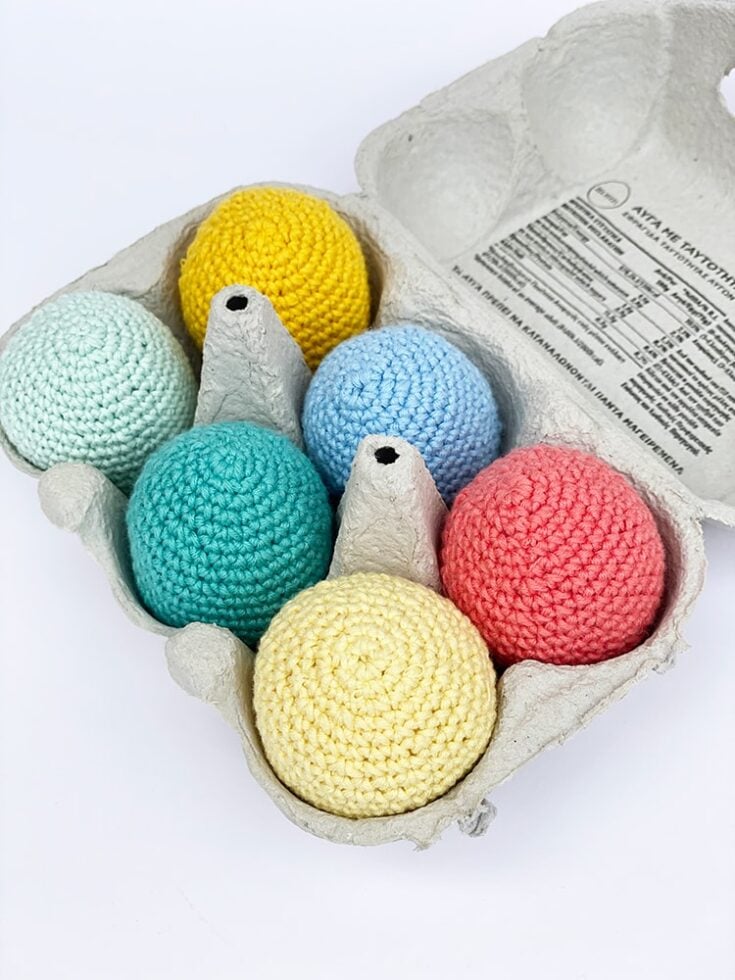
Make mini crochet Easter eggs to decorate your home with this spring.
Easy to make, the small eggs are great for stash-busting.
Using around 10g of yarn per egg, you can make many, all in different colors!
Please scroll down to view the free printable pattern.

Why Crochet Easter Eggs Make The Perfect Spring Decoration
Crocheting your own Easter eggs is a wonderful way to add a personalized and charming touch to your springtime decor.
Not only are they fun to make, but they also allow you to get creative with colors, patterns, and sizes—so each egg is completely unique.
Moreover, unlike store-bought plastic eggs, crocheted versions are reusable year after year.
This makes them an eco-friendly and sustainable choice for decorating your home.
In addition, handmade decorations carry sentimental value.
They bring warmth, meaning, and a cozy, handcrafted feel to your Easter celebrations.
Best of all, these crochet Easter eggs aren’t just for display—they also make a fantastic alternative for a fun and safe Easter egg hunt, especially for little ones.
Use Up Scrap Yarn With This Fast Easter Egg Pattern
Making decorations for Easter is always fun, and there are many free patterns to be found online.
These small eggs are very quick to make; starting from the top, you work down to the bottom.
You stuff the mini eggs as you work, making them nice and full to get the right shape.
It’s a great scrap yarn project that needs very little yarn.

Yarn & hook tips for the perfect crochet egg
I used fingering weight yarn for the pastel-colored eggs and sport weight for the red eggs.
You can experiment with yarn weights and hook sizes to create your Easter eggs.
Any yarn weight can work: DK yarn, worsted weight yarn, etc.
Keep in mind you need to adjust the hook size if you change the yarn weight.
I made them in one solid color, but you could easily make a striped egg by alternating the colors.
Make one in all of your favorite spring colors.
Helpful resources
- Yarn Weight Guide {+ Conversion Chart}
- Yarn Types Explained: A Guide To Different Fibers
- How To Read A Yarn Label (Step By Step)
Crochet Easter Eggs
Pattern Notes
- Stuffing – Stuff the egg as you work.
- Gauge – Don’t worry too much about gauge for this pattern. The gauge of the egg I made is 6 sts/7 rounds in 1 inch.
- Size – Height – 3 inches/8 cm/Circumference 5.5 inches/14 cm
- You will work in one continuous spiral; this pattern has no turning chains.
- You can place a marker at the beginning of each round so you can keep track of where you are in the pattern.
- To make the eggs in stripes – you can change colors as you work.
Copyright Info
- Please do not copy, sell, redistribute, or republish this pattern.
- If you wish to share this pattern, please provide a link to the pattern page only.
- You may sell items produced using this pattern.
- Do NOT use the copyrighted photos for your product listing.
- Please give pattern credit to Louise Bollanos or tag @handylittleme.

The supplies you need…
Yarn
- Leftovers from your yarn stash – less than 10g per egg of any fingering yarn.
- I used leftover cotton in various colors for the eggs.
- You can experiment with other yarn weights and hook sizes.
Hook Size
- 2 mm (US B-1) Hook to work with fingering yarn.
- Any hook size to compliment your chosen yarn weight.
Notions and other materials
- Scissors.
- Darning needle/tapestry needle/yarn needle.
- Tape measure.
- Stuffing – Poly-fil/fiberfill/wadding.
- Stitch marker.

Crochet abbreviations and terms
The pattern is written in US crochet terms.
- beg – beginning
- ch – chain
- sc – single crochet
- sc2tog – Insert hook in next stitch, yarn over, and pull up a loop (2 loops on hook). Insert the hook in the next stitch, yarn over, and pull up a loop (3 loops on hook), yarn over, and draw through all 3 loops on hook. 1 stitch decreased.
- () – the instructions in the parentheses – mean to complete those x number of times given.
Pattern Instructions
With your yarn choice and a 2 mm (US B-1) crochet hook, make a slipknot.
- Ch 3 – join to form a circle (magic ring).
- R1 – Work 6 sc through the center of the ring (place a marker at the beg of the round).
- R2 – Work 2 sc into every stitch around. (12 sts)
- R3 – (sc, 2 sc into the next st, 2 sc, 2 sc into the next st) x 2, sc, 2 sc into the next st. (17 sts)
- R4 – (sc x 3, 2 sc into the next st) x 4, sc. (21 sts)
- R5 – (sc x 6, 2 sc into the next st) x 3. (24 sts)
- R6 – sc x 3, 2 sc into the next st, (sc 7, 2 sc into the next st) x 2, sc x 4. (27 sts)
- R7 – (sc x 8, 2 sc into the next st) x 3. (30 sts)
- R8 – sc x 6, 2 sc into the next st, sc x 14, 2 sc into the next st, sc x 8. (32 sts)
- R9 – sc x 15, 2 sc into the next st, sc x 16. (33 sts)
- R10 – sc x 32, 2 sc into the next st. (34 sts)
- R 11-13 – sc into every st. (34)
- *Turn the egg to the right side out and start stuffing as you work.
- R14 – (sc2tog, sc x 15) x 2. (32 sts)
- R15 – sc x 8, sc2tog, (sc x 9, sc2tog) x 2. (29 sts)
- R16 – sc x 3, sc2tog, sc x 8, sc2tog, sc x 7, sc2tog, sc x 5. (26 sts)
- R17 – (sc x 5, sc2tog, sc x 4, sc2tog) x 2. (22 sts)
- R18 – sc x 2, sc2tog, sc x 3, sc2tog, sc x 4, sc2tog, sc x 3, sc2tog, sc x 2. (18 sts)
- R19 – (sc, sc2tog) x 6. (12 sts)
- R20 – sc2tog x 6. (6 sts)
Making up/Finishing
- Finish the egg by cutting the yarn and feeding the yarn through the last loop to close.
- Thread the darning needle and weave the loose end through the top of the egg. Cut off the loose end.
- You may want to add a ribbon to hang or to create a hanging loop from the tail end of the yarn.
Crochet Easter Eggs
This free crochet Easter eggs pattern is perfect for beginners and a great way to use up leftover yarn.
Quick and easy to make, these decorative eggs are ideal for spring crafting and Easter decorating.
Materials
- Leftovers from your yarn stash – less than 10g per egg of any fingering yarn.
- I used leftover cotton in various colors for the eggs.
- You can experiment with other yarn weights and hook sizes.
Tools
- 2 mm (US B-1) Hook to work with fingering yarn.
- Any hook size to compliment your chosen yarn weight.
- Scissors.
- Darning needle/tapestry needle/yarn needle.
- Tape measure.
- Stuffing – Poly-fil/fiberfill/wadding.
- Stitch marker.
Instructions
Crochet Easter Eggs Pattern Instructions
With your yarn choice and a 2 mm (US B-1) crochet hook, make a slipknot.
- Ch 3 – join to form a circle (magic ring).
- R1 – Work 6 sc through the center of the ring (place a marker at the beg of the round).
- R2 – Work 2 sc into every stitch around. (12 sts)
- R3 – (sc, 2 sc into the next st, 2 sc, 2 sc into the next st) x 2, sc, 2 sc into the next st. (17 sts)
- R4 – (sc x 3, 2 sc into the next st) x 4, sc. (21 sts)
- R5 – (sc x 6, 2 sc into the next st) x 3. (24 sts)
- R6 – sc x 3, 2 sc into the next st, (sc 7, 2 sc into the next st) x 2, sc x 4. (27 sts)
- R7 – (sc x 8, 2 sc into the next st) x 3. (30 sts)
- R8 – sc x 6, 2 sc into the next st, sc x 14, 2 sc into the next st, sc x 8. (32 sts)
- R9 – sc x 15, 2 sc into the next st, sc x 16. (33 sts)
- R10 – sc x 32, 2 sc into the next st. (34 sts)
- R 11-13 – sc into every st. (34)
- *Turn the egg to the right side out and start stuffing as you work.
- R14 – (sc2tog, sc x 15) x 2. (32 sts)
- R15 – sc x 8, sc2tog, (sc x 9, sc2tog) x 2. (29 sts)
- R16 – sc x 3, sc2tog, sc x 8, sc2tog, sc x 7, sc2tog, sc x 5. (26 sts)
- R17 – (sc x 5, sc2tog, sc x 4, sc2tog) x 2. (22 sts)
- R18 – sc x 2, sc2tog, sc x 3, sc2tog, sc x 4, sc2tog, sc x 3, sc2tog, sc x 2. (18 sts)
- R19 – (sc, sc2tog) x 6. (12 sts)
- R20 – sc2tog x 6. (6 sts)
Making up/Finishing
- Finish the egg by cutting the yarn and feeding the yarn through the last loop to close.
- Thread the darning needle and weave the loose end through the top of the egg. Cut off the loose end.
- You may want to add a ribbon to hang or to create a hanging loop from the tail end of the yarn.
Notes
Abbreviations and terms
The pattern is written in US crochet terms.
- beg – beginning
- ch – chain
- sc – single crochet
- sc2tog – Insert hook in next stitch, yarn over, and pull up a loop (2 loops on hook). Insert the hook in the next stitch, yarn over, and pull up a loop (3 loops on hook), yarn over, and draw through all 3 loops on hook. 1 stitch decreased.
- () – the instructions in the parentheses – mean to complete those x number of times given.
Notes
- Stuffing – Stuff the egg as you work.
- Gauge – Don’t worry too much about gauge for this pattern. The gauge of the egg I made is 6 sts/7 rounds in 1 inch.
- Size – Height – 3 inches/8 cm/Circumference 5.5 inches/14 cm
- You will work in one continuous spiral; this pattern has no turning chains.
- You can place a marker at the beginning of each round so you can keep track of where you are in the pattern.
- To make the eggs in stripes – you can change colors as you work.
Could you share your work with us?
I love seeing your finished projects on social media.
If you enjoyed making the Easter eggs, I’d love to see yours on Instagram, be sure to tag me @handylittleme.
If you are on Facebook, stop over to the Handylittleme Facebook Group and share a photo.
Or come over to the Handylittleme Facebook page to catch up on the latest patterns.
You can also find us on Pinterest and Ravelry.
I’d love to see your work.
Happy Crocheting!

Crochet Lessons
If you are a beginner and need help with the crochet basics, check out the crochet lessons here – Crochet Lessons {With Video Tutorials}.
There, you will find tutorial posts for all the crochet techniques a newbie needs to know.
Join The Handy Little Me Facebook Group to connect with more makers.
And if you need more video tutorials, check out my YouTube channel here – Handy Little Me – YouTube
More Helpful Resources
This amigurumi Easter egg pattern is great for any beginner.
- You should be comfortable making a slip knot (how to make a slip knot (step by step)) and creating a chain (how to start a crochet chain).
- You should be comfortable working single crochet (how to single crochet (SC)).
- You should be comfortable working sc2tog – making a single crochet decrease.
- You should also be comfortable reading crochet patterns (how to read crochet patterns for beginners).
- And understanding crochet abbreviations and terms (US + UK).

More Easter Projects
Finally, if you are looking for your next Easter project, check out the patterns below:
Crochet
- Crochet Easter Basket (Free Pattern PDF)
- 15 Easter Crochet Patterns
- 23 Free Crochet Chicken Patterns (Easy + Cute Ideas)
- 23 Best Easter Egg Crochet Patterns
- 35 Free Easter Crochet Patterns (Cute Ideas To Make)
- 31 Adorable Free Crochet Bunny Patterns For Easter
Knitting
- Baby Bunny Hat (Easy + Quick Pattern)
- Easter Bunny Pattern (Floppy Ears + Cuddly!)
- Bunny Softie Pattern (Easy To Knit)
- Easter Bunny Egg Cozy
- Bunny Slippers For Baby (Perfect For Easter!)
- Easter Bunny Hat {Knit Flat}
- Bunny Ears Headband {With Knitted Ears}
- Easter Craft Activities {For Kids}
- Easter Chick Slippers Pattern {+ Loop Stitch Tutorial}
- Bunny Tea Cosy Pattern
- Bunny Ear Hat (Easy Pattern)
- Stuffed Bunny Pattern {With Crochet Overalls}
- Bunny Booties Knitting Pattern

Hi, you may need to change the hook size K in this pattern to work with a fingering weight yarn. Perhaps a B or C hook to coordinate with that light of yarn? Anyway, adorable pattern perfect for the season. Thank you!!
Hello Deanne,
You can experiment with various hook sizes and yarn weights using this pattern.
It’s a great stash-busting pattern to use up any leftovers you have in your stash.
I hope you enjoy the pattern!
Louise