Simple Knit Hat Pattern (Free Printable Chunky Beanie PDF)
THIS ARTICLE CONTAINS AFFILIATE LINKS THAT SUPPORT HANDY LITTLE ME CONTENT AND FREE PATTERNS.If you’re craving a quick, cozy winter make, this simple hat pattern is perfect for curling up on the sofa and dreaming of fresh mountain air.
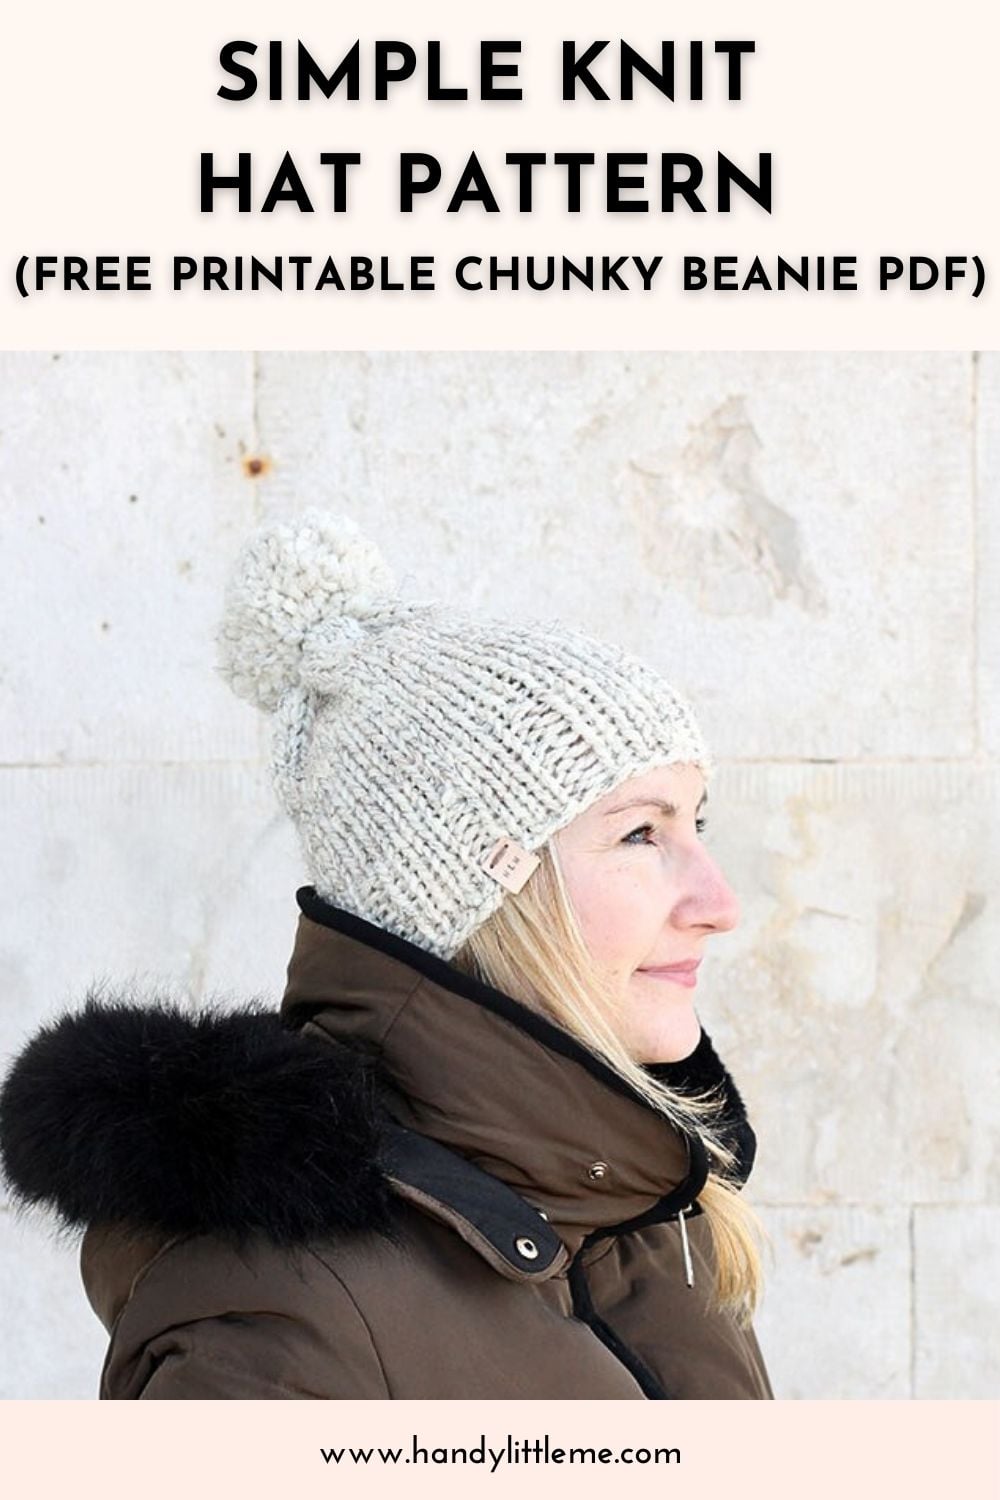
The Athena beanie is a classic, neutral design that looks right at home on snowy city streets and at your favorite ski resort for a little style inspiration.
Worked in super bulky yarn, this chunky beanie knits up fast and has that squishy ribbed brim with a smooth stockinette stitch body that never goes out of style.
It’s designed for an advanced beginner who is ready to try knitting in the round and practice a few basic stitches and decreases.
If you love to knit practical pieces you’ll actually wear, this hat is a satisfying weekend project—and a great gift to make for friends, family, or charity donation piles.
Before You Get Started
Skills + Techniques
This is an easy (advanced beginner) project.
You should be comfortable with:
- Casting on and binding off
- Working in the round on circular needles
- Knit and purl
- k2tog (knit two together) for shaping
You’ll shape the top of the hat with simple decreases.
If you’re new to knitting in the round, you can follow my video tutorials on how to join in the round with circular knitting needles.

Yarn + Materials
Yarn
- 1 skein of Lion Brand Wool-Ease Thick and Quick in Wheat.
- Suitable for size 10.00 mm (US 15) needles.
- Super bulky weight – 106 yards.
- Yarn Weight Guide (+ Conversion Chart)
Needles
- Set of 10.00 mm (US 15) 16″ circular knitting needles
- To complete the decreases, you may need to switch from circular needles to dpns (double-pointed needles) or use the magic loop method. (View Tutorial – Magic loop knitting | step by step)
Notions
- Tape measure
- Darning needle (yarn needle)
- Scissors
- Stitch markers
Other Tools
Pompom maker Clover 2 – 1/2 inch Large.

Fit + Size
- Size: Adult medium
- Length (lying flat, without pom): 9″ / 23 cm
- Width (lying flat): 9″ / 23 cm
- To fit head circumference: 22–26″ / 56–66 cm
Gauge
- Gauge: 10 sts and 15 rounds = 4 in / 10 cm in the round
Checking your gauge will help your hat fit well and use a similar amount of yarn to the sample.
Construction Notes
- The hat is worked in the round from the brim up.
- A simple ribbed brim flows into a smooth body that looks like classic stockinette.
- Quick decreases shape the crown before closing up the top and adding an optional pom.

Abbreviations
Knitting Abbreviations And Terms (US And UK)
- K – Knit
- K2tog – Knit the next 2 stitches together
- P – Purl
- PM – Place marker
- Rnd(s) – Round(s)
- St(s) – Stitch(es)

Pattern Instructions
Brim
Cast on 40 sts.
Join in the round, pm, being careful not to twist the sts.
Rnd 1: *P1, K3, P1; rep from * to end of rnd. (8 repeats)
Repeat Rnd 1 until the work measures 2.5″ / 6.5 cm from the cast-on edge.
Hat Body
Next rnd: Knit.
Continue to knit every rnd (stockinette stitch in the round) until the hat measures 8.5–9″ / 22–23 cm from the cast-on edge.
Crown Decrease
Next rnd (decrease): *K2tog; rep from * to end of rnd. (20 sts remain.)
Break yarn, leaving a tail.
Thread the tail onto a tapestry needle and draw it through the remaining 20 sts.
Pull tight to close the top of the hat and fasten securely on the inside.
Finishing
- Weave in all loose ends.
- Make a pom pom (or use a faux fur pom) and stitch it securely onto the top of the hat.
Your chunky Athena hat is ready to wear!

FAQ
Is this pattern suitable for beginners?
Yes—this is written for an advanced beginner.
If you’re comfortable with knit and purl and ready to try knitting in the round, you’ll be able to make this hat.
The super bulky yarn and straightforward shaping make it very approachable.
Can I use a different yarn?
Absolutely. Any super bulky (06) yarn should be fine, as long as you can match the gauge.
Wool, wool blends, and other cozy fibers all work beautifully.
Just remember that different fibers may change the drape and warmth slightly.
Can I adjust the size?
You can adjust the fit by:
- Changing your needle size (smaller for a snugger hat, larger for a looser one)
- Working fewer or more rounds before the crown decreases for a shorter or slouchier look
If you’re confident in modifying patterns, you can also cast on more or fewer stitches in multiples that suit the ribbing.
Do you have more free hat knitting patterns?
Yes! If you enjoy this design, you can explore my other free hat knitting patterns and free patterns for cozy accessories on the blog—they’re perfect companion projects for using up leftover yarn and trying new textures.
Can I sell items made from this pattern?
Yes, you may sell finished items made from this pattern in small quantities.
Please credit Handy Little Me as the designer when you do.
The pattern itself, however, is protected: please do not copy, sell, redistribute, or republish the instructions.
If you’d like to share this project with a friend, please link to the pattern page rather than sharing the PDF directly.
Free Printable
To make this project even easier, I’ve created a free printable version of the simple knit hat pattern.
You can keep it handy while you work—no need to keep checking your phone or scrolling through the blog.
It’s perfect for printing out or saving to your tablet for easy access anytime.
Simple Knit Hat Pattern Free

Learn how to knit a simple chunky hat in the round using super bulky yarn.
This step-by-step pattern is perfect for advanced beginners and includes an adult medium size, with a free printable PDF.
Materials
- 1 skein of Lion Brand Wool-Ease Thick and Quick in Wheat.
- Suitable for size 10.00mm (US 15) needles.
- Super bulky weight – 106 yards.
Tools
- Needles - Set of 10.00mm (US 15) 16″ circular knitting needles
- To complete the decreases, you may need to switch from circular needles to dpns (double-pointed needles) or use the magic loop method.
- Tape measure
- Darning needle (yarn needle)
- Scissors
- Stitch markers
- Pompom maker Clover 2 – 1/2 inch Large.
Instructions
Brim
Cast on 40 sts.
Join in the round, pm, being careful not to twist the sts.
Rnd 1: *P1, K3, P1; rep from * to end of rnd. (8 repeats)
Repeat Rnd 1 until the work measures 2.5″ / 6.5 cm from the cast-on edge.
Hat Body
Next rnd: Knit.
Continue to knit every rnd (stockinette stitch in the round) until the hat measures 8.5–9″ / 22–23 cm from the cast-on edge.
Crown Decrease
Next rnd (decrease): *K2tog; rep from * to end of rnd. (20 sts remain.)
Break yarn, leaving a tail.
Thread the tail onto a tapestry needle and draw it through the remaining 20 sts.
Pull tight to close the top of the hat and fasten securely on the inside.
Finishing
- Weave in all loose ends.
- Make a pom pom (or use a faux fur pom) and stitch it securely onto the top of the hat.
Your chunky Athena hat is ready to wear!
Notes
Abbreviations
- K - Knit
- K2tog - Knit the next 2 stitches together
- P - Purl
- PM - Place marker
- Rnd(s) - Round(s)
- St(s) - Stitch(es)
Fit + Size
- Size: Adult medium
- Length (lying flat, without pom): 9″ / 23 cm
- Width (lying flat): 9″ / 23 cm
- To fit head circumference: 22–26″ / 56–66 cm
Gauge
Gauge: 10 sts and 15 rounds = 4 in / 10 cm in the round
Checking your gauge will help your hat fit well and use a similar amount of yarn to the sample.
Construction Notes
- The hat is worked in the round from the brim up.
- A simple ribbed brim flows into a smooth body that looks like classic stockinette.
- Quick decreases shape the crown before closing up the top and adding an optional pom.
Could you share your work with us…
I love seeing your finished projects on social media.
If you enjoyed making the easy beanie pattern, I’d love to see yours on Instagram, tag me @handylittleme or #handylittleme.
If you are on Facebook, stop over to the handylittleme Facebook group and share a photo.
I’d love to see your work.
Happy Knitting!
More Free Hat Knitting Patterns
- Ribbed Beanie Knitting Pattern (Unisex Mariner’s Hat)
- 37 Knit Hat Patterns For All Skill Levels
- 17 Cable Hat Knitting Patterns
- How To Knit A Hat For Complete Beginners (+ Video Tutorial)
- How To Knit A Hat With Circular Needles
- Ponytail Hat Knitting Pattern
- Messy Bun Hat Pattern
- Beanie Hat With Pom Pom| The Astraia
- Double Pom Pom Hat Pattern
- Ribbed Hat Pattern | Autumn Ready
Where is the free printable pdf?
Hello Arleen, it’s underneath the heading that says ‘Free Printable’.