How To Single Crochet Decrease (sc2tog)
THIS ARTICLE CONTAINS AFFILIATE LINKS THAT SUPPORT HANDY LITTLE ME CONTENT AND FREE PATTERNS.Making decreases in crochet is essential for shaping your project, whether you’re making amigurumi, garments, or accessories, knowing how to single crochet decrease (sc2tog) is a must.
This step-by-step tutorial walks you through how to do a single crochet decrease with clear instructions and helpful tips.

Before You Get Started
Here are a few quick notes before diving in:
- Make sure you’re comfortable with the single crochet (sc) stitch first.
- Practice on a swatch with medium-weight yarn and a 5mm (H-8) hook to keep things easy.
- Decreases help shape your work by combining two stitches into one, reducing the total stitch count.
- The abbreviation for this is sc2tog (single crochet two together), and it’s often used in patterns for toys, hats, and shaping rows.
Tools & Materials Needed
- Worsted weight yarn or any smooth, light-colored yarn
- 5mm crochet hook (or appropriate size for your yarn)
- Scissors
- Yarn needle (for weaving in ends)
How To Make A Single Crochet Decrease (sc2tog)
The sc2tog is simple and great for beginners.
It allows you to decrease one stitch by combining two single crochets into one.
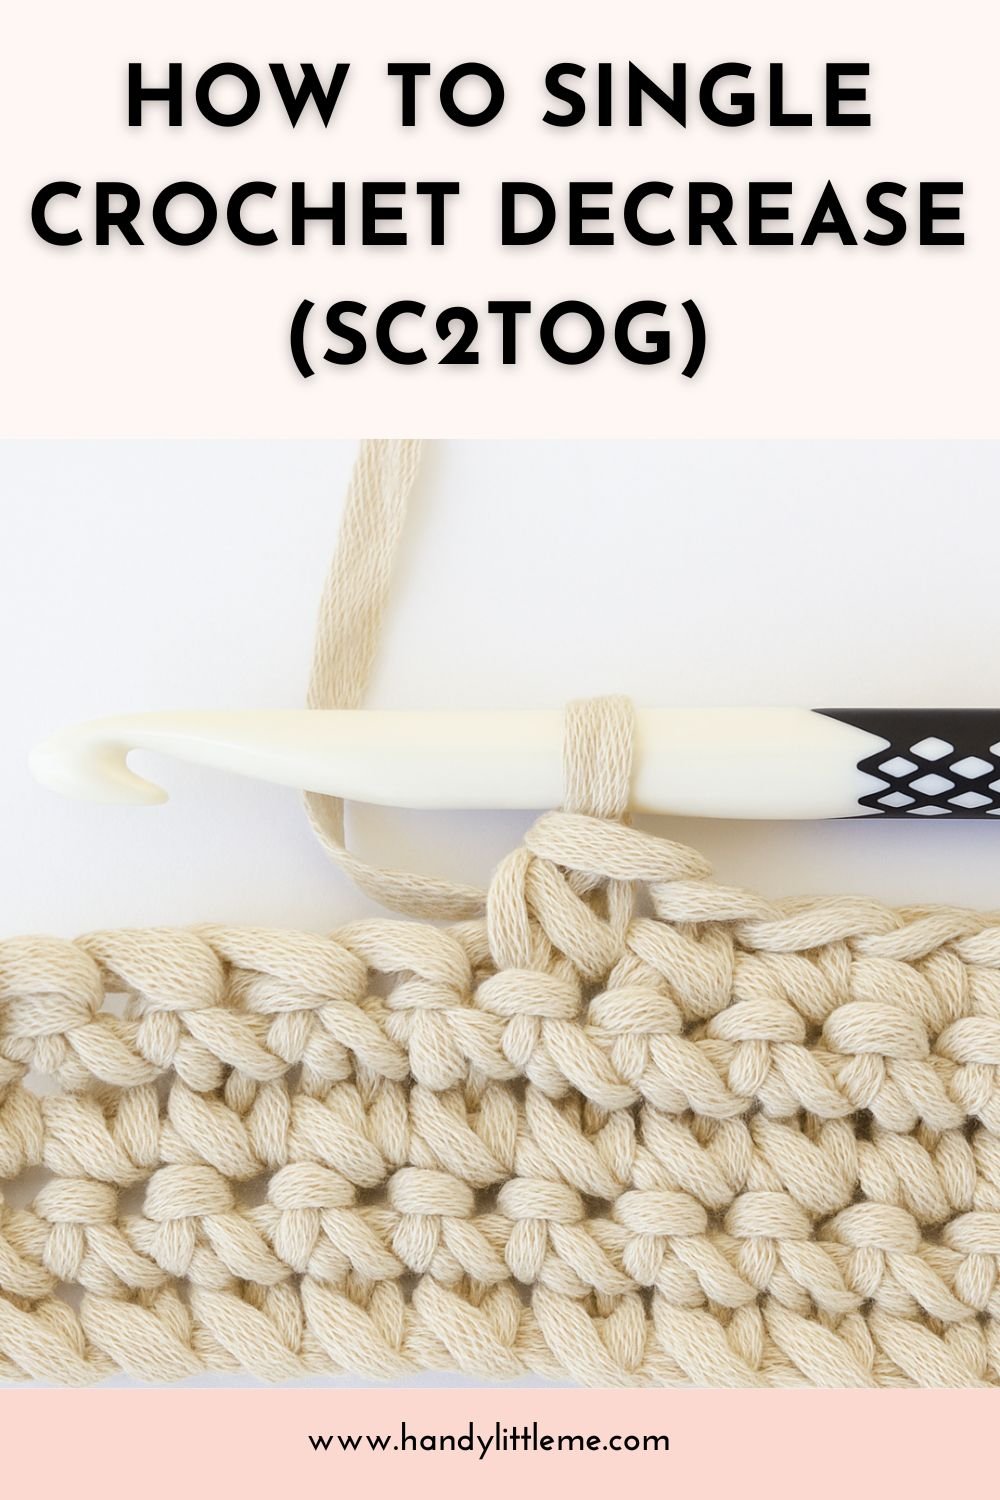
Step 1 – Start your first single crochet.
To begin to sc2tog, you should begin by creating a single crochet stitch.
Then insert your hook into the first stitch in your pattern, where it tells you to start your decrease.

Step 2 – Hook the yarn and pull up a loop
To complete the first single crochet, you will hook the yarn and pull it through a new stitch, the same as any other single crochet stitch.
You should now have two loops on your hook.

Step 3 – Insert your hook into the next stitch
To continue with the decrease, insert your hook into the next stitch as if you were going to single crochet in that stitch.
Keeping those two loops on your hook, you will be making a third loop.

Step 4 – Make another loop
Hook your yarn, pull it through, and make a third loop on the hook.
This means you will have two single crochet stitches and the original stitch together side by side on your hook, ready to be joined into one stitch.

Step 5 – Hook the yarn and pull through all three loops
Yarn over with your hook and pull through all three loops on your hook in one go.
This is the final step of that stitch.
You will have made those stitches into just one stitch, meaning that you have crocheted two stitches together.
First single crochet decrease stitch completed!

Tips for Success
- Use stitch markers to mark decrease rows if your pattern calls for shaping.
- Keep your tension relaxed — tight stitches can make decreasing tricky.
- Practice on scrap yarn before working into your final project.
- The sc2tog isn’t just for amigurumi, it’s used in shawls, garments, and even bags to shape rows and rounds.
Video Tutorial
You can watch the video tutorial with the step-by-step instructions in this post or head over to my YouTube channel here.
FAQs
1. What does sc2tog mean?
Breakdown of the Abbreviation:
sc = single crochet – This is the basic stitch type being used.
2 = two stitches – Indicates the number of stitches involved in the decrease.
tog = together – Signals that the two stitches will be worked into one.
Learn everything about crochet abbreviations. – Crochet Abbreviations (US + UK Terms) Free Printable
2. What is a decrease row?
A decrease row is a row where stitches are intentionally reduced to shape the fabric.
You’ll often find these in sleeves, hats, or amigurumi designs.
Decrease rows are essential in creating shaping in patterns, such as narrowing sleeves, tapering hats, or forming curves in amigurumi.
By reducing the stitch count in a controlled manner, a decrease row helps the piece conform to a desired shape or size, adding structure and dimension to the project.
3. What is the difference between invisible decrease and normal decrease?
The main difference between the invisible decrease method and a normal decrease in crochet lies in their technique and appearance.
A normal decrease, often called single crochet two together (sc2tog), involves inserting the hook through both loops of two consecutive stitches, creating a noticeable bump or gap in the fabric.
This method is straightforward but can leave visible holes, especially in tight projects like amigurumi.
In contrast, an invisible decrease is worked only through the front loops of two stitches, resulting in a much neater, flatter finish.
This technique minimizes gaps and blends more seamlessly with the surrounding stitches, making it ideal for projects that require a polished, professional look.
4. Is invisible decrease the same as amigurumi decrease?
Almost! “Amigurumi decrease” often refers to the invisible decrease, a neater version of sc2tog worked only in the front loops.
It reduces bulk and hides gaps.
5. How many stitches does a decrease remove?
A decrease in crochet reduces two or more stitches into one, effectively subtracting at least one stitch from your stitch count.
For example:
- In a sc2tog (single crochet two together), two stitches become one, decreasing the stitch count by one.
- In a dc3tog (double crochet three together), three stitches become one, decreasing the stitch count by two.
Patterns will tell you exactly how many stitches to decrease and which method to use.
6. What other types of decreases are there?
- 1. Single Crochet Decrease (sc2tog) – Combines two single crochet stitches into one.
- 2. Double Crochet Decrease (dc2tog) – Combines two double crochet stitches into one.
- 3. Invisible Decrease – The invisible single crochet decrease is a neater version of sc2tog, worked through the front loops only of two stitches.
- 4. Half Double Crochet Decrease (hdc2tog) – Combines two half double crochets into one.
- 5. Treble Crochet Decrease (tr2tog) – Combines two treble (triple) crochet stitches into one.
- 6. Cluster Stitches – Similar to decreases, but often decorative.
- 7. Skip-a-Stitch Decrease – A simpler method where a stitch is skipped to reduce stitch count.
Want to Learn More?
Learn how to work the basic crochet stitches and more with the posts below
- How To Half Double Crochet Stitch For Beginners (hdc)
- Half Treble Crochet Stitch (htr) For Beginners
- How To Treble Crochet (TR)
- How To Single Crochet (SC)
- How To Double Crochet (dc) For Beginners
- 50 Crochet Stitches For All Skill Levels (Free)
- Star Stitch Crochet Tutorial (Easy For Beginners)
Free Patterns to Try
- How To Crochet A Blanket
- 50 Stash Busting Crochet Patterns
- Crochet Round Rug Pattern
- 37 Easy Crochet Dishcloth Patterns (+ Free Beginner Pattern)
- Crochet Dishcloth Pattern Set
- Free Outlander Cowl Crochet Pattern
Join the Handy Little Me Knitting + Crochet Community on Facebook.
Follow us on TikTok, Instagram, and Pinterest for more tutorials and inspiration!


