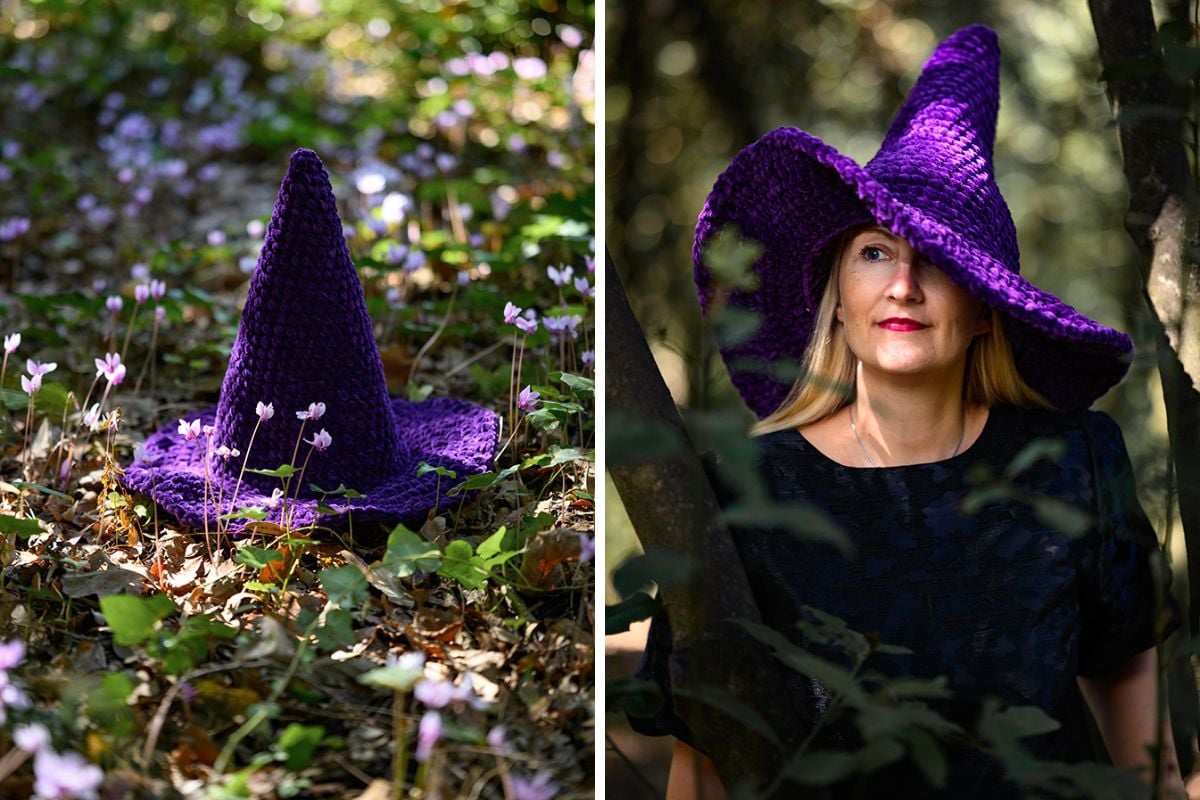
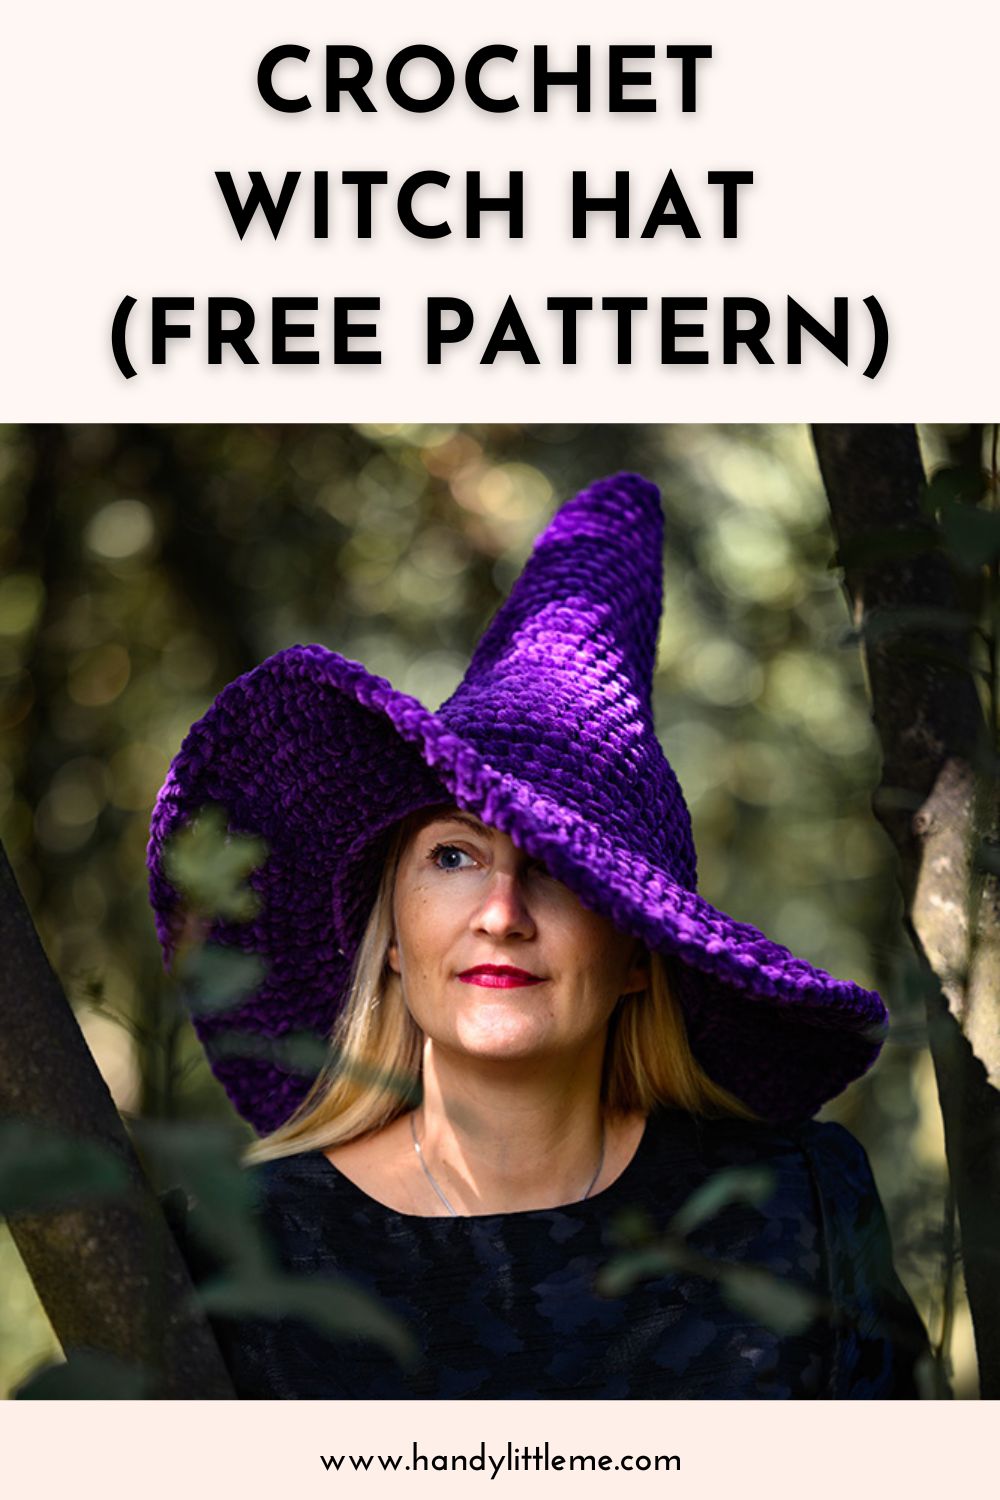
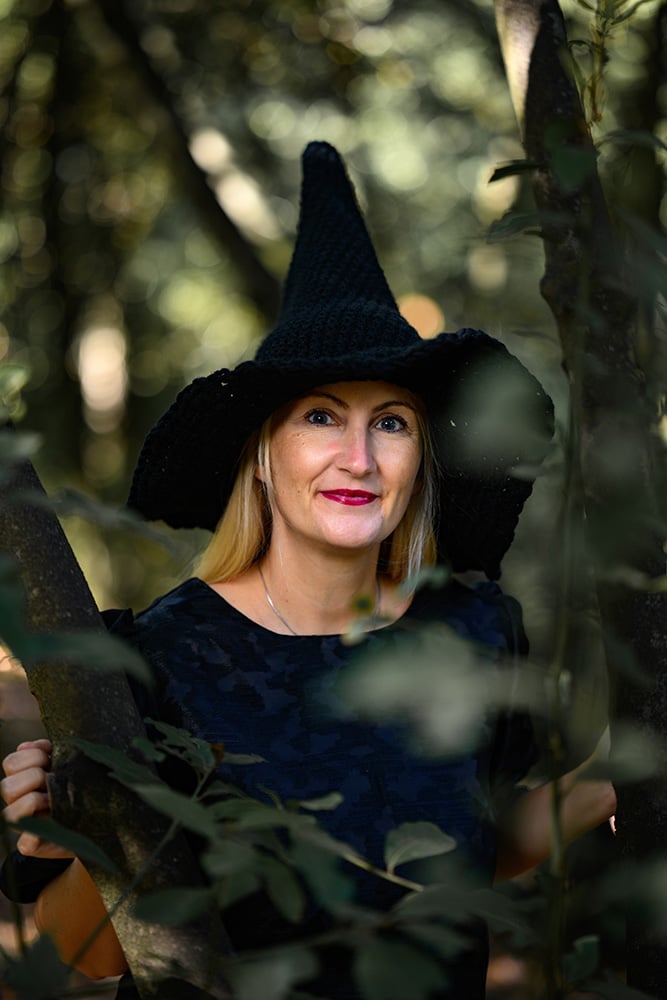
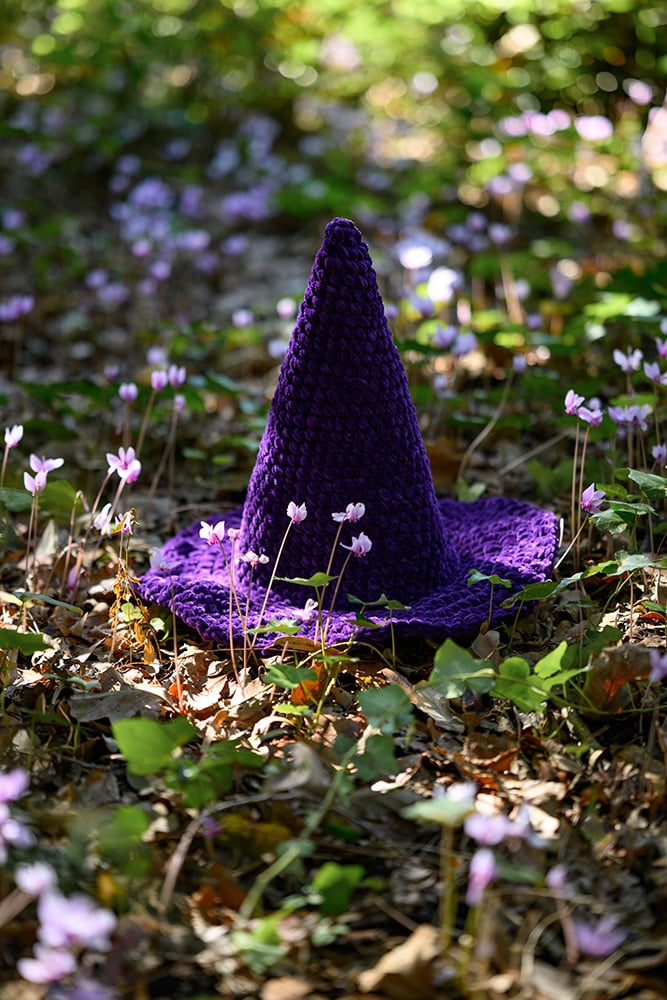
Crochet Witch Hat (Free Pattern)
THIS ARTICLE CONTAINS AFFILIATE LINKS THAT SUPPORT HANDY LITTLE ME CONTENT AND FREE PATTERNS.If you’ve been craving a quick, spooky-cute make for Halloween, this cozy witch hat is a winner.
It works up fast in bulky yarn, has a satisfyingly pointy crown, and a brim you can customize from neat and modest to wide and dramatic.
We’ll walk through the full adult pattern, plus simple sizing notes for child, teen, and adult large—so you can whip up a matching set.
This guide uses continuous rounds, clear stitches and abbreviations, and plenty of tips (hello, stitch markers!) to keep everything stress-free.
Please scroll down to view the free pattern, or grab your printer-friendly, ad-free PDF here.
Before You Get Started
A few notes to make the project smooth and fun:
- This hat is worked top-down in the round: pointy cone → short straight section → BLO “ridge” → brim in FLO.
- Use a firm, springy bulky/super-bulky for the best stand-up shape.
- Keep a marker in the first st of each rnd so tracking increases is effortless.
- Abbreviations you’ll see: MR (magic ring), sc (single crochet), hdc (half double crochet), dc (double crochet, optional variation), inc (2 sc in next st), BLO (back loop only), FLO (front loop only), sl st (slip stitch), ch (chain), sts (stitches).
- Working in front loops (or “flo”) when noted creates the crisp brim flare and a tidy ridge.
Tools/Materials Needed
- Bulky/super-bulky yarn
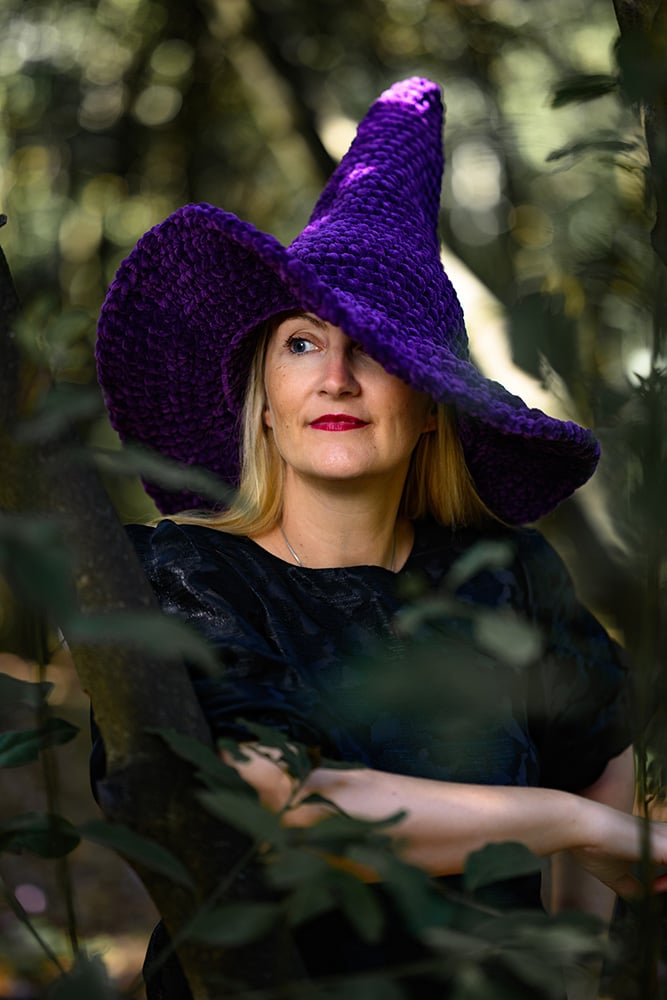
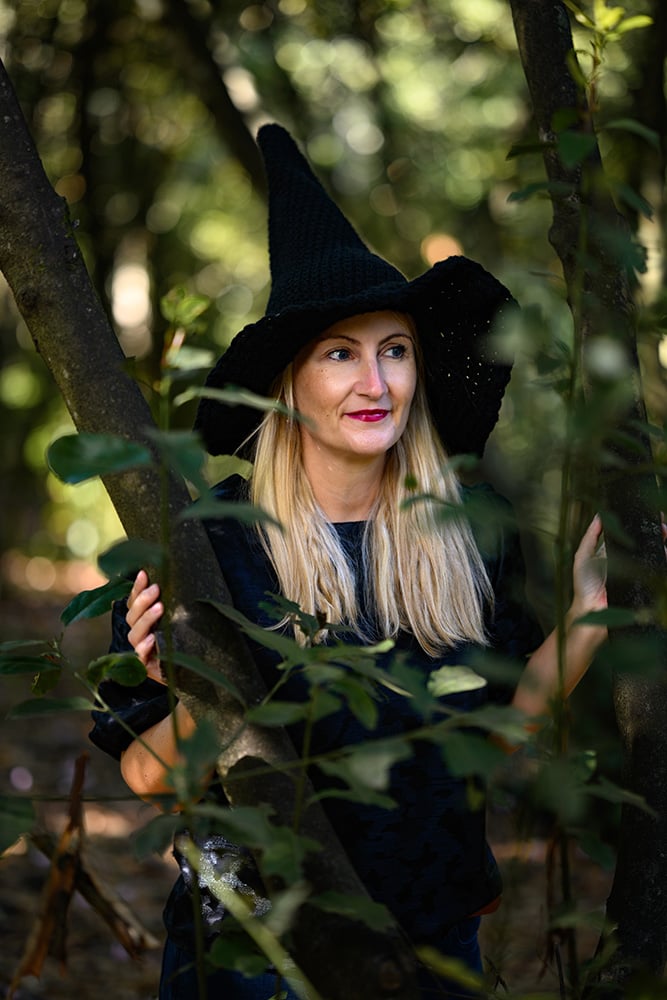
- For the black hat I used: Himalaya Snow – 351 yards (I needed 3 balls)
- For the purple hat I used: Himalaya Dolphin Baby knit with two strands together – around 430 yards (I needed 4 balls)
- Find yarn substitutions here
- 8 mm/US L-11 crochet hook
- Stitch marker(s)
- Scissors
- Tape measure
- Tapestry needle (for weaving ends and optional wire joi
- Optional: millinery wire or weed-whacker line for a wired brim
Size & Fit Guide (Child • Teen • Adult • Adult Large)
This pattern grows by adding classic 3-point increase rounds in the cone.
Stop increasing when the stitch count roughly matches the head circumference you want, then work “even” rounds for height before the ridge.
At ~9–11 sc per 10 cm (about 3.5–4.25 sts per inch):
- Child (~50–52 cm / 19.5–20.5″) → stop around 48 sts, then work 3–6 even rounds for a shorter crown.
- Teen / Small Adult (~54–56 cm / 21–22″) → stop at 54 sts (given below), then 4–8 even rounds for classic height.
- Adult Large (~58–60 cm / 22.75–23.5″) → add R34 to reach 57 sts (pattern below). If you prefer extra ease or super-thick yarn, add one more increase round later: [18 sc, inc] x3 = 60 sts.
Fit tip: Try the opening on the head after reaching 54–60 sts. Fiber stretch and personal tension vary; adjust with one extra inc round or a plain round as needed.
Gauge – 8 sts / 8 rows in single crochet using the bulky yarn and an 8mm/US L-11 hook in 10 x 10 cm and 4 x 4 inches.
Abbreviations
- MR – magic ring
- sc – single crochet
- hdc – half double crochet
- dc – double crochet (optional variation)
- inc – increase (2 sc in next st)
- BLO – back loop only
- FLO – front loop only
- sl st – slip stitch
- ch – chain (e.g., join with sl st; ch 1)
- rnd – round
Tip: When joining new yarn at the brim, insert the hook into the FLO, yarn over, and pull through to start cleanly; if you chain up, place the second ch loosely to avoid a jog.
Step-By-Step Instructions
Please scroll down to view the free pattern, or grab your printer-friendly, ad-free PDF here.
Adult Witch Hat Pattern
Stitches used: MR, sc, hdc, inc (= 2 sc in same st), BLO, FLO
Construction: pointy cone → short straight section → BLO “ridge” → brim in FLO
Cone (Crown)
- R1: MR, 6 sc in ring (6)
- R2: [sc, inc] x3 (9)
- R3: sc around (9)
- R4: [2 sc, inc] x3 (12)
- R5: sc around (12)
- R6: [3 sc, inc] x3 (15)
- R7: sc around (15)
- R8: [4 sc, inc] x3 (18)
- R9: sc around (18)
- R10: [5 sc, inc] x3 (21)
- R11: sc around (21)
- R12: [6 sc, inc] x3 (24)
- R13: sc around (24)
- R14: [7 sc, inc] x3 (27)
- R15: sc around (27)
- R16: [8 sc, inc] x3 (30)
- R17: sc around (30)
- R18: [9 sc, inc] x3 (33)
- R19: sc around (33)
- R20: [10 sc, inc] x3 (36)
- R21: sc around (36)
- R22: [11 sc, inc] x3 (39)
- R23: sc around (39)
- R24: [12 sc, inc] x3 (42)
- R25: sc around (42)
- R26: [13 sc, inc] x3 (45)
- R27: sc around (45)
- R28: [14 sc, inc] x3 (48)
- R29: sc around (48)
- R30: [15 sc, inc] x3 (51)
- R31: sc around (51)
- R32: [16 sc, inc] x3 (54)
- R33: sc around (54)
Fit check: Try the opening on your head or measure the circumference.
If you want ~56 cm, 54 sts may be perfect at ~10 sc/10 cm.
Optional for larger fit:
- R34 (optional for larger fit): [17 sc, inc] x3 (57)
- R35: sc around (57)
Straight Section (for crown height)
Work 4–8 rounds sc around (no increases) to reach your preferred height.
- Short, perkier cone: 4 rounds
- Classic tall crown: 6–8 rounds
Ridge Round
Next round (BLO): sc around in BLO of every st.
Sl st, fasten off (leave tails to weave).
This creates the neat ridge where the brim will flare.
You’ll use the front loops of this round for the brim.
Brim
Join yarn to any FLO of the ridge round.
Work in joined rounds: join with sl st; ch 1 does not count as a stitch.
- Brim R1 (FLO): [sc 8, inc] x 6 (adds +6) = 60 sts
- Brim R2: [sc 9, inc] x 6 = 66 sts
- Brim R3 (switch to hdc): [hdc 10, inc] x 6 = 72 sts
- Brim R4: [hdc 11, inc] x 6 = 78 sts
- Brim R5: [hdc 12, inc] x 6 = 84 sts
- Brim R6: [hdc 13, inc] x 6 = 90 sts
Continue adding one more plain stitch between increases each round to your taste:
- Modest brim: 4–6 rounds total
- Wide, dramatic brim: 8–10+ rounds
Finish: Sl st in next st, fasten off, weave in ends.
For a crisp edge, see “Customizing & Tips” below for optional wire and sewing the casing closed on the last round of the brim.
Customizing & Tips
- Gauge check: If the brim starts ruffling, work an occasional round without increases. If it’s too flat/curving upward, add one extra increase (space 7 increases evenly instead of 6).
- Stiffness/shape: A wool blend or tightly spun acrylic holds the loop structure nicely. Light steam-block (be gentle with acrylic).
- Wired brim (optional): Work 1 round of loose sl st as a casing; thread millinery wire/weed-whacker line through; overlap and tape ends; close the gap with a few whip-stitches.
- Band detail: After the ridge, add 2–3 even rounds before starting brim increases, or surface-slip-stitch a contrasting stripe. You can also add stripes to the cone for a fun, classic look.
- Child/Teen tweaks: Stop increasing at 48–51 sts for smaller heads, then add fewer even rounds before the ridge for a shorter crown.
- Adult Large: Use R34 to reach 57 sts; for extra ease, add [18 sc, inc] x3 later to reach 60 sts and proceed.
FAQs
Can I use the original mini hat idea with a bigger hook?
Follow the same logic, but bumping hook/yarn size alone won’t reach adult circumference.
Keep extending the cone’s increase sequence until your stitch count matches the target head size, then proceed ridge (BLO) → brim (FLO) exactly as shown.
How do I make a teen or child size?
Stop increases earlier (48–51 sts), work fewer even rounds for crown height, then do the ridge and brim.
Try on as you go for the best fit.
Can I switch to dc for a lighter brim?
Yes—swap the hdc rounds for dc to add drape and speed.
What if I crochet tightly or loosely?
Use your fit check at 48–60 sts and adjust with one more increase round (or an even round) to dial in comfort.
Where can I find more tutorials?
Explore our crochet tutorials library for technique refreshers and finishing tricks.
Grab all 7 of my Halloween Crochet Patterns here…
Troubleshooting At A Glance
- Brim ripples: Too many increases. Work a plain round.
- Brim curls up: Too few increases. Add one extra inc spaced evenly.
- Cone too short: Add 2–4 more even rounds before the ridge.
- Cone too floppy: Swap to a firmer yarn or tighten tension slightly.
Share Your Work
If you try this in candy-purple or add a striped band, tag us—we’d love to cheer on your spooky stitch-craft.
Tag me on Instagram @handylittleme or use #handylittleme to show off your makes.
Join the Handy Little Me Facebook Group to share photos, ask questions, and connect with other makers.
Happy crocheting!
Want More Free Crochet Patterns?
- Crochet Mini Witch Hat Pattern (Free Printable)
- Crochet Ghost (Free Printable)
- Eyeball Crochet Coaster Pattern (Free Printable)
- Crochet Halloween Garland (Free Printable)
- Crochet Pumpkin Coaster (Free Printable)
- Crochet Cauldron Pattern (Free Printable)
- The Best Crochet Halloween Costumes For Babies
- Crochet Ribbing Tutorial
- Pumpkin Crochet Pattern (Free, Easy + Adorable)
- Free Crochet Pumpkin Pattern For Beginners
- Crochet Pumpkin {Single Crochet Ribbing}
- Crochet Acorn Garland Free Pattern (Fall Decor)
- 41 Free Halloween Crochet Patterns (Cute + Spooky)
Hi, enjoying crocheting the adults’s witches hat but struggling with the brim
I have 54 front loops but I’m not sure of the increase for the brim
Please could confirm how many stitches in the first round of the brim?
Hi, Karen! You’re right on track. If you have 54 front loops, work Brim Round 1 (FLO) as [sc 3, inc] x6.
That adds 6 stitches, so you’ll finish the round with 60 sts. (Join with a sl st; the ch 1 doesn’t count as a stitch.)
if I do (3sc, inc) x6 that’s only 30 stitches. do I then just sc the rest of the front loops? it doesn’t make sense. if you’re increasing only 6 stitches they should be evenly spaced (so not every 4th stitch). or do you mean to keep increasing every 4th stitch around which is more than 6, it’s at least 8 on a child size and more on an adult.
Hi, thank you so much for pointing that out — you’re absolutely right. The brim increases should be worked evenly around the full round, adding 6 stitches total, so I’ll update that section to make it clearer. I really appreciate you catching that!