Japanese Knot Bag Knitting Pattern
THIS ARTICLE CONTAINS AFFILIATE LINKS THAT SUPPORT HANDY LITTLE ME CONTENT AND FREE PATTERNS.In this post, you will see a Japanese knot bag knitting pattern that is simple, practical, and fun to make.
This easy bag is worked flat and then seamed, with one longer handle and one shorter handle that loop together to close the bag.
Knit in cotton yarn with a textured woven stitch, it makes a lovely everyday bag or small project bag.
Please scroll down to view the free knitting pattern online or grab the inexpensive, ad-free printable PDF in my shop here.

Before You Get Started
- Skill Level – Easy (Advanced Beginner)
- This pattern is an easy project and is worked flat in one piece before being seamed.
- The bag uses a woven stitch pattern, which gives the fabric texture and a little extra structure, making it a great choice for a reusable bag.
- A Japanese knot bag has two handles of different lengths.
- To close the bag, the longer handle passes through the shorter one, creating the signature knot-style closure.

Materials
Yarn
- 1 x The Pima Cotton from We Are Knitters (Sand).
- This cotton is 100% Pima Cotton / 100g/3.05oz/232 yds/212m.
- This is an Aran/Worsted weight yarn/10 Ply yarn.
Needles
- 5 mm (US 8) knitting needles.
- The bag is worked back and forth on the needles – knit flat.
Notions
Print + Stitch
The Muses Collection
The Japanese Knot Bag belongs to the Muses Collection, a range of classic knit designs inspired by the ancient Greek Muses.
Size Information
Finished measurements
- Width of bag = 28 cm/11 inches.
- Height of bag = 18 cm/7 inches.
- Height of longest handle = 16 cm/6 inches.
- Height of shorter handle = 10 cm/4 inches.
- Width of handle = 8 cm/3 inches.
Gauge
18 sts/32 rows in 10 cm/4 inches in the stitch pattern.
Abbreviations
- CO – Cast on
- Cont – Continue
- K – Knit
- Patt – Pattern
- P – Purl
- Sl1PW – Slip one stitch purlwise
- St(s) – Stitch(es)
- Rep – Repeat
- RS – Right side
- WS – Wrong side
- WYIF – With yarn in front
- WYIB – With yarn in back

Pattern Instructions
Please note: For this stitch pattern, you will cast on multiples of 2+1+2 (edge stitches); for example, 2+10=20+1=21+2=23
Worked flat knitting back and forth on two needles:
Worked in one piece and then seamed.
Cast on 53 sts.
- Row 1 (RS): K1, *K1, WYIF Sl1PW* – Rep from * to* to the last 2 sts, K2.
- Rows 2 and 4 (WS): Purl.
- Row 3: K1, *WYIF Sl1PW, WYIB K1* – Rep from * to * to last 2 sts, WYIF Sl1PW, WYIB K1.
Rep rows 1 – 4 until your piece measures 36 cm/14 inches.
The bag handles
- Next RS row (Row 1 of patt) – Work in patt over the next 16 sts, cast off the center 21 sts, and work in patt over the final 16 sts.
- Next row – Cont to work on the final 16 sts only and place the other 16 sts onto a stitch holder.
- Cont to work in the stitch pattern (Start and end each RS row with a K1 stitch ) on these 16 sts only – until the handle measures 32 cm/12.5 inches.
- Cast off.
- Place the other 16 sts from the stitch holder onto the needle and work in patt (Start and end each RS row with a K1 stitch ) until the handle measures 20 cm/8 inches.
- Cast off.
Please note – you may wish to make your bag handles shorter – work fewer rows in order to do this.

Finishing
- You may wish to block your bag before seaming.
- Fold the main body of the bag in half (with the right sides facing out) and seam each side (the straight edges and side seams) using the mattress stitch.
- Then fold over and seam each handle to the other side of the bag.
- Weave in all loose ends.
Blocking
You may wish to block your own Japanese knot bag before seaming.
You can do that as follows:
- Lay the item out on blocking mats, lightly stretch it into place, and pin it with blocking pins.
- Spray with cold water.
- Allow to dry completely.
- Tutorial – Blocking Knits – How To Block Knitting Guide

Video Tutorial
If you would like extra help with the stitch pattern, you can watch the woven stitch video tutorial below.
You may also like…
This Japanese knot bag pattern is knitted with raffia and made using a slip stitch ribbing stitch pattern – Raffia Japanese Knot Bag Knitting Pattern.

Share Your Make
I love seeing your finished projects on social media.
If you enjoyed making the Japanese Knot Bag Pattern, I’d love to see yours on Instagram, tag me @handylittleme.
If you are on Facebook, check out the handylittleme Facebook page and share a photo.
I’d love to see your work.
Happy Knitting!

FAQ
What size is a Japanese Knot Bag?
The size of a Japanese knot bag can vary, as it comes in various dimensions to accommodate different needs and preferences.
Generally, the size of a Japanese knot bag is classified into three main categories: small, medium, and large.
- Small: Small Japanese knot bags are typically more compact and designed to carry a few essential items. They are ideal for holding small personal belongings, such as cosmetics, keys, a phone, or a wallet. The approximate dimensions for a small bag could be around 6 to 8 inches (15 to 20 cm) in width and 6 to 10 inches (15 to 25 cm) in height.
- Medium: Medium-sized Japanese knot bags offer a bit more space and versatility. They can hold a variety of items, including a small notebook, a tablet, or a water bottle, in addition to the usual personal essentials. The dimensions for a medium-sized Japanese knot bag might range from 8 to 12 inches (20 to 30 cm) in width and 8 to 12 inches (20 to 30 cm) in height.
- Large: Large Japanese knot bags provide ample storage and can hold more substantial items, such as a book, a light jacket, or a larger tablet or laptop. These bags are suitable for those who need a roomier option for everyday use. The dimensions for a large Japanese knot bag could be around 12 to 15 inches (30 to 38 cm) in width and 12 to 15 inches (30 to 38 cm) in height.
Keep in mind that these size ranges are approximate and can vary depending on the designer or maker of the Japanese knot bag.
Additionally, some bags might be specially customized to fit specific needs or preferences, such as making a project bag or a market bag for a quick trip to the grocery store.

How does a Japanese Knot Bag work?
A Japanese knot bag is a stylish and functional bag known for its unique design and simple closing mechanism.
It consists of two handles, one longer and one shorter, attached to the bag’s body.
To understand how it works, follow these steps:
- Bag Structure: The Japanese knot bag is typically shaped like a soft, unstructured pouch or tote bag. It can vary in size, from small to medium, and has a round or rectangular bottom.
- Handle Configuration: The bag has two handles – a longer handle (a large loop) and a shorter handle (a short loop). The longer handle is often used to carry the bag over the shoulder, while the shorter handle is meant to be held in hand.
- Opening and Closing: To open the bag, you lift the shorter handle, which loosens the knot, creating an opening at the top. This allows you to access the bag’s contents easily.
- Placing Items: Once the bag is open, you can place your items inside it, much like any other bag or pouch.
- Knotting: To close the bag, you take the longer strap and pass it through the shorter strap. This creates a loop, and the longer strap is pulled tight, securing the bag shut with a knot. The closure is flexible enough for you to access the contents by placing your hand underneath the shorter strap.
- Carrying: With the knot tied, you can hold the shorter handle in your hand or slide it over your wrist (as a wristlet). Alternatively, you can carry the bag over your shoulder using the longer handle.
What is the history of the Japanese Knot Bag?
The Japanese knot bag, also known as the Japanese knot purse or Azuma bukuro, is a traditional Japanese-style bag with a unique design that allows it to be closed and carried by looping the longer handle through the shorter one.
This creates a charming knot that secures the bag’s contents.
While the exact origins of the Japanese knot bag are not well-documented, it is believed to have a long history deeply rooted in Japanese culture.
Historically, Azuma bukuro bags were made from traditional fabrics, often using kimono fabric scraps or other textiles.
These bags were a compact size commonly used to carry small personal items, such as cosmetics, handkerchiefs, or sewing materials.
The knot design made it convenient to keep the bag securely closed while also offering easy access to its contents.

More Free Knitting Patterns
Check out more knitting patterns and the stitch pattern tutorials you need to try out!
- Diamond Leaf Tank Top Knitting Pattern (Euterpe | Muses Collection)
- Ripple Stitch Tee Knitting Pattern (Calliope | Muses Collection)
- How To Knit The Ripple Stitch (Tutorial)
- Slip Stitch Rib Bag Knitting Pattern (Muses Collection)
- How To Knit Slip Stitch Rib (Tutorial)
- The Polyhymnia Cardigan Knitting Pattern
- Clio Tee Knitting Pattern With A Feather And Fan Panel
- Thalia Garter Stitch Tank Top Knitting Pattern
- How To Knit The Feather And Fan Stitch (Tutorial)
- Feather and Fan Wrap Knitting Pattern (Melpomene | Muses Collection)
- How To Knit An Easy Lace Stitch Pattern (Tutorial)
- Lace Tee Knitting Pattern (Erato | Muses Collection)
- How To Knit The Mesh Stitch (Tutorial)
- Lace Mesh Top Knitting Pattern (Urania | Muses Collection)
- How To Knit A Shawl For Beginners (Step-By-Step Tutorial)
- 12 Summer Knits (The Muses Collection)
Hi there!
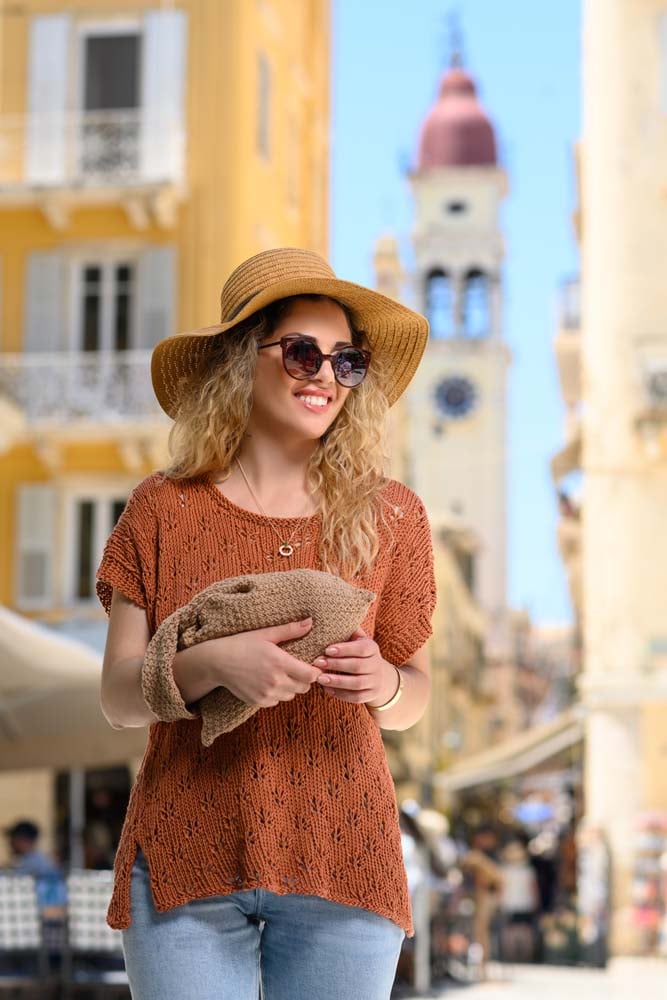
Thank you so much for sharing your beautiful inspiring work. This bag is beautiful as is the top the model is wearing! Do you have a pattern as well for the top to purchase? I’d love to make both!
Thx again and take care
Carol 🙂
Hello Carol,
I’m so happy you like the bag and tee patterns, you can find the tee pattern here – https://shop.handylittleme.com/collections/muses/products/the-erato-tee-knitting-pattern
There is also an option to grab both patterns in a bundle here – https://shop.handylittleme.com/collections/muses/products/the-muses-collection-knitting-patterns
Happy knitting!
Louise
hi, so I’m at the part of the handles and I’m not super clear on how to cast off while keeping the working yarn uncut. how then do I start the second 16 stitches for the handles? anybhelp would be appreciated 🙏🏾🙏🏾
Hello JoJo,
You can work the first 16 sts for the handle without breaking the yarn but when you have completed that and cast off, you will cut the yarn.
Then you will have to rejoin the yarn to the first stitch of the other 16 sts for the other handle.
I hope that helps,
Louise
Hi Louise,
I love this bag pattern and am currently working on the handle section. I have a problem tho, my pattern isn’t lining up with the main section of bag. Any tips? Do I keep the row patterns exactly the same ie. rows1 and three are slightly different?
Tia.. Gina😊
Hi Gina 😊
I’m so glad to hear you’re enjoying the pattern!
When it comes to the handle section, yes—you’ll want to keep the stitch pattern consistent with the rest of the bag so that everything lines up nicely.
Rows 1 and 3 are intentionally slightly different to create the texture, so repeating them exactly as written is correct.
If things aren’t lining up, double-check that your stitch count is consistent with the end of the main body section—sometimes a missed increase or decrease earlier on can cause the handle section to shift a little.
Also, make sure you’re starting and ending each row in the right place, as that can make a difference with textured patterns.
Let me know how it goes or if you’d like to send over a photo — I’d be happy to take a closer look!
Happy knitting,
Louise
Louise – thanks for your quick response! I started the handle again and was able to line up the pattern😃 Yeah! A knitted bag was the item I most wanted to knit when I picked knitting back up – so happy to be almost completed my first one! Thank you so much for the pattern and help!
There is still something bugging me – my execution of the edging of straps.
Any advice here? Some of the edges are “ bumpy”?
Not sure how to add a pic on here to show you😂
Hi Gina, 😊
Great question—and no worries, those slightly “bumpy” edges are actually part of the nature of the stitch pattern.
Because of the texture and how the edges are shaped, especially around the straps, it can create a bit of a wavy or uneven look as you go.
Blocking the finished piece can help smooth everything out and give the edges a more polished look—so definitely give that a try if you haven’t already!
And I totally get wanting to share a pic—sadly, blog comments don’t allow image uploads, but feel free to send it to me via email or tag me on social media if you’d like me to take a closer look 😊
Happy knitting!
Louise
Pattern question. It says multiples of 2+1+2, but the example provided (2+10=20+1=21+2=23) is confusing me! The pattern is for cast on 53 which is too big for my needs. I am thinking…2+30+2=35 cast on. Can you confirm before I start this?? I am excited to make this bag!!
Hi Linda — great question, and you’re not alone… that example is confusing as written! 😊
Here’s the simple way to think about it:
“Multiples of 2 + 1 + 2” = (an even number) + 3
So you can cast on any even number, then add 3.
That’s why the sample ends up as 23 (20 is even, +1 +2 = +3 total).
✅ Your idea works:
2 + 30 + 2 = 34, then +1 would make it 35 — which fits the rule (even + 3).
So yes, 35 stitches is a valid cast-on for a smaller bag.
Quick tip: the first and last 2 stitches are the edge stitches, and the +1 is what keeps the stitch pattern centred, so try to keep that structure and you’ll be golden.
Have fun making it — I’d love to hear how it turns out!