How To Knit The Ripple Stitch (Tutorial)
THIS ARTICLE CONTAINS AFFILIATE LINKS THAT SUPPORT HANDY LITTLE ME CONTENT AND FREE PATTERNS.In this tutorial, you will learn how to knit the ripple stitch, a simple textured stitch pattern that creates a subtle wave effect across the fabric.
This stitch pattern combines knit and purl stitches in a repeating sequence to form gentle ripples that add movement and texture to your knitting.
The ripple stitch is versatile and can be used for many projects, such as scarves, sweaters, blankets, and textured garments.
Once you establish the repeat, this stitch becomes very easy to memorize and relaxing to knit.

Before You Get Started
Skill Level – Easy (Advanced Beginners)
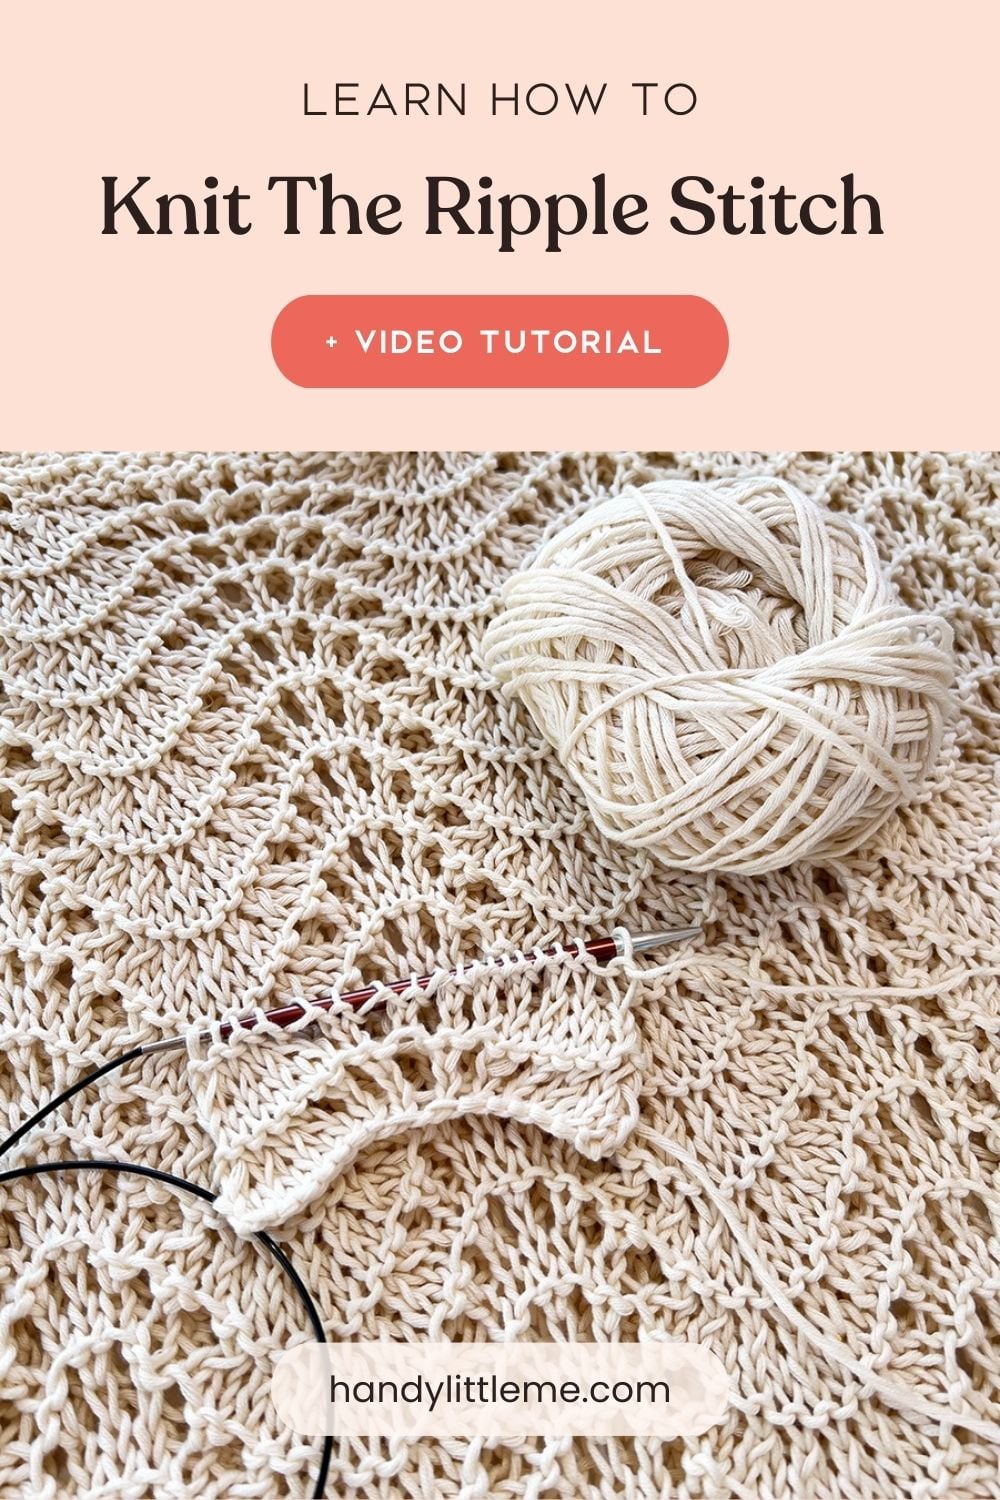
The ripple stitch creates a wave-like or rippling texture in the knitted fabric.
This effect is produced by working knit and purl stitches in a specific pattern across the row.
It’s a great stitch pattern for advanced beginners, as it only requires basic knitting skills such as:
- Knit stitches
- Purl stitches
- Following a simple row repeat
Because the stitch pattern is repetitive, it’s easy to knit once you have completed a few rows.
If you are practicing this stitch for the first time, try knitting a small swatch before using it in a larger project.

Materials
To knit a ripple stitch swatch, you will need:
- Any yarn weight
- Knitting needles suitable for your yarn
- Scissors
- Tapestry needle (optional)
Because this is a stitch tutorial, you can practice using any yarn and needle size you like.
Abbreviations
- K – Knit
- K2tog – Knit the next two stitches together (decrease)
- St(s) – Stitch(es)
- P – Purl
- Rep – Repeat
- RS – Right side
- WS – Wrong side
- YO – Yarn over (increase)
Abbreviations/Chart
- Multiple of 18 sts.
- 4-row stitch repeat.

The Stitch Pattern
This stitch pattern is worked in a multiple of 18 sts.
For a sample cast on 18 stitches or for a larger sample cast on 36 stitches.
- Row 1 (RS): Knit.
- Row 2 (WS): Purl.
- Row 3: *(K2tog) 3 times, (YO, K1) 6 times, (K2tog) 3 times; Rep from * to the end of the row.
- Row 4: Knit.
Repeat rows 1-4 until you reach your desired size.
Cast off.
Video Tutorial
If you would like to see the ripple stitch worked step by step, you can watch the tutorial below.
This video will guide you through the yarn overs and decreases used to create the pattern.
Pattern Using This Stitch
If you would like to use this stitch in a garment project, you can try the Ripple Stitch Tee Knitting Pattern
This pattern uses the ripple stitch to create an elegant summer top.

FAQ
What is the ripple stitch?
The ripple stitch is a textured knitting stitch pattern that creates a gentle wave effect across the fabric.
The ripples form by alternating knit and purl stitches in a repeating sequence, which produces raised and recessed areas that resemble soft waves.
This type of textured stitch is often used in garments and accessories because it adds visual interest while keeping the fabric flexible and comfortable to wear.
The ripple stitch works particularly well for sweaters, tees, scarves, blankets, and textured panels in knitting projects.
Is the ripple stitch beginner-friendly?
Yes. The ripple stitch is suitable for advanced beginners because it uses only knit and purl stitches in a simple repeat.
What can you make with the ripple stitch?
Once you learn the ripple stitch, you can use it in many different knitting projects.
It works especially well for:
- knitted tops and tees
- sweaters and cardigans
- scarves and cowls
- blankets and throws
- textured accessories
Because the stitch pattern creates a subtle wave texture, it adds interest without making the fabric too bulky.
One project that uses this stitch is the Calliope Tee, a lightweight, textured top from the Muses Collection.
Tips for knitting the ripple stitch
Here are a few helpful tips when working this stitch pattern:
- Use stitch markers between repeats to help keep track of the pattern.
- If you lose your place, look at the knit and purl columns in the fabric to identify where you are in the repeat.
- Knit a practice swatch first so you can become comfortable with the rhythm of the pattern.
- Blocking can help the ripple texture relax and look more even.
Once you have completed a few repeats, the stitch pattern becomes easy to memorize.
Why does the fabric look wavy?
The ripple effect comes from alternating knit and purl stitches, which create raised and lowered sections that form the wave pattern.
Do I need to block this stitch?
Blocking is optional but recommended if you want the stitch definition to look smoother and more even.

Is The Ripple Stitch The Same As Old Shale?
The terms “ripple stitch” and “old shale” are often used interchangeably in the knitting community, but they can refer to different patterns depending on context and technique.
Old Shale
Old Shale is a traditional Shetland lace pattern often used in shawls and other delicate projects.
It creates a wavy effect by combining multiple increases and decreases within the same row.
The traditional Old Shale pattern involves a sequence that typically includes yarn overs and multiple stitches knitted together, resulting in a feathered or scalloped edge.
This gives the fabric a soft, wavy look, ideal for the edges of blankets or the borders of garments.
View an old Shale knitting pattern here: Cream Tea Old Shale Dishcloth Knitting Pattern
Ripple Stitch
Ripple stitch in knitting generally refers to any stitch pattern that creates a rippled or wavy effect in the fabric.
This can be achieved through various increases and decreases similar to Old Shale, but the specific pattern might not necessarily be the traditional Old Shale.
Ripple stitches can vary greatly in their appearance and texture based on how the increases and decreases are arranged.

Share Your Make?
I love seeing your finished projects on social media.
If you enjoyed learning how to knit the ripple stitch, I’d love to see your work on Instagram, tag me @handylittleme.
If you are on Facebook, stop over to the Handylittleme Facebook Group and share a photo.
You can also check out my Facebook page here.
Happy Knitting!
More Free Knitting Patterns
Check out more knitting patterns and the stitch pattern tutorials you need to try out!
- Diamond Leaf Tank Top Knitting Pattern (Euterpe | Muses Collection)
- Slip Stitch Rib Bag Knitting Pattern (Muses Collection)
- How To Knit Slip Stitch Rib (Tutorial)
- The Polyhymnia Cardigan Knitting Pattern
- Clio Tee Knitting Pattern With A Feather And Fan Panel
- Thalia Garter Stitch Tank Top Knitting Pattern
- How To Knit The Feather And Fan Stitch (Tutorial)
- Feather and Fan Wrap Knitting Pattern (Melpomene | Muses Collection)
- How To Knit An Easy Lace Stitch Pattern (Tutorial)
- Lace Tee Knitting Pattern (Erato | Muses Collection)
- How To Knit The Mesh Stitch (Tutorial)
- Lace Mesh Top Knitting Pattern (Urania | Muses Collection)
- How To Knit A Shawl For Beginners (Step-By-Step Tutorial)
- Japanese Knot Bag Knitting Pattern
- 12 Summer Knits (The Muses Collection)