How To Knit A Tubular Cast-On & Tubular Bind-Off
THIS ARTICLE CONTAINS AFFILIATE LINKS THAT SUPPORT HANDY LITTLE ME CONTENT AND FREE PATTERNS.In this blog post, you will see how to knit a tubular cast-on and a tubular bind-off.
If you want your knitted hats, cuffs, socks, or sweaters to look beautifully finished and professionally made, the tubular cast-on and tubular bind-off are two techniques worth learning.
These methods create a smooth, rounded edge that flows directly into 1×1 ribbing, giving your handknits a high-end look often seen in designer garments.
Tubular edges are especially wonderful for gifts, because they instantly elevate your knitting—adding stretch, comfort, and that little touch of luxury that makes your project feel extra special.
In this guide, you’ll find: What each tubular technique is, how they work, when to use them, a roundup of tutorials, and answers to all of your questions.

Tubular Cast On & Tubular Bind Off Tutorials
Learn how to work a tubular cast on and tubular bind off with these easy tutorials, perfect for neat, stretchy ribbing on hats, cuffs, and hems.
Happy Knitting!
Long-Tail Tubular Cast-On Tutorial by Purl Soho
This tutorial walks you through forming the long-tail tubular cast-on with clear, step-by-step images that show exactly how the half-stitches develop into a smooth, rounded edge.
It covers both flat knitting and working in the round, making it easy to apply the technique to hats, cuffs, and sweater hems.
Plus a video tutorial.

Italian Tubular Cast-On by Brilliant Life Hacks
This guide introduces the Italian tubular cast-on with simple explanations and approachable photography, breaking the movement down into small, confidence-building steps.
It focuses on yarn positioning, loop formation, and how the tubular structure begins to take shape right away.
Perfect if you want a quick, gentle introduction without too much technical detail.
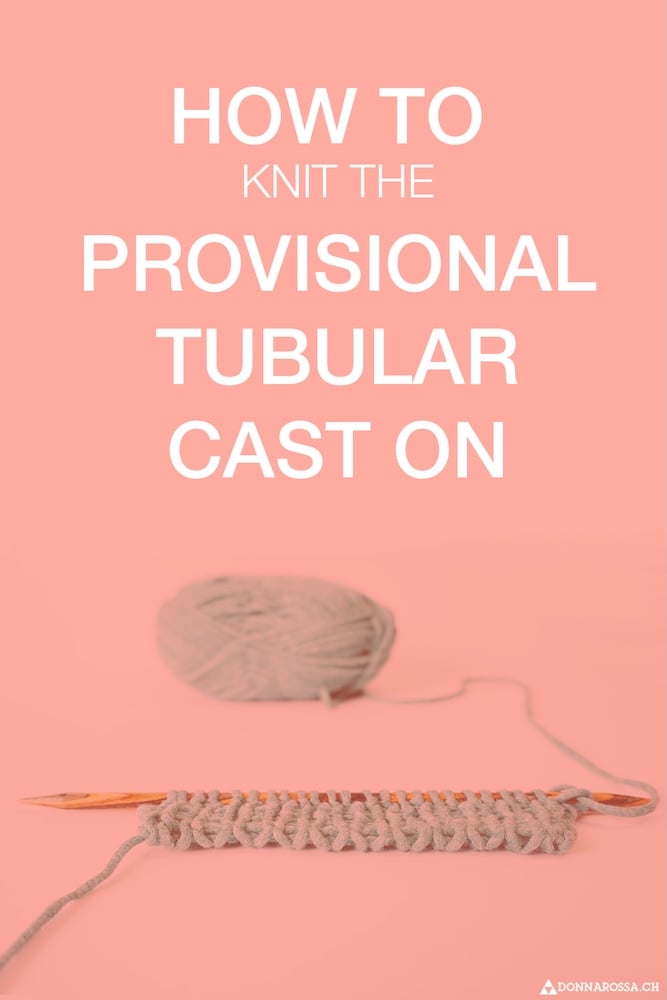
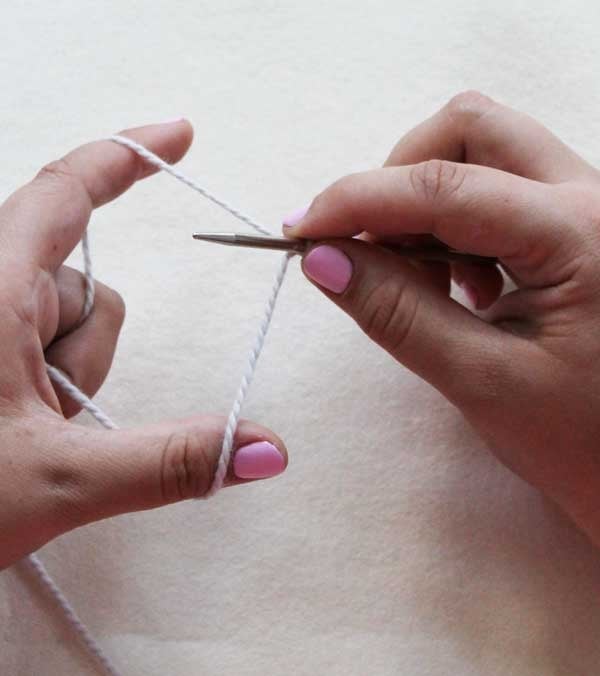
Provisional Tubular Cast-On (Scrap-Yarn Method) by Donna Rossa
This tutorial demonstrates how to work a provisional tubular cast-on using waste yarn, then remove it to reveal a perfectly balanced tubular edge underneath.
The close-up photos make each stage easy to understand, even though this method is a little more advanced.
Ideal for knitters who enjoy extra precision and don’t mind an extra step or two for a flawless finish.

Tubular Cast-On (Detailed Step-by-Step) by Nimble Needles
This in-depth guide explains the tubular cast-on with clear photos and helpful notes about tension, needle positioning, and how the half-stitches transform during the set-up rows.
It’s thorough, visually detailed, and perfect for knitters who like to understand not only how, but why a technique works.
If you’re looking for a comprehensive explanation with great visuals, this is an excellent choice.
Italian Tubular Bind-Off (Flat & In the Round) by Sheep and Stitch
This tutorial breaks down the tubular (Italian) bind-off with straightforward, beginner-safe instructions that make the sewing sequence easy to manage.
It focuses on creating a smooth, flexible finish that blends seamlessly into ribbing, whether you’re working flat or in the round.
A great option if you want a neat, stretchy edge for sweaters, hats, and cuffs.:

Tubular Bind-Off in the Round by 10 Rows a Day
This guide shows how to work the tubular bind-off specifically in the round, making it especially useful for finishing hats, cowls, and other circular projects.
It explains how to keep the tension smooth, how to sew invisibly across the join, and how to avoid tight bind-off edges.
Perfect if you want a polished finish on ribbed brims without any bunching or pinching.

Tubular Bind-Off by Ysolda
This tutorial explores the tubular bind-off with high-quality step-by-step photos and thoughtful notes about maintaining even tension.
It’s great for understanding how the sewn path mimics knitted stitches and creates that smooth, rolled edge.
Ideal for knitters who appreciate visual clarity and a relaxed teaching pace.
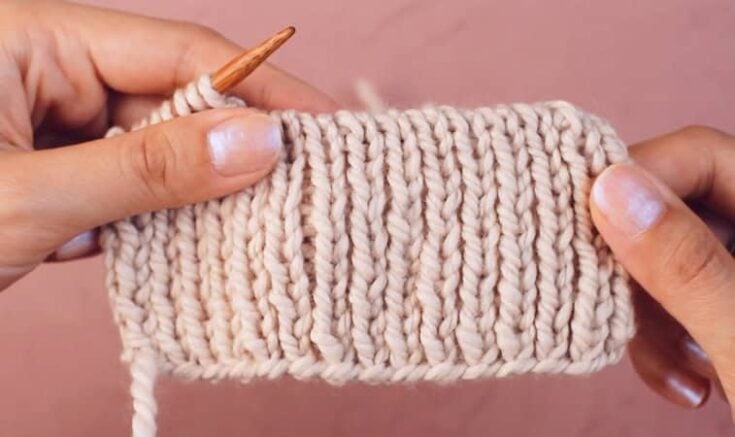
What Is A Tubular Cast-On? (And How It Works)
A tubular cast-on creates a smooth, rounded, stretchy edge that looks like the stitches are growing out of a tiny knitted tube.
It blends beautifully into 1×1 ribbing and gives your knitting a soft, professional-looking start that keeps its shape without tightening or changing the natural width of the ribbing.
How it works:
A tubular cast-on begins by forming half-stitches rather than full stitches, which are later expanded when you work your first stitch of the set-up row.
After a few set-up rows, these half-stitches “open up” and become full knit and purl stitches, creating a neat rolled edge that is stretchy and comfortable.
There are three ways to make a tubular cast-on:
All three produce the same tubular edge — they just use slightly different steps.
1. Italian cast-on (the easiest & most popular)
This method sets up alternating knit and purl loops right from the beginning.
The edge instantly looks rounded and almost tubular before you even work your set-up rows.
Many knitters prefer it because it feels simple and gives a beautiful result with minimal fuss.
2. Long-tail tubular cast-on (similar to long-tail)
This one starts off looking like a regular long-tail cast-on, where your cast-on tail helps create the alternating knit and purl half-stitches needed for the tubular edge.
After working a couple of special set-up rows, these half-stitches grow into full stitches and form the tube.
3. Provisional tubular cast-on (using scrap yarn)
With this method, you cast on using waste yarn, knit a few rows with your main yarn, then remove the provisional yarn.
When the scrap yarn is pulled out, hidden loops are revealed that open into the tubular edge.
It’s the most precise version, but also the slowest.
Do all tubular cast-on methods get the same result?
Yes, they all create a rounded, stretchy, seamless edge that flows smoothly into 1×1 ribbing.
That’s the purpose of a tubular cast-on, no matter which method you choose.
However, here’s the nuance: The process looks different.
Italian = no scrap yarn, very clean, very smooth.
The final effect is the same – After your first 2–4 rows of ribbing, you cannot tell which method was used unless you know exactly what to look for.
When should you use a tubular cast-on?
A tubular cast-on is an excellent choice whenever you want a stretchy, comfortable, and polished edge on your knitting.
It works beautifully for beanies and hat brims, sleeves and cuffs, sock and mitten openings, as well as sweater hems and collars.
Because it blends so seamlessly into 1×1 rib, it’s perfect for any ribbed edge, especially on garments worn close to the skin.
If you want your project to have a soft, high-quality finish—whether it’s for yourself or a gift—the tubular cast-on is a go-to technique that adds both comfort and elegance.
Materials you need for tubular cast-on
- Working yarn
- Knitting needles (a circular or straight needle set)
- Optional: scrap yarn for provisional methods
- Your hands (thumb + index finger for long-tail versions)
Is the tubular cast-on beginner-friendly?
Yes — especially with a video tutorial.
Although it looks complicated, the steps are slow, repetitive, and easy to learn.
What techniques do you need to know for the tubular cast-on?
You don’t need to be an advanced knitter — just comfortable with a few basics.
Here’s what’s helpful to know:
- How to make a slip knot
- How to hold yarn for a long-tail cast-on (thumb + index finger)
- How to work knit stitch (k) – How To Knit Garter Stitch For Beginners (Tutorial)
- How to work purl stitch (p) – How To Knit The Purl Stitch For Beginners (Tutorial)
- How to work 1×1 ribbing (k1, p1)
- How to slip stitches (sl1 pwise) – Slip Stitch Knitting (How To Slip Knit Stitches)
More cast-on methods
What Is A Tubular Bind-Off? (And How It Works)
A tubular bind-off creates a rounded, invisible, stretchy edge at the end of your knitting.
It’s essentially the sewn equivalent of a tubular cast-on and pairs beautifully with 1×1 rib.
How it works:
1. First, you knit a few set-up rows in 1×1 rib.
These rows help form the beginning of a tiny “tube,” just like in a tubular cast-on.
2. Then, using a tapestry needle, you sew through the stitches in a repeating pattern, following the line your working needle would normally take when knitting.
The sewing follows the same path that your yarn would take if you were knitting each stitch one at a time. This is similar to the Kitchener stitch, but adjusted for ribbing.
3. As you sew, the stitches roll forward and the tube closes neatly, giving you an invisible finish at the end of the row.
The result is: very stretchy, soft, cushioned, completely seamless, and beautifully professional.
It’s the perfect match for any tubular cast-on, and a great choice for hats, cuffs, and top-down sweater hems.
When should you use a tubular bind-off?
A tubular bind-off is ideal when you want a stretchy, smooth, and polished finish on any ribbed edge.
It’s perfect for hat crowns, sleeves, and wrist cuffs, the tops of socks and mittens, and top-down sweater hems—anywhere you need flexibility and a clean, seamless look.
Because it mirrors the softness and roundness of a tubular cast-on, it’s especially useful when you want both edges of your project to match.
If your garment needs comfort, stretch, and a professional finish, the tubular bind-off is an excellent technique to use.
Materials you need for tubular bind-off
- Working yarn
- Your knitting needle (circular, straight, or DPNs)
- Tapestry needle
- Scissors
- Optional: a smaller needle for tension control
Is the tubular bind-off beginner-friendly?
Yes — but it feels more advanced because it’s a sewn bind-off.
If you’ve ever done Kitchener stitch, you’ll pick it up quickly.
With a good tutorial, it becomes rhythmic and relaxing once you get the hang of it.
More cast-off methods
FAQs
1. Why choose a tubular edge?
Tubular edges—both cast-on and bind-off—create a rounded, elastic, professional-looking finish that blends perfectly into 1×1 rib.
They add comfort, stretch, and a luxury feel that’s perfect for hats, cuffs, and sweater edges.
2. Is the tubular method worth the extra effort?
Yes!
These techniques take a few extra minutes but make your knitted items look beautifully finished, especially for gifts or frequently worn garments.
3. Is the Italian method the same as the tubular method?
Yes — the Italian cast-on and Italian tubular bind off are simply tubular methods worked in a specific way.
They both produce the same smooth, rolled edge.
4. What’s the best cast-on for a beanie?
For ribbed brims: tubular cast-on
For absolute beginners: long-tail cast-on (stretchy and quick)
5. What are the best alternatives to tubular techniques?
- Long-tail cast-on
- German twisted cast-on
- Old Norwegian cast-on
- Standard sewn bind-off for ribbing
All give good elasticity without the extra steps.
6. Do tubular methods require set-up rows?
Cast-on: sometimes (depends on the method).
Bind-off method: almost always (2–4 rows of 1×1 rib).
Set-up rows help form the “tube” structure.
7. What do I need to work tubular edges in the round?
You’ll need circular needles or DPNs.
Otherwise, the process is the same as working flat.
8. Does a tubular cast-on and bind-off only work for ribbing?
Yes, tubular cast-off and cast-on edges are designed specifically for ribbing, especially 1×1 rib.
They work by creating alternating knit and purl “half-stitches” that grow into full stitches, which only makes sense when your fabric actually uses alternating knit and purl stitches.
Because ribbing is built from knits and purls, the tubular edge blends into it perfectly.
Learn how to knit ribbing here. – How To Knit Rib Stitch Patterns (1×1 and 2×2 ribbing)
Knitting lessons
If you are new to the craft and need help with the knitting basics, or want more tips and tricks, check out these helpful tutorials: Knitting Lessons (With Video Tutorials).
This includes basic knit stitches, short rows, the magic loop, and more.
Also included is a list of knitting abbreviations (UK + US terms), a knitting needle size guide, and more.
You can also check out this step-by-step guide on how to knit for beginners. – How To Knit – A Complete Beginner’s Guide
If you need more video tutorials, check out my YouTube channel here. – Handy Little Me – YouTube.
For extra help and to connect with more makers from the crafting community, check out the Handylittleme Facebook group.
If you also love to crochet, check out easy patterns here. – Free Crochet Patterns
You can also find us on social media, Ravelry, Pinterest, Instagram, Twitter, Etsy, and TikTok.
Free Knitting Patterns
If you are looking for project inspiration, check out the patterns below.
- How To Knit A Hat For Complete Beginners (+ Video Tutorial)
- 20 Temperature Blanket Patterns (The Ultimate Guide)
- How To Knit A Hat With Circular Needles (Step-By-Step)
- 31 Free Baby Blanket Knitting Patterns (Easy Knit Blankets)
- How To Knit Baby Booties (Step-By-Step)
- Knitted Dog Sweater Pattern (3 Sizes)
- 12 Simple Knitting Stitches For Beginners
- Free Knitted Dishcloth Patterns
- 37+ Patterns To Use Up Your Yarn Stash (Small Projects)
- Free Dog Sweater Knitting Pattern (Straight Needles)
- Super Easy Corner To Corner Baby Blanket Pattern (Knit)
- Easy Baby Sweater Knitting Pattern For Beginners
- How To Knit A Baby Hat (Straight Needles)
- Pumpkin Knitting Pattern (Beginner Friendly!)
- 8 Cable Stitch Knitting Patterns
- Free Knitted Heart Pattern (Easy + Quick Project)
- 20+ Fall Oversized Knits (Sweater Knitting Patterns)
- Ribbed Beanie Knitting Pattern (Unisex Mariner’s Hat)