Easy Baby Sweater Knitting Pattern For Beginners
THIS ARTICLE CONTAINS AFFILIATE LINKS THAT SUPPORT HANDY LITTLE ME CONTENT AND FREE PATTERNS.Make this easy baby sweater knitting pattern for beginners with step-by-step photographs to guide you.
Knitting a baby sweater can be a delightful and straightforward project, especially when crafted in one piece!
This easy-to-follow pattern eliminates the need for seaming, making it perfect for beginners or anyone looking for a quick, satisfying knitting experience.
The full pattern is free below, or you can purchase the ad-free printable PDF here.

How To Knit A Baby Sweater With Straight Needles
You can also find this pattern in this ebook here – 10 Baby Knitting Patterns Ebook.
Notes
Skill Level – Basic (Beginner Knitter)
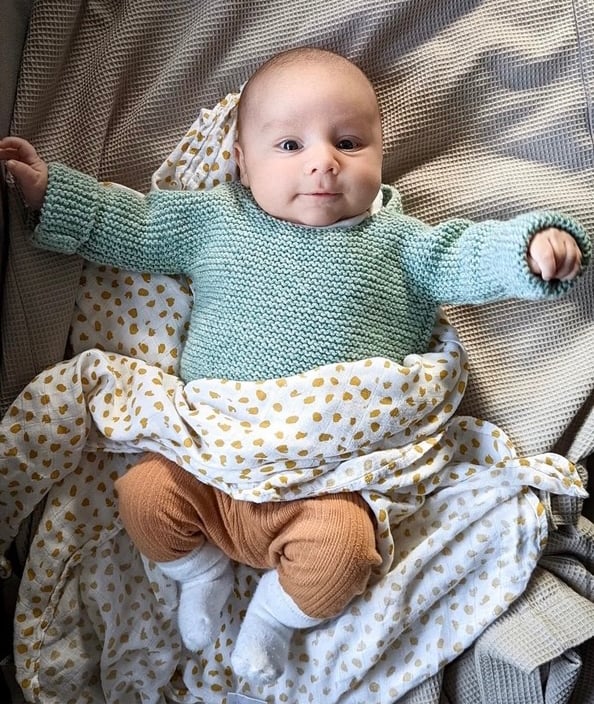
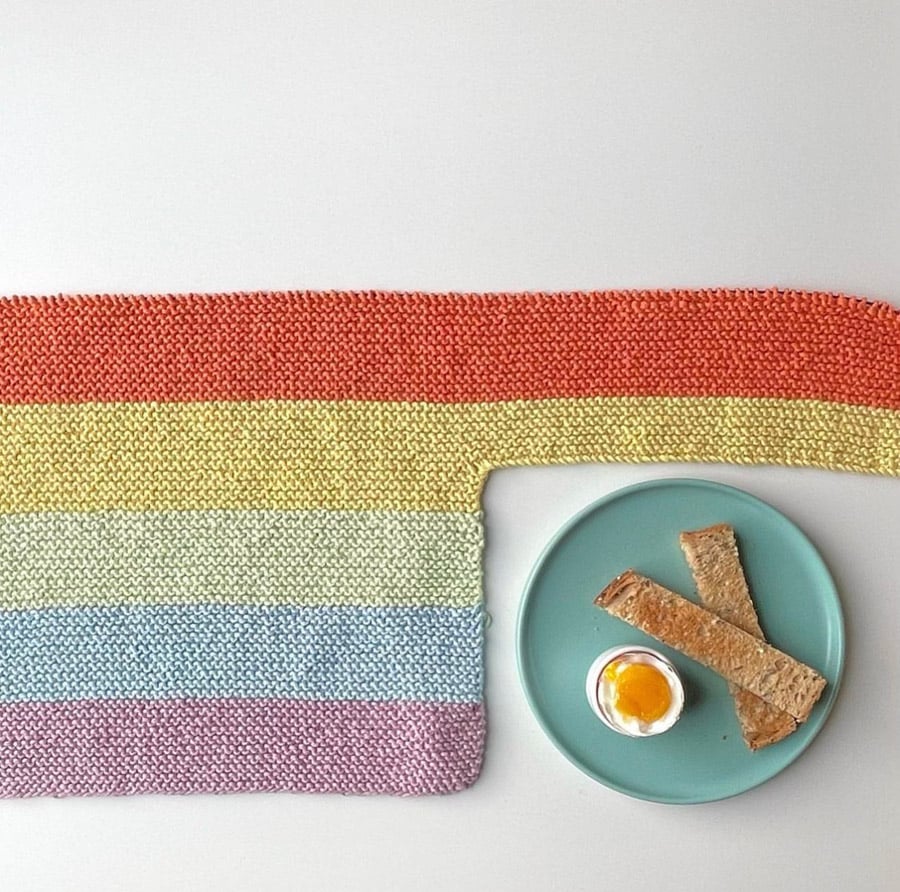
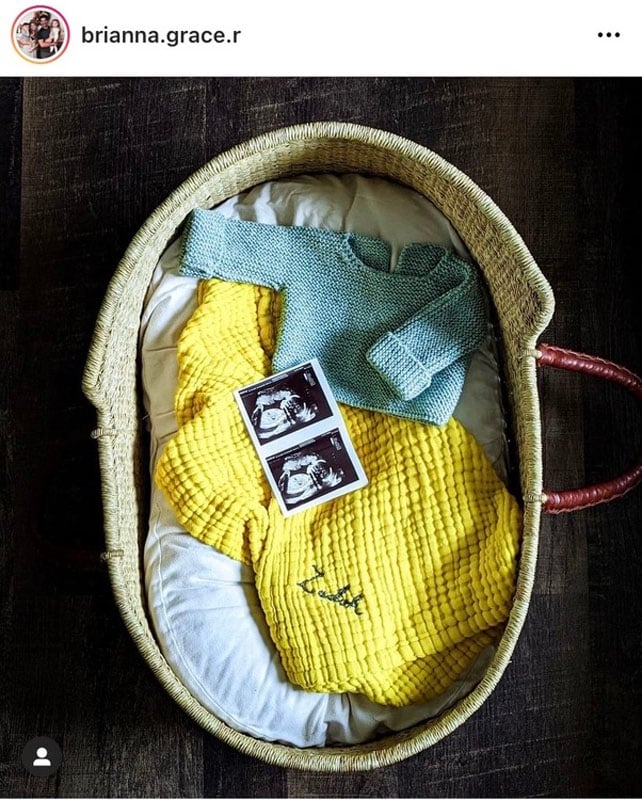
This quick knit would be the perfect gift for a friend’s baby shower or any new moms.
- This written pattern for beginners includes three sizes: 0-3 months, 3-6 months, and 6-9 months.
- The pullover sweater is knitted in one piece: the front piece, the sleeves (long sleeves), and then the back piece.
- The front neck is a crew neck with a neck opening V on the back (this allows for easy dressing).
- There is a color block stripe on the front and back of the sweater.
Copyright Info
- Please do not copy, sell, redistribute, or republish this pattern.
- If you wish to share this pattern, link to the pattern page only.
- You may sell items produced using this pattern.
- Do NOT use the copyrighted photos for your product listing.
- For the copyright T&C, please read my Terms of Use.

Size Information
Size – (Newborn) 0-3 months/3-6 months/6-9 months
The first set of numbers applies to the small size, the second set to the medium size, and the third to the large size.
An easy way to adjust this sweater and make it in a larger size would be to use a larger needle size and a heavier yarn weight; for example, if you wanted to make it for a 12-18 months size, you could make the 6-9 months size with a larger size needle, either 5.5mm/US 9 or 6 mm/US 10 needed and bulky weight yarn or 5 mm /US 8 needles and an aran weight yarn/worsted weight yarn.
Gauge – 20 sts and 46 rows in 4×4 inches / 10×10 cm in garter stitch.
The Supplies You Need
Yarn
- Main Color/Yarn B – 2 (3, 3) x skeins of Baby DK Yarn.
- Baby DK weight yarn = 50g/165m/179yds.
- Total yards needed for Yarn B = 358 (537, 537).
- You will also need one skein of a contrasting color for the color block stripe.
- Contrasting Color/Yarn A = 1 (1, 1) skein of Baby DK yarn (50g/165m/179yds.)
- Yarn Weight Guide (+ Conversion Chart)
Needles
Notions
- Tape measure
- Darning needle
- Scissors
- Stitch holder
Other Materials
- Sewing needle and thread in the same color as the ribbon.
- Ribbon (half a meter or around 50 cm/19.5 inches long)

Knitting Abbreviations
Knitting Abbreviations And Terms (US And UK)
- Beg – Begin(ning)
- Cont – Continue(ing)
- CO – Cast on
- K – Knit
- K2tog – Knit the next two stitches together
- Rem – Remaining
- Rep – Repeat
- St(s) – Stitch(es)
Print + Stitch
Purchase the ad-free PDF pattern
Want a clean, printable version of this pattern? You can purchase the ad-free PDF in my shop. It’s perfect for printing, saving to your device, and making without distractions.
Pattern Instructions
Time needed: 1 day, 4 hours and 30 minutes
How To Knit A Baby Sweater
- Work The Front Of The Sweater In Yarn A
Yarn A – Powder (Peach) / Yarn B – Nature (White)
With 4 mm (US 6) needles and Yarn A cast on 52 (60/68) sts.
Work in garter stitch until the piece measures 2.5″ (3″/3.5″) from the cast-on edge.
- Change to Yarn B
Change to Yarn B and continue in garter stitch until the piece measures 5″ (6″/7″) from the cast-on edge.
- Start To Work The Sleeves
Cast on 34 (40/46) sts at the beginning of the next row.
Knit to the end of that row. - Turn The Work For The Other Sleeve
Turn the work and cast on 34 (40/46) sts for the other sleeve.
- Knit The Sleeves
Continue to knit garter st on these sts until the piece measures 7″ (8.5″/10″) from the cast-on edge of the sweater (not the sleeve cast on edge).
- Start To Work The Neck
Knit 53 (63/72) sts cast off the center 14 (14/16) sts, and knit to the end of the row.
- Next Work On Each Set Of Stitches Separately
Row 1: Slip the first st, knit to the end, turn (you are only working on the first set of sts).
Row 2: Knit 2 sts, K2tog through the back loops, knit to the end of the row.
Work the last 2 rows twice more.
Work in garter st until the piece measures 8.5″ (10″/11.5″) (from the sweater co edge – not the sleeve co edge).
Knit the row then cast on 11 (11/12) sts at the end of the next row, turn then knit the next row.
Work on these 61 (71/81) sts for a further 2.75″ (3.25″/3.75″). - Place The Side You Have Just Been Working On Onto A Stitch Holder
Break the yarn and leave the sts on the needle (or on a stitch holder) while you continue to work the other side.
- Working The Other Side
With the wrong side facing, rejoin the yarn to the neck edge and knit the row.
Row 1: Knit to the last 4 sts, K2tog, K2.
Row 2: Knit
Work the last 2 rows twice more.
Continue in garter stitch until the piece measures 8.5″ (10″/11.5″).
Cast on 11 (11/12) sts at the beg of the next row
Work on those 61 (71/81) sts for a further 2.75″ (3.25″/3.75″). - Joining The Halves
Next Row: Knit across all of the sts from both of the halves, knitting the two center sts together.
Work in garter st until the piece measures 3.5″ (4″/4.5″) from the back of the neck edge. - Casting Off For The Sleeves
Cast off 34 (40/46) sts at the beg of the next two rows.
Continue to knit for a further 2.5″ (3″/3.5″). - Continue To Knit The Back Of The Sweater
Change to Yarn A and knit in garter st until that color measures 2.5″ (3″/3.5″).
Cast off. - Making Up The Sweater
Fold the sweater over and start to stitch the side seams.
You can use an invisible joining seam or the mattress stitch. - Seaming The Sleeves
When stitching the sleeve seams, leave a neat edge in the seaming of the cuffs, so that when they are turned back you don’t see any bumpy edges.

- Stitching The Ribbon To The Back Of The Neck
Cut two lengths of ribbon and stitch (with sewing thread) to the back openings.
Fold the end of the ribbon, then stitch it into place on the inside of the sweater – so you don’t see the ribbon on the right side of the sweater.
Tie the ribbon into a bow. - Weave In All Loose Ends
To finish off your baby sweater, make sure to weave in any loose ends that you can see.
Then your sweater will be ready to wear or to gift!


Knitted by Our Community
See how knitters have brought this pattern to life with their own yarn choices and style.

Could you share your work with us…
If you enjoyed making the baby sweater knitting pattern, I’d love to see yours on Instagram; tag me @handylittleme or #handylittleme.
If you are on Facebook, stop over to the handylittleme Facebook group and share a photo.
I’d love to see your work.
You can also find me on Ravelry, Pinterest, and YouTube.
Happy knitting!

FAQ
How Long Does It Take To Knit A Baby Sweater?
The time it takes to knit a baby sweater can vary widely depending on several factors, including the complexity of the design, the speed of the knitter, the type of yarn used, and the amount of time dedicated to knitting each day.
Here’s a rough breakdown:
- Skill Level of the Knitter: Beginners might take longer as they are still mastering the techniques, while experienced knitters can work much faster.
- Pattern Complexity: A simple pattern with basic stitches (like stockinette or garter stitch) and minimal color changes or finishing details will be quicker to complete. More complex patterns with cables, lace, or colorwork will require more time.
- Size of the Sweater: Baby sweaters can vary in size depending on the age of the baby. A preemie or newborn size will be quicker to knit than a sweater for 6-12 months or 18-24 months.
- Knitting Time Per Day: If you can only knit a few hours a week, it will take longer to complete than if you can knit a few hours each day.
On average, a simple baby sweater might take anywhere from 10 to 20 hours of knitting time.
This can be spread out over several days to a couple of weeks, depending on how much time a knitter can dedicate to the project each day.

The Yarn I Used For The Baby Sweater Knitting Pattern
The yarn I used for the step-by-step photograph tutorial is called Rico Creative Cotton Aran and has recommended needle sizes of 4 mm (US 6) or 5 mm (US 8) knitting needles.
I used 4 mm (US 6), but this needle size is more commonly used with DK/Light Worsted/8 Ply yarn.
So the sweater can be made with any yarn with the 4 mm (US) recommended needle size.
I bought the ribbon for the tie on the back of the neck from a local craft store.
Yarn Substitutes for DK Yarn
- Sirdar Happy Cotton
- James C Brett – Baby DK
- Sirdar Snuggly – DK
- Paintbox Yarns – Baby DK
- Stylecraft Bambino
- Sirdar Snuggly – Baby Bamboo DK
- King Cole – Comfort DK
- Merino Wool Superwash Yarn
- Ewe Ewe Yarns

What Is The Easiest Thing To Knit For A Baby?
One of the easiest and most satisfying knitting projects for a baby is a simple baby blanket.
Baby blankets require basic knitting skills and provide a great opportunity to practice techniques like casting on, knitting in garter stitch, and binding off.
They can be as straightforward or as decorative as you like, depending on the yarn and stitch pattern you choose.
Baby booties are another excellent choice for beginners.
They typically require only small amounts of yarn and can be completed quickly, making them perfect for a quick project or a last-minute gift.
Both projects offer flexibility in size and style, and they don’t require complex shaping or fitting, which makes them ideal for those new to knitting.

This Baby Sweater Knitting Pattern Is Great For Beginners
This easy-knit baby sweater is a great pattern and an easy project for any beginner, as it uses a basic garter stitch throughout.
Knit in one piece, the sweater requires some shaping, which is done through simple increases and decreases.
Choose soft, washable yarns in cheerful colors to create a cozy, comfortable sweater that’s as practical as it is charming.
Whether you’re a seasoned knitter or picking up needles for the first time, this one-piece baby sweater is a heartwarming project that stitches love into every loop.

Helpful Resources
This baby sweater knitting pattern is the perfect pattern and a great way for beginner knitters to develop their skills.
- Knitting cast-on methods
- Knitting Lessons
- How to cast on knitting
- How to cast off knitting for total beginners (step by step).
- How to knit garter stitch
- How to knit the purl stitch (for beginners + a video tutorial)
- How to knit stockinette stitch (for beginners)
- How to read knitting patterns for beginners
- Knitting abbreviations and terms (US and UK)
- How to knit rib stitch patterns (1×1 and 2×2 ribbing)
- How to knit two stitches together – K2tog

More Baby Knitting Patterns
- 31 Free Baby Blanket Knitting Patterns (Easy Knit Blankets)
- Easy Baby Cardigan Knitting Pattern (One Piece)
- How To Knit Baby Booties (Step-By-Step)
- Super Easy Corner To Corner Baby Blanket Pattern (Knit)
- Baby Cardigan Knitting Pattern
- 25 Knitting Patterns For Baby Sweaters Knit In One Piece
- Easy Baby Blanket Knitting Pattern
- Sheep Baby Booties Knitting Pattern
- Mommy And Me Hats (Knitting Patterns}
More Free Patterns
- How To Knit A Hat For Complete Beginners (+ Video Tutorial)
- 20 Temperature Blanket Patterns (The Ultimate Guide)
- How To Knit A Hat With Circular Needles (Step-By-Step)
- Knitted Dog Sweater Pattern (3 Sizes)
- 12 Simple Knitting Stitches For Beginners
- 37+ Patterns To Use Up Your Yarn Stash (Small Projects)
- Free Dog Sweater Knitting Pattern (Straight Needles)
- Pumpkin Knitting Pattern (Beginner Friendly!)
- 8 Cable Stitch Knitting Patterns
- 10 Free Knitted Baby Headbands (Easy Patterns)
- Free Knitted Heart Pattern (Easy + Quick Project)
- 20+ Fall Oversized Knits (Sweater Knitting Patterns)
- 32 Super Simple Knitting Projects For Beginners
Any information on how you stitch the ribbon to the sweater? Needle and thread? Needle and yarn? Not sure how to attack this
Hello Maddy, yes you stitch the ribbon to the V opening of the sweater. The instructions are in the making up section of the pattern. You need a sewing needle and thread – stitching one length of ribbon to each side. Stitch on the inside of the V so you don’t see any edges on the outside. You can see in the photos how this should look. I hope that helps! 🙂
Oooohhh I see it now, thanks so much!
Hi!
I am a beginner knitter and this is my first sweater, I am trying to figure out how to begin knitting the sleeves on this piece but am unsure if I am starting the sleeve separately from teh body of the sweater or knitting them on directly from the sweater, if that makes sense?
I am teaching myself a lot of this using you tube so any suugestions or terminology you could send my way so I can figure out what the next step is in the project would be so helpful!
Thanks so much
Patty
Hello Patty, the sweater is knit in one piece – so you knit on from the body and neckline etc and the sleeves are knit as a continuation from the main body of the sweater. As you go on you will see how it starts to take shape. I hope that helps 🙂
Yes! That helps! I actually did figure it out and am now tackling the neckline but stuck again! My neck hole keeps getting knit together. I must be missing something but not sure what! My two sets of stitches are either side of the neck hole and totally lost on how to continue.
Thanks so much for your response! Love this design. Want to make it (using wool) for my older son as long as I have what it takes to knit a newborn sweater!
Hello Patty, are you casting off the centre 14 stitches? After you do that you have to work on each set of stitches separately. If you need more help, feel free to contact me using the contact page. Thanks!
Hi there! I was wondering if you could suggest a alternate yarn other than the one that you had used in this pattern. I have a new grand daughter and would love to learn to knit this for her. I live in Ontario Canada and always buy my yarn at a Michaels Craft Store here. I just need a suggestion. Your work is absolutely beautiful and I always look forward to your weekly emails. Thank you, thank you, thank you!! You are very inspiring and you have tempted me to take that extra little step to try something new that is kind of out of my little knitting world 😄😄 So I really want to thank you for doing what you do for the knitters around the world!!! Very much appreciated!!!!
Carol
Hello Carol, thank you so much for your kind words, I’m so happy you like the patterns and my emails 🙂
For the baby sweater, any double knitting yarn will be ok to use – for example, if you want cotton you could have a look at Lion Brand 24/7 cotton. For 100% acrylic, you could look at Bernat Softee Baby Solids – they have some lovely colours or Red Heart Lovely wool which is a wool/acrylic blend.
But any DK yarn that can be used with size 4mm (US 6) needles will be ok for this project.
I hope that helps and you enjoy making the baby sweater! 🙂
Hi I love this pattern and just starting to knit for my niece and this is my first attempt at a sweater. All is going well however I’m confused at the rejoin the yarn to the neck edge and the bit about knitting the two separate sides back together again by knitting the two centre stitches together. It’s absolutely boggling my mind
Hello Hannah, as you can see in the photograph for step 8 – you will have your needle with the pointy end at the neck edge – to continue knitting you need to rejoin the yarn to the first loop on your needle. Then later when you have knit that section and are ready to join the halves – you can see in the image in step 10 – that you knit across the two halves, knitting the centre stitches together. I hope that helps 🙂
hi this sweater looks really lovely and easy to make…I am looking for an easy project since it is hard to concentrate on anything too complex at this time of social distancing….. I want to make it on a yarn that calls for a 5 mm needles. The yarn is called barroco remix ( it is a cotton, silk, linen and nylon blend) Can you tell me the width of the front of the sweater so I can have an idea of how many stitches I should cast on. I tried 60 stitiches …. I am making this for a 9 month old baby but it looks very wide. before I continue I was hoping you could help by providing the width of the front portion of the sweater.
Thanks so much for your pattern.
Hello Rochelle, I measured the sweater I have in my archives and it is 10″ wide – that is for a 0-3-month-old.
Perhaps the smallest size cast on with 5mm needles will work? You can test out casting on 52 sts and measure to see if that is a better fit.
I hope that helps 🙂
Louise
thank you so much for your reply. I casted on 60 stitches and the front measures about 11 inches. I am going to continue knitting and will send you photos of the finished project. Thanks for your help. I really appreciate it….take care, Rochelle
Hi!
I’m looking for some clarification on Step 7:
“Work in garter st until the piece measures 8.5″ (10″/11.5″) (from the sweater co edge – not the sleeve co edge).”
Can you clarify which bits I should be measuring? If possible, could you write the measurements onto one of the photos with some arrows? The photos are so helpful, thank you for these! Just not sure where I should be measuring from to get 8.5″.
Thanks!
Hello Jen, you will measure from the bottom edge of the sweater where you first cast on.
I hope that helps 🙂
Louise
Hi,
I am considering making this sweater, but I am confused about one thing: when I read the instructions for the neckline, it seems like the k2t is made at the side of the neck for the left sleeve and at the side of the cuff for the right sleeve… (steps 7 and 9) Clearly, I misunderstood something, could you clarify? Also, in step 7 you need to slip the first stitch of the knot row, but in step 9 you don’t need to do that. Is this correct? Why do you slip the first stitch?
Last question about the yarn: I always worry that cotton isn’t very soft to that touch, could I also make this in baby merino wool?
Thanks so much!
Hello Astrid,
The instructions all work out – the decreases are in the correct places for the shaping.
You slip that stitch on that set of stitches to get a neat edge, you don’t do that on the other side because you are rejoining the yarn to that edge.
You can make this sweater in cotton or in baby merino yarn if you wish.
Happy knitting!
Louise
Working on this adorable sweater right now and so far it’s CUTE!! I’ve worked my first side of the neck, but, just want to confirm that the decreases are at the end of the sleeves not near the neck (so the slip is at the neck for the nice edge and then the K2tog at the end of the sleeve – once the work is flipped). I’m curious why the decreases are necessary? Thank you for the lovely free pattern 🙂
Hello Karlee,
I’m so happy that you are enjoying the baby sweater pattern.
The decreases should be happening at the neck edge and not the sleeves.
The sleeves do not change at this point, as you are shaping the neck.
I hope that helps!
Louise
Okay, thank you! Working each row as a there and back, makes much more sense. Thanks!!
Hi Louise,
I’m enjoying knitting this sweater for a friend of my daughter. It’s so cute. I notice you are still answering questions about the pattern-amazing!
I am at the bind of the 14 stitches on the neck. What method do you recommend?
Hello Tina,
I am so happy you are enjoying the pattern.
You can use any cast off method of your choice, it doesn’t have to be a stretchy one.
You can see some cast off methods here – https://www.handylittleme.com/cast-off-knitting-methods/
Happy knitting!
Louise
The yarn you used for this pattern is called Aran. I think that’s weight #4. You recommended to someone else to use a dk weight yarn as a replacement and that is weight #3. Should the yarn I use be a #4 or #3?? Thanks for your help.
Hello Cindy,
The yarn I used is called Rico Creative Cotton Aran and has a recommended needle size of 4mm (US 6) or 5mm (US 8) knitting needles.
I used 4mm (US) but this needle size is more commonly used with DK/Light Worsted/8 Ply yarn.
So the sweater can be made with any yarn that has the 4mm (US) recommended needle size.
I hope that helps!
Louise
This pattern is exactly what I need. A baby sweater that’s simple to knit and made with yarn that is readily available. I have a question. In step 7 working the sleeve shown on the left, there are stitches on the right hand needle. Is that needle used to work the left hand sleeve? Or do I need a third needle? Or do I put the right hand stitches on a stitch holder?
Hello Margie,
In step 7 you will only work on that set of stitches, the other stitches (on the right-hand needle) will just be on your other needle waiting.
You don’t need to use another needle, as you can use both needles to continue that side, as you will be turning the work and knitting back along the row you just knit in step 1.
You can see in the step 7 photograph that the left side is larger than the other – this is the side you will be working on.
You will need a stitch holder for step 8.
I hope that helps!
Louise
Hello,
I am starting on step seven and a little confused by what to do on row 2. First time doing a k2tog through back loops. Do I knit two, then do the k2tog through back loops to the next two? And then knit on. Or am I supposed to k2tog through the first two knitted stitches? Though then they’ll be on the other needle so that doesn’t seem right. Just want to make sure I do this step correctly before I proceed.
Thank you so much,
Patty
Hello Patty,
To perform this decrease, you work the same as if you were knitting through the back loop of just one stitch, but instead, you go through two.
Your right-hand needle goes through the back loop of the first stitch, then the second.
Make a knit stitch as normal, pulling both loops off the left-hand needle.
One stitch will remain on the right-hand needle.
This will give you a nice texture to the fabric.
I hope that helps!
Louise
Hi Louise please can you help im on step 10 joing the halves together im confused do I put the stitches from the stitch saver onto the same needle as the other stitches then work these across . If so do i break the yarn and knit from the begining of the needle
Hello Elizabeth,
I would place the sts on the stitch holder onto your other knitting needle and then continue to knit across those sts from the working needle with the other sts on.
Then you can knit across all of the sts and knit the two center sts together.
I hope that makes sense?
Thanks,
Louise
Hi,
I’m loving this sweater and pattern. I’m just wondering which method you think is the best way to cast on for the sleeves or anytime you don’t have a long tail? Thanks
Hello Jenn,
I use the thumb cast on/long-tail method.
There are other methods you could try out – I have a blog post that you can view here – https://www.handylittleme.com/knitting-cast-on-methods/
I hope that helps!
Louise
Is it possible to knit this sweater in the round? If so, how long should the needles be? If using the straight needles, how long should those needles be? Thanks, helane
Hello Helane,
You could try knitting the sweater in the round – using a 32″ or 40″ cable and the given needle size in the pattern.
If you use straight needles, you can use any length needle really, long or short because the pieces are all small.
I used my 4mm (US 6) bamboo needles that measure 14″ long.
I hope that helps!
Louise
Hello Louise, I love this sweater!
Any ideas on how to make it for an adult? I am thinking size 17 needles and bulky yarn?
Thank you for sharing your creativity!
Susan
Hello Susan,
I’m so happy you like this sweater! 🙂
Making the sweater for adults would require testing and pattern math different from the baby sweater.
Perhaps it’s something I can look into developing in the future.
Happy knitting!
Louise
Hi, I love this pattern so much! I’m a beginner knitter and I love how simple the pattern is to understand! Can we use different colours aswell as the colours in the pattern?
Thank you from Lisa x
Hello Lisa,
Thank you, I’m so happy you like the pattern 🙂
Yes, you can use whatever colors you wish – the colors I have used are just my own preference.
You can make this in any color that you like.
You can choose one color for Yarn A and another for Yarn B.
Alternatively, you can knit all in one color and not add the color block.
I hope you enjoy the pattern!
Louise
I love this pattern and would think it would be easy to enlarge it for an adult. Any thoughts on someday achieving that? I would love to knit this for myself. Thanks for sharing all your knitting and crocheting ideas. I enjoy reading your emails and ideas.
Hello Gale,
Perhaps in the future I will be able to look into doing that.
So happy you are enjoying the patterns!
Louise
Hi, what does ‘Work the last 2 rows twice more.’ mean on step 7. Thanks.
Hello Ellie,
That means to repeat the last two rows (rows 1 and 2) you just worked twice more…
So including rows 1 and 2 that would be 6 rows in total.
I hope that helps!
Louise
Hi, I’m loving this pattern but have gotten stuck on step 7.
I’ve followed the first two instructions and finished this step (Row 2: Knit 2 sts, K2tog through the back loops, knit to the end of the row), and have ended up with the row I’ve just knitted on my right needle, and the other sleeve on my left needle (with the neck bridging the gap) but I’m not sure how to proceed. Am I supposed to go back on myself to keep working on the same sleeve, or do I knit to the very end (thereby putting both sleeves on the same needle again) and then repeat the first and second instruction of this step?
Hope that makes sense, thanks!
Hello Sophie,
In the next step, you will see that you need to place those stitches you have just worked onto a stitch holder – in order to continue to work the other side.
I hope that helps,
Louise
Love this basic pattern, Louise. Could u direct me on Ravelry or Pinterest to a similar pattern for an adult? Thanks for sharing your knitting and crochet ideas♥
Hello Susie,
Sorry, I don’t know of an adult-sized pattern like this – I plan on making one in the fall.
Glad you enjoyed the pattern 🙂
Louise
Hi! I’m in the middle of making this pattern and I love it so far, but I’m a little confused with step 7. Where is says to slip the first stitch would put it at the edge of the sleeve, but that doesn’t seem right. Could you clarify where the slipped stitch is supposed to be in the row, if it’s supposed to be in the collar area or at the end of the sleeve?
Thank you!
Hello Lorelei,
If you worked step 6 and cast off the neck stitches and then worked to the end of the row, when you turn to work step 7, the slipped stitch should be at the start of that row which should be at the sleeve end.
I hope that helps,
Louise
I am enjoying knitting this jumper. It’s the first time I’ve ever made clothing. I am concerned at how wide the sleeves are though. I am making 3-6 month size.
Hello Teri,
The sleeves may seem wide but they are turned over to seam, so if you fold it and check, they will be ok.
I hope that helps,
Louise
Hi Louise,
I made this sweater twice for my two new nieces. They turned out very cute and both sets of parents were happy with their gifts. Thank you for the great patterns!
Hello Katrina,
I’m so happy you like the pattern 🙂
Happy knitting!
Louise
I love how this pattern works up all in one piece. It was extremely easy to follow. Great Pattern. Thank you very much! My new granddaughter coming in Dec will be nice and warm.
Hello Tammy,
Thank you so much for your kind words, I am so happy you enjoyed this pattern.
Happy knitting!
Louise
Hi! Really and adorable sweater. I am looking forward to trying to knit it. Is it safe to assume that circular needles can be used? I was also wondering if an eye-cord could be used in place of the ribbon. Thank you!
Hello Lyn,
Yes you can use circular needles to knit the sweater, it is knit flat, back and forth, as if you were working on straight needles.
You could use an icord instead of ribbon, that would be fine and serve the same purpose.
I am knitting one at the moment for a gift and using circular needles, I use them for everything, they are easier on my hands.
I hope you enjoy the pattern!
Louise
Hi Louise!
I’m wondering if you could provide some clarification for step 5 – the instructions say to measure from the sweater co edge until the piece measures 8.5 inches, but my piece already measures 9 inches from the sweater co edge. Should I be measuring 8.5 inches from the color change? Or adding together and measuring 17.5 inches from the sweater co edge? I’m not sure I’ve read the instructions correctly. Thank you!
Hello Cecily,
You will measure the length from the cast on edge of the sweater or the very first row, not the sleeve cast on edge or the color change.
Depending on the size you are making it should measure 7 inches for the smallest size, 8.5 inches for the next size and 10 inches for the largest size.
I hope that helps,
Louise
I have a question regarding Step 10 -Work in garter st until the piece measures 3.5″ (4″/4.5″) from the back of the neck edge. What do you consider the back of the neck edge? I was thinking from the point the two sides are joined? I have already joined the two pieces so would I put the tape measure there and measure down or is should I measure from the top of the back neckline? Thank you.
Hi Maria,
Great question — thank you for asking!
Yes, when the pattern says to “measure from the back of the neck edge,” it refers to the top of the back neckline — not the point where the two sides are joined.
So you’ll want to place your tape measure at the very top of the back neck (where the neckline begins) and measure downwards from there, through the garter stitch section, until you reach the measurement specified (3.5″, 4″, or 4.5″ depending on the size you’re making).
You’re absolutely right to check, and I hope that helps clear things up! Let me know if you have any other questions — happy to help 😊
Happy knitting!
Louise
Hi there,
Is there any way to create a buttonhole at the neck instead of sewing in a ribbon? If so, do you have simple instructions for that?
Thx and loving the pattern so far!
Hi Catherine F, thank you so much—I’m really glad you’re enjoying the pattern! 😊
I’m sorry, I don’t have instructions for adding a buttonhole to this pattern—just what’s written in the post. However, a simple way to create a buttonhole is to work a yarn over (yo) followed by a knit two together (k2tog) where you’d like the hole to be. That creates a small opening perfect for a button!
Just be sure to test it out on a swatch first to check the size against your button. Hope that helps, and happy knitting! 🧶✨