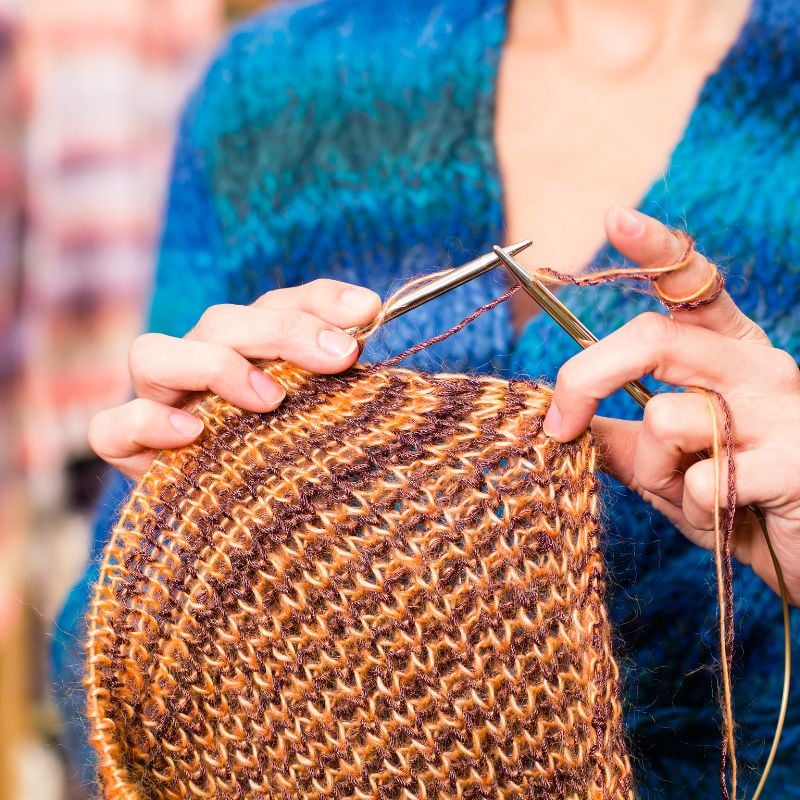
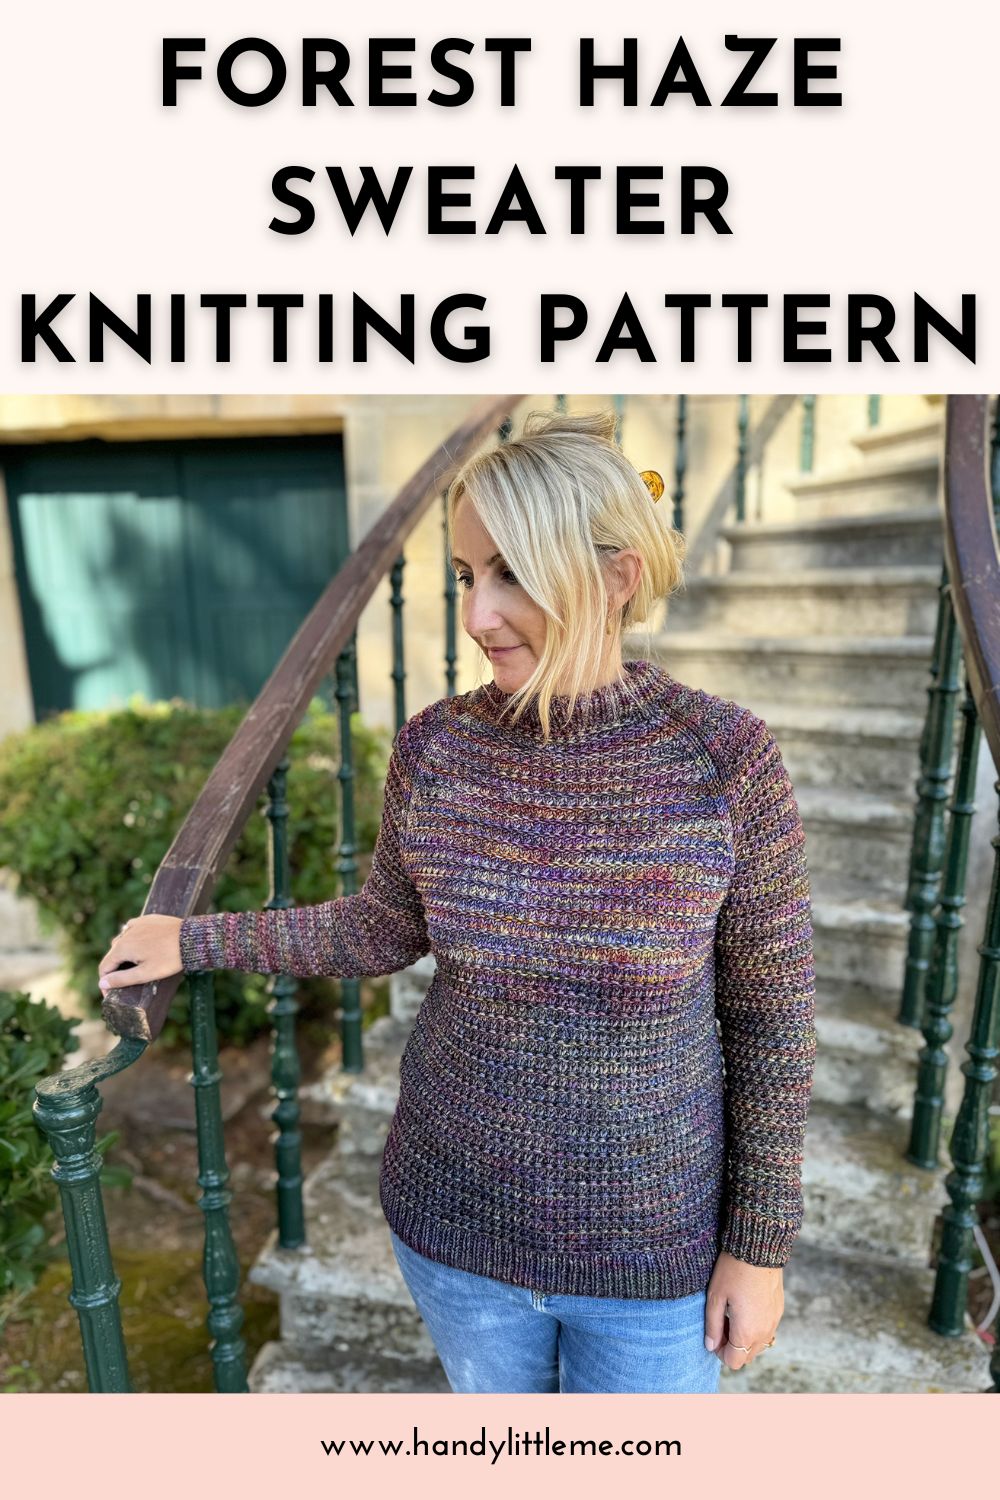
Forest Haze Sweater Knitting Pattern
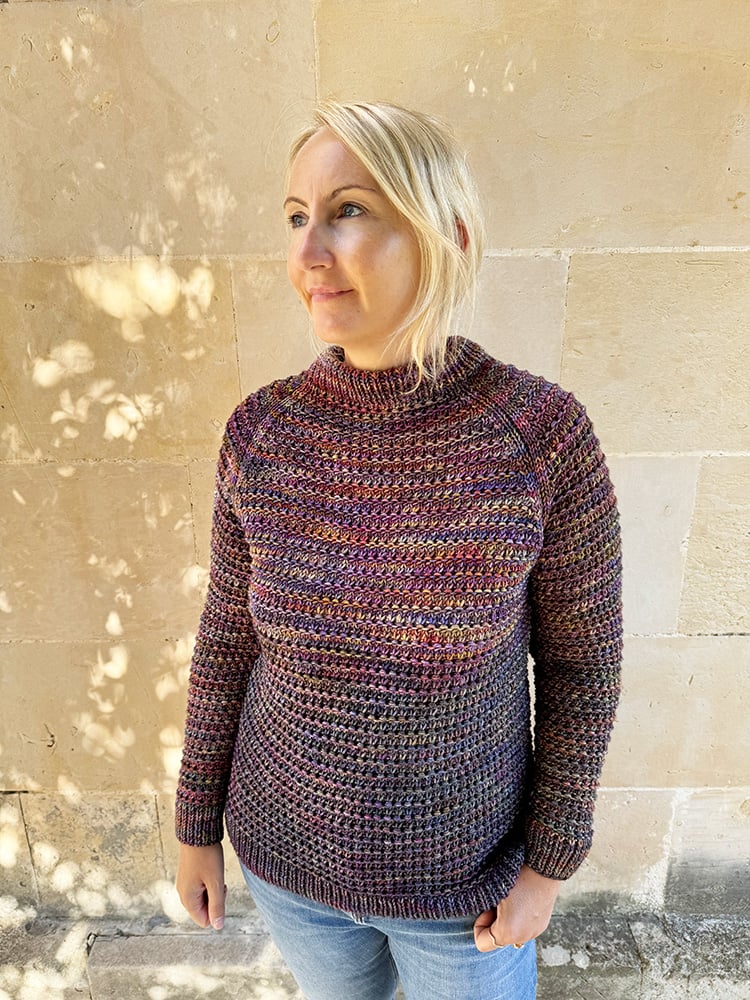
THIS ARTICLE CONTAINS AFFILIATE LINKS THAT SUPPORT HANDY LITTLE ME CONTENT AND FREE PATTERNS.Introducing the Forest Haze Sweater Knitting Pattern, an easy yet elegant raglan sweater designed for advanced beginners.
As the air begins to crisp and the leaves turn shades of gold, orange, and red, there’s no better time to cozy up with your next knitting project.
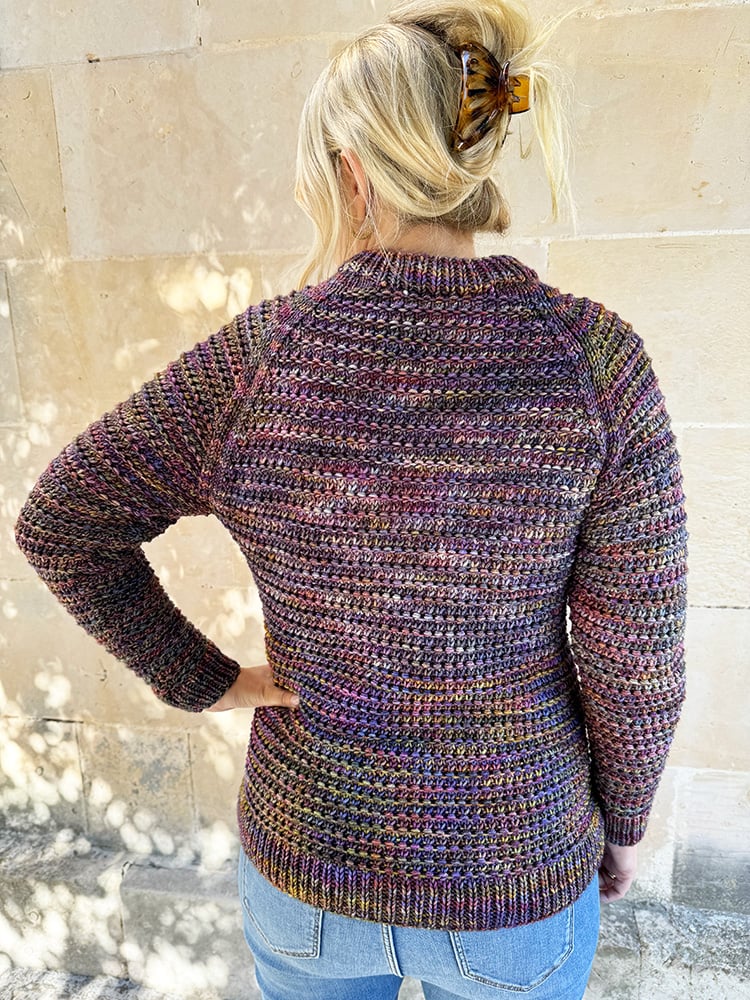
Made with the ever-so-luxurious Malabrigo Rios yarn in a beautiful palette of purples and greens, this project brings the tranquility of a forest stroll straight to your needles.
Whether you’re looking to expand your skills or are just in need of a relaxing knit, this sweater pattern offers the perfect balance of simplicity and stylish flair.
Scroll down to view the free pattern, or grab the printer-friendly ad-free PDF here.
The Yarn: Malabrigo Rios
The Forest Haze Sweater calls for Malabrigo Rios, a worsted-weight yarn that is beloved for its softness and rich color variations.
Rios is 100% superwash Merino wool, which not only makes it incredibly soft but also easy to care for—perfect for a sweater you’ll want to wear all season long.
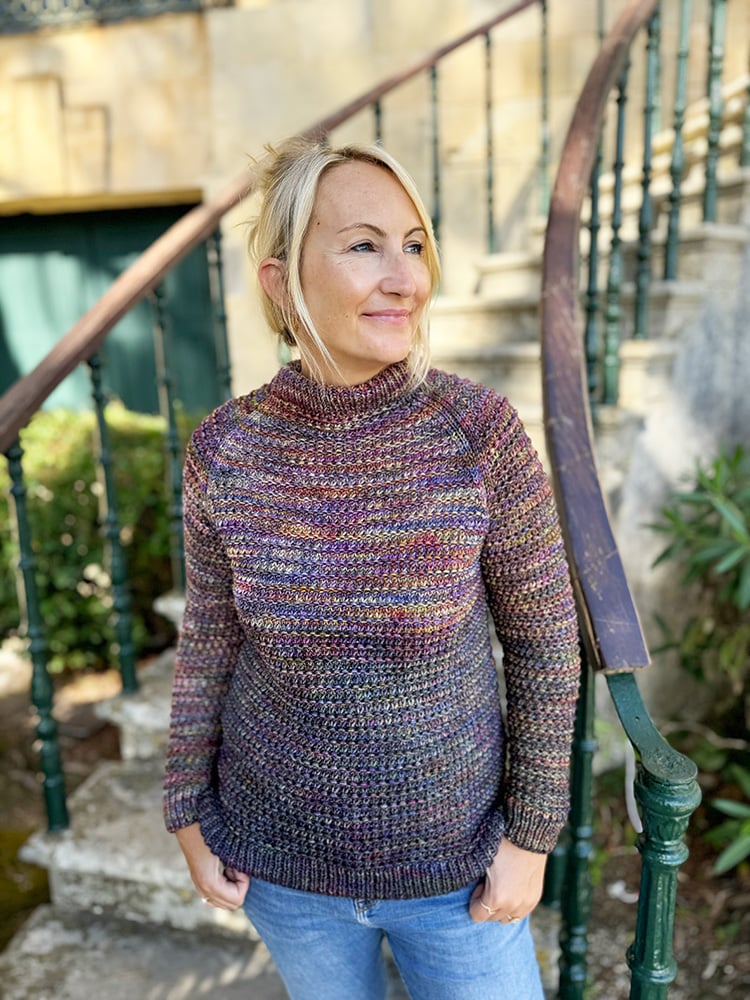
The hand-dyed colors in this yarn range from deep forest greens to subtle, misty purples, creating a stunning visual that mirrors the magic of an autumn forest at dawn.
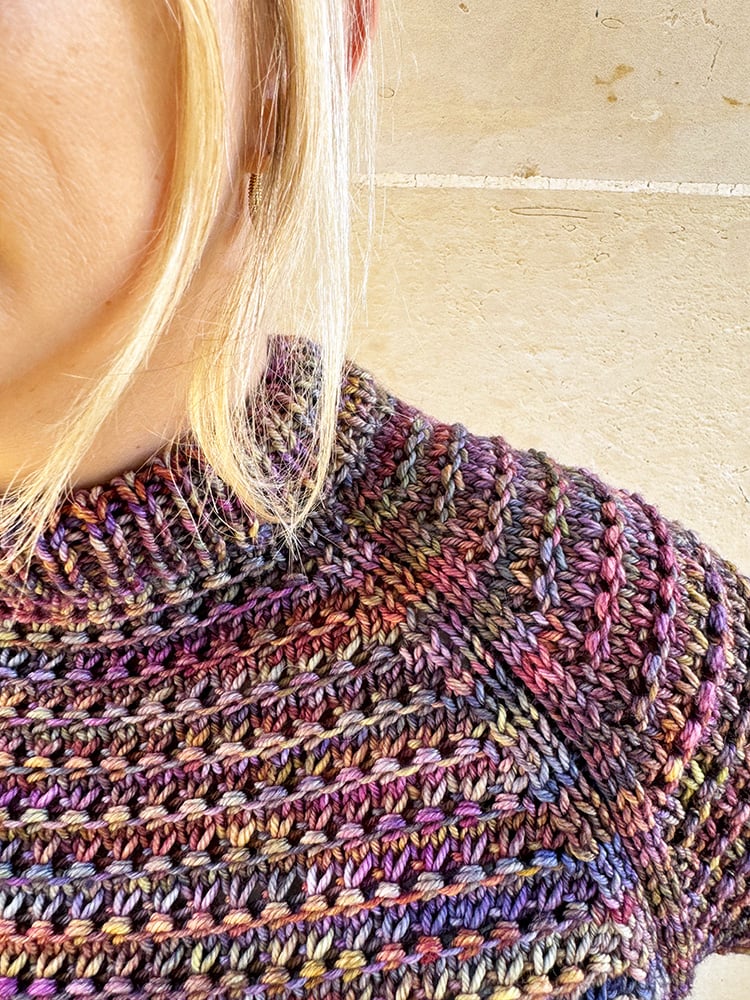
Not only does Rios offer unparalleled softness and warmth, but the subtle shifts in its colorway will give your sweater a one-of-a-kind look.
Why You’ll Love This Sweater:
- Perfect for Fall: The color palette and cozy warmth of this sweater make it an ideal fall staple.
- Malabrigo Magic: Knitting with Malabrigo Rios is a dream—it’s soft, squishy, and the color variations make even the simplest stitches look stunning.
- Wearable Wardrobe Piece: The Forest Haze Sweater is casual yet stylish, perfect for everyday wear or layering for a fall hike.
- Boost Your Confidence: If you’re an advanced beginner, this project will boost your skills without being overwhelming.
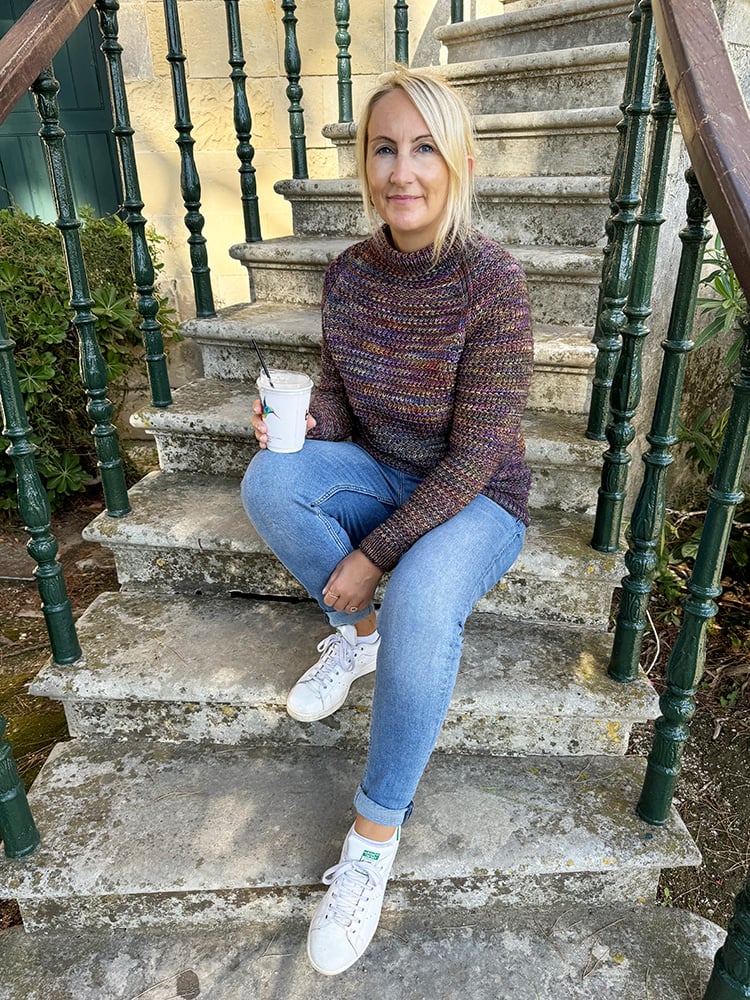
The Sweater Pattern: Simple and Stylish Raglan Design
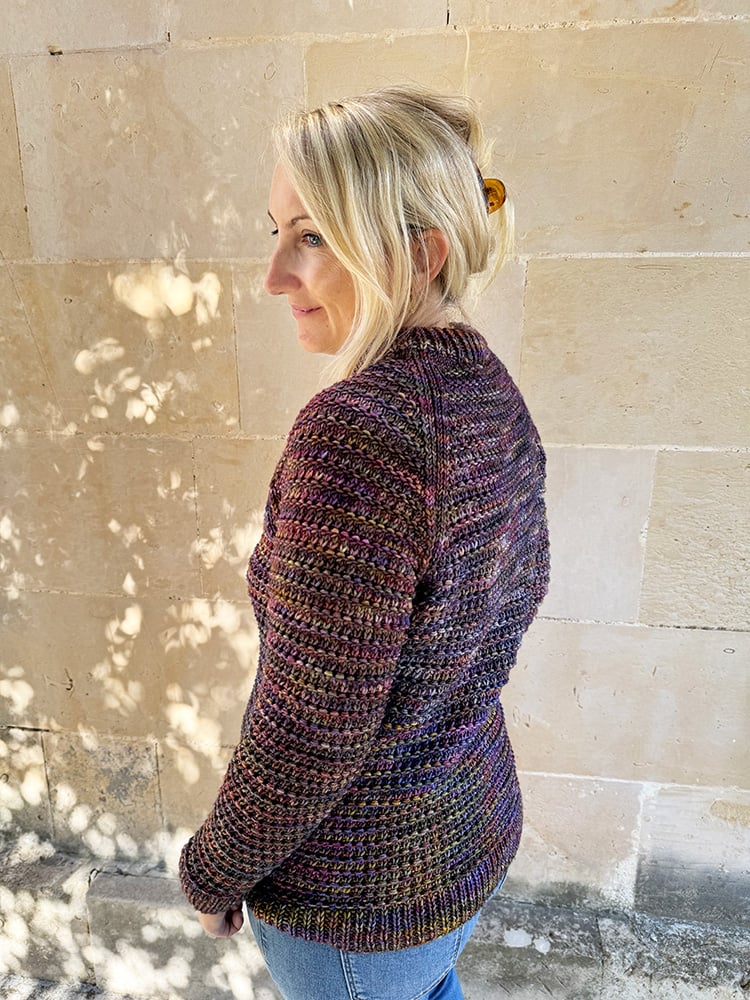
The Forest Haze Sweater features a classic raglan design, making it a great choice for those who are looking to expand their knitting skills beyond scarves and accessories.
This raglan sweater is knit flat (back and forth on straight needles or circulars), with the sleeves and body shaped by decreases or increases at the shoulders, resulting in a beautifully smooth fit.
This pattern uses two needle sizes:
- 5 mm / US 8 (for ribbed bands, cuffs and neck)
- 5.5 mm / US 9 (for a slightly looser gauge in the body)
The mix of these needle sizes allows for a well-fitted neckline and hem while giving the body of the sweater a bit of drape.
The result is a flattering and comfortable sweater that can be layered over a light shirt or worn on its own.
Copyright Info
- Please do not copy, sell, redistribute, or republish this pattern.
- If you wish to share this pattern, link to the pattern page only.
- You may sell items produced using this pattern.
- You must give pattern credit to Louise Bollanos/Handy Little Me as the designer.
- Do NOT use copyrighted photos for your product listing.
- For the copyright T&C, please read my Terms of Use.

Skill Level: Easy (Advanced Beginner)
The Forest Haze Sweater is designed with advanced beginners in mind.
While some experience with simple increases/decreases is helpful, the pattern is straightforward and easy to follow.
Grab your ad-free printable PDF pattern in my shop here.
Key Techniques You’ll Learn:
- Raglan increases: The raglan shaping gives the sweater a smooth fit across the shoulders.
- Simple ribbing: Basic ribbing at the neckline, cuffs, and hem adds a neat, finished look to the sweater.
- Working with worsted-weight yarn: Malabrigo Rios works up quickly with great stitch definition, making it an excellent choice for learning how to shape and construct a sweater.

What You’ll Need:
Yarn
- Any worsted weight yarn/10-Ply yarn.
- Malabrigo Rios 877 Queguay = 6 (7, 7, 8, 8, 9, 9) skeins.
- Each skein is 210 yards/110g.
- Total yards needed for the sweater sizes = 1,260 (1,470, 1,470, 1,680, 1,680, 1,890, 1,890)
Needles
- 5 mm (US 8) knitting needles.
- 5.50 mm (US 9) knitting needles.
- I used my set of interchangeable circular needles as there were many stitches to cast on, and it was easier to use the cables.
- I also used spare cables with end caps to hold spare stitches when needed.
Notions
- Scissors
- Darning needle
- Tape measure
- Stitch holders x 3 and/or spare cables with end caps.
Size Information
- Adult/Woman
- S (M, L, XL, XXL, XXXL)
Size: (Figures in square brackets refer to larger sizes)
- To Fit Chest / Bust: 30 [36; 40; 44; 48; 56] inch / 76 [91.5; 101.5; 111.5; 122; 142] cm
- Actual Measurement: 37 [40; 44; 49; 55; 63] inch / 94 [103; 113; 124.5; 140; 160] cm
- Length From Shoulder: 24.5 [25; 26; 26.5; 27; 27.5] inch / 62 [63.5; 66; 67; 68.5; 70] cm
- Sleeve Seam: 18 inch / 46 cm
In the photographs, the model is wearing a large size.
Please note – This is a fitted sweater; if you want to have more room, with more ease, then I suggest making one size up from your regular size.
Gauge
- 18 sts x 24 rows = 4×4 inches /10×10 cm of stitch pattern – with the 5.5 mm (US 9) needles.
- Take time to make a gauge swatch to check your tension. Wash and block your swatch before measuring.
- Use larger or smaller needles if necessary to obtain the correct gauge.
Tips for Success:
- Swatch before you start!: Always check your gauge before casting on to ensure the sweater fits as expected. For this pattern, you should aim for approximately 18 stitches and 24 rows over 4 inches (10 cm) in the stitch pattern using the larger needles.
- Pick your size carefully: The Forest Haze Sweater is designed with a bit of positive ease, meaning it’s slightly roomier for a comfortable fit. Be sure to choose your size based on your bust measurement, plus a few extra inches for ease.
- Take your time with the raglan increases: The success of the raglan shaping lies in even, consistent increases.
Knitting Abbreviations
- Beg = Beginning
- CO = Cast on
- Cont = Continue(ing)
- Dec = Decrease (Cast off)
- Foll = Following
- K = Knit
- KFB = Knit into the front and back of the stitch to increase
- K2tog = Knit the next two stitches together to decrease
- P = Purl
- Rem = Remaining
- Rep = Repeat
- RS = Right side
- SSK – Slip, slip, knit
- St(s) = Stitch(es)
- WS = Wrong side
Stitch Pattern Notes
1 x 1 ribbing = K1, P1 (It is obtained by alternating knit and purl stitches in one row and “knitting by pattern” in every next row.
This means that we make a knit stitch when the previous row stitch looks like V and make a purl stitch when the previous looks like a bump.)
Cast On: even number of stitches.
- Row 1 (RS): (k1, p1) till the end of the row.
- Row 2 (WS): (k1, p1) till the end of the row.
Repeat these two rows.
Forest Haze Sweater Knitting Pattern Instructions
- The Forest Haze Sweater is worked in 4 pieces: Back, Front, and 2 Sleeves.
- Each piece is worked from the lower edge upwards, beginning with a ribbed lower band.
- Circular needles are used to accommodate the number of stitches.
- Work back and forth on the circular needle as if working on straight needles.
- The pattern is written for all sizes, starting with the small size and with changes for different sizes listed in all necessary places.
- To follow the pattern more easily, circle or highlight all numbers pertaining to your size before beginning.
Back
With 5 mm (US 8) knitting needles CO 82 (90, 98, 106, 118, 130) sts.
- Work in 1 x 1 ribbing until the piece measures 2 inches from the CO edge.
Change to 5.5 mm (US 9) knitting needles.
- Row 1 (RS): Knit to the end of the row.
- Row 2 (WS): *K2tog* Rep from * to * to the end of the row.
- Row 3: *KFB* Rep from * to * to the end of the row.
- Row 4: Purl to the end of the row.
Rep rows 1-4 until the piece measures 15 (15, 15.5, 16, 16, 16.5) inches from the CO edge, ending with a WS row.
Shape Raglan
Keep working in the stitch pattern (Rows 1-4 above) while you complete the decreases.
Row 1 : Cast off 2, (2, 3, 3, 4, 4) sts at beg of the row, K to end. 80 (88, 95, 103, 114, 126) sts.
Row 2: Cast off 2, (2, 3, 3, 4, 4) sts at beg of the row, *K2tog* Rep from * to * to the end of the row, K1. 78 (86, 92, 100, 110, 122) sts.
Row 3: *KFB* Rep from * to * to the end of the row.
Row 4: Purl to the end of the row.
Decrease rows…
Decrease Row 1: K2, SSK, K to last 4 sts, K2tog, K2. 76 (84, 90, 98, 108, 120) sts
Row 2: P4, *K2tog* rep from * to * to the last 4 sts, P4.
Decrease row 3: K2, SSK, *KFB* rep from * to * to last 4 sts, K2tog, K2. 74 (82, 88, 96, 106, 118) sts
Decrease Row 4: Purl to the end of the row.
Repeat decrease rows 1-4, staying in the stitch pattern until 34 (34, 36, 36, 38, 38) sts remain.
You can leave these sts on a spare needle/stitch holder or cable with end caps.
Front
With 5 mm (US 8) knitting needles CO 82 (90, 98, 106, 118, 130) sts.
- Work in 1 x 1 ribbing until the piece measures 2 inches from the CO edge.
Change to 5.5 mm (US 9) knitting needles.
- Row 1 (RS): Knit to the end of the row.
- Row 2 (WS): *K2tog* Rep from * to * to the end of the row.
- Row 3: *KFB* Rep from * to * to the end of the row.
- Row 4: Purl to the end of the row.
Rep rows 1-4 until the piece measures 15 (15, 15.5, 16, 16, 16.5) inches from the CO edge, ending with a WS row.
Shape Raglan
Keep working in the stitch pattern (Rows 1-4 above) while you complete the decreases.
Row 1 : Cast off 2, (2, 3, 3, 4, 4) sts at beg of the row, K to end. 80 (88, 95, 103, 114, 126) sts.
Row 2: Cast off 2, (2, 3, 3, 4, 4) sts at beg of the row, *K2tog* Rep from * to * to the end of the row, K1. 78 (86, 92, 100, 110, 122) sts.
Row 3: *KFB* Rep from * to * to the end of the row.
Row 4: Purl to the end of the row.
Decrease rows…
Decrease Row 1: K2, SSK, K to last 4 sts, K2tog, K2. 76 (84, 90, 98, 108, 120) sts
Row 2: P4, *K2tog* rep from * to * to the last 4 sts, P4.
Decrease row 3: K2, SSK, *KFB* rep from * to * to last 4 sts, K2tog, K2. 74 (82, 88, 96, 106, 118) sts
Decrease Row 4: Purl to the end of the row.
Repeat decrease rows 1-4, staying in the stitch pattern until 34 (34, 36, 36, 38, 38) sts remain.
- On the next RS row, K 11 sts, then place the central 12, (12, 14, 14, 16, 16) sts for the neck onto a stitch holder, then place the remaining 11 sts onto another stitch holder.
- There will be 11 sts on either side of the neck.
- Each side of the neck will now be worked separately.
Shape Neck
Keeping the raglan shaping correct, K2tog, K2tog, at neck edge of foll RS row, K2tog at neck edge of next RS row, then cast off the rem 8 sts at neck edge of foll RS row.
Purl all WS rows.
Next, with RS of work facing you – place the 11 sts from the st holder onto the needles and rejoin the yarn for the other side of the neck.
Reverse the shaping as follows:
- K2tog, K2tog, K to the end of the row.
- P to the end of the row.
- K2tog, K to the end of the row.
- P to the end of the row.
- Cast off 8 sts.
Left Sleeve
With 5 mm (US 8) knitting needles CO 38 (40, 42, 44, 46, 48) sts.
- Work in 1 x 1 ribbing until the piece measures 2 inches from the CO edge.
Change to 5.5 mm (US 9) knitting needles.
- Row 1 (RS): Knit to the end of the row.
- Row 2 (WS): *K2tog* Rep from * to * to the end of the row.
- Row 3: *KFB* Rep from * to * to the end of the row.
- Row 4: Purl to the end of the row.
- Cont to work in the pattern, repeating rows 1-4 until the piece measures 4.5 inches from the CO edge, ending with a WS row.
Shape Sleeves
Row 1 (RS): (still working in the established pattern) KFB into the first and last stitch of the row. (2 sts increased)
Rep row 1 (increasing 2 sts) on every foll 4th row until there are 68 (74, 78, 82, 84, 86) sts.
Cont to work in patt until sleeve measures 15.5 inches from the CO edge.
*At this point check that you are happy with the length of the sleeves – they should start just below the underarm. If you need to make them longer, work more rows, but if you prefer a shorter sleeve you may need to pull out (frog) a few rows.
Shape Raglan
- Still working in the established stitch pattern = Cast off 2, (2, 3, 3, 4, 4) sts at beg of next 2 rows (WS row K1 at end of row). 64 (70, 72, 76, 76, 78) sts. Next, Work rows 3 and 4 of the established stitch pattern.
- Decrease Row 1: K2, SSK, K to last 4 sts, K2tog, K2. 62 (68, 70, 74, 74, 76) sts
- Row 2: P4, *K2tog* rep from * to * to the last 4 sts, P4.
- Row 3: K2, SSK, *KFB* rep from * to * to last 4 sts, K2tog, K2.
- Row 4: Purl to the end of the row.
- Repeat rows 1-4, staying in the stitch pattern until 12 sts remain.
- Cast off 6 sts – P to the end of the row.
- K to the end of the row.
- Cast off rem 6 sts.
Right Sleeve
Work as for the left sleeve until you have 12 sts left on the needle.
Shape Raglan
- P 6 sts, cast off the rem 6 sts, break yarn, and secure.
- Rejoin the yarn to the first stitch and K to the end of the row.
- Cast off rem 6 sts.
Making Up
You can find a mattress stitch tutorial here.
Tip
It’s best to work on a large surface (like a dining table or desk) so you can lie the pieces out flat and see where you will be seaming.
Step 1
Seam the back right raglan sleeve seam using the mattress stitch. Make sure the right sides are facing you.
Step 2
Join the right sleeve seam to the front raglan seam using the mattress stitch.
Make sure the right sides are facing you.
Step 3
Join the left raglan sleeve seam to the front raglan seam using the mattress stitch.
Make sure the right sides are facing you.
Step 4
Leave the left-back raglan seam open for now.
With the RS of work facing you, use the 6mm (US 10) knitting needles and do the following:
- Pick up and knit 16 (16, 18, 20, 20) sts from the side front neck edge and top of the sleeve.
- Then K across the 10 (12, 14, 14, 16, 16) sts from the stitch holder at the center front.
- Then, pick up K 16 (16, 18, 20, 20) sts from the side of the front neck edge and top of the sleeve.
- Finally, K across the 34 (34, 36, 36, 38, 38) sts from the spare stitch holder at the back.
Work in 1 x 1 ribbing (K1, P1) for 3 inches, ending with a WS row.
Cast off in rib.
Step 5
Join rem back raglan seam and cont up the neck ribbing (reversing the seam for the rem half, so it looks neat when turned over).
Step 6
Fold neck ribbing in half to WS and catch down loosely on the WS. This creates a chunky collar with a neat edge.
Step 7
Join side and sleeve seams using the mattress stitch.
Then, you can weave in any leftover loose ends.
I also like to use a lint roller to clean the garment afterward in case of any fluff, pet hair, etc.
Final Thoughts
The Forest Haze Sweater is more than just a knitting project—it’s a cozy companion for those chilly autumn days ahead.
The lush, earthy tones of the Malabrigo Rios yarn combined with the simple, flattering raglan design will make this sweater a favorite in your wardrobe for years to come.
Grab your needles, choose your favorite fall colorway, and let the Forest Haze Sweater transport you to the tranquility of a misty autumn forest.
Happy knitting!
Could you share your work with us?
I love seeing your finished projects.
If you enjoyed making the Forest Haze Sweater, I’d love to see yours on Instagram, be sure to tag me @handylittleme or #handylittleme to be featured.
If you are on Facebook, stop over to the handylittleme Facebook group and share a photo.
I’d love to see your work.
More Patterns You May Be Interested In…
- How To Knit A Hat For Complete Beginners (+ Video Tutorial)
- 20 Temperature Blanket Patterns (The Ultimate Guide)
- How To Knit A Hat With Circular Needles (Step-By-Step)
- 31 Free Baby Blanket Knitting Patterns (Easy Knit Blankets)
- Chunky Cable Knit Sweater Pattern
- Knitted Dog Sweater Pattern (3 Sizes)
- 12 Simple Knitting Stitches For Beginners
- Cozy Cottage Moss Stitch Sweater Knitting Pattern
- How to Knit – A Complete Beginner’s Guide
- 37+ Patterns To Use Up Your Yarn Stash (Small Projects)
- Free Dog Sweater Knitting Pattern (Straight Needles)
- Super Easy Corner To Corner Baby Blanket Pattern (Knit)
- Easy Baby Sweater Knitting Pattern For Beginners
- How To Knit A Baby Hat (Straight Needles)
- Pumpkin Knitting Pattern (Beginner Friendly!)
- Snood Knitting Pattern (Free + Easy)
- Free Knitted Heart Pattern (Easy + Quick Project)
- 20+ Fall Oversized Knits (Sweater Knitting Patterns)
- Circular Knitting: Bottom-Up Sweater Knit In The Round


