How To Knit Fisherman’s Rib Stitch (And Headband Pattern)
THIS ARTICLE CONTAINS AFFILIATE LINKS THAT SUPPORT HANDY LITTLE ME CONTENT AND FREE PATTERNS.This post will teach you how to knit Fisherman’s rib stitch and a free headband pattern.
The knitted headband has a step-by-step tutorial so you can follow along and learn this fantastic reversible pattern if you are a new knitter.
This stitch pattern can be used in a number of projects, like sweaters, cardigans, hats, scarves, and blankets.
Please scroll down to view the free pattern, or grab the printable PDF in my shop here.

What Is A Fisherman’s Rib?
Fisherman’s rib, also known as brioche rib, is a textured knitting stitch pattern that produces a thick, reversible fabric with a distinctive, lofty appearance.
It’s often used for scarves, hats, and other cold-weather accessories due to its warmth and plush texture.
The Fisherman’s rib stitch pattern creates a raised, textured fabric using yarn overs and slipped stitches.
Combining these stitches results in a pattern that looks a bit like traditional ribbing but has a more pronounced and textured appearance.
Additionally, Fisherman’s rib is reversible, meaning it looks the same on both sides, making it suitable for scarves and other items (like small projects) where both sides will be visible.
When working with Fisherman’s rib, it’s essential to pay attention to your tension, as it can affect the elasticity of the fabric.
It’s a bit more involved than basic ribbing, but the result is a richly textured and cozy stretchy fabric.

Is Fisherman’s Rib Stretchy?
Yes, Fisherman’s rib is generally considered to be a stretchy stitch pattern.
Fisherman’s rib creates a more elastic fabric than traditional ribbing.
This stretchiness makes Fisherman’s rib an excellent choice for items like hats, headbands, scarves, and garments where a bit of give is desirable.
The stretch is especially useful in ribbed cuffs, hems, and bands, providing a comfortable fit without sacrificing warmth.
However, it’s important to note that the stretchiness of Fisherman’s rib can also be influenced by factors such as the type of yarn used, needle size, and individual knitting tension.
Experimenting with different yarns and needle sizes can help you achieve the desired level of stretch in your finished project.

Is Brioche Stitch The Same As Fisherman’s Rib?
While Brioche stitch and Fisherman’s rib share some similarities, they are not exactly the same.
Both stitches fall under the category of brioche knitting, and they involve yarn overs and slipped stitches, resulting in a textured and reversible fabric.
However, there are key differences between the two…
Fisherman’s Rib:
- In Fisherman’s rib, each knit stitch is knit with the stitch below known as ‘knit one below’. The knit one below creates an elongated stitch, and when worked on the next row, it is typically knit together with the slipped stitch.
- Fisherman’s rib is often worked with a single color of yarn, and it creates a fabric with a pronounced vertical texture.
Brioche Stitch:
- The Brioche method involves the use of a “brioche knit” stitch and a “brioche purl” stitch, which are often denoted as “brk” and “brp.” These stitches are worked with yarn overs, creating a similar elongated effect.
- Unlike Fisherman’s rib, brioche stitch is often worked with two colors of yarn, creating a reversible fabric with a unique texture. The use of two colors allows for the creation of intricate patterns, often referred to as “two-color brioche.”
In summary, while Fisherman’s rib and Brioche stitch are related techniques that produce textured and stretchy fabrics, they differ in the specific stitches used and the overall appearance of the finished fabric.
Both stitches, however, are popular choices for creating warm and cozy garments with a distinctive look.

Fisherman’s Rib Stitch Headband Pattern
Here is a knitted headband pattern for you to try out!
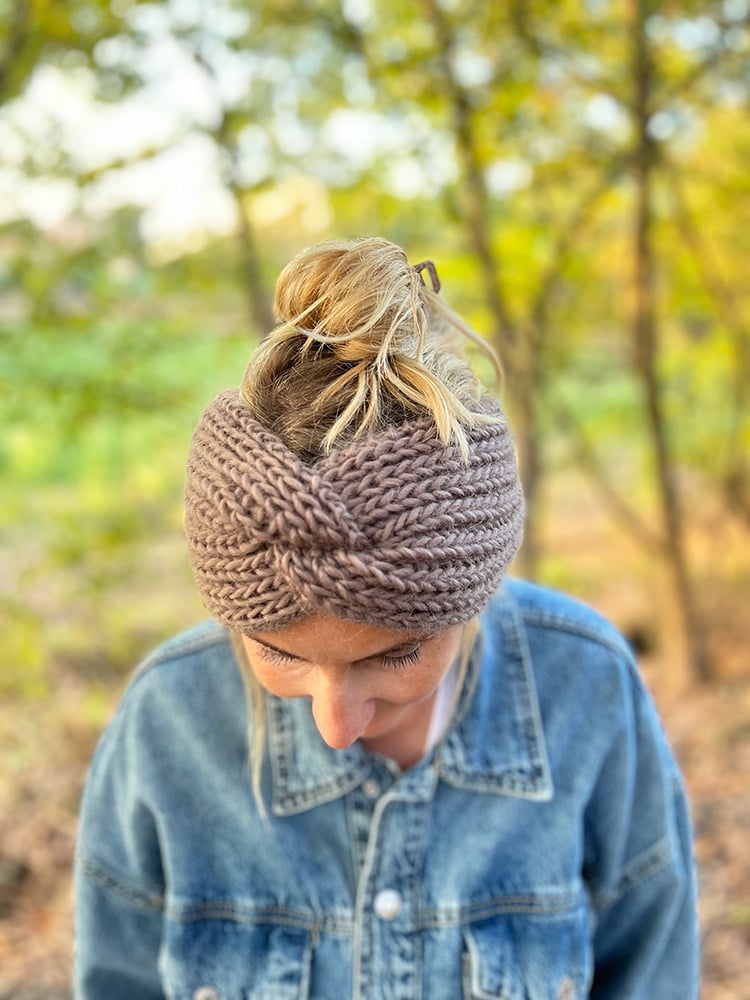
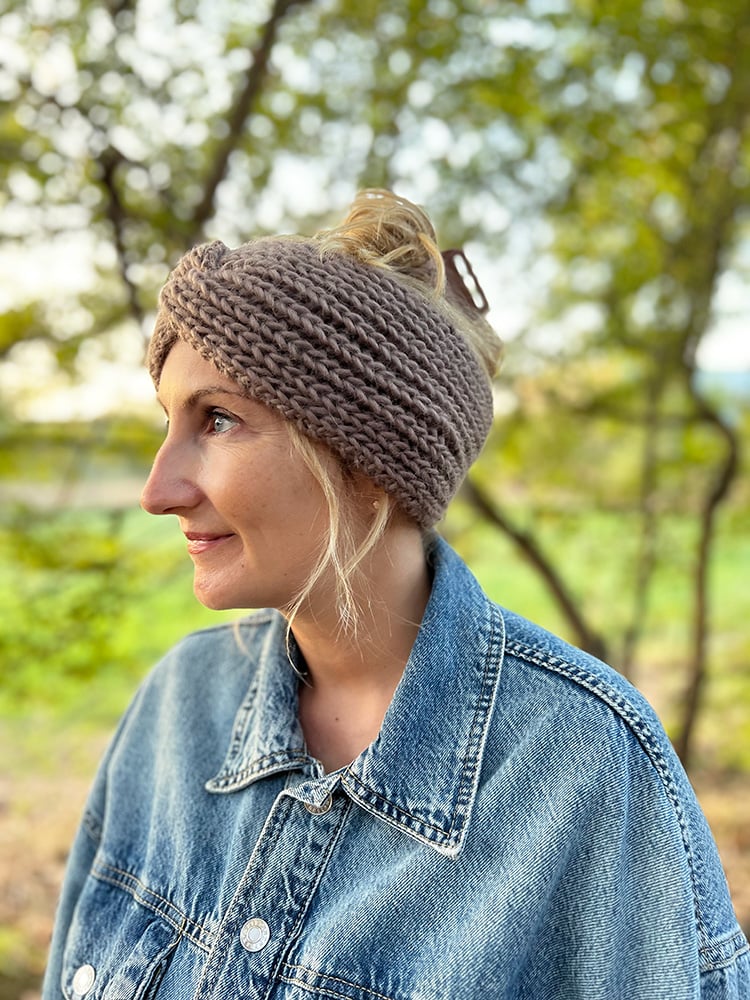
This headband is knit with the fisherman’s rib stitch, a great stitch to create a thick fabric.
This headband is a great pattern and first project for a beginner as it uses simple stitches, and there is a video tutorial to help you along.
The right side and wrong side of the knitted fabric are the same, as this is a reversible pattern.
Grab your ad–free printable PDF pattern in my shop here with all the necessary photographs.
Copyright Info
- Please do not copy, sell, redistribute, or republish this pattern.
- If you wish to share this pattern, link to the pattern page only.
- You may sell items produced using this pattern.
- You must give pattern credit to Louise Bollanos/Handy Little Me as the designer.
- Do NOT use copyrighted photos for your product listing.
- For the copyright T&C, please read my Terms of Use.
Skill Level – Basic (Beginner Knitters)

Measurements/Sizes
- Adult S/M = Length – 20 inches.
- Width = 5 inches.
- To fit a head with a circumference size of around 22-24 inches.
- You can adjust the length easily by working fewer or more rows depending on your head circumference size.
Gauge – 14 sts and 16 rows = 4in/10cm in fisherman’s ribbing.

The supplies you need…
Yarn
- Bulky Yarn 05/Chunky/12-Ply
- I used 1 ball of West Yorkshire Spinners Chunk Roving RE: TREAT in Quiet 1015.
- One ball is 100g/153 yards/140m.
- Around half will be enough to make one headband (50g/76.5yds/70m).
Needles
- Pair of 6 mm (US 10) knitting needles.
- You can use straight needles or circular needles for this pattern to knit flat.
Notions
- Tape measure
- Darning needle/tapestry needle
- Scissors
Abbreviations
- Beg – Begin(ning)
- Cont – Continue(ing)
- K – Knit
- K1B – Knit one stitch below (insert the right needle into the next stitch on the left needle, going into the loop of the stitch below on the previous row and knitting through – see video tutorial here.)
- P – Purl
- Rem – Remaining
- Rep – Repeat
- St(s) – Stitch(es)

View The Video Tutorial On My YouTube Channel Here
Time needed: 1 day, 3 hours and 30 minutes
How To Knit Fisherman’s Rib Stitch (And Headband Pattern)
- Step 1 – Cast on
Grab your bulky yarn and size 6 mm (US 10) knitting needles and cast on 19 stitches.
- Step 2 – Row 1 (The setup row)
Row 1 – Knit one stitch, then begin a repeat of *purl one stitch, knit one stitch – repeating from this symbol * P1, K1 until you reach the end of the row. Turn the work.
Abbreviated version – Row 1: K1, *P1, K1 – Rep from * to the end of the row. - Step 3 – Row 2
Row 2 – Purl one stitch, then begin a repeat of *knit one stitch below, purl one stitch – repeating from this symbol * K1B, P1 until you reach the end of the row. Turn the work.
Abbreviated version – Row 2: P1, *K1B, P1 – Rep from * to the end of the row. - Step 4 – Row 3
Row 3 – Knit one stitch, then begin a repeat of *purl one stitch, knit one stitch below into the next stitch – repeating from this symbol * P1, K1B until you reach the end of the row. Turn the work.
Abbreviated version – Row 3: K1, *P1, K1B – Rep from * to the end of the row. - Step 5 – Repeat the pattern
Rep rows 2 and 3 until the piece measures 20 inches (or your desired length).
*You can add more or less length depending on how long you want the headband to be (you need to measure your head to check and read the size info). - Step 6 – Cast off
Cast off in pattern.
Weave in any loose ends.
Leave one long tail for seaming. - Step 7 – Making up
Lie the headband out flat with the right side facing up.
Fold the ends into the middle. - Step 8 – Prepare for the twist
Then, offset them so that half of one side is touching the other half at an angle.
- Step 9 – Hold the edges together
Hold the ends together.
- Step 10 – Fold the edges
Fold the top section over onto the right side of the fold.
- Step 11 – Fold the remaining edges in
Fold the bottom section over and hold it into place.
- Step 12 – Seaming the twist
Then, push your needle through, catching all four sections, seaming until the end, and securing with a knot.
- Step 13 – Turn the right side out
Turn the right side out and lay flat.
Your headband is now ready to wear or gift.
Does Fisherman’s Rib Use More Wool?
Fisherman’s rib tends to use more yarn than standard knit stitches or traditional ribbing.
This is because of the nature of the stitch pattern (a horizontal stretch), which creates elongated stitches and a plush, textured fabric with lots of volume.
If you’re working on a project with a specific amount of yarn and are concerned about running out, it’s a good idea to make a gauge swatch to estimate how much yarn you’ll use per stitch and adjust your project accordingly.
Keep in mind that the extra yarn usage is part of what gives Fisherman’s Rib its distinctive look and feel.
It’s a trade-off between yarn consumption and the unique, cozy texture with this stitch pattern’s slightly different look.
Related Post: How To Knit One Below (K1B Tutorial + Video)

Can You Knit Fisherman’s Rib With An Even Number Of Stitches?
Yes, Fisherman’s rib can be knit with an even number of stitches and an odd number of stitches).
Fisherman’s rib is a versatile stitch pattern that can be adapted to different stitch counts.
The key is maintaining the sequence of knit stitches and purl stitches that create the characteristic texture of Fisherman’s rib.

More Free Knitting Patterns
You may also like these rib patterns…
- Beret Hat Knitting Pattern (Fisherman’s Rib)
- Chunky Knit Sweater Pattern (Half Fisherman’s Rib)
- Fisherman’s Rib Stitch Knit Pattern (Flat + In The Round)
Share your work with us…
If you enjoyed making the knitted headband, I’d love to see yours on Instagram; tag me @handylittleme or #handylittleme.
If you are on Facebook, stop over to the handylittleme Facebook group and share a photo.
I’d love to see your work.
Happy knitting!
More Patterns You May Be Interested In…
- How To Knit A Hat For Complete Beginners (+ Video Tutorial)
- How to Knit – A Complete Beginner’s Guide
- Celtic Cable Knit Headband Pattern
- Woodland Whispers Headband Free Knitting Pattern
- Braided Oak: Cable Knit Headband Pattern
- Falling Leaves Free Ear Warmer Knitting Pattern
- How To Knit A Hat With Circular Needles (Step-By-Step)
- 31 Free Baby Blanket Knitting Patterns (Easy Knit Blankets)
- How To Knit Baby Booties (Step-By-Step)
- 31 Knitted Headbands To Make (Free + Simple)
- 12 Simple Knitting Stitches For Beginners
- Falling Leaves Free Ear Warmer Knitting Pattern
- 37+ Patterns To Use Up Your Yarn Stash (Small Projects)
- Free Dog Sweater Knitting Pattern (Straight Needles)
- Super Easy Corner To Corner Baby Blanket Pattern (Knit)
- Easy Baby Sweater Knitting Pattern For Beginners
- How To Knit A Baby Hat (Straight Needles)
- Pumpkin Knitting Pattern (Beginner Friendly!)
- 8 Cable Stitch Knitting Patterns
- Free Knitted Heart Pattern (Easy + Quick Project)
- 20+ Fall Oversized Knits (Sweater Knitting Patterns)


