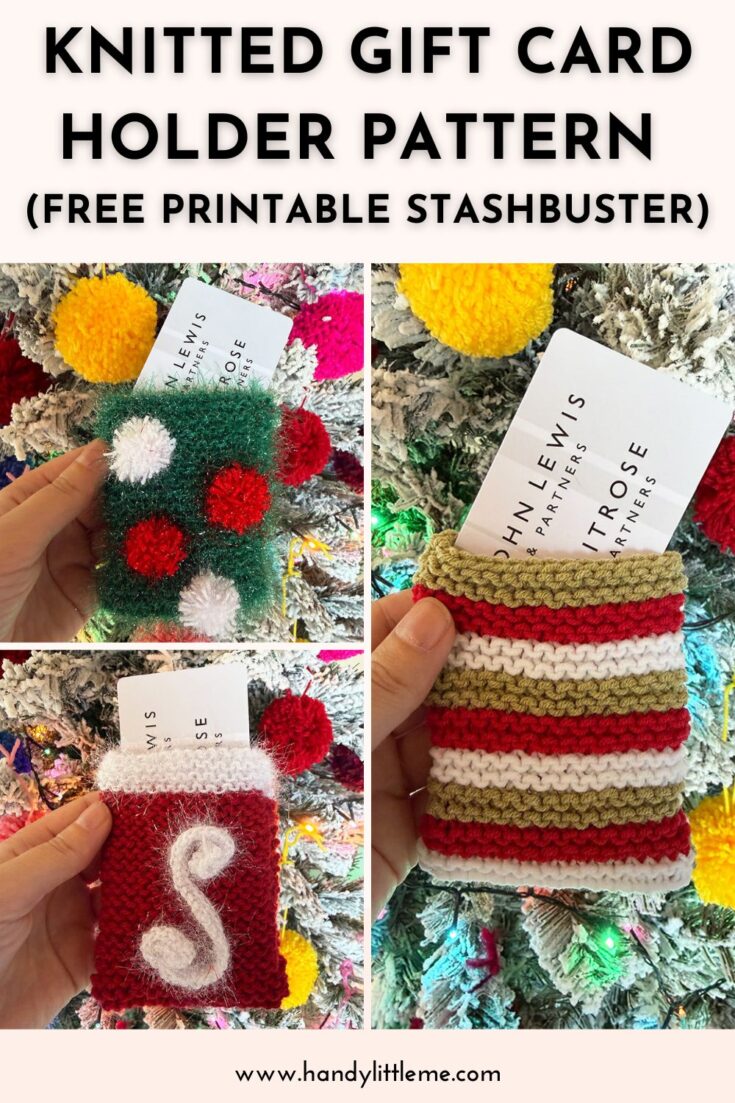
Knitted Gift Card Holder Pattern (Free Printable Stashbuster)
THIS ARTICLE CONTAINS AFFILIATE LINKS THAT SUPPORT HANDY LITTLE ME CONTENT AND FREE PATTERNS.If you need a quick, handmade touch for a present, this knitted gift card holder is the perfect little project.
It’s a stashbuster that uses DK-weight scraps, knits up fast, and instantly makes a gift card feel more thoughtful (even if you’re wrapping at the last minute!).
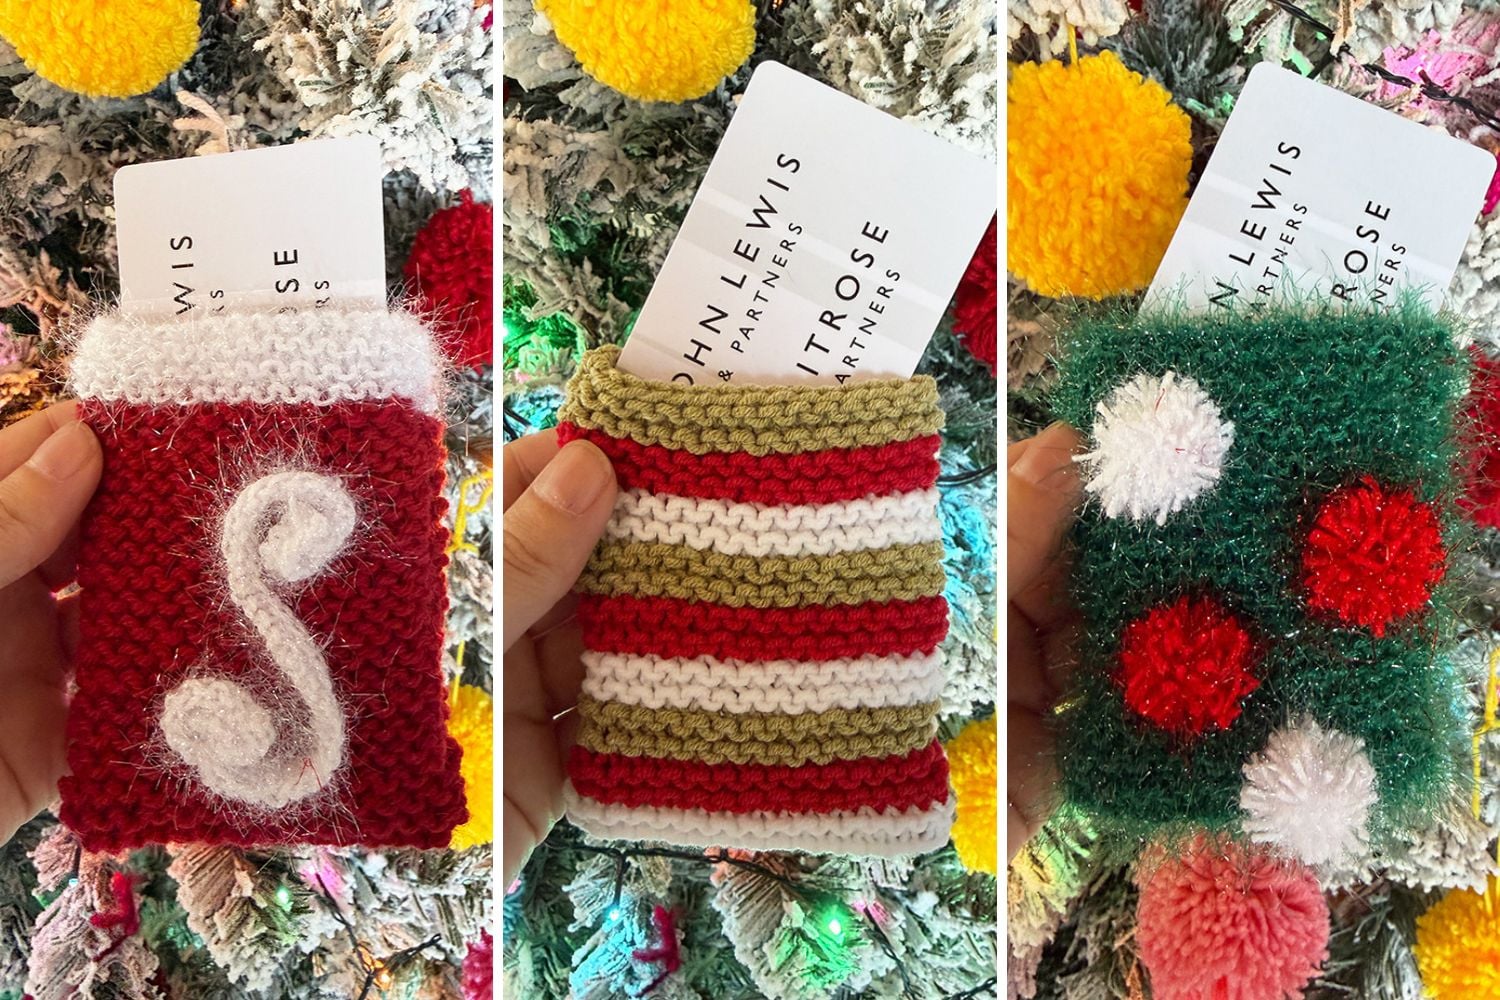
In this post, you’ll find three easy designs—a simple festive holder, a striped version, and a cute “tree” option.
All three are worked in garter stitch (knit every row), then folded and seamed into a pocket.
Grab your leftovers and let’s make something small, cozy, and giftable.
Before You Get Started
- This is meant to be a dense little fabric, so your card doesn’t show through. If your knitting is loose, go down a needle size.
- Garter stitch looks similar on both sides, so don’t stress about the “right” side—just pick the neater one for the front.
- For the cleanest finish, weave in ends before you seam, especially on the striped version.
Materials Needed
- Yarn: DK weight scraps (small amounts)
- Total yarn needed for one gift card holder: ~16–22 meters (18–24 yards) of DK yarn (includes a little extra for seaming + weaving in)
- Needles: 4 mm (US 6) straight needles (or size to get a firm fabric)
- Notions: tapestry needle, scissors
Optional extras:
- Contrast scraps for tiny embroidery (star, heart, initial)
- A small button + yarn loop or ribbon closure
- Mini pom-poms (especially cute for the tree version)
Size Info
Fits a standard gift card/credit card.
Approx: 3.5” (9 cm) wide x 4” (10 cm) tall when folded.
Abbreviations
- CO – cast on
- k – knit
- st(s) – stitch(es)
- BO – bind off
- Garter stitch = knit every row

Pattern Instructions
Construction (all three designs)
You’ll knit one long garter stitch rectangle, then fold it into a pocket and seam the sides.

Design 1: Simple Christmas Knitted Gift Card Holder (Beginner)
Skills needed
If you can do these, you’re good:
- Cast on
- Knit stitch
- Bind off
- Sew seams with a tapestry needle
- No purling required (it’s all garter stitch).
Yarn colors
- Yarn A: White (Yarn Art Christmas – novelty yarn)
- Yarn B: Red (Red DK – Drops Lima scraps)
Gauge (not critical)
- Roughly 10 sts / 22 rows = 5 cm / 2″ in garter stitch with DK yarn.
- Gauge doesn’t need to be perfect—just aim for a fabric dense enough that the card won’t poke through.
Instructions
Step 1 – Cast on
CO 16 sts in Yarn A (white).
Knit 6 rows.
Step 2 – Knit the rectangle
Change to Yarn B (red).
Knit every row until the piece measures about 20 cm / 8″ long.
Change back to Yarn A (white).
Knit 6 rows.
Step 3 – Bind off
BO all sts loosely. Cut yarn and pull tail through last st.
Step 4 – Fold to form the pocket
Lay the rectangle flat and choose the neater side for the front.
Fold the cast-on edge up to create a pocket deep enough to cover the gift card.
Step 5 – Seam the sides
Using a tapestry needle and matching yarn, sew up both sides of the folded pocket with whip stitch or mattress stitch.
Weave in ends securely on the inside.
Optional
Add a small embroidery detail or a button/loop closure, or knit a length in Yarn A to turn into an embroidered letter on one side of the pocket.
For example: cast on 30 sts and then bind off.
Sew the strip of yarn into the shape of a letter.

Design 2: Striped Knitted Gift Card Holder (Beginner)
Yarn colors
- Yarn A: Green
- Yarn B: Red
- Yarn C: White
For this, I used scraps of Sirdar Snuggly Replay (DK).
Instructions
Step 1 – Cast on
CO 16 sts in Yarn A (green).
K 4 rows.
Step 2 – Knit the stripes
Change to Yarn B (red), K 4 rows.
Change to Yarn C (white), K 4 rows.
Repeat the 3-color stripe sequence (A, B, C) until your piece measures about 20 cm / 8″ long.
Finish with 4 rows of Yarn A (green).
Step 3 – Bind off
BO loosely. Weave in ends.
Step 4 – Fold + seam
Fold into a pocket as in Design 1 and seam both sides.

Design 3: Green Tree Knitted Gift Card Holder (Beginner)
This one is super simple—then you “decorate” it with mini pom-poms.
Materials
- DK green yarn (Yarn Art Christmas – novelty yarn is fun here!)
- Scrap yarn for mini pom-poms (I used a Clover 3/4 inch pom pom maker)
- Optional: fabric glue or stitch pom-poms on
Instructions
Step 1 – Cast on
CO 16 sts in green.
Step 2 – Knit the rectangle
Knit every row until your piece measures about 20 cm / 8″ long.
Step 3 – Bind off
BO loosely. Weave in ends.
Step 4 – Fold + seam
Fold into a pocket and seam both sides.
Step 5 – Decorate
Make a few mini pom-poms and glue or stitch them onto the front like “ornaments.”

FAQ
What size gift cards does this fit?
A standard credit-card-sized gift card.
If you need it wider, CO 18–20 sts instead.
Can I use worsted/aran yarn?
Yes—your holder will be thicker and slightly bigger.
For a neat fit, try a smaller needle and keep the fabric dense.
Can I knit this in the round?
You can, but it’s honestly faster flat.
The fold-and-seam method is quickest for a last-minute make.
Do I need perfect gauge?
No, just make sure the fabric isn’t too loose.
If you can see gaps, go down a needle size.
How do I add a closure?
Sew on a small button and make a simple yarn loop, or stitch a short ribbon to tie.

Free Printable
To make this project even easier, I’ve created a free printable version of the gift card holder patterns.
You can keep it handy while you work—no need to keep checking your phone or scrolling through the blog.
It’s perfect for printing out or saving to your tablet for easy access anytime.
Gift Card Holder Knitting Pattern (Free Printable)
Knit a cute gift card holder with DK scrap yarn!
This beginner-friendly garter stitch pattern includes 3 stashbuster designs to choose from + a free printable.
Materials
- Scraps of white, red and green yarn.
- Novelty yarn (Yarn Art Christmas)
- DK Yarn - Drops Lima or Sirdar Snuggly Replay
- Total yarn needed for one gift card holder: ~16–22 meters (18–24 yards) of DK yarn (includes a little extra for seaming + weaving in)
Tools
- 4 mm / US 6 knititng needles (straight or circular)
- Scissors
- Tape measure
- Yarn needle
- Optional - Clover 3/4 inch pom pom maker.
Instructions
Construction (all three designs)
You’ll knit one long garter stitch rectangle, then fold it into a pocket and seam the sides.
For images, please check the main blog post.
Design 1: Simple Christmas Gift Card Holder (Beginner)
Yarn colors
- Yarn A: White (Yarn Art Christmas - novelty yarn)
- Yarn B: Red (Red DK - Drops Lima scraps)
Gauge (not critical)
- Roughly 10 sts / 22 rows = 5 cm / 2" in garter stitch with DK yarn.
- Gauge doesn’t need to be perfect—just aim for a fabric dense enough that the card won’t poke through.
Instructions
Step 1 – Cast on
CO 16 sts in Yarn A (white).
Knit 6 rows
Step 2 – Knit the rectangle
Change to Yarn B (red).
Knit every row until the piece measures about 20 cm / 8" long.
Change back to Yarn A (white).
Knit 6 rows.
Step 3 – Bind off
BO all sts loosely. Cut yarn and pull tail through last st.
Step 4 – Fold to form the pocket
Lay the rectangle flat and choose the neater side for the front.
Fold the cast-on edge up to create a pocket deep enough to cover the gift card.
Step 5 – Seam the sides
Using a tapestry needle and matching yarn, sew up both sides of the folded pocket with whip stitch or mattress stitch.
Weave in ends securely on the inside.
Optional: Add a small embroidery detail or a button/loop closure, or knit a length in Yarn A to turn into an embroidered letter on one side of the pocket. For example: cast on 30 sts and then bind off. Sew the strip of yarn into the shape of a letter.
Design 2: Striped Gift Card Holder (Beginner)
Yarn colors
- Yarn A: Green
- Yarn B: Red
- Yarn C: White
- For this, I used scraps of Sirdar Snuggly Replay (DK).
Instructions
Step 1 – Cast on
CO 16 sts in Yarn A (green).
K 4 rows.
Step 2 – Knit the stripes
Change to Yarn B (red), K 4 rows.
Change to Yarn C (white), K 4 rows.
Repeat the 3-color stripe sequence (A, B, C) until your piece measures about 20 cm / 8" long.
Finish with 4 rows of Yarn A (green).
Step 3 – Bind off
BO loosely. Weave in ends.
Step 4 – Fold + seam
Fold into a pocket as in Design 1 and seam both sides.
Design 3: Green Tree Gift Card Holder (Beginner)
This one is super simple—then you “decorate” it with mini pom-poms.
Materials
- DK green yarn (Yarn Art Christmas - novelty yarn is fun here!)
- Scrap yarn for mini pom-poms (I used a Clover 3/4 inch pom pom maker)
- Optional: fabric glue or stitch pom-poms on
Instructions
Step 1 – Cast on
CO 16 sts in green.
Step 2 – Knit the rectangle
Knit every row until your piece measures about 20 cm / 8" long.
Step 3 – Bind off
BO loosely. Weave in ends.
Step 4 – Fold + seam
Fold into a pocket and seam both sides.
Step 5 – Decorate
Make a few mini pom-poms and glue or stitch them onto the front like “ornaments.”
Notes
Size Info
Fits a standard gift card/credit card.
Approx: 3.5” (9 cm) wide x 4” (10 cm) tall when folded.
Abbreviations
- CO – cast on
- k – knit
- st(s) – stitch(es)
- BO – bind off
- Garter stitch = knit every row
Could you share your work with us…
I love seeing your finished projects on social media.
If you enjoyed making the knitted gift card holder, I’d love to see yours on Instagram, tag me @handylittleme or #handylittleme.
On Facebook, stop over to the handylittleme Facebook group and share a photo.
I’d love to see your work.
Happy Knitting!
Free Knitting Patterns For Christmas
- 27 Knitted Stocking Stuffers (All Free Patterns!)
- Candy Cane C2C Dishcloth (Free Printable Knitting Pattern)
- Holly Jolly Dishcloth Knitting Pattern (Free Printable)
- Elf Dog Sweater Knitting Pattern (Free in 3 Sizes)
- Christmas Elf Dog Bandana Knitting Pattern (4 Sizes)
- Dog Christmas Hat Pattern
- Knitted Elf Hat Pattern
- Knitted Santa Hat
- Knit Tree Skirt Pattern (Free And Easy Christmas DIY)
- 28 Free Christmas Stocking Knitting Patterns (The Best)
- 30+ Free Christmas Knitting Patterns (Best Knitted Ideas)
- 30 Christmas Sweater Knitting Patterns (Jumper Ideas)
- 17 One Skein Knitting Patterns {Easy + Quick}
- 35 Free Knitted Christmas Decorations (Knitting Patterns)
- 27 Free Christmas Knitting Patterns For Babies
- 33 Free Christmas Knitting Patterns For Kids
- 13 Vintage Knitted Christmas Stocking Patterns
- Tartan Christmas Decorations (Plaid Knitting Pattern)
- 50+ Best Free Knitted Gifts For Christmas
- Christmas Blanket Knitting Pattern (Free + Festive!)
- How To Make A Chunky Knit Pillow Cover- Free Pattern
- Table Runner Knitting Pattern
- Knit Placemat Pattern
- Free Sock Knitting Pattern (Easy + Simple For Beginners)
- Free Cable Mittens Knitting Pattern (Classic Knit)
- How To Make An Easy Pom Pom Christmas Tree DIY Craft
- How To Make A Christmas Wreath (Easy Homemade DIY)
- Christmas Tree Hat Knitting Pattern
- Dog Santa Outfit Costume DIY (Free Knitting Pattern)
- 47 Holiday Knitting and Crochet Patterns
- 44 Handmade Gifts – The Best Ideas For Everyone On Your List