Knitted Bow Tie (Free Stash Busting Knitting Pattern)
THIS ARTICLE CONTAINS AFFILIATE LINKS THAT SUPPORT HANDY LITTLE ME CONTENT AND FREE PATTERNS.In this post, you will see how to make a quick and easy knitted bow tie.
This knitting pattern is a great stash buster, using up leftovers in your yarn stash.
The stylish bow tie can be made in any kind of yarn.
View the free pattern below or grab the inexpensive PDF in my shop here.

Make A Knitted Bow Tie
You all know I love anything tartan, Scottish, or linked to the Outlander TV series, and this tartan bow tie fits right in!
Knit similarly to this Fraser Tartan Scarf Knitting Pattern, the Fraser Tartan Dog Sweater Pattern, and these Tartan Christmas Decorations (Plaid Knitting Pattern).
The tartan effect is created by knitting stripes and then weaving lengths of yarn through the knitted fabric.
The Yarn I Used
You can easily make a knitted bow tie from leftover yarns in your stash.
I used leftovers from Paintbox Chunky yarn in red and green to create a striped knitted rectangle.
Then the green yarn was used to weave the tartan into the knitted fabric – up and over into the garter stitch bumps.

Resources and tutorials you may find helpful in following this pattern
This very simple pattern is great for any beginner knitter.
- Knitting Lessons
- How to cast on knitting
- How to cast off knitting for total beginners (step by step)
- How to knit garter stitch
- How to knit the purl stitch (for beginners + a video tutorial)
- How to knit stockinette stitch (for beginners)
- How to read knitting patterns for beginners
- Knitting abbreviations and terms (US and UK)

Tartan Bow Tie Knitting Pattern
Grab your inexpensive, ad-free, PDF printable pattern in my shop here.
Notes
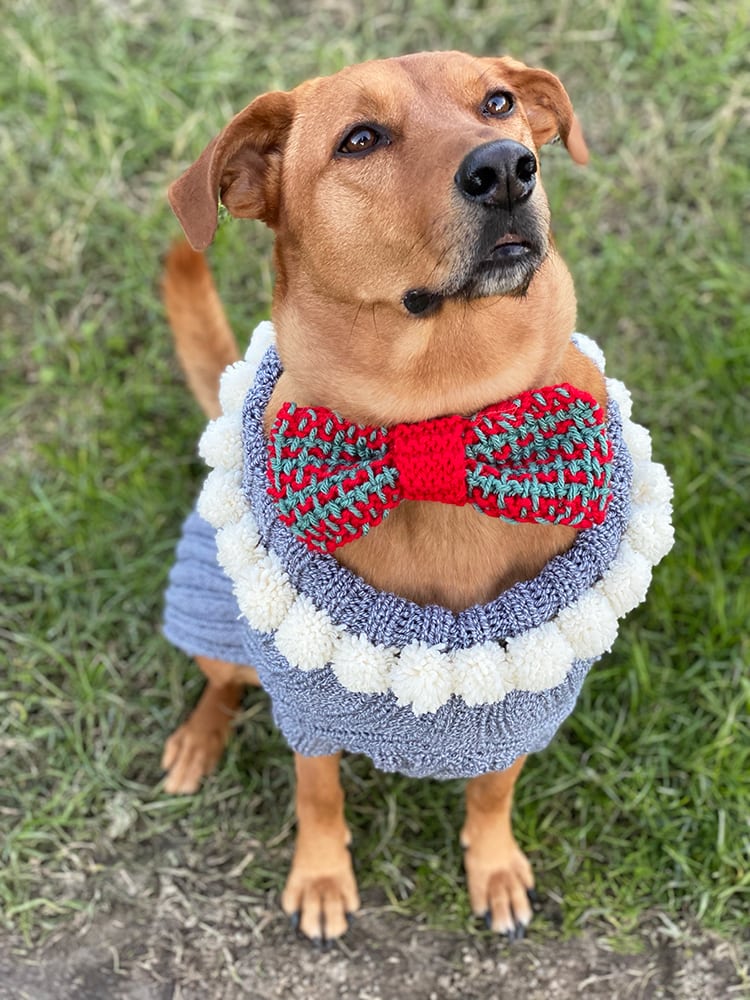
Make a knitted tartan bow tie to place onto your dog’s collar.
Make a bow tie in a solid color for a black-tie affair, or experiment with stripes, intarsia, or the tartan.
You can make with yarn scarps in worsted weight yarn and 5 mm needles (US 8) or whatever yarn scraps you have in your stash.
You may also like this Christmas dog sweater knitting pattern.
Copyright Info
- Please do not copy, sell, redistribute, or republish this pattern.
- If you wish to share this pattern, link to the pattern page only.
- You may sell items produced using this pattern.
- In all product listings, please credit Handy Little Me (Louise Bollanos) as the designer.
- Do NOT use the copyrighted photos for your product listing.
- For the copyright T&C, please read my Terms of Use.
Skill Level – Basic
Gauge – 10 x 10 cm/4 x 4 inches = 16 sts/20 rows in garter stitch.
Measurement/Sizes
Knitted samples laying flat will measure…
- Large – Length = 8″ / Width = 3″
- Medium – Length = 6″ / Width = 2.5″
- Small – Length = 4″ / Width = 2″

The Supplies You Need
Yarn
Yarn – Paintbox Chunky
- Yarn A – Red
- Yarn B – Green
- Chunky/Bulky/12 Ply yarn
- Scraps in various colors.
- Around 30g of each color.
Needle Size
- 6.5 mm knitting needles (US 10.5).
- This project is knitted flat – back and forth on straight needles.
Notions
- Tape measure
- Darning needle
- Scissors
Abbreviations / Knitting Abbreviations And Terms (US And UK) List
- CO = Cast on
- Cont = Continue
- K = Knit
- Patt = Pattern
- Rep = Repeat
- St(s) = Stitch(es)

Pattern Instructions
Time needed: 3 hours and 30 minutes
How To Make A Knitted Bow Tie
- Step 1 – Knit A Striped Rectangle
Yarn A – Red
Yarn B – Green
Cast on 20 (22, 24) sts using the long tail method.
Knit every row (working in garter stitch); you will create a striped rectangle as follows:
Yarn A – Knit 4 rows.
Yarn B – Knit 2 rows.
Yarn A – Knit 2 rows.
Yarn B – Knit 2 rows.
Yarn A – Knit 4 rows.
Yarn B – Knit 2 rows.
Yarn A – Knit 2 rows.
Yarn B – Knit 2 rows.
Yarn A – Knit 4 rows.
Cast off in yarn A, secure, and weave in the loose end.
- Step 2 – Weave The Plaid
You will need strands of yarn in your chosen color for the weaving.
With Yarn B – thread the darning needle and weave the yarn up and under the garter stitch bumps.
You can see a video tutorial on how to do this here – video tutorial here.
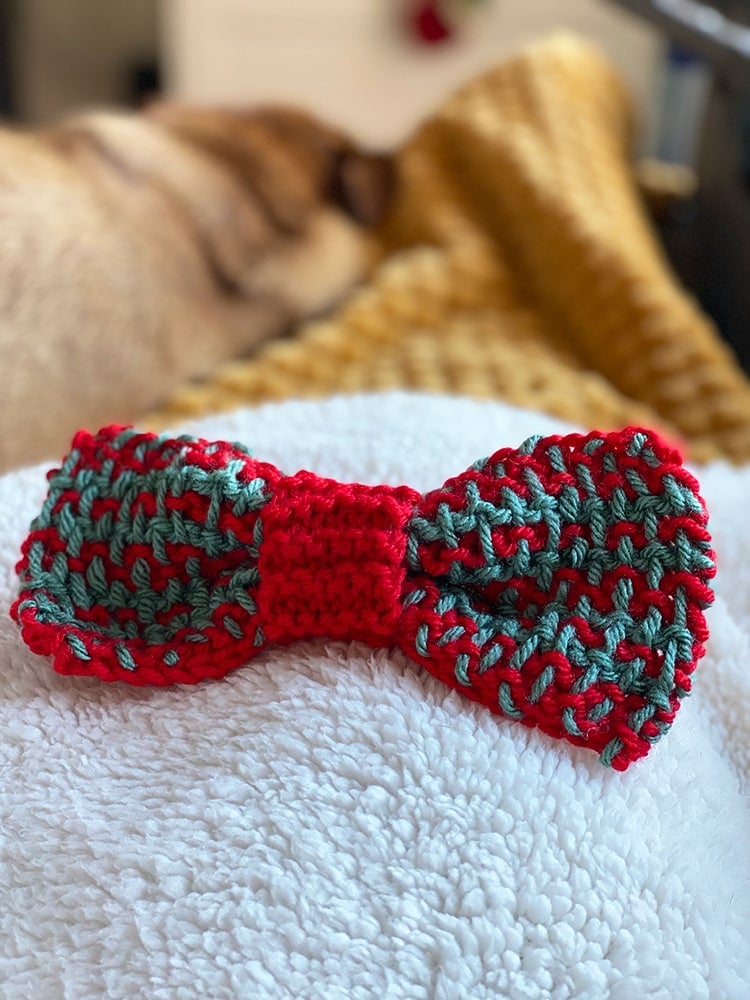
The image below is from another pattern but it is the same weaving technique you will do on this rectangle.
The image above shows the bow tie rectangle when the green yarn has been woven through it.
You can cut each strand or leave the yarn attached to the ball and weave up and into each row without cutting the yarn.
This will mean fewer ends to weave in.
- Step 3 – Knit The Middle Section
In Yarn A cast on 4 (5,6) sts
Knit in garter stitch for 20 rows.
Cast off and leave a length of yarn for seaming. - Step 4 – Cinch The Rectangle
Cinch the rectangle in the middle and place the middle section around it to meet edge-to-edge at the back of the work.
- Step 5 – Seam The Middle Section
Seam the middle section at the back of the work securely with a running stitch, but leave a little room so that the dog’s collar can slide through it.
- Step 6 – Weave In Any Loose Ends
Weave in any loose ends and trim where necessary.
The bow tie should be ready to wear!
You can slide the dog’s collar through the loop at the back created by the middle section.
This is easy to place on and off the dog’s collar.


Free Knitting Patterns For Christmas
- Knit Tree Skirt Pattern (Free And Easy Christmas DIY)
- 28 Free Christmas Stocking Knitting Patterns (The Best)
- 30+ Free Christmas Knitting Patterns (Best Knitted Ideas)
- 30 Christmas Sweater Knitting Patterns (Jumper Ideas)
- 17 One Skein Knitting Patterns {Easy + Quick}
- 35 Free Knitted Christmas Decorations (Knitting Patterns)
- 27 Free Christmas Knitting Patterns For Babies
- 33 Free Christmas Knitting Patterns For Kids
- 13 Vintage Knitted Christmas Stocking Patterns
- Tartan Christmas Decorations (Plaid Knitting Pattern)
- The 50+ Best Free Knitted Gifts For Christmas
- Christmas Blanket Knitting Pattern (Free + Festive!)
- How To Make A Chunky Knit Pillow Cover- Free Pattern
- Free Sock Knitting Pattern (Easy + Simple For Beginners)
- Free Cable Mittens Knitting Pattern (Classic Knit)
- How To Make An Easy Pom Pom Christmas Tree DIY Craft
- How To Make A Christmas Wreath (Easy Homemade DIY)
- Christmas Tree Hat Knitting Pattern
- Dog Santa Outfit Costume DIY (Free Knitting Pattern)
- Elf Dog Sweater Knitting Pattern (Free in 3 Sizes)
- Christmas Elf Dog Bandana Knitting Pattern (4 Sizes)
- Dog Christmas Hat Pattern
- Free Dog Hat Knitting Pattern (Bobble Hat With Ear Holes)
- Knitted Elf Hat Pattern
- Christmas Puppy Sweater Knitting Pattern
- Dog Christmas Hat Pattern (Holiday Elf Hat For Dogs)
- Knitted Santa Hat
- Cable Knit Dog Sweater Pattern
Share your work with us…
l Iove seeing your finished projects on social media.
If you enjoyed making the bow tie, I’d love to see yours on Instagram, be sure to tag me @handylittleme.
If you are on Facebook, stop over to the handylittleme Facebook group and share a photo.
You can also find me on Ravelry.
I’d love to see your work.
Happy Knitting!
Thanks. I’ve been struggling for a few months trying to teach myself how to knit. I finally decided to find a small project to do so I can have that feeling of accomplishment instead of frustration. This is officially the first thing I have ever correctly knitted.
Hello Kris,
That’s awesome!
I’m so happy you stuck with it and saw something finished.
I know that can be hard when you are starting out with knitting.
I hope you will choose more projects now to keep going.
Happy knitting!
Louise