Crochet Drawstring Bag Pattern (Simple For Beginners)
THIS ARTICLE CONTAINS AFFILIATE LINKS THAT SUPPORT HANDY LITTLE ME CONTENT AND FREE PATTERNS.This crochet drawstring bag pattern is a great beginner-friendly pattern that is really easy!
With some basic crochet knowledge, you can create a really pretty bag to wear during the summer months.
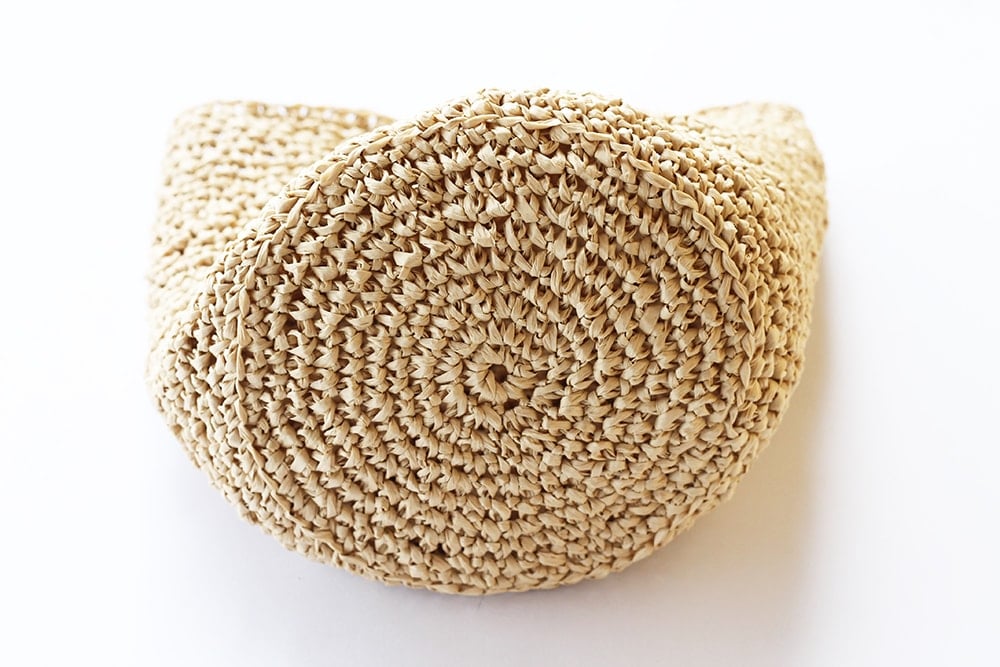
Made from raffia in a natural color, this bag can go with any outfit.
Please scroll down to view the free pattern or grab the printable PDF pattern in my shop here.

An Easy Level Crochet Pattern
This pattern is for anyone who is an advanced beginner.
The bag is simple; you create a circle base first, then continue to single crochet.
Once the bag reaches the height you want, you stop and weave through a cord, which can be pulled together to close the bag.
The drawstring pulls the top of the bag closed and can be tied into a bow.
Alternatively, you could knot the ends or weave through two lengths of cord, pulling through to each end to pull the drawstrings closed more traditionally.
I also added a raffia tassel with beads and bits I found in a local craft store.

Crochet Drawstring Bag Pattern
Grab your inexpensive ad-free, PDF printable pattern here.
Notes
The pattern is written using US crochet terms and abbreviations.
You can find a free PDF of US and UK terms and abbreviations here – Crochet Abbreviations And Terms (US + UK)
*Please note*
- For the base – Do not turn at the end of the round, but continue working in a spiral, with the right side (RS) always facing.
- Keep count of the sts by placing a marker (PM) on the last st of each round.
- There are no turning chains in this pattern.
Copyright Info
- Please do not copy, sell, redistribute, or republish this pattern.
- If you wish to share this pattern, please provide a link to the pattern page only.
- You may sell items produced using this pattern.
- Do NOT use the copyrighted photos for your product listing.
- For the copyright T&C, please read my Terms of Use.
Measurements
- The drawstring bag measures – base diameter = 6 inches
- Height – 9.5 inches
- *You can adjust the number of sts you ch for the bag strap if you want to make it longer or shorter*
- Strap = 43 inches
- Tassel charm length = 12 inches
Gauge = 15 stitches, 19 rows to 10cm/4″
The Supplies You Need
Yarn
- 2 x King Cole Raffia – in the color Natural – (1456) 100g
- Alternative raffia yarn – Ra Ra Raffia from Wool and The Gang
Hook
Crochet Hook – Size 5.5mm (US 9/I)
Notions
- Tape measure
- Darning needle/tapestry needle
- Scissors
- Stitch markers
Other Materials
- Thread or cord for the tassel.
- Keyring clip x 1 for the tassel – 1.5 inch/ring – 1 inch
- Keyring clips x 2 for the bag chain – 1 inch
- Gold bag chain – 43 inches
- Pliers (for the keyring clips/bag chains)
Abbreviations
- CH – Chain
- PM – Place marker
- SC – Single crochet
- SS – Slip stitch
- RS – Right side
Time needed: 6 hours and 30 minutes
Crochet Drawstring Bag
- The Base Of The Bag
Make a 4 ch and join with an ss in the first ch to form a ring.
Round 1: (RS) – 1 ch; 8 sc in ring (8 sts) PM (see notes)
Round 2: 2 sc in each sc (16 sts)
Round 3: *1 sc in next sc, 2 sc in next sc* rep from * to end. (24 sts)
Round 4: 1 sc in each sc
Round 5: *1 sc in next sc, 2 sc in next sc* rep from * to end. (36 sts)
Round 6: 1 sc in each sc
Round 7: *1 sc in each of next 2 sc, 2 sc in next sc* rep from * to end. (48 sts)
Round 8: 1 sc in each sc
Round 9: *1 sc in each of next 3 sc, 2 sc in next sc* rep from * to end. (60 sts)
Round 10: 1 sc in each sc
Round 11 – sc all the sts into the back loop only
- The Body Of The Bag
*Please note – keep the marker to denote which is the beginning/end of the round.
Continue to work in a spiral – sc all of the sts in every round (in both loops) – until the bag measures = 9.5 inches (rounds worked- 30)
You can make the bag as tall as you want.
- Finish The Bag
Finish the last st with an ss and cut the yarn.
Secure and weave in the ends.
Weave in all other loose ends. - The Drawstring Cord
With the cord (around 1 meter) weave through the bag leaving 3 sts (or holes) between stitches.
About 1.5 inches or 2 inches below the top of the bag.
Pull together and tie in a bow to close the bag. - Adding The Chain Strap
Add the bag clips and chain to each side of the bag, the raffia is strong, so they will not pull the side of the bag out of shape.
You may need to use pliers to open the clasp on the key ring clip to attach the bag chain.
You can also add a bag charm – if you wish, made from beads and a raffia tassel.
You can see how to make a tassel in this tutorial here. – How To Make Tassels {Photo + Video Tutorial}


Grab The Ad-Free Printable Pattern PDF Here
Could you share your work with us?
I love seeing your finished projects on social media.
If you enjoyed making the bag, I’d love to see yours on Instagram, be sure to tag me @handylittleme.
If you are on Facebook, stop over to the handylittleme Facebook page and share a photo.
I’d love to see your work.
Happy Crocheting!
Crocheting With Raffia
I used raffia from King Cole in a natural color.
If you have never crocheted with raffia, it is quite easy to work with.
However, you can use raffia alternatives as there are many around, like Ra Ra Raffia from Wool and the Gang.
Other gorgeous color choices from King Cole Raffia include browns, greens, and reds.
What is the best crochet stitch for a crochet raffia summer bag?
For a crochet raffia summer bag, you’ll want to choose a stitch that is not only aesthetically pleasing but also durable and able to withstand the rigors of everyday use.
One excellent choice for a raffia bag is the “single crochet” stitch.
A great option would also be the double crochet (dc) and the half double crochet.
They provide structure and durability while still allowing the bag to maintain its shape.
Another option could be the “linen stitch” or “moss stitch,” which creates a lovely woven-like texture that complements the natural look of raffia yarn.
This stitch also produces a sturdy fabric suitable for bags while adding a subtle visual interest.
- Learn how to double crochet here – How To Double Crochet (dc) For Beginners
- Learn how to crochet the linen stitch here – How To Crochet The Linen Stitch (Tutorial + Pattern)

What supplies do you need to crochet a bag?
To crochet a bag, you’ll need several essential supplies.
You’ll need a pair of scissors for cutting yarn and finishing off your project.
A yarn needle comes in handy for weaving in ends and sewing seams if your bag has multiple pieces.
A stitch marker set can also be helpful for keeping track of your rounds.
Depending on your design, you might also need other materials such as lining fabric, a zipper, buttons, or other embellishments to customize your bag to your liking.
With these supplies in hand, you’re ready to embark on your crochet bag-making journey!
Can a beginner crochet a bag?
Absolutely! Crocheting a bag can be a fantastic project for crocheters at any skill level.
While some bag patterns may involve more complex stitches or construction techniques, there are plenty of simple bag patterns designed for beginners.
Bags are typically smaller projects than blankets or garments, making them less daunting for beginners.
You can complete a bag relatively quickly and gain a sense of accomplishment.
If you are making a crochet bag for the first time, opt for a small project like a drawstring pouch rather than a backpack.
More Crochet Bag Patterns
There are many other free crochet bags on my blog that you can view by clicking on the links below;
- Large Beach Bag Crochet Pattern
- Crochet Circle Bag Pattern {With Fringe}
- Crochet Clutch Pattern (Beginner Friendly!)
- Crochet Beach Bag Pattern {Mixtape Yarn}
- Crochet Boho Bag Pattern {With Fringing!}
- Crochet Fringe Clutch Pattern
- Fringe Crossbody Bag Pattern {Crochet}
- 19 Free Crochet Beach Bags (Summer Perfect Patterns)
- Crochet Bag Pattern For Beginners
- Raffia Crochet Bag Pattern (Step By Step)

Crochet Lessons
If you are a new maker and need help with the crochet basics, check out the crochet lessons here – Crochet Lessons {With Video Tutorials}.
There, you will find tutorial posts for all the crochet techniques a newbie needs to know and a full video tutorial to help you along.
This includes how to make a slip knot, how to create a foundation chain (ch), and how to crochet the basic stitches, such as single crochet stitches (sc) and double crochet stitches (dc).
It also includes how to make a single crochet decrease and all the crochet abbreviations (in UK and US terms) a maker needs to know.
And if you need more video tutorials, check out my YouTube channel here – Handy Little Me – YouTube
Resources and tutorials you may find helpful in following this pattern:
This pattern is great for any advanced beginner.
- You should be comfortable making a slip knot (how to make a slip knot (step by step)) and creating a chain (how to start a crochet chain).
- You should be comfortable working single crochet (how to single crochet (SC)).
- You should also be comfortable reading crochet patterns (how to read crochet patterns for beginners).
- And understanding crochet abbreviations and terms (US + UK).

Free Crochet Patterns
- Free Crochet Easter Eggs Pattern
- 50 Best Crochet Stitches For Blankets And Afghans
- Crochet Round Rug Pattern
- 35 Free Easter Crochet Patterns
- 35 Free Cotton Yarn Crochet Patterns
- Crochet Dishcloth Pattern Set
- Crochet Washcloth Pattern
- 39 Free Crochet Top Patterns To Make For Summer
- How To Crochet A Blanket
- 50 Stash Busting Crochet Patterns
- 40 Free Granny Square Crochet Patterns
- Crochet Blanket Sizes And How Much Yarn
- Outlander Shawl Crochet Pattern
- Crochet Beach Cover-Up Pattern
I’m having trouble finding raffia yarn in my area, what could I use in its place?
Hello Christine, can you order the raffia online? There are many choices from the King Cole Raffia to Ra Ra Raffia by Wool and the gang, Katia – Rafia or Universal Yarn – Yashi. To substitute you would change the look of the bag but you could try using cotton? This would also have a light summery vibe. I hope that helps 🙂
Just finished my crochet bag and gave it as a gift to my friend for her birthday. She’s a knitter and is wondering if you have a knitting pattern for this bag.
Thank you!
~Yvonne
Hello Yvonne,
I’m so happy you made the bag as a gift, what a lovely idea!
I’m sorry I don’t have this as a knitting pattern, only crochet.
Thanks,
Louise
I made a slightly modified version and I loved it! It turned out super cute 🙂
Hello Natalie,
I’m so happy you liked the pattern 🙂
Happy crocheting,
Louise
New to crochet. Bought pattern for drawstring bag. Looking for weight of the raffia yarn suggested. Is it #5 bulky? or something else? Wanting to substitute something else and need to compare. Thanks,
Hello Pat,
The raffia yarn used in the drawstring bag pattern is typically classified as a double knitting (DK) or light worsted weight, which corresponds to a #3 weight category.
For example, Wool and the Gang’s Ra-Ra Raffia yarn is 100 grams with approximately 250 meters (273 yards) per skein, and they recommend using a 3.5mm to 5mm crochet hook.
When substituting yarn, consider the following:
Yarn Weight: Opt for a DK or light worsted weight yarn to maintain the bag’s structure and size.
Fiber Content: Raffia provides a firm, slightly stiff texture ideal for bags. If you choose a different fiber, such as cotton or a cotton blend, ensure it offers similar sturdiness.
Yardage: Match the total yardage required for the project to ensure you have enough yarn.
Hook Size: Adjust your hook size as needed to achieve the correct gauge and desired fabric tension.
Always create a gauge swatch with your chosen substitute yarn to ensure the final product meets your expectations.
Happy crocheting!
Louise