How To Knit A Bunny For Beginners (Free Pattern)
THIS ARTICLE CONTAINS AFFILIATE LINKS THAT SUPPORT HANDY LITTLE ME CONTENT AND FREE PATTERNS.In this easy-to-follow guide, you’ll learn how to knit a bunny for beginners using a free, beginner-friendly knitting pattern.
Create a delightful, cuddly bunny toy that’s perfect for little hands to hug and play with.
Please scroll down to view the free pattern or grab the ad-free printable PDF pattern in my shop here.

Easy Bunny Knitting Pattern for Beginners
This bunny knitting pattern is ideal for advanced beginners.
You’ll practice essential knitting skills, including casting on, casting off, knitting stitches (mastering the knit stitch), and purling stitches.
The bunny is knit flat (back and forth) on straight 4 mm knitting needles using worsted-weight yarn.
You’ll also learn basic shaping techniques, such as simple increases and decreases, and how to neatly seam the bunny together since it’s knitted in separate pieces.
Tips for Beginner Knitters
If you’re new to knitting, modern baby knitting patterns like this bunny toy are the perfect way to build your skills.
Once you’re comfortable, you can gradually move on to more challenging patterns involving cables and advanced stitches.
For a comprehensive knitting guide, explore this helpful post: How to Knit – A Complete Beginner’s Guide

Knit A Bunny Toy As A Thoughtful Gift
This adorable knitted bunny makes a wonderful gift, especially for Easter or baby showers.
Its soft and plush design ensures it’s safe and gentle for babies and young children. Plus, it’s easy to clean!
You can customize your knitted bunny in any yarn color to perfectly match a nursery theme, making it a thoughtful, versatile, and personal gift.
Recommended yarn for knitting the baby bunny
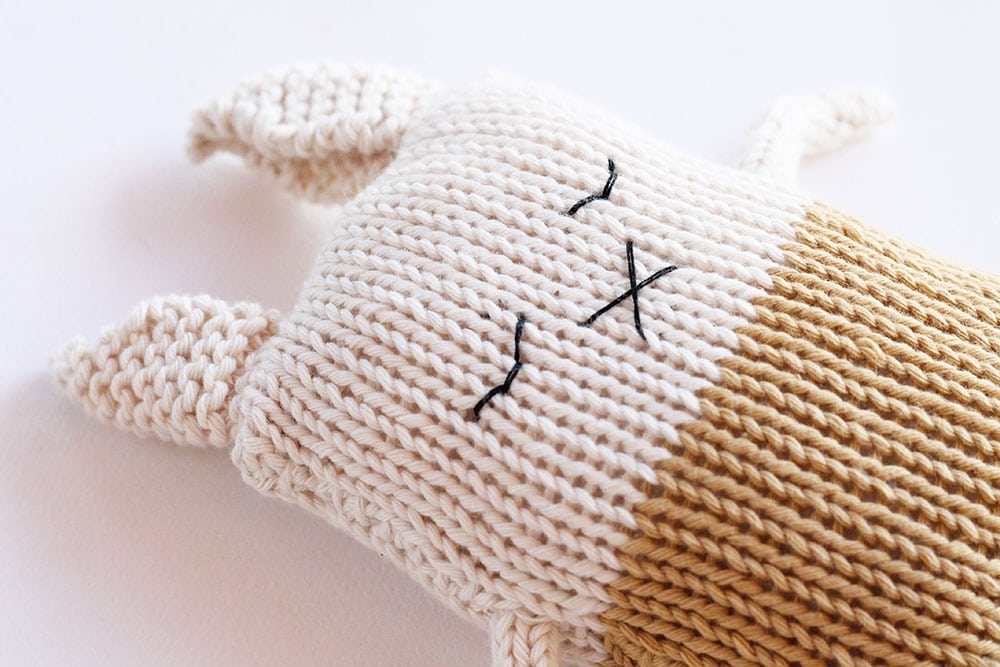
For this bunny knitting project, I used Rico Creative Cotton Aran yarn (50g/85m/93yds) in two colors: Nature (60) and Sand (59).
This medium-weight (04) worsted yarn/cotton yarn occasionally splits during knitting, but with gentle patience, you’ll achieve a neat, professional finish.
Bunny Softie Pattern
Purchase the inexpensive, ad-free, PDF printable pattern in my shop here.
You can also find this cuddly toy pattern in this Ebook here – 10 Baby Knitting Patterns Ebook.
Pattern Notes
Skill Level – Basic (Beginners)
The bunny is made in separate pieces, then sewn together and stuffed.
This bunny rabbit has a modern look and is great to give as an Easter gift or to place inside an Easter basket.
The bunny toy can be given accessories like a ribbon tied around the neck in a favorite color, a bow tie added, and carrots.
Copyright Info
- Please do not copy, sell, redistribute, or republish this baby bunny knitting pattern.
- If you wish to share this pattern, please provide a link to the pattern page only.
- You may sell items produced using this pattern.
- Do NOT use the copyrighted photos for your product listing.
- For the copyright T&C, please read my Terms of Use.
Size Information
- Height = 10′′ (from top of ears to bottom of legs)
- Width = 4.5′′ (body, not inc arms).
Gauge – 14 sts and 28 rows in 4×4 inches / 10×10 cm in stocking stitch.
The Supplies You Need
Yarn
- 1 x Rico Creative Cotton Aran 50g/85m/93yds in color – Sand (59).
- 1 x Rico Creative Cotton Aran 50g/85m/93yds in color – Nature (59).
- Any medium weight yarn 04/worsted weight yarn.
- I used cotton yarn/a natural fiber.
- Yarn Weight Guide (+ Conversion Chart)
Needles
Notions
- Tape measure
- Darning needle/yarn needle
- Scissors
- Sewing needle
Other Materials
- Fiberfil / toy stuffing
- A small amount of black sewing thread for the eyes and mouth
Knitting Abbreviations
List of Knitting Abbreviations And Terms (US And UK)
- Beg = Begin(ning)
- Cont = Continue(ing)
- K = Knit
- K2tog = Knit 2 sts together
- P = Purl
- Rem = Remaining
- Rep = Repeat
- St(s) = Stitch(es)
- St St = stocking stitch – knit 1 row, purl 1 row
How To Knit A Bunny Toy: Easy Instructions
You will need two yarn colors:
- Yarn A – Sand (Mustard)
- Yarn B – Nature (White)
Body – Make 2 Pieces
- With yarn A, cast on 20 sts and work in stocking stitch until the piece measures 3′′ from the cast on edge.
- Change to yarn B and continue to work in st st until the piece measures 6′′ from the cast on edge.
- Cast off.
Arms – Make 2 Pieces
- With yarn B cast on 6sts.
- Work in st st until the piece measures 2.5′′ from the cast on edge.
- Next row: K1, K2tog – rep to the end of the row.
- Next row: Purl.
- Next row: K2tog twice.
- Thread the remaining length of yarn through the last 2 st and sew up the seam – try to catch some toy stuffing in as you stitch.
Legs – Make 2 Pieces
- With yarn B cast on 10 sts and work in st st until the piece measures 2.5′′ from the cast on edge.
- Next row: K1, K2tog – rep to the end of the row.
- Next row: Purl.
- Next row: K1, K2tog.
- Cut yarn and thread through the rem sts.
- Sew up the side seam and stuff with toy stuffing as you go.

Ears – Make 2 Pieces
- With yarn B cast on 10 sts.
- Knit all sts until the piece measures 1.5′′ from the cast on edge.
- Next row: K2tog, knit till last 2 sts, K2tog.
- Next row: Knit.
- Repeat the previous 2 rows until there are 2 sts left.
- Next row: K2tog.
- Cast off.
Finishing
- Sew in any loose ends.
- Sew the eyes and mouth onto the front body piece (securing with a knot so they stay put).
- Sew the body pieces together (the front piece and the back piece) with the right sides facing you (I used the mattress stitch); sew in the arms, legs, and ears (fold into the head seam, as you can see in the photo above) where you want them to go, and leave a gap near the bottom, and stuff with toy stuffing when you are just about done.
- Then, stitch the gap closed.
- The plush bunny is simple to make, but the assembly is a little bit fiddly at times, trying to get the limbs – arms and legs to stitch in the right places and be equal; I think I pulled them out a few times before I was happy.
- Use the photograph for reference – for where to place the arms and legs.
- Optional – make a tiny pom pom and add a pom-pom tail.

Could you share your work with us?
I love seeing your finished projects on social media.
If you enjoyed making the adorable bunny, I’d love to see yours on Instagram, be sure to tag me @handylittleme.
If you are on Facebook, stop over to the Handylittleme Facebook Group and share a photo.
You can also find us on Pinterest and Ravelry.
I’d love to see your work.
Happy Knitting!
Knitting Lessons
If you are a new knitter and need help with the knitting basics, check out the knitting lessons here – Knitting Lessons (With Video Tutorials).
There, you will find step-by-step tutorials for all the different knitting techniques a newbie needs to know.
For more easy knitting patterns, check out this pattern category, there you will find a range of knitting patterns – Beginner Knitters.
And if you need more video tutorials, check out my YouTube channel here – Handy Little Me – YouTube.
Resources and tutorials you may find helpful in following this pattern:
This free bunny softie pattern is excellent for any advanced beginner knitters.
- Knitting cast-on methods
- Knitting Lessons
- How to cast on knitting
- How to cast off knitting for total beginners (step by step)
- How to knit garter stitch
- How to knit the purl stitch (for beginners + a video tutorial)
- How to knit stockinette stitch (for beginners)
- How to read knitting patterns for beginners
- Knitting abbreviations and terms (US and UK)
- How to knit rib stitch patterns (1×1 and 2×2 ribbing)
- How to knit two stitches together – K2tog
More Easter Projects
Free Crochet Patterns
Check out these free crochet patterns, including a cute easter basket with a bunny tail.
- Crochet Easter Basket (Free Pattern PDF)
- 15 Easter Crochet Patterns
- Crochet Easter Eggs {Free Pattern Download}
Free Knitting Patterns
You can find cute bunny rabbits, knit bunny hats, and more.
- Easter Bunny Pattern (Floppy Ears + Cuddly!)
- Easter Bunny Egg Cozy
- Bunny Slippers For Baby (Perfect For Easter!)
- Easter Bunny Hat {Knit Flat}
- Bunny Ears Headband {With Knitted Ears}
- Easter Craft Activities {For Kids}
- Easter Chick Slippers Pattern {+ Loop Stitch Tutorial}
- Bunny Tea Cosy Pattern
- Bunny Ear Hat (Easy Pattern)
- Stuffed Bunny Pattern {With Crochet Overalls}
- Bunny Booties Knitting Pattern
- 21 Free Knitted Bunny Patterns For Easter Gifts
- 17+ Free Knitted Chicken Patterns
- 25 Free Easter Knitting Patterns (Easy Ideas)
More Baby Knitting Patterns
You may also be interested in these baby knits (which include more bunny patterns), which are also made from 100% cotton:
- Easy Baby Sweater Knitting Pattern For Beginners
- Baby Cardigan Knitting Pattern (For Beginners)
- Easy Baby Cardigan Knitting Pattern
- How To Knit A Baby Hat (Straight Needles)
- Baby Blanket Pattern (Patchwork + 4 Stitch Patterns)
- Stuffed Bunny Pattern {With Crochet Overalls}
- Baby Slippers Knitting Pattern
- How To Knit Baby Booties (Step By Step)
- Sheep Baby Booties Knitting Pattern

")
